


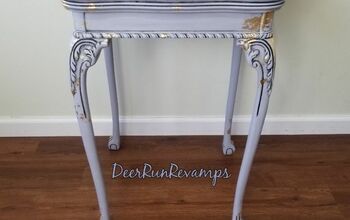
Big Update for a Small Table

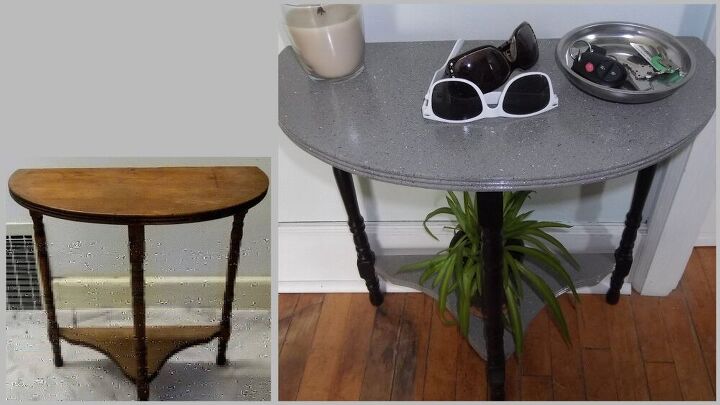
I got this small side table for about $10 at a local thrift store. I thought it was really cute but a little plain and very wobbly. I just needed to fix the wobbliness and give it a whole new look with some paint.
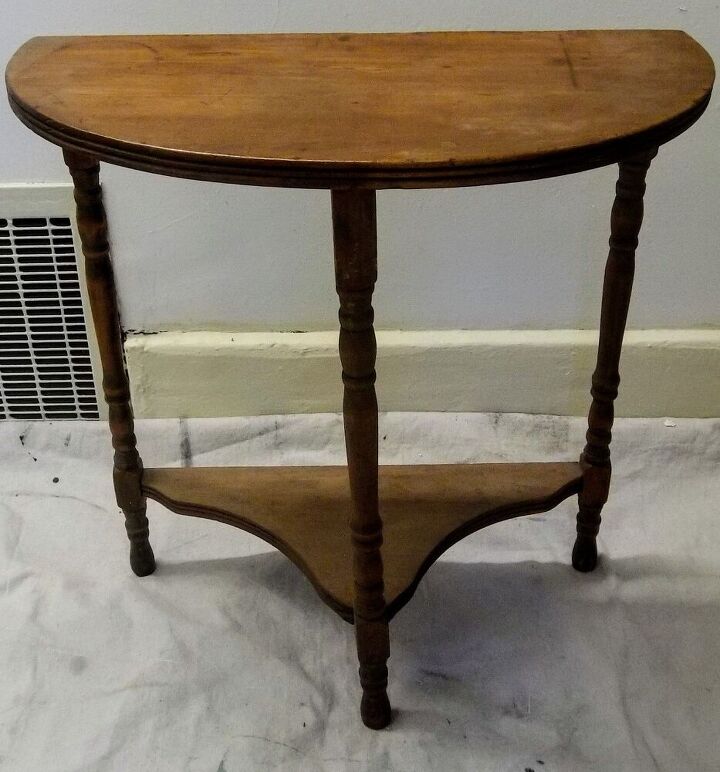
Here is where I started. A small cute side table, but just a little bit plain.

The legs were attached with wooden pegs and wood glue so the only way to remove them was to cut them off. I simply used a jigsaw and cut all three legs away from the table and bottom shelf. Once the table was all separated into pieces I gave every piece a good sanding.
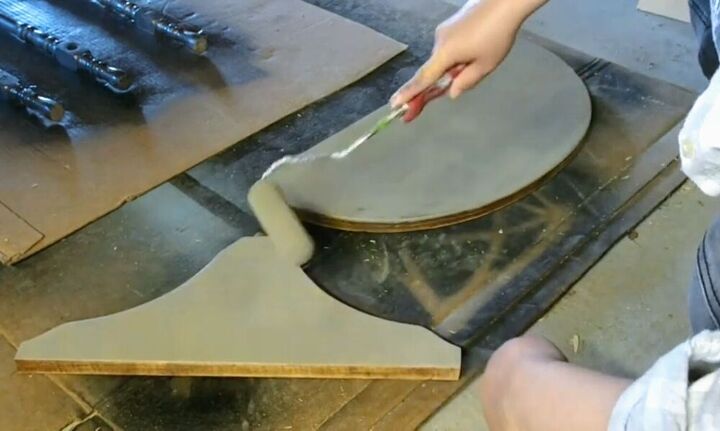
I wanted to give the table top and table shelf a stone-ish/ granite-ish look, so I started off with a natural gray color. I like to buy paint from hardware stores mistinted section so I actually got this color paint in a full gallon for $9. A good tip for finding decent paint at a cheaper price is to check out Lowe's or Home Depot and ask for their mistinted paint and you'll find quality paint for a cheaper price. You don't get to pick the color you want but I usually find some good neutral colors that I can use on a lot of different prime projects.
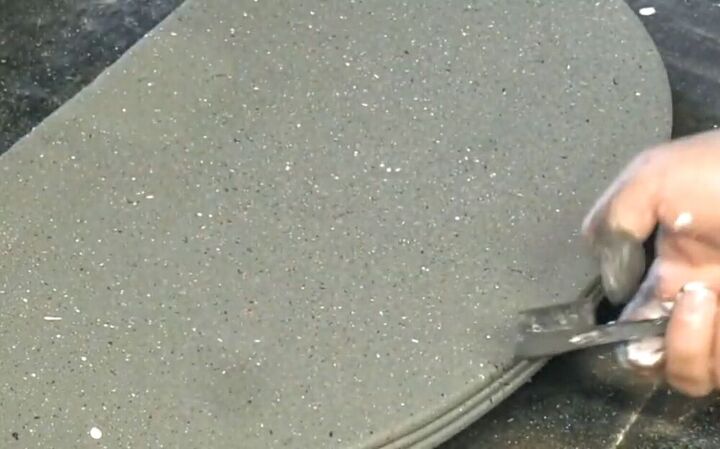
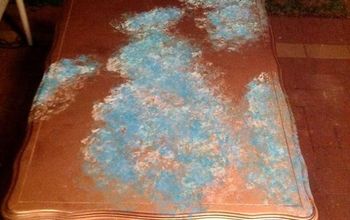
For the next step I wanted to add some speckles of different color on to the tabletop. I used a white and charcoal colored paint for this part. I use a toothbrush dipped it in some water and then some paint and then with my thumb kind of flicked the paint onto the surface. You don't always have to use water with this step that the paint I had was kind of thick so I just added a little bit of water to thin the paint to give it a smoother spray.
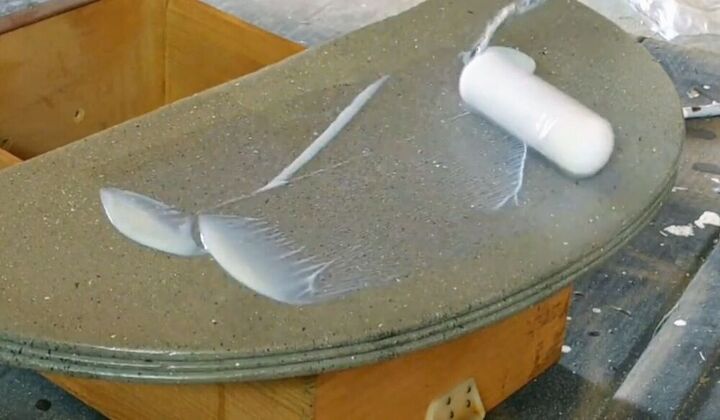
The table top and bottom shelf each got two coats of a high gloss clear coat.
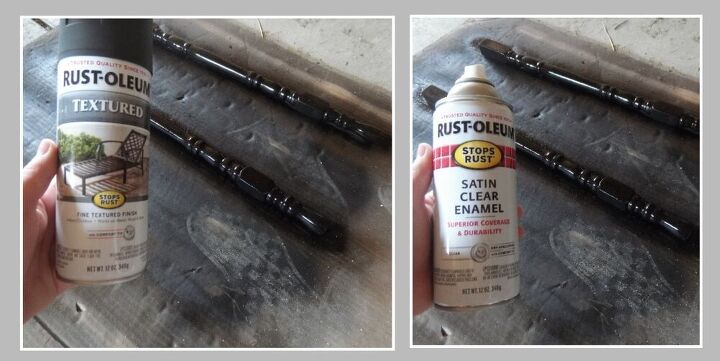
I used black spray paint on the legs and covered it with a satin clear enamel spray.
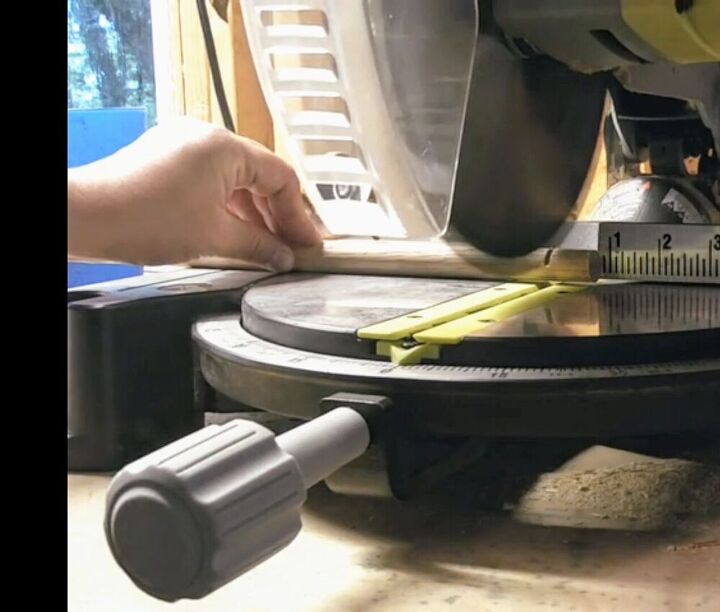
The legs were originally attached with wooden pegs and wood glue, so no I decided to put it back together the same way. I got a wooden dowel and then cut pegs that measured about 1.25 in.
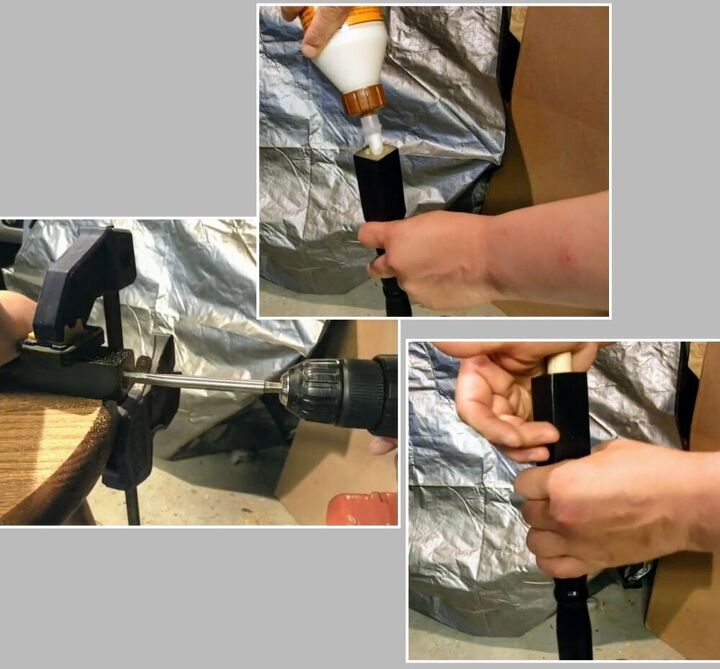
I drilled holes in the legs, filled the hole with wood glue, and then stuck the wood pegs into the holes.
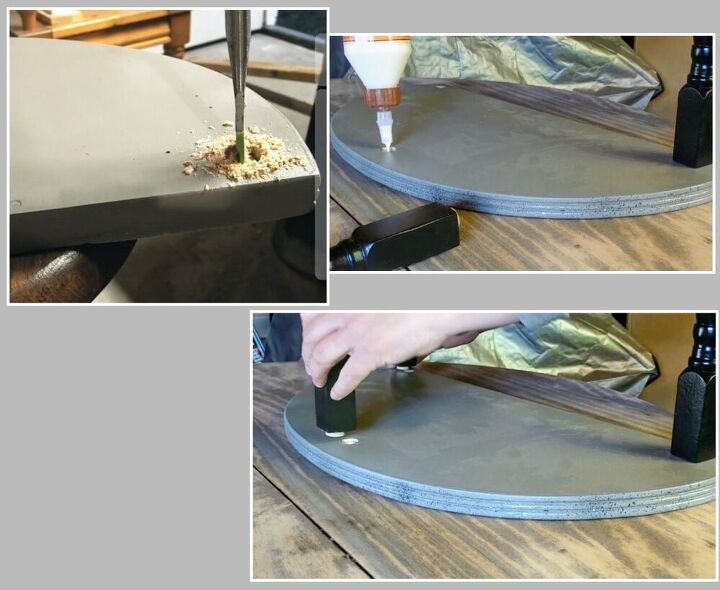
I drilled holes in the table top and the bottom shelf, filled them with wood glue, and then carefully placed the legs(with wood pegs already glued in) into the holes on the table top.
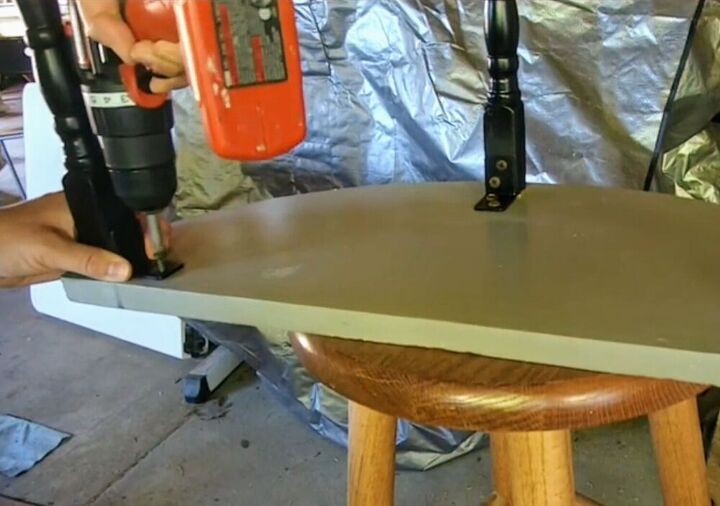
I had a few corner brackets laying around from a previous project and they were the perfect size for this table. I screwed them to the bottom of the table top and onto the legs, for a little extra stability.
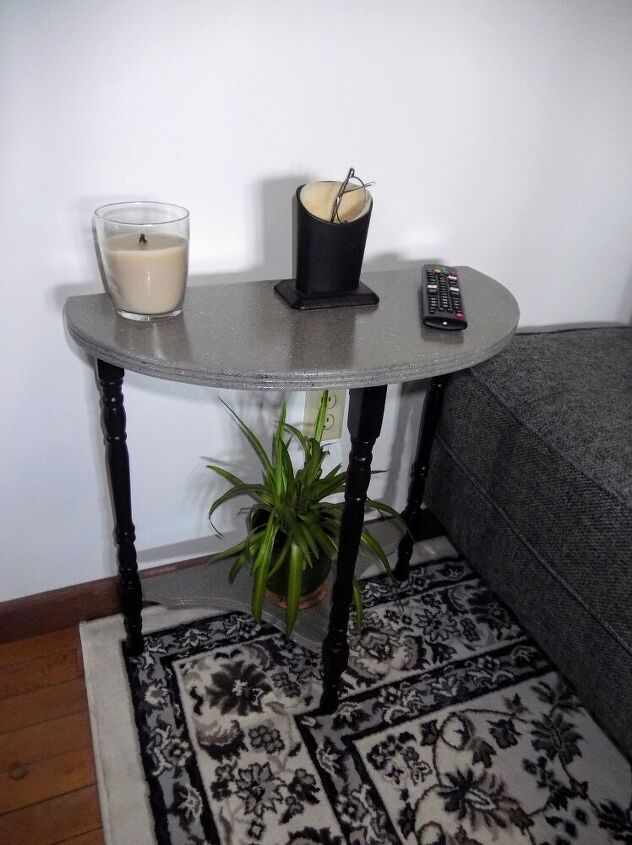
And here is the final look! It's like new! What was once a plain, wooden, wobbly side table is now a sturdy, stylish table!
Resources for this project:
See all materials


Comments
Join the conversation
-
Nice job! I did this on a GIANT scale in my son's room. I splotch painted his ceiling with neon orange and green using a 4" brush banged against a block of wood. 😎
-
Nice job and I needed these instructions. I painted a wooden bench white a few months ago and it turned out drippy, blotchy, etc. I put it in the living room for Easter company and it's still there. One day I saw a picture of a table from a Paris flea market that was splattered or speckled (black and brown) and I said aha! that is what I will do to my white table, but use several colors. Haven't had time to do it with the weather being too wet or too dry and couldn't quite remember how it was done. Now I will try both of these options (finger and screen) on a test piece of wood and go from there when the weather gets a wee bit cooler. Thank you so much!


Frequently asked questions
Have a question about this project?
Tell me more about the Finish you coated with. Is it made for Marine products?
Beautiful finished table. Can I ask - why didn't you sand the legs?