


Preparing a Wall for Wallpaper (Upstairs Hallway Remodel 1)

I am working on a total hallway remodel! Changing everything from the ceiling down to the baseboards. This project is a lot of work, so I'll be breaking it down into several posts. This post is how I prepared a wall for wallpaper. This hallway is getting an accent wall!
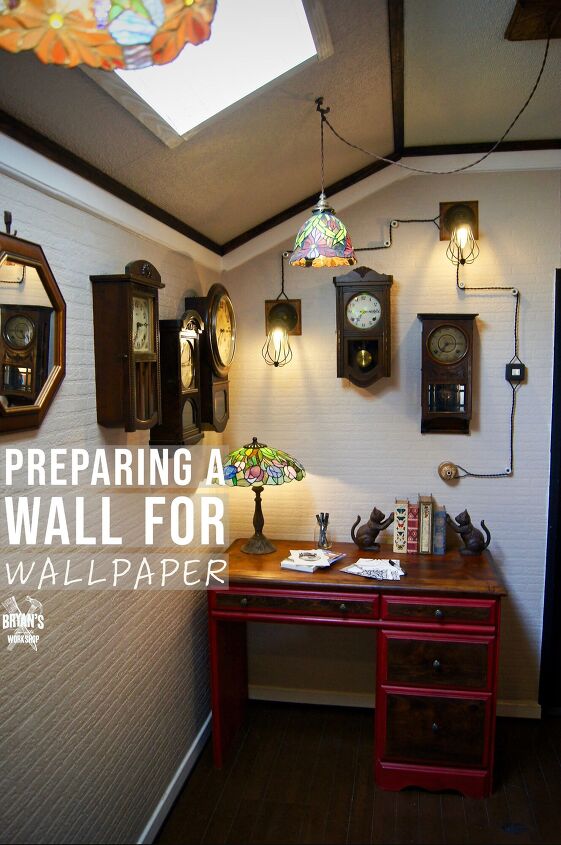
This is the upstairs hallway! I restore old Japanese clocks and display a lot of them up there. The main light source in this area was a roof window. We had the roof window removed last year and with it went all of the nice sunlight and moonlight.
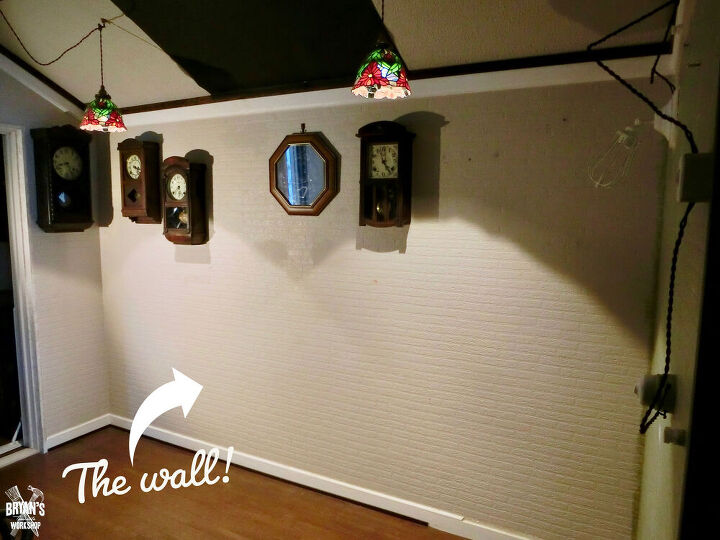
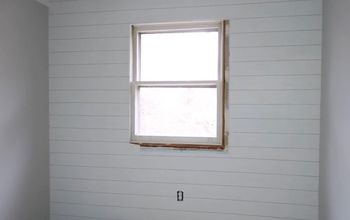
This will be the accent wall. That black square on the ceiling is where the roof window was.
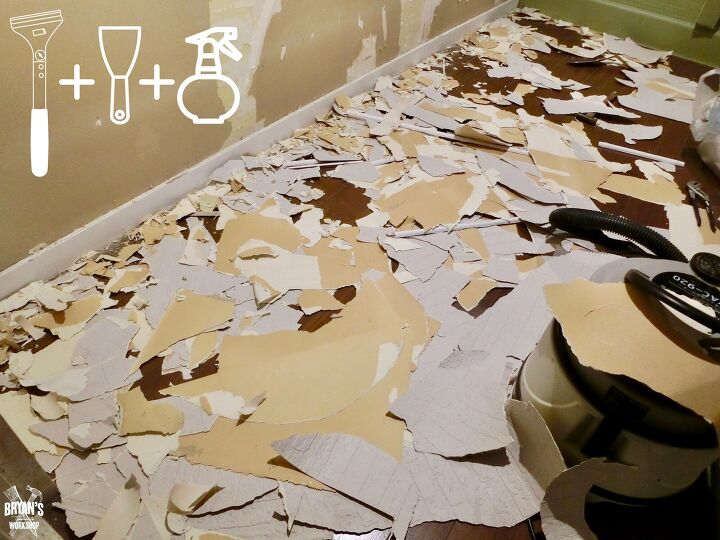
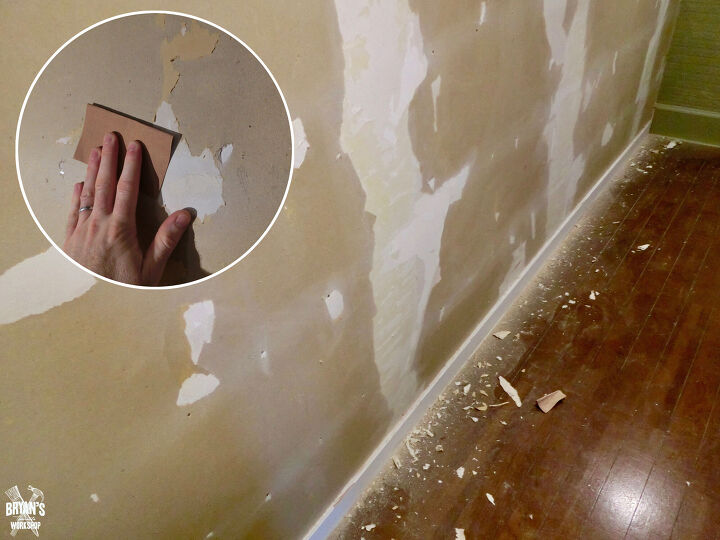
Removing wallpaper is messy work! Newer wallpaper is often strippable making it easy to take down, but the old stuff gets nasty. This is old wallpaper installed in 1989. This wallpaper I'm taking down is thick and textured. It was easy getting a paint scraper under it and once it was loose enough to pinch, it pulled off in big pieces. Wide razor scrapers are popular for removing wallpaper, but I leave a lot of gouges in the drywall with them.
I thought this wallpaper would give me trouble, but is was easy peasy! For tough to remove wallpaper, use a wallpaper striper. It works awesome! Usually it mixes with hot water in a spray bottle. Just read the directions and fill up. Spray the wall in small sections, let it soak for few minutes and then go to town with a scraper. If it won't soak, rough up the surface with sandpaper and try again.
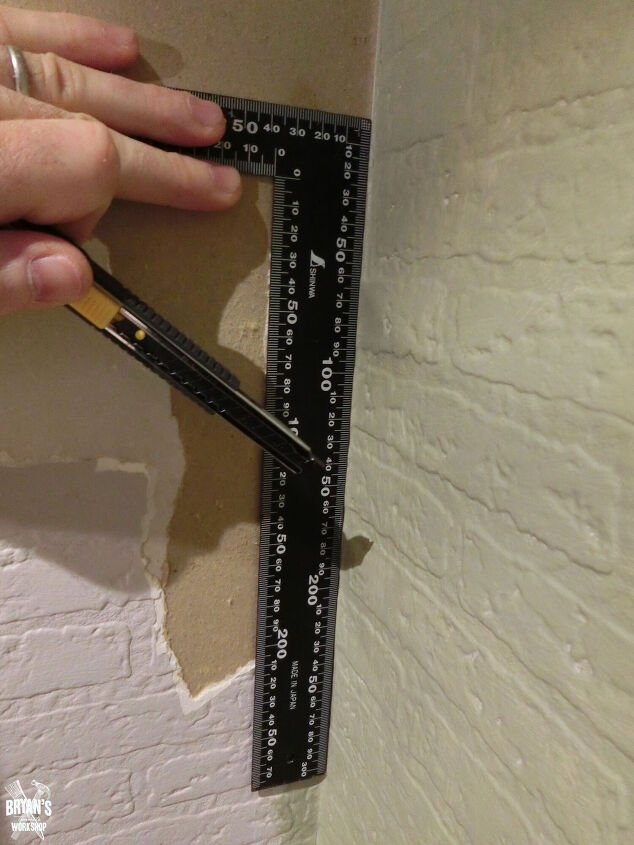
I ran a small boxcutter down the edge of a ruler in the corners.
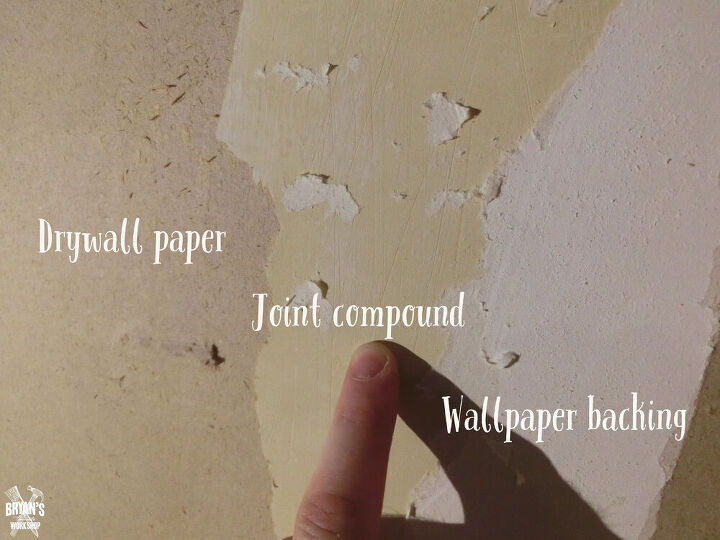
Drywall paper is thick paper on the front and back of drywall. It turns brown with age and will most likely come off when you remove wallpaper, especially if the wall wasn't primed first. If drywall has had something stripped from it: wallpaper, wood paneling, or has had a lot of repairs made to it where the wall is rough, then a skim coat is a good idea. A skim coat is a thin coat of joint compound, also known as mud, that you can use to repair or smooth damaged walls. You may need a skim coat if you are repairing a crack, filling a joint, or leveling an area with an existing flat surface
You'll need to sand the drywall to get all of the loose junk off and get it ready for a sealer/primer.

Dont skip this step! I live in Japan and went with a local brand. This sealer/primer penetrates into a variety of base materials, controlling moisture and reinforcing the strength of the base.
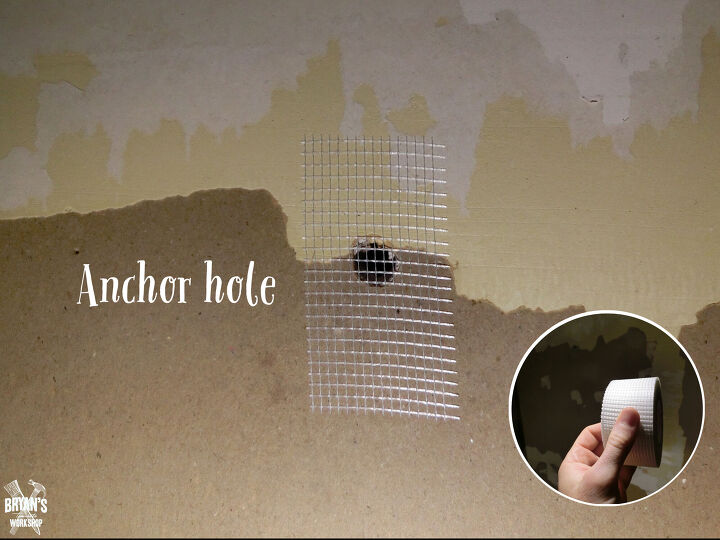
It's time to patch up these anchor holes and gouges! Like you saw, I had clocks all over this wall. Some were held up by studs and the others by anchors. Anchor holes are big, but small enough to easily patch up. You don't need the tape for nail size holes. Small holes like this can be patched over with drywall tape or self adhesive mesh tape. Larger holes like something a doorknob would make need a more rigid material to span over the larger opening like a stick-on patch. Any bigger and it's best to cutout drywall for the hole, use anchor boards behind it and finish with tape and joint compound.
Joint compound is called "putty" in Japan and there are a bazillion types available! This is a types of all-purpose that they call dual-use putty that can be used as either a base coat or top coat. It has a fine texture, excellent applicability due to minimal shrinkage, provides good adhesion to wallpaper and can also be used as base coat for paint finishing. Use a drywall taping knife to push joint compound in and across the tape to create a smooth, flat surface. The mesh tape sticks to the wall, but too much pressure will move it around. Let the compound dry overnight, and then sand until smooth. Repeat with a second coat.
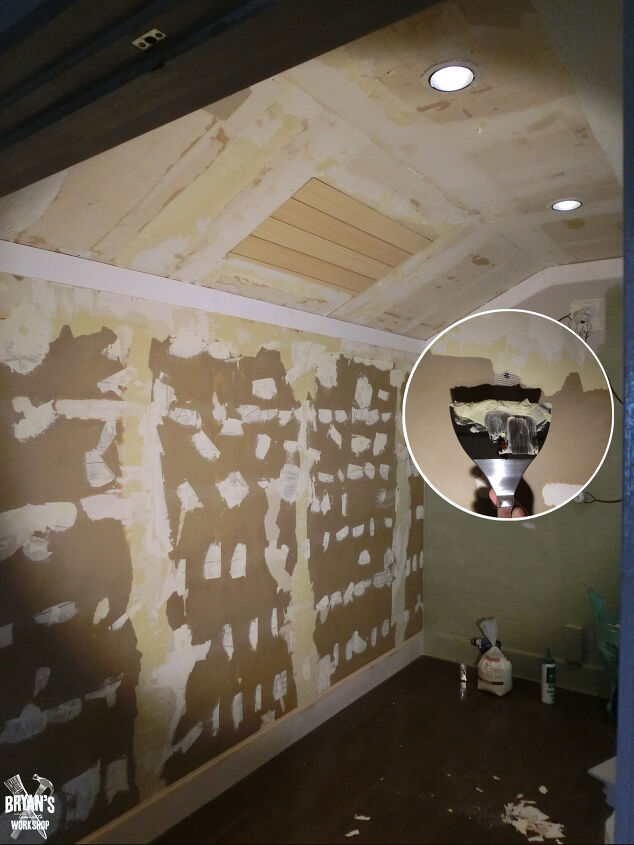
All-purpose joint compound is fine for projects like this, but mesh tape should be covered with setting-type compound if you're doing joints, because it is stronger than drying type and will compensate for mesh tapes greater elasticity. After the initial coat, either type of compound can be used. There are so many types of joint compound out there, so make sure you pick the right kind!I knocked out all of the holes, gouges and drywall nail heads in no time. Next is sanding and a second coat.
Nail pops! These are caused when construction nails work themselves loose, literally popping out from the surface of the drywall. The popped nail pushes out a bit of drywall or paint, creating a small bump or crack. Every home gets nail pops. If you get one, you need to fix it. There are no nail pops on this wall, but I have them in other rooms. I'll make a how to when I get around to fixing them. You can either take two drywall screws, put one above and the other below the nail pop making sure you're in the stud. Pull out the popped nail and then seal/prime and patch. The other method is with a drywall nail. When used properly, drywall nails are every bit as effective as drywall screws for wall installations so don't worry. Nail the new nail as close to the original hole as you can in the stud. The head of the new nail will overlap the old nail, preventing the old nail from slipping out again. Slightly recess the new nail and then seal/prime and patch.
More on the old roof window patch in a future post.
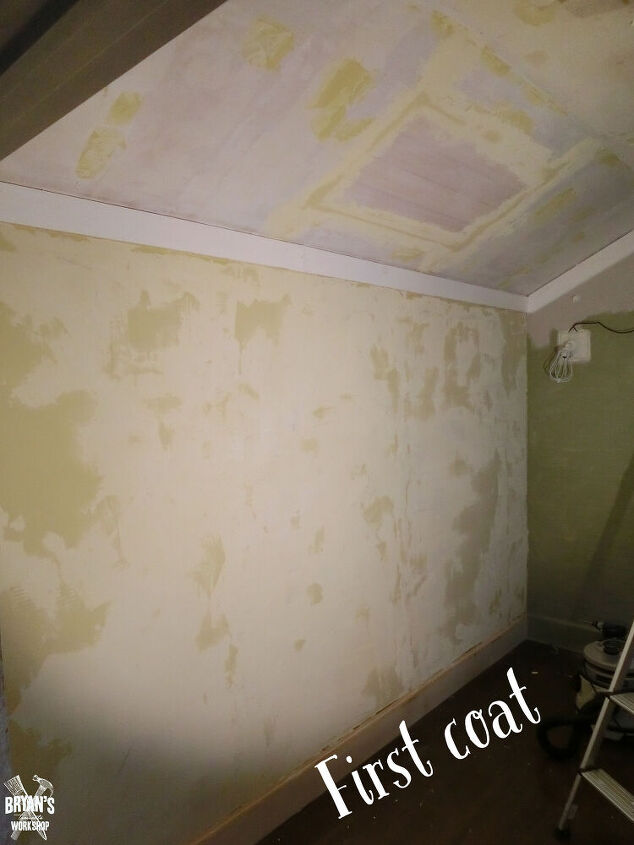
First coat complete. Joint compound dry times are all different, so read the bag. This brand dries in 2 hours. I let it dry for 24 and then sanded it.
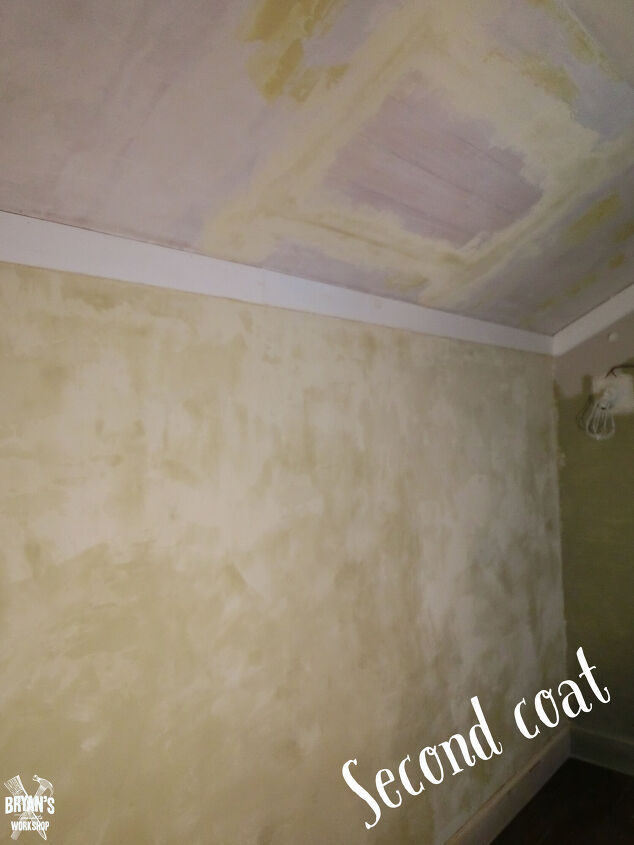
Second coat! Don't cheap out on your skim coating tools. I bought a cheapo drywall squeegee and the rubber on the tip starting coming off in little bits. Next up is sanding and sealing with a sealer/primer.
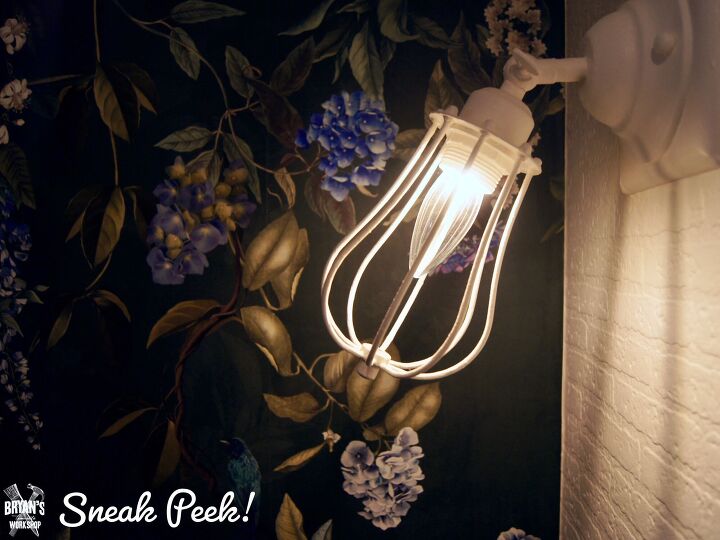
This wallpaper from Photowall is incredible!
Resources for this project:
See all materials


Comments
Join the conversation
-
If you spray the wall paper first with water it will peel the paper off easier n want to have to do so many repairs been there done that lol


Frequently asked questions
Have a question about this project?