


Cable Rails – a DIY Inexpensive Upgrade for Our Deck!
Putting new cable wire deck rails in! I made the conduit railings for the deck a few years ago even though I knew I would need to replace them eventually because: DOGS! The new cable rails moved to the top of the list this spring because Annie is now a permanent resident and she was very good at sneaking off to the treasure trove of a pasture full of horse poop. I can’t even express how annoyed we became of yelling at (and bathing) the damn dog. Not that I really blamed her… But having all of our doors to the deck open is mandatory for my happiness as long as the weather makes it possible! So, it was time for a solution that Annie could not get through…
A couple years ago I moved the dog kennel out from the corner of the house to be right up along the back of the deck. It widened the kennel and made a lot more sense than having a “dead” unusable area between the dog kennel and the back side of the deck.
When I did that I used a gate chain link panel along the deck so, eventually, I would be able to leave the gate open and any doggos would have the deck to run on all the time as well.
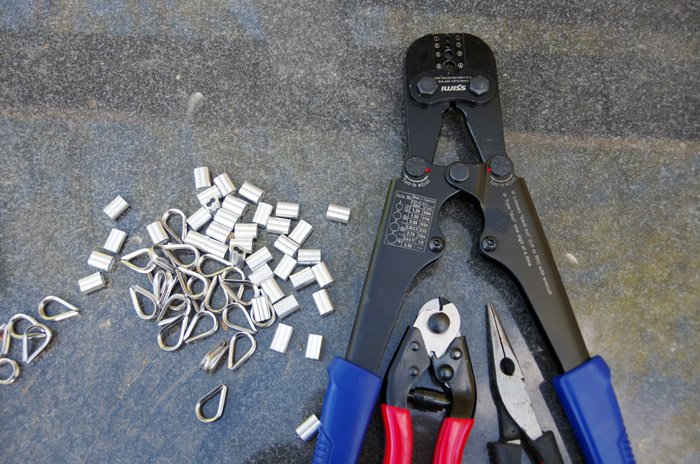
Of course that would only work if the deck had rails that would KEEP A DOG ON IT. So, here we are! For this project check out the materials list below. The entire project came to around $200.
INTERRUPTION OF POST HERE TO MAKE A NOTE: If you plan on doing these rails the big cable rail kit companies out there will try to convince you to spend a lot more money than I did. Their kits are ridiculously EXPENSIVE and MORE DIFFICULT TO INSTALL.
They will also try to convince you to spend over $100 on a hydraulic clamp that you will never use for anything else and is way beyond what you need for this project. I spent a long time doing research before finally figuring it all out.
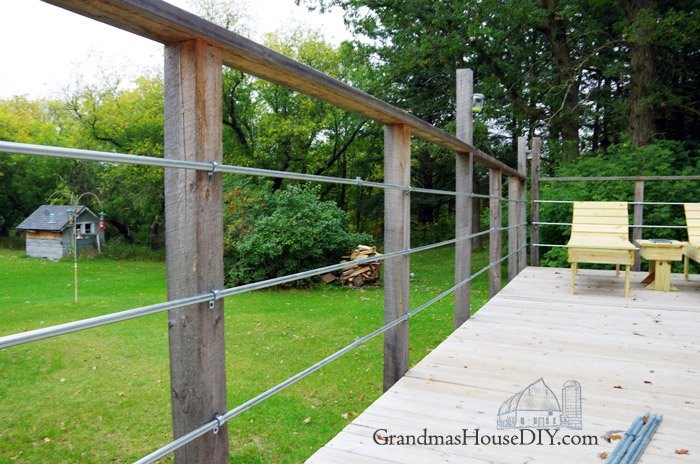
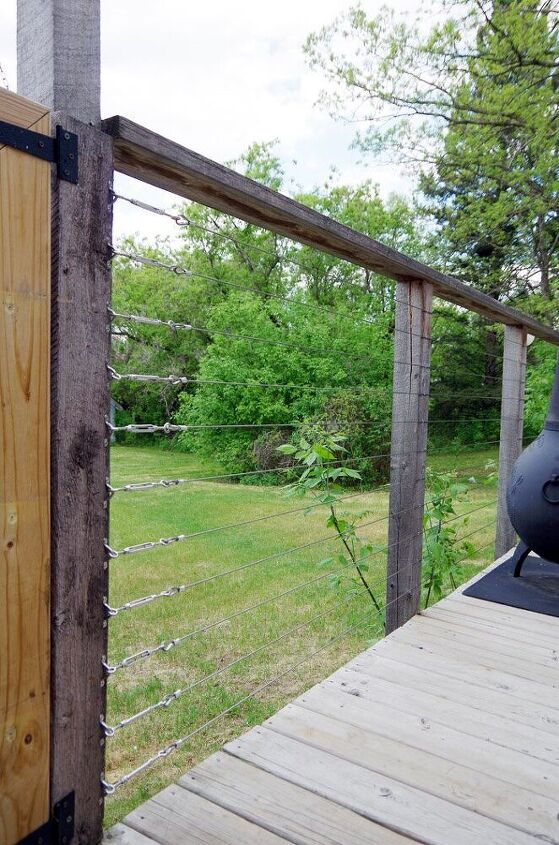
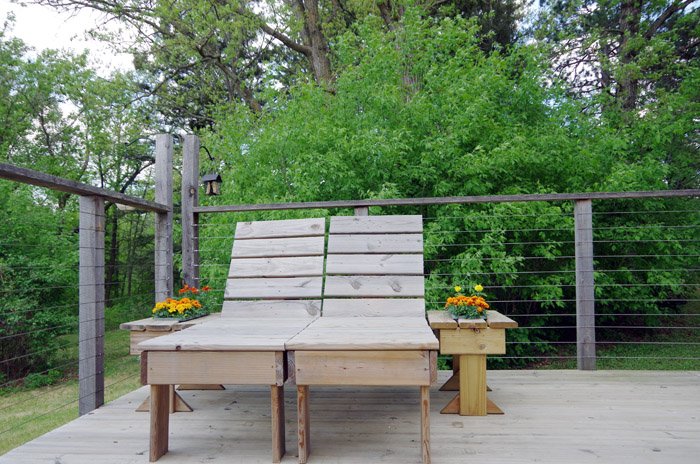
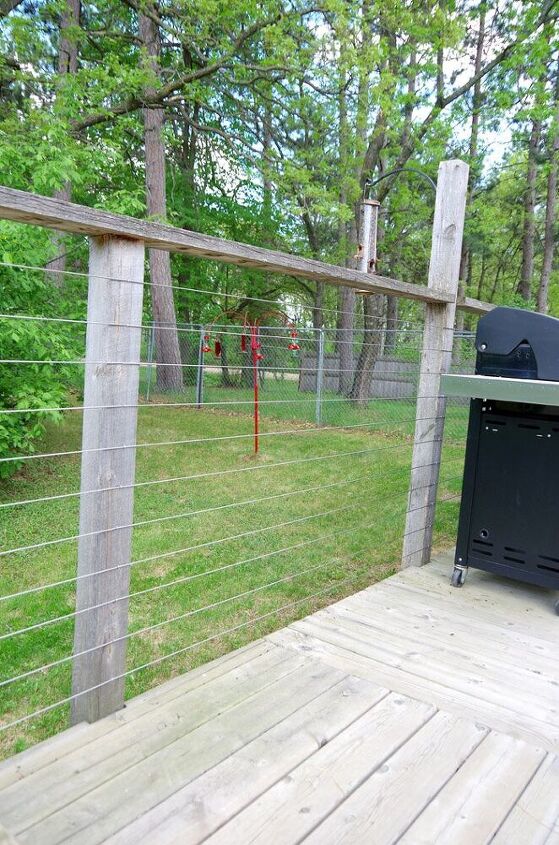
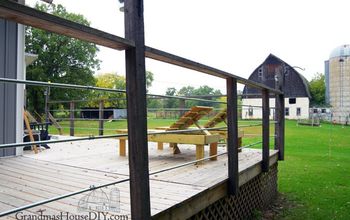
With my materials we had enough to do 11 strands with four inches between each strand. My deck rails are extra tall at four feet but 11 strands was still plenty to keep most doggos on the deck.
(Note on rail height: I LOVE the height of the rails, yes they’re really tall but its a great spot to lean and, even better, it doesn’t interfere with the view when we’re sitting down.)
(I don’t know if this is to code – just like with my previous rails, it is not an issue for me – but if you plan on doing this project (or ANY project!) please check with your local building codes to see if they apply to you.)
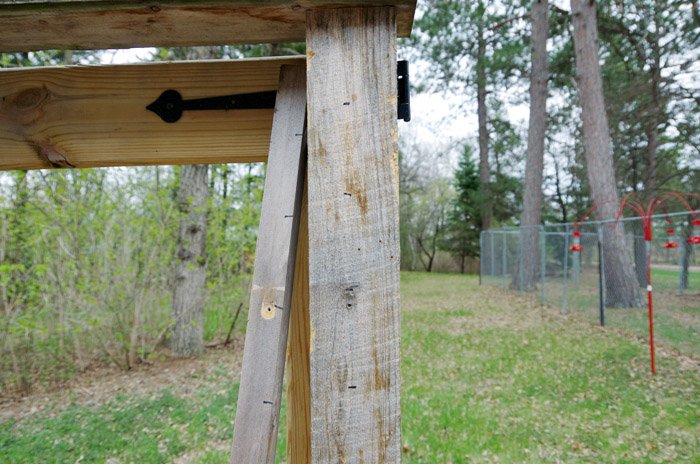
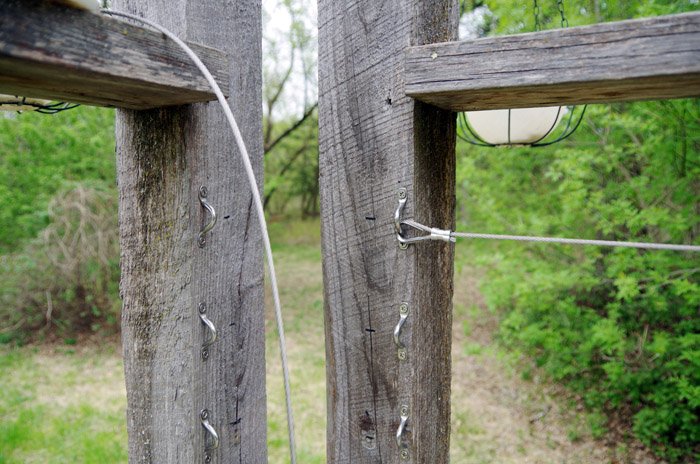
My deck posts are screwed to the outside of the deck so putting the strands on the inside of them (instead of THROUGH them) made more sense. It also meant we didn’t have to drill a million holes that day so YAY…(I grabbed a 4 foot 2×2 and made myself a ruler so I didn’t have to measure on every post.)
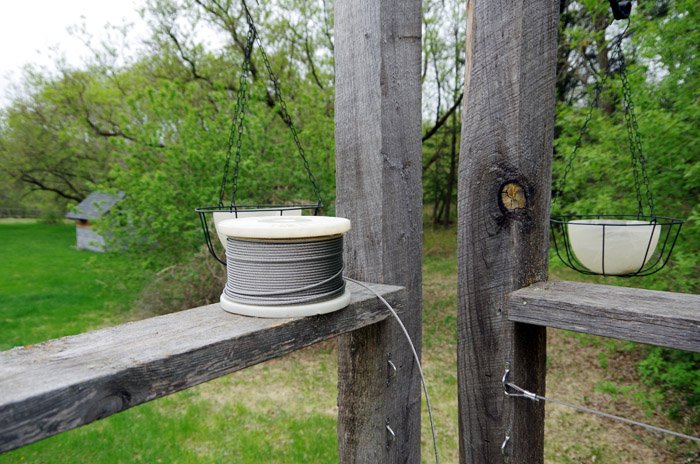
What took the longest on this project was the two hours to put up all the hardware! And to unscrew all of the tighteners too! Once it was all up though putting in the cable lines was pretty simple.
We ran the wire through one end and then all the way to the other end, looped it, clamped it and then pulled it tight at the first end, looped it and clamped it there before cutting it.
Then we simply repeated the process.
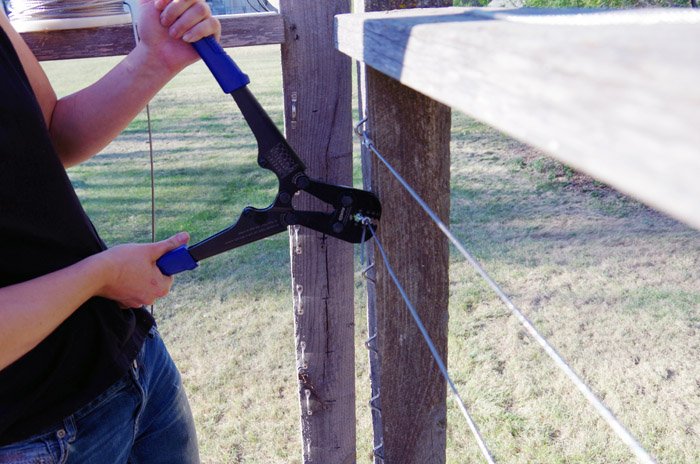
It meant we didn’t waste a single strand of wire and didn’t have to do any measuring – it was easy! After that we just tightened up the fasteners and we were done!
It really was that EASY… however I have to mention that after two hours of running steel wire our hands were pretty beat up. Yes this was easy to do. Yes we both felt like we lost a layer of skin off of our thumbs and the tips of our fingers. I tried wearing gloves initially but this was too tedious for gloves.
I did most of the clamping, we shared the threading but it was Lodi who had the hand strength to push the clamps up to the loop as tight as possible (like a pony tail) I would have had to have used pliers to get them as tight as he could.It meant both of our hands were VERY tired by the end of this.
Another thing we both learned the hard way is if you brush against that wire cable just right it will attempt to rip all of your hair out lol. Because we didn’t put the cable through the posts we also went around with poultry fencing staples and tacked down each strand.
The pictures look so different because we did this over a few different days.
First set of pics we got all the hardware up and did one strand, another night we ran the rest of the cable rails and yet another night we really tightened it all up and then used my 2×2 ruler again to make sure each staple was exactly where we wanted it.
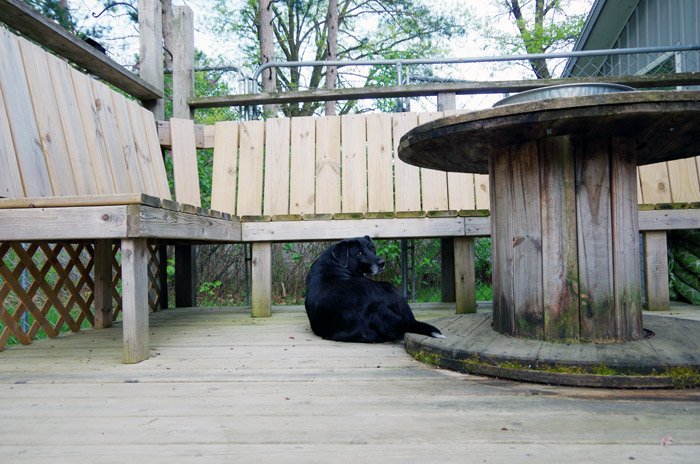
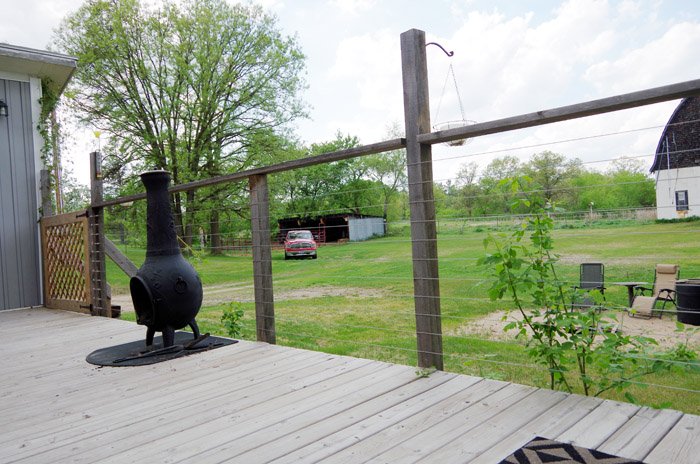
After that I waited a while to get pics of everything when summer was finally here and the yard was looking a little nicer. Annie uses the deck as her sentry post now.
She comes up out of her dog kennel from under the bench with no problem and does laps starting at her doggie door, up on the deck and all the way around coming in through the kitchen screen door and back out again like its her own personal race track.
She sits a few feet from the entrance to her dog kennel guarding the entire space from chipmunks – its her duty lol.
The gates I built back when I did the conduit rails also had to be upgraded to keep a dog in. I had some extra lattice that I simply replaced the conduit with – its not perfect but works fine for now.The gates will eventually be replaced when we move on to stage two of the deck but, like everything, it takes time and finances before we can get there.
For now the gates do their job even if they’re not real pretty!All in I would totally recommend these cable rails for any deck or balcony – they’re modern, don’t interrupt the scenery and are really easy to install. Besides that they’re STURDY – you can’t pry them a part more than a tiny amount at all.


Comments
Join the conversation
-
I love this look! Fabulous job. Thanks for sharing.
-
This is what we need to keep our view of our yard open! Love this and your instructions! Thank you so much!


Frequently asked questions
Have a question about this project?