


Updating My Deck Part Two: Hand Railings for My New Stairs

Can't have stairs without handrails/handrailings/etc/whatever, (at least in this case). Took about a day and a half, but came out great! Now before you get started, check local codes and make sure your ideas/plans comply with building regs where you live. It might save you a ton of headache
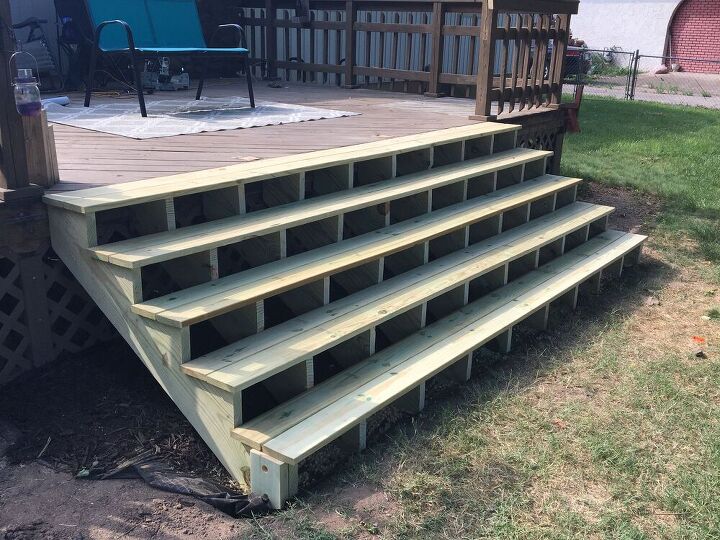
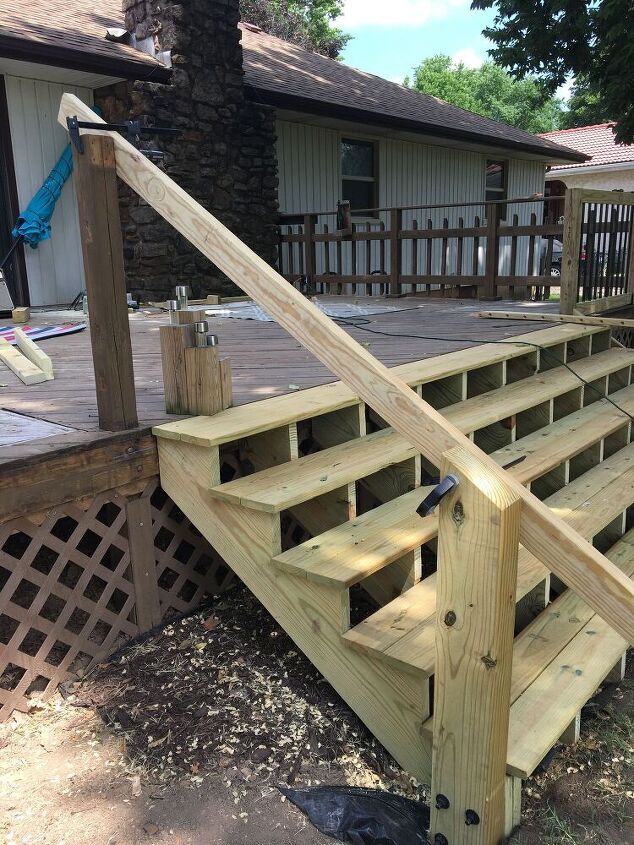
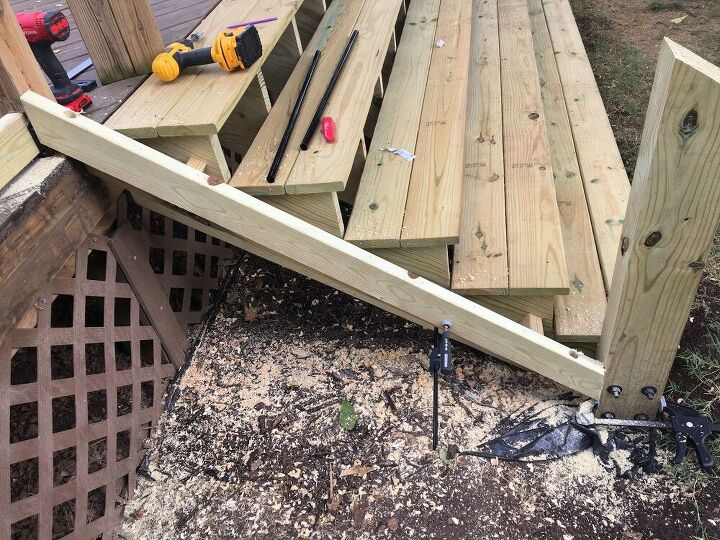
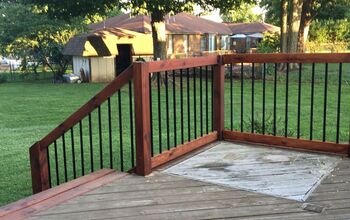
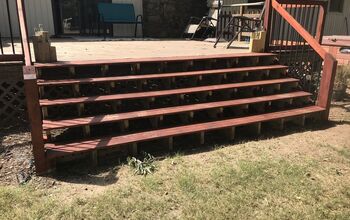
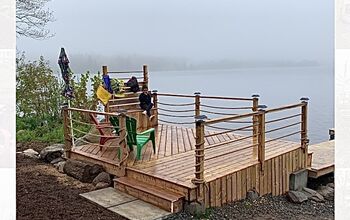
Here are the new wider stairs I added to my deck. (Details here ). Due to all the necessary details I broke down the stairs and handrailings into two diff posts. Note that these stairs are 12' wide. Whoever built my deck years ago built the posts on 4 foot spaces not centers, so when I took out the handrail I had more than a 12' opening. Time to make some adjustments. I got myself in a tough spot on this: I didn't know how tall to make the handrails, absolutely no idea. So... I built the horizontal rails on either side first, simply to have something to measure. Note the old 2x2 balusters on the right-hand side of the stairs, they will disappear during this post.
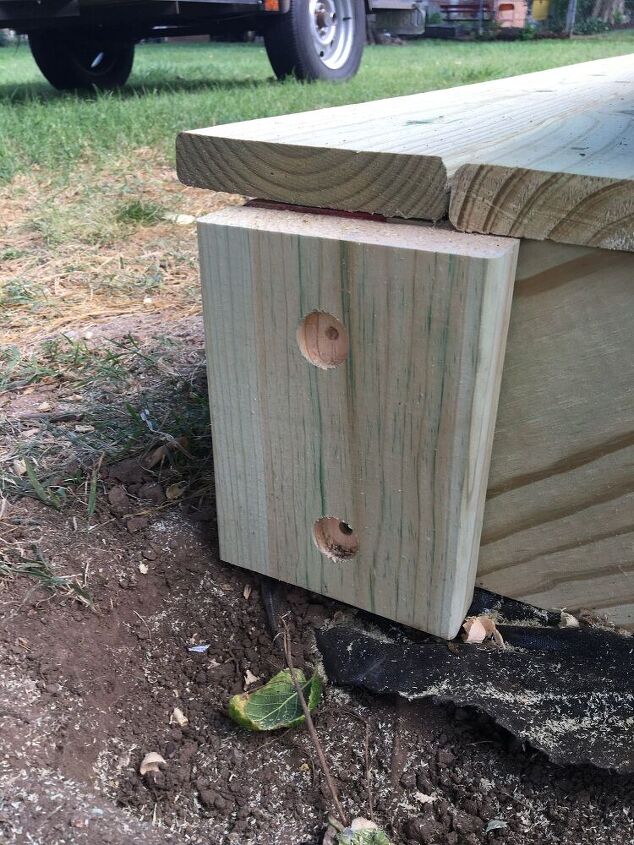
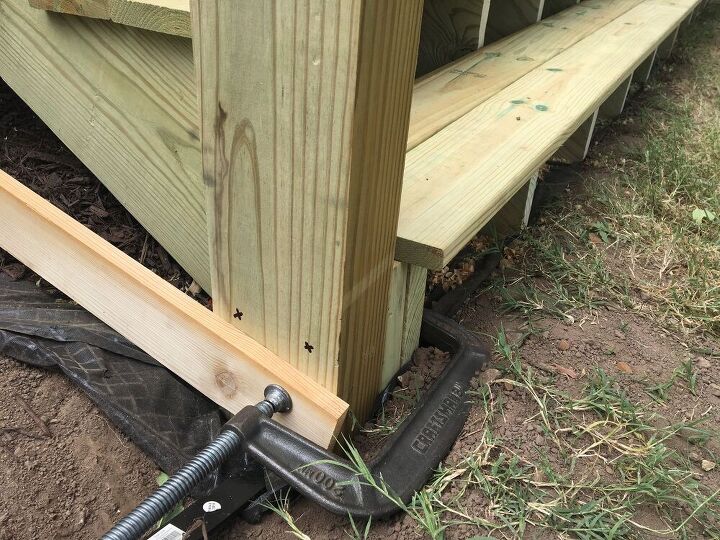
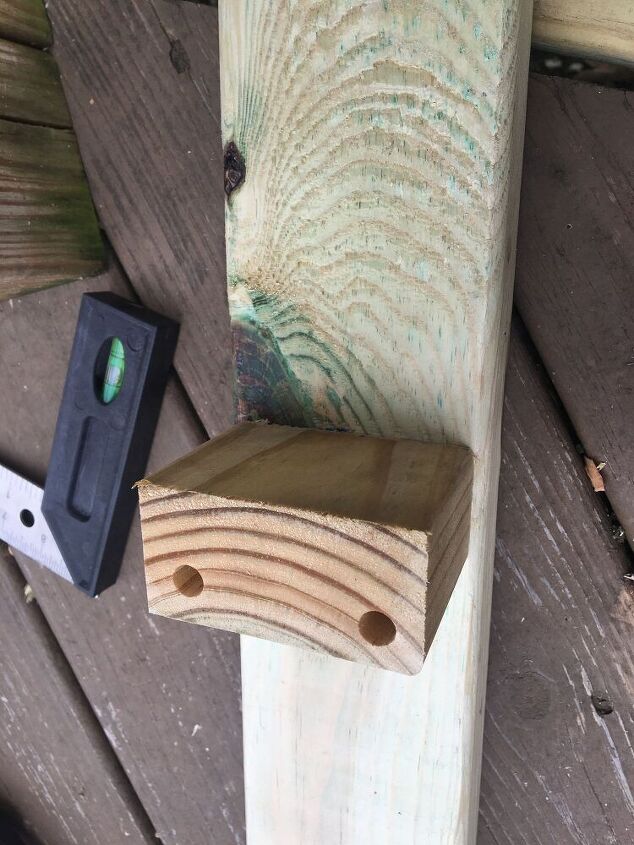
I made this spacer out of some scrap 2x6 I had left over from boxing in the stair stringers. First they helped line up the new posts on the stairs to the old posts on the deck. Bonus: I didn't have to trim the stair treads for the posts. I used a 1" spade bit to countersink a couple of deck screws so that the screw heads would not interfere with fit etc.
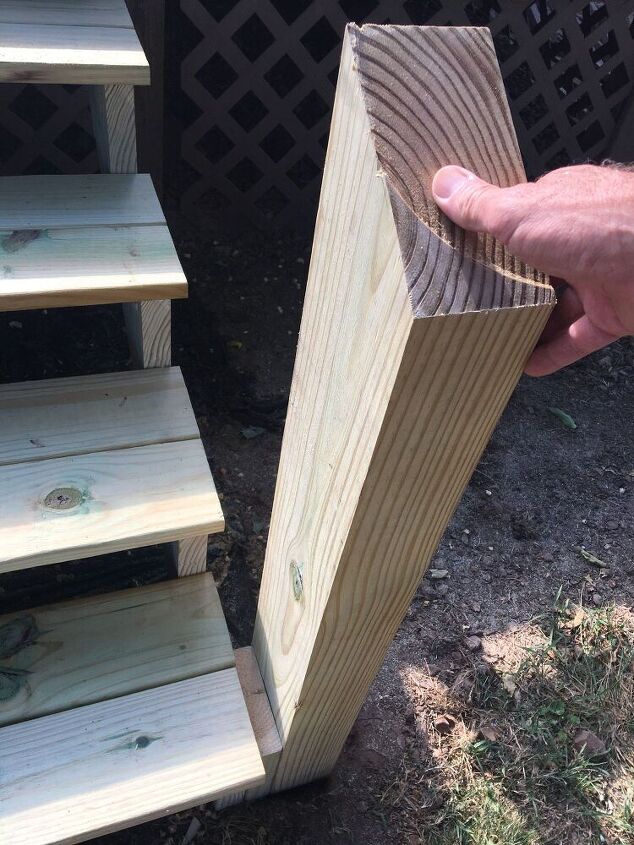
I cut the top of the new 4x6 post at a 33° angle. There were no 8' 4x4s in my town to be found. Because my miter saw is only 10", I had to flip the board and make a second cut. The diff in the cuts can be seen at the top of the post. A minute or two with a planer or sander will fix this right up.
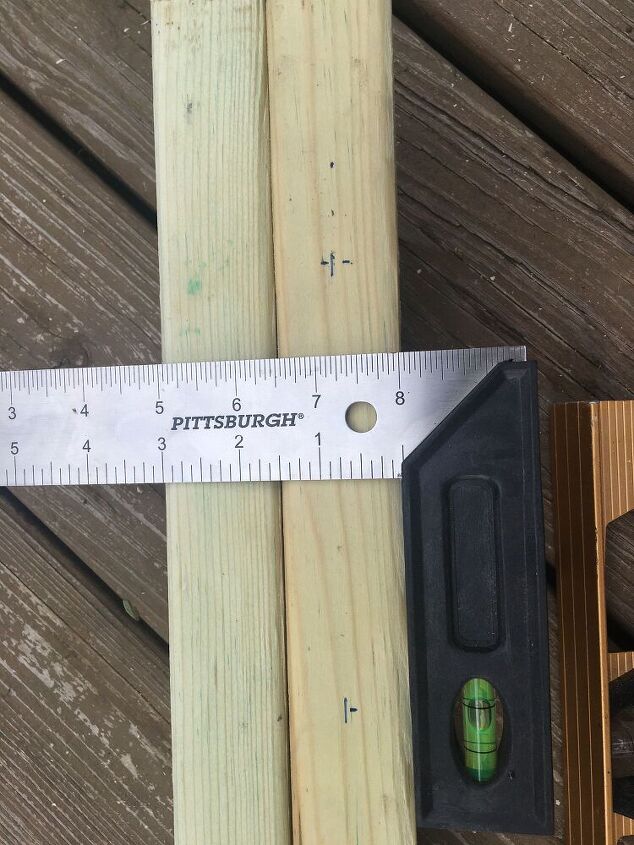
How did I come up with 33°? High school geometry / algebra. Turns out I needed it TWICE on this project, so I'm glad I remembered it. I'll document it later in another pic, but basically my stairs have a 6.5" rise and a 10" run, so when you plug that into a right triangle, the rise becomes 'opposite' the angle, and the run becomes the 'adjacent' in the right triangle. Using my phone calculator 6.5/10 = .65 then "2nd Key" for Inverse TAN(gent) and I got 33.02°. Super easy. I'll be using it again later in this post. Look at the comments too if you need more help, and FEEL FREE to ask!
Don't sweat it. You get to use your phone calculator. It's not like it's long division on paper, right? 😉
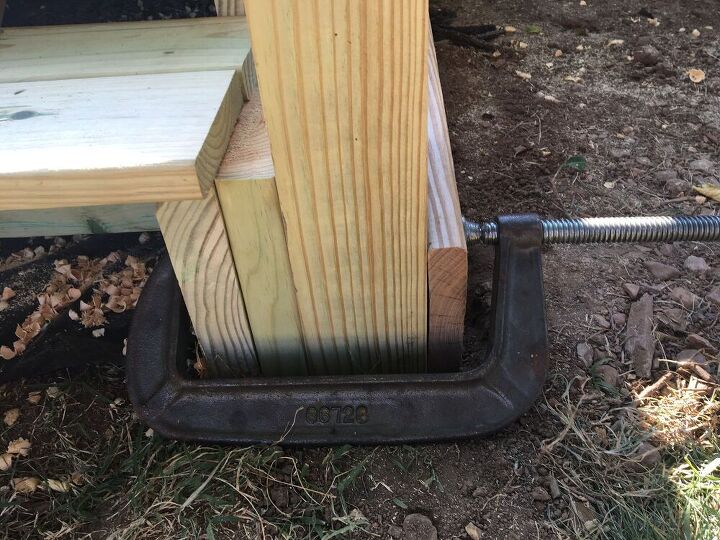
I grabbed the big C-Clamp I use on disc brakes, and a scrap of lumber to hold this all together. The scrap keeps the clamp from denting the outside of the post. I checked for plumb every direction with a level.
Here on the other side you can see I am ready to drill two of the four needed 1/2" holes for bolts. I didn't have a drill bit long enough, so I bought a cheap 1/4" foot long bit from Amazon ($6) and drilled through, and then when both sides were marked by the 1/4" hole, I used a regular 1/2" drill bit from both the inside and outside.
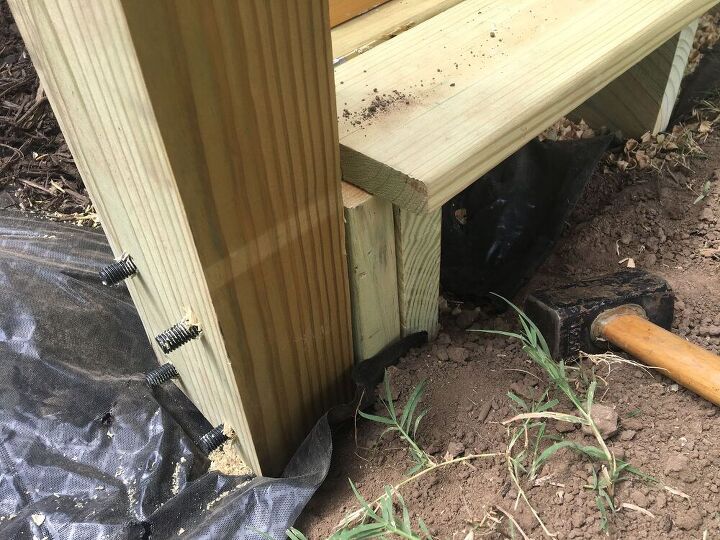
I bought eight total 1/2" x 8" black carriage bolts, with flat washers and nuts. Because carriage bolts have an internal square underneath the head, I also bought eight 3/4" flat washers. These were standard galvanized and went on the inside where they won't be seen. 1/2" is our code minimum where I live. Here I've got a mini sledge hammer to drive the bolts thru the treated pine. Make sure you keep the washer off the threads as you're knocking these through.
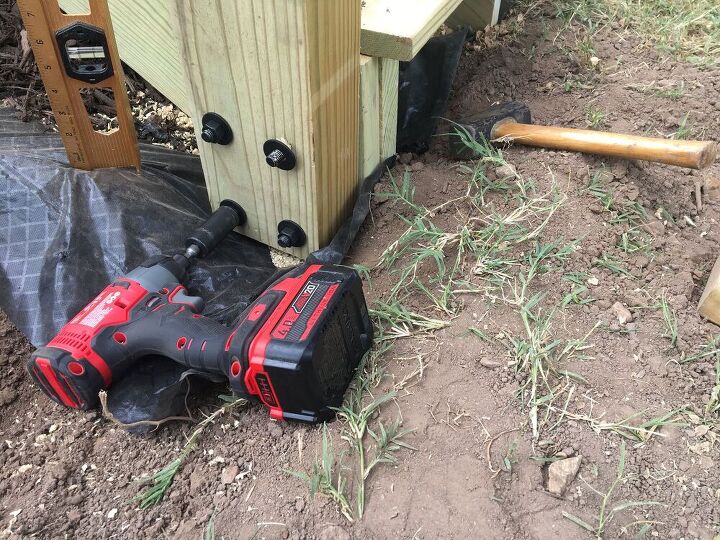
Check for plumb/square/etc on each side and adjust as needed. A sliver of scrap from the treated lumber makes a nice shim if absolutely necessary (I used the miter saw). I added the black 1/2" flat washers and nuts, and then tightened them down with the same impact wrench I used to build the stairs. Turns out the 4x6 gave me a bigger spread for the bolts which will make the post more secure in the end, and met distance requirements for local codes.
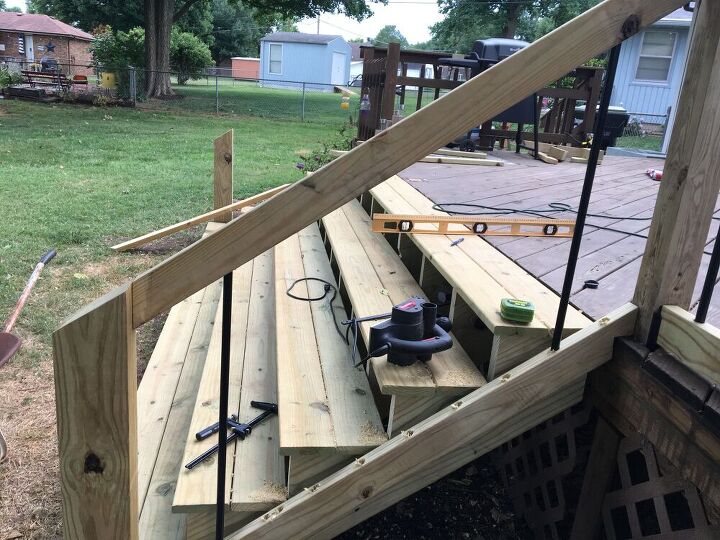
I measured and calculated etc over and over trying to figure out this top handrail. Turns out the old post on the deck was nowhere near plumb and I was just beating myself up with the math. I finally decided to clamp a piece of treated 2x4 to the posts top and bottom and mark where they cross the post. This was so easy I wish I had thought of it first. I did the same for the bottom. However, because the bottom had to be notched to clear the existing decking, I made the bottom right board three times! Once I had it right it made a great template for the left one, which came out near perfect
(note the old balusters are missing on the left)
Somewhere during this project I decided to switch from wooden to aluminum balusters. They're a bit more work but I liked the look so I thought I would give it a try. While building the stair railings, I did 4' of my deck railings to get some of the math worked out. Turns out 4.5" centers on the 3/4" aluminum balusters works good, looks good, and meets code. HOWEVER.... 4.5" spacing on level lumber is not the same as the distance along the stair railings. I'll try to explain it better in pics and diagrams, but I used the high school math again and everything came out right. This time I used the COS(ign) of 33° which I rounded to .84. Then I calculated 4.5" / .84 = 5.35 ". To keep it simpler, I used 5 3/8". Look at the comments for more details. Don't draw your center line the full length, just where you plan to drill. This way you won't have to sand off a ton of markings.
Now you have to stop and think here. My posts were 48" apart, but with the handrails being slanted, they came out to 56-57". I estimated I would use ten balusters. Ten balusters means nine spaces. Here's the math.
9 spaces of 5.375" x 9 = 48.375 " for the balusters
57" - 48.375 = 8.625" (the space for both ends left over)
8.625" / 2 = 4.31". Once you factor in the radius and diameter of the balusters, this left less than 4" from the end balusters to the posts, and every building code I could find said the MAX spacing was 4". This worked out for me. I had to adjust the end spacing for each slanted railing, the top ones were not the same length as the bottom due to lack of plumb, age, ect. Remember you're using a calculator and it doesn't take too long to get comfortable with the math 😊
because the bottom railings were hard to get to at the base of the post, and I still wanted to hide my screws... I made these spacers to fit. I used my Kreg bit to countersink some holes, and I attached the spacers from the inside. I used regular deck approved screws
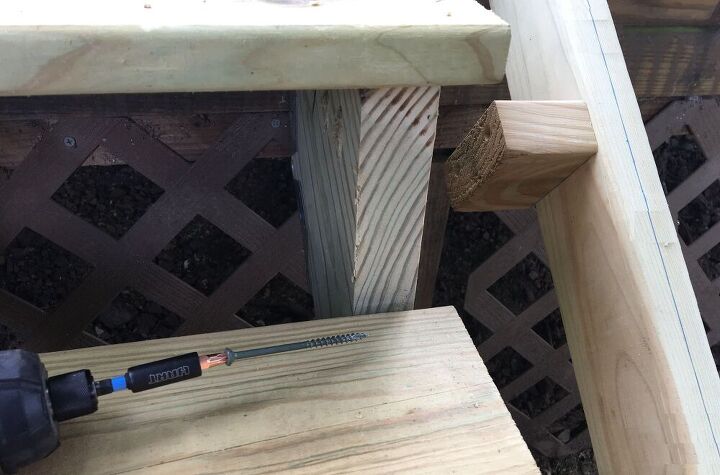
Here's how I attached the spacer to the outside stringers... from inside the stringers. took a bit of trial and error, but worked. Note that someone marked the center line all the way down and now has to clean that up....
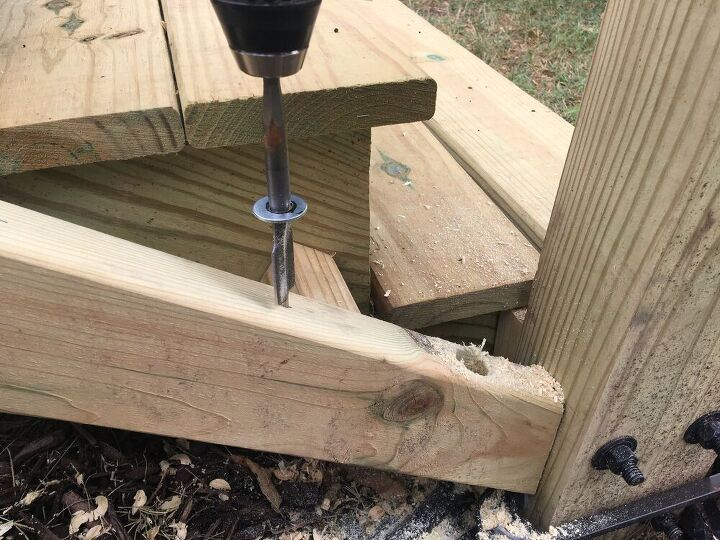
After some practice (and wasted lumber) I learned it was best to just mount the boards and do my best to drill straight down. Here I'm using a 1" spade bit into the 2x4 as best as I can keep it vertical. The 3/8" washer makes a nice depth gauge to see how far I've gotten into the wood. When the washer gets up to the Sharpie line on the bit shaft, I've gone far enough and need to stop
So after a bit more trial & error (and more wasted lumber) I found that if you take the top railing off and rotate it (twirl it like a baton) 180° you can clamp it to the bottom rail and things get much easier. Here I'm drilling the top railing while it's clamped upside down to the bottom railing
Using a couple of the aluminum balusters, I test fit my top and bottom rails. First I had to make sure each set of holes was deep enough that the top rail would slide all the way down, and second I had to make sure none of the holes were too deep. Of course a few were, so I took out the test balusters and added a pine chip or two inside the hole. Once I had all of the baluster holes fitted, it was time for the final assembly
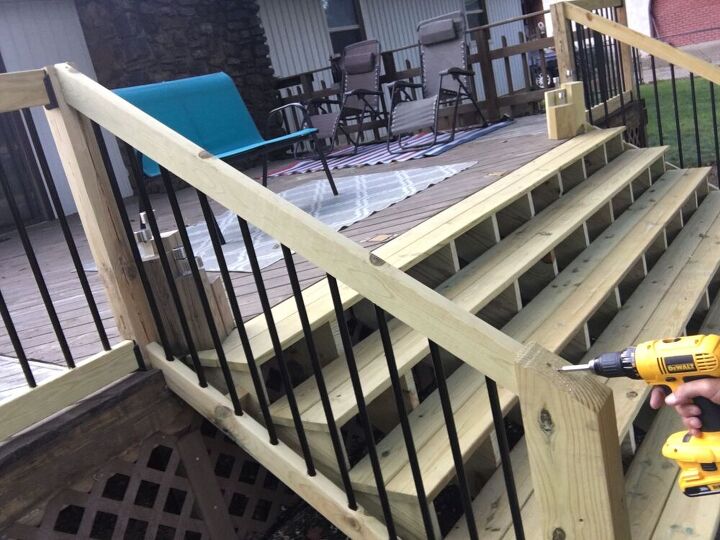
So working from the bottom up, I put in a baluster, then the top rail, then the next baluster, and the next...etc. Since I'm right handed I work right to left. letting my left hand raise and lower the top railing while my right hand guides the balusters into the top holes. You WILL get frustrated but don't give up. Once you have all of your balusters in, secure the rail at each end with a good No 10 x 3 deck screw.
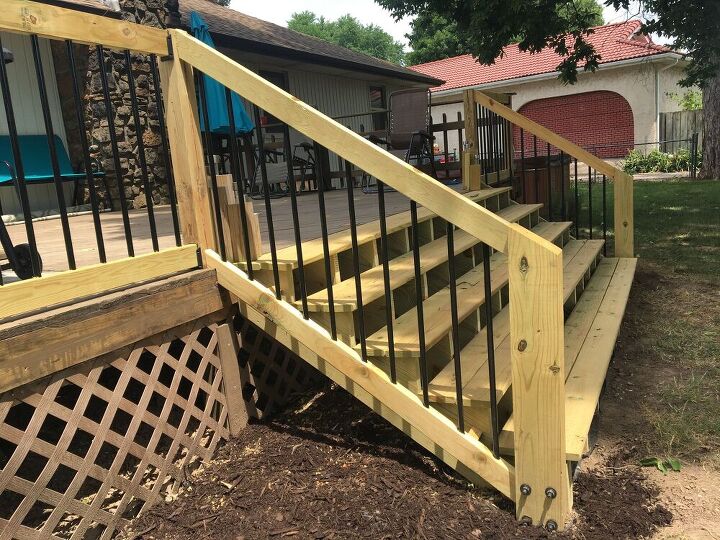
The new balusters for the horizontal rails are installed in this pic (expect a future project with details), which came in handy for some measuring. After I get it stained (the wood needs to dry two weeks after leaving the lumber store) I'll post a better pic in the comments. Meanwhile I'm already enjoying it. I moved my solar porch lamp from the front deck for one side of the stairs and made a second one in 5 minutes (for about $4!) to go on the other side.
I don't have a blog, or a shop with $4000 woodworking tools. This is a true guy-at-home DIY. My commercial occupation is electrical engineering so I can truly say I'm not a carpenter. I used a miter saw, planer, impact drill, and standard cordless drill for this project, nothing out of reach for the average homeowner. Less than $300 tools total! Please comment if you have thoughts or ideas to make it easier for someone else, and as always... happy Hometalking
Completed!
Resources for this project:
See all materials


Comments
Join the conversation
-
How about some stain? I still need to do the deck boards themselves. Here you can see I've made progress on the side railings too. I hope to post them in a detailed project ASAP
-
Beautiful!! A clean modern look!!
I admire your skill and vision!


Frequently asked questions
Have a question about this project?