


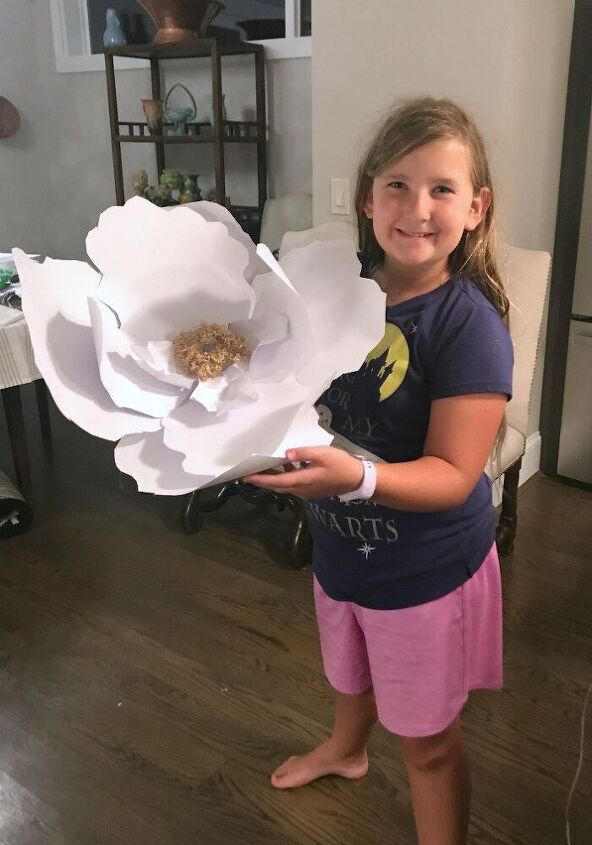
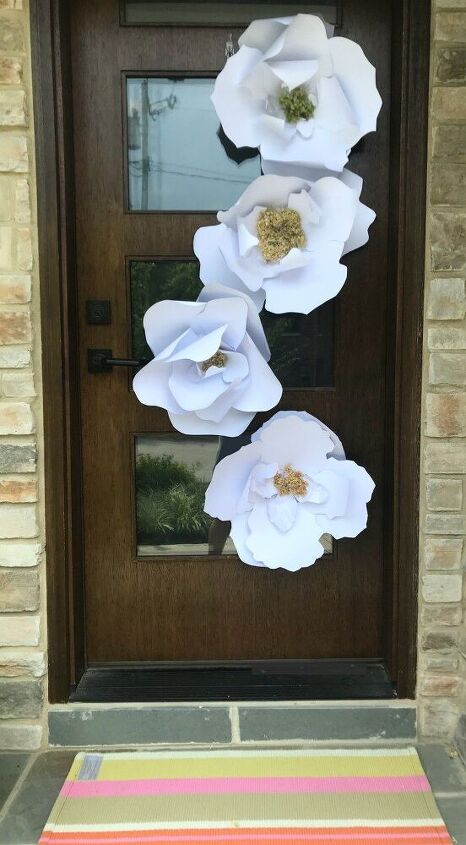
Easy Giant Paper Flowers
3 Materials
$30
30 Minutes
Easy
What surprised me most when making these giant paper flowers was not how sturdy they felt or how stunning they looked but how EASY they were to make. Of course, once you learn the basic construction, you can become more adventurous and end up with some truly mind-blowing creations. But even in their simplest form, they are lovely. I taught my friend’s 11-year-old daughter to make them and was amazed at how easily she learned the task. In fact, she rocked it.
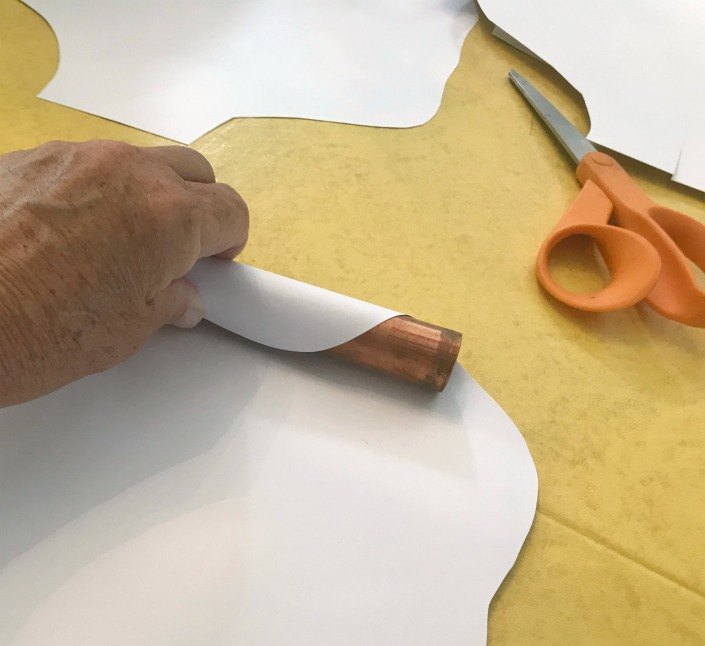
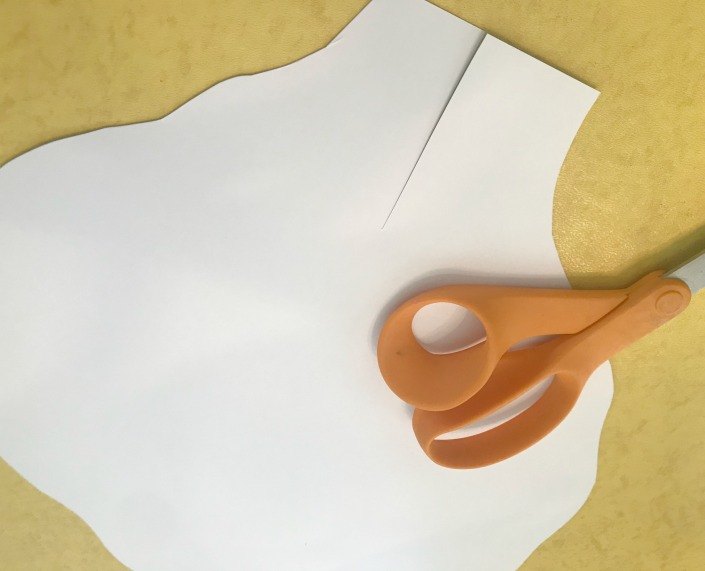
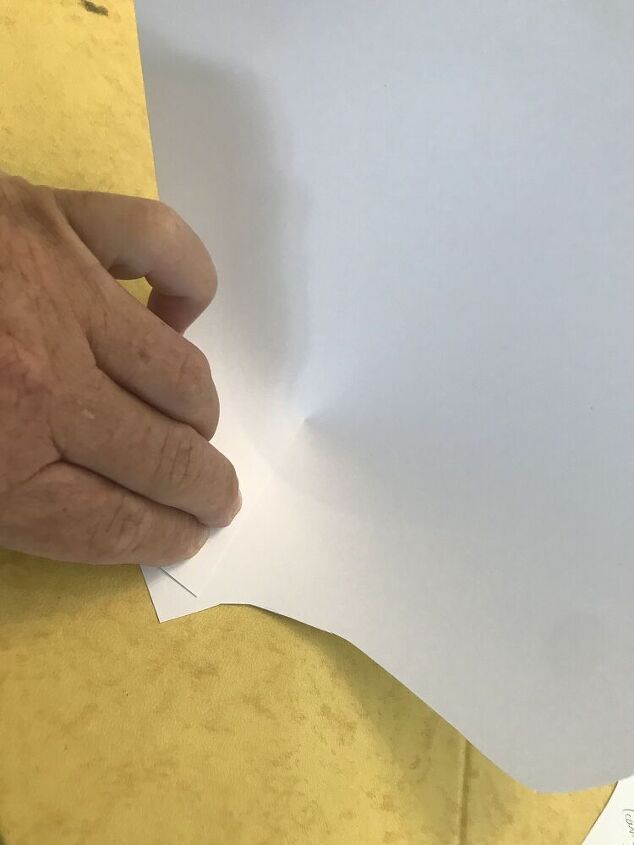
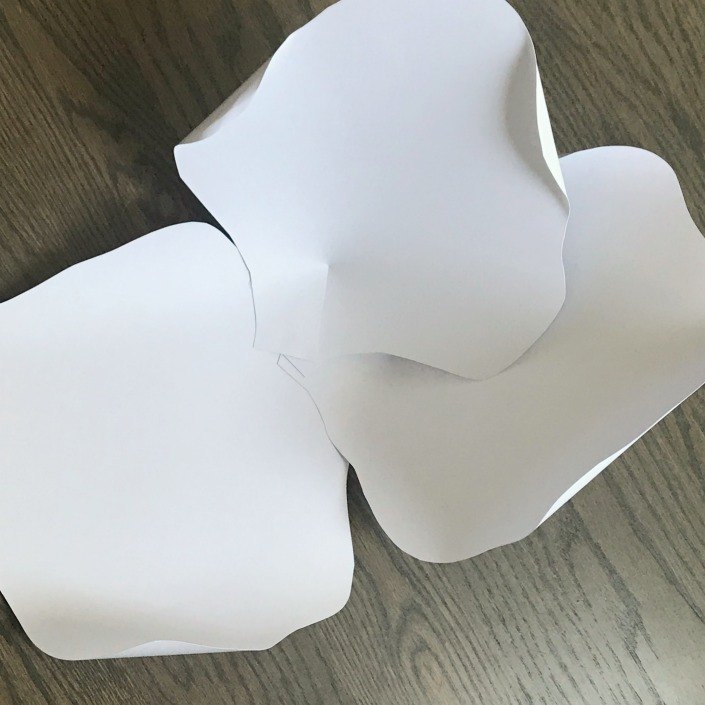
step 1 - making the petals

Curl – Once the petals are cut, curl some of their edges, using a small cylinder shaped object. I used a small copper pipe, but even a broomstick will work.
Cut & glue – Next, cut a 2-3 inch slit in the base of each petal. Apply hot glue to one side of the base, then gently pull the other side over it. This adds dimension. For the first layer of petals, I usually do this to only two of the four petals. For the subsequent layers, I do this for all petals.
Assemble – Once the petals are cut, curled and shaped, glue the bases on top of each other, as shown below.
step 2 - layering the petals
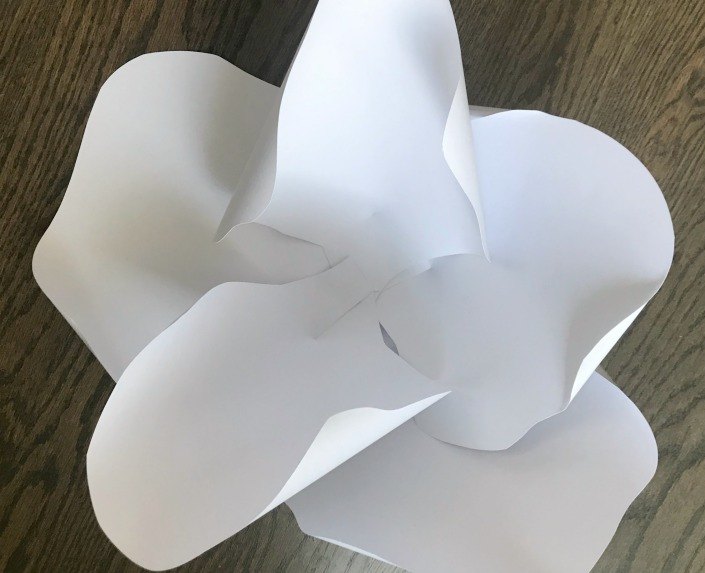
Repeat this process for a third layer of petals, but this time cut the petals just a bit smaller then the largest ones. I like to curl the layers closest to the center more tightly than the base layers.
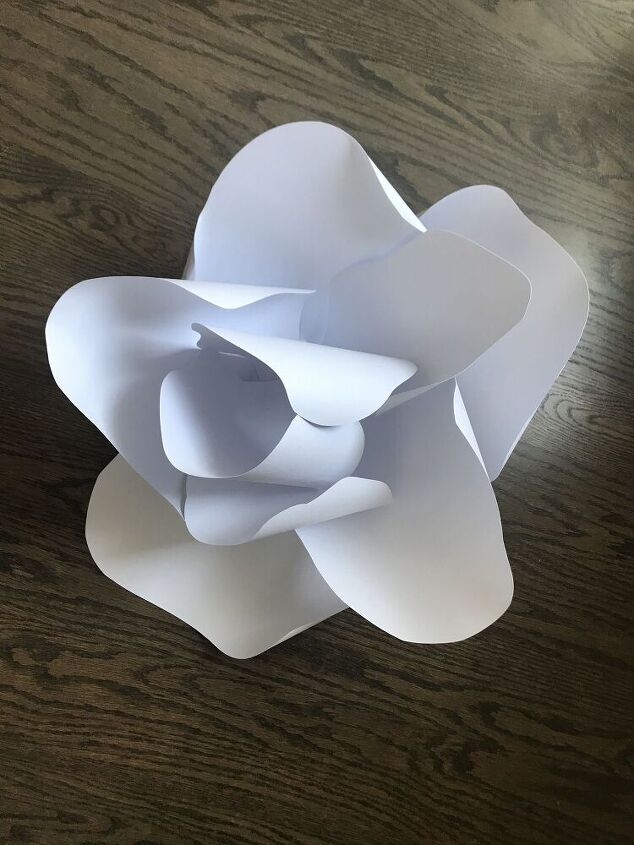
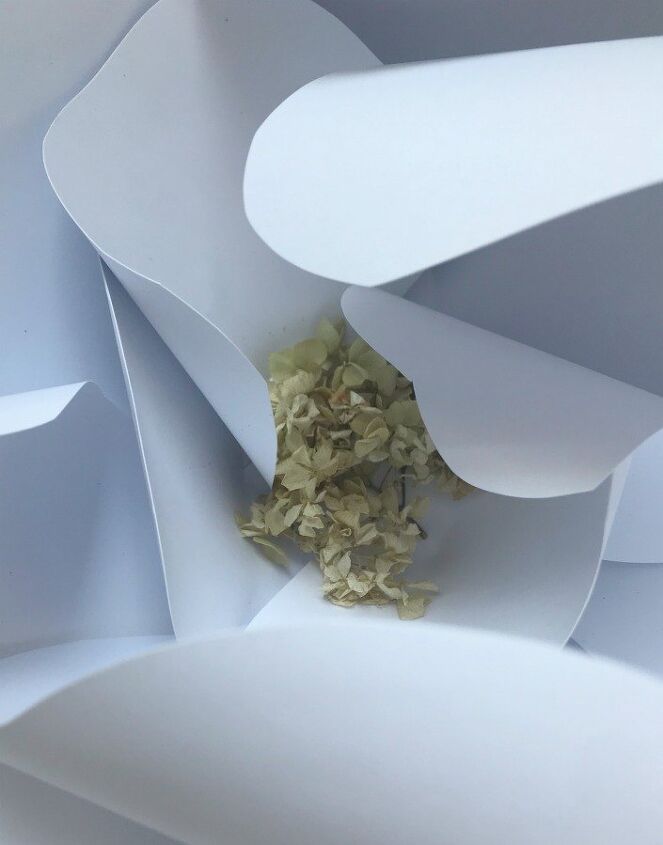
step 3 - adorn the center
final notes
- create a base layer of 4 large petals
- second layer of 3 large petals
- third layer of 3 smaller petals
- fourth layer of 3 even smaller petals (cut 2 petals from 1 sheet of paper)
- glue a dried blossom to the center
Resources for this project:


Any price and availability information displayed on [relevant Amazon Site(s), as applicable] at the time of purchase will apply to the purchase of this product.
Hometalk may collect a small share of sales from the links on this page.More info

Want more details about this and other DIY projects? Check out my blog post!


Frequently asked questions
Have a question about this project?