


DIY Kitchen Table Wood Bench (Farmhouse Style)
Today, I'll be showing you how I built a DIY kitchen table wood bench that has a rustic farmhouse style. Even if you don't need this type of bench, the techniques covered in this project can be directly translated toward other projects such as a table top.
There are several things which are difficult to fully explain with words and images, so be sure to check out the video tutorial above/below!
There are several things which are difficult to fully explain with words and images, so be sure to check out the video tutorial! Be sure to visit my blog and subscribe to my YouTube channel for more DIY tutorials.
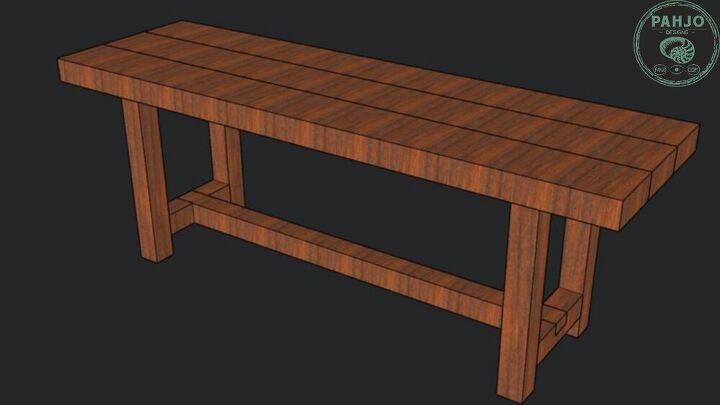
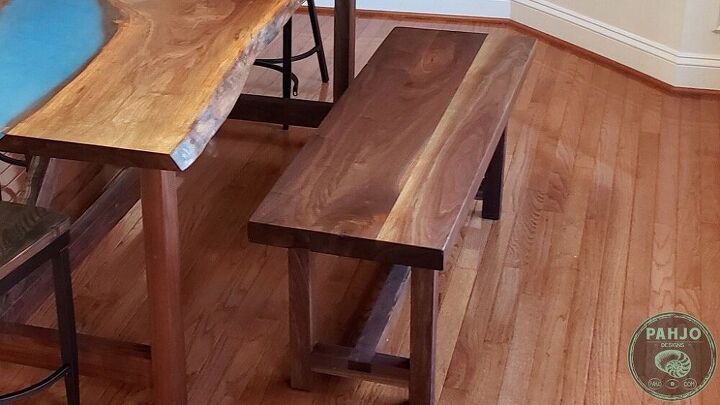
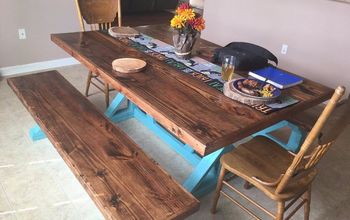
First, I designed and built this farmhouse style bench seat for one of my clients to accompany a live edge walnut table.
So, the bench seat design matches the table.
In addition, the bench seat top attaches to the bottom via threaded inserts and screws. Threaded inserts make it easy to detach the bench top for easy shipping and transport.
To make it easy to build, I split this build into 2 parts: Bench top and Bench bottom.

This step and the next step aren't necessary if you don't have the tools. The majority of the time, the wood you buy can be planed (flat surface) and joined (straight sides) by the hardwood dealer or big box store (Home Depot / Lowes).
So, you can do this project without needing to purchase the tools I used to mill lumber.
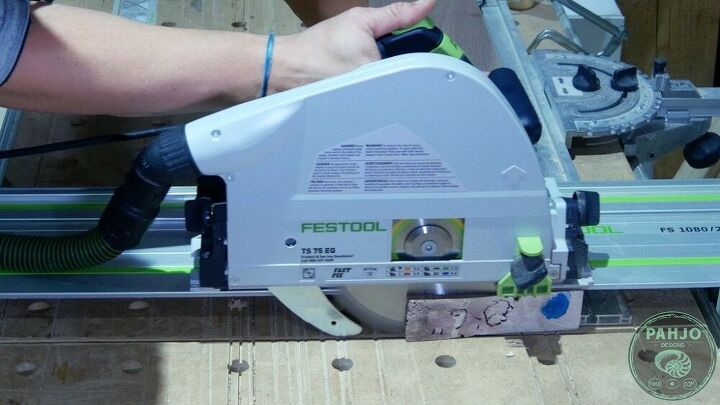
After I got one straight side, I used the straight side as reference and crosscut each end to square it off.
I trimmed the other side and cut the boards to size. So, I ended up with 3 boards at 50"x5.25"x2" (LxWxThickness).
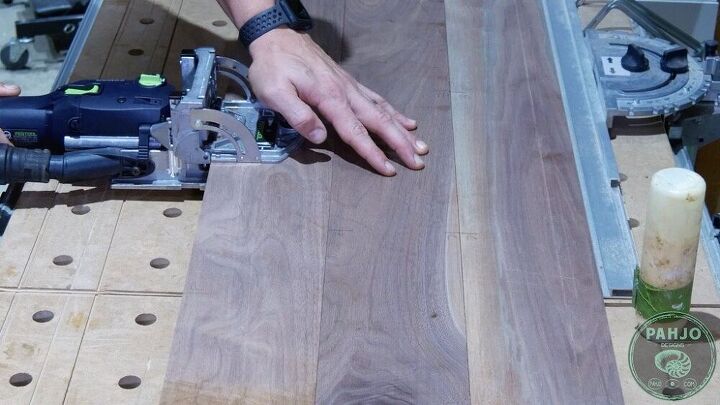
So, there are various ways to join pieces of wood together. I used a festool domino, which is a mortise and tenon machine.
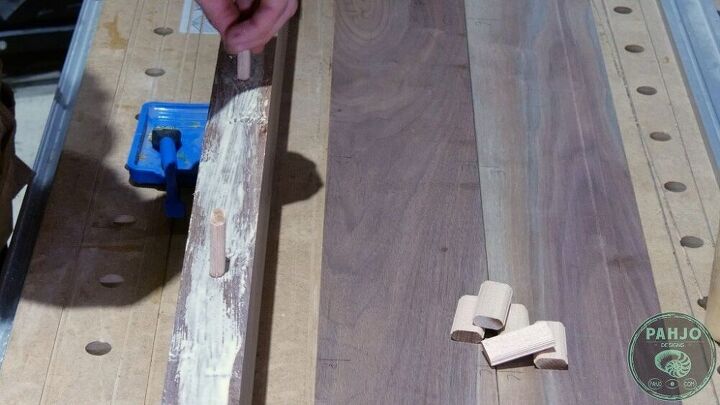
However, a wood dowel jig or a biscuit jointer are a more cost efficient way to join wood together. Pocket holes work as well, but I steer clear of pocket holes for wood thicker than 1.5" thick.
If you are new to woodworking, a wood dowel jig will be your best choice. Basically, all you need is a dowel jig (under $20.00), a drill, and wood dowels the same size as your drill bit (normally 3/8").
Regardless of the joinery method you choose, I recommend you space the dowels/biscuits/dominos 12" apart and 3" from each end.
Glue is required regardless of the joinery method you choose to use. Apply glue liberally.
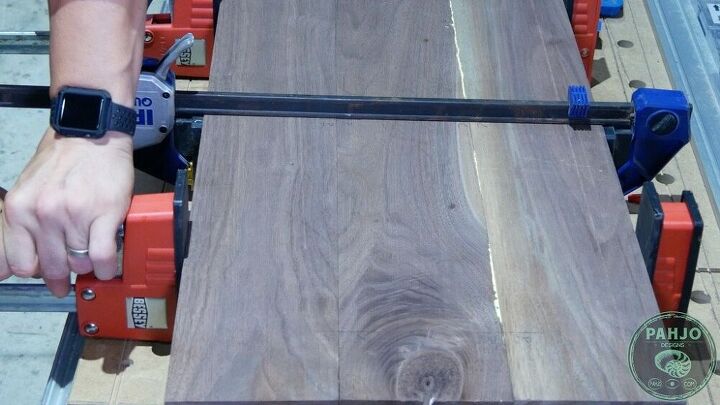
Clamp the boards together. As a quick tip, make sure a small amount of glue comes out the seams as this signifies the proper amount of glue was applied.
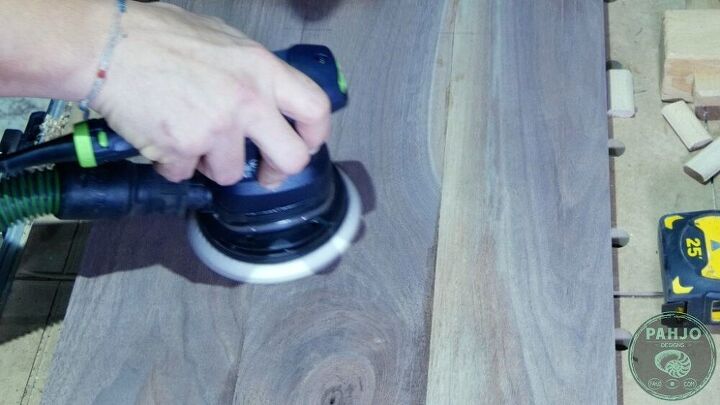
I sanded the wood bench with 80 grit, 120 grit, 150 grit, 180 grit, 220 grit, and 320 grit.
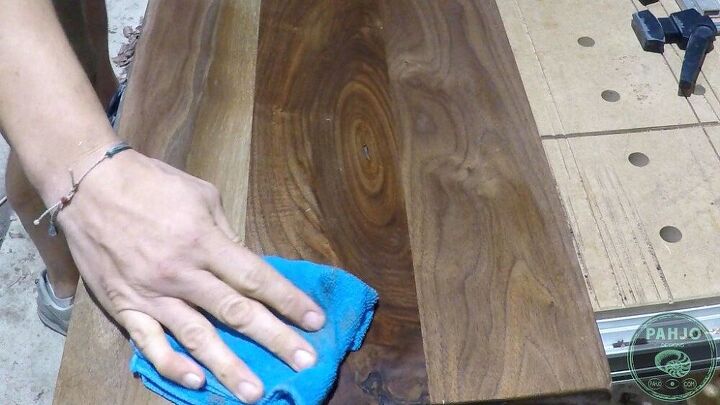
Since this bench needs to be smooth since it will be used as a seat, I wipe the surface with a damp wet rag to raise the grain. Then, I sand with 320 grit (or whatever last grit was used) one final time.
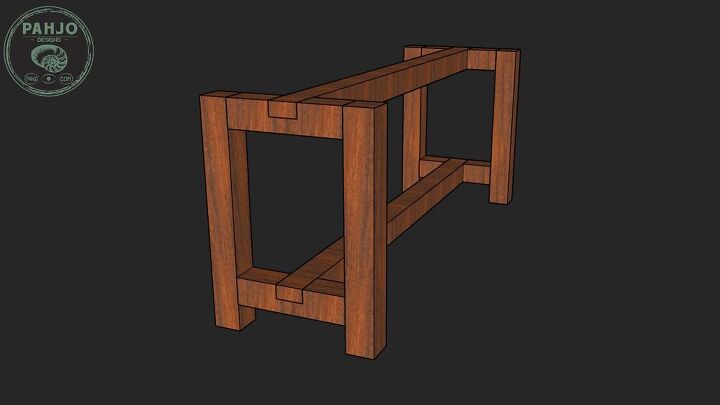
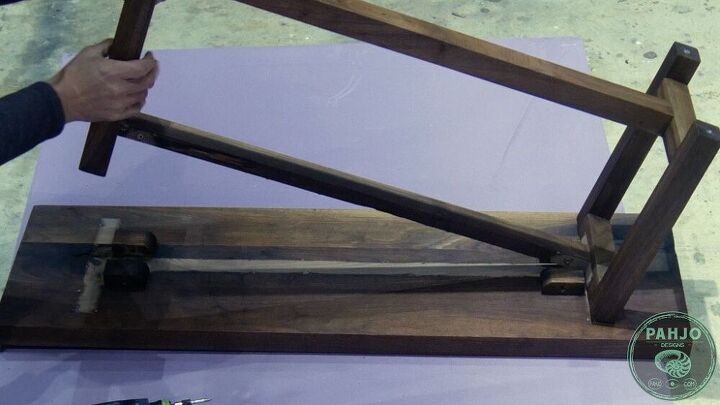
The second part of this project involves building the bottom part of the bench. I designed the bench to use half-lap wood joints which are very easy to make with a common power or hand tools.
The bottom consists of a top and bottom runner that connect to a cross support at each end with half-lap joints. Finally, 4 legs attach to the cross supports in 2 locations (top and bottom). If my written description is a bit confusing, the picture associated with this step should clarify any confusion.
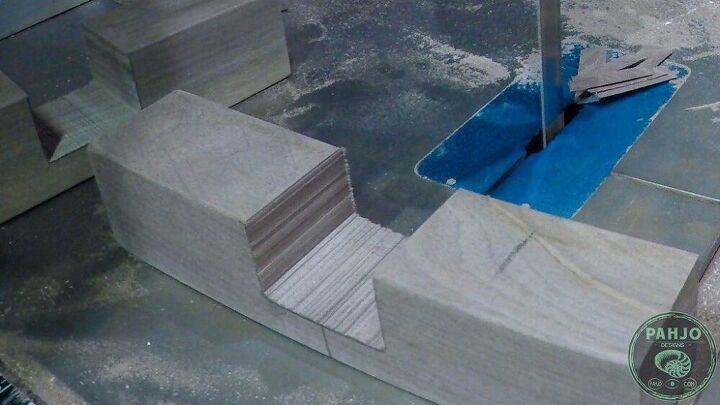
I used my bandsaw to cut the half-lap joints, but a jigsaw or handsaw works as well. Regardless of the tool you use, it is important to clean up the joint with a chisel or sandpaper so the insides are somewhat smooth and flat. This ensures the glue will hold the 2 pieces of wood together.
The half-lap joint consists of a notch cut in a piece of wood, which is half the thickness and the same width as the other board.
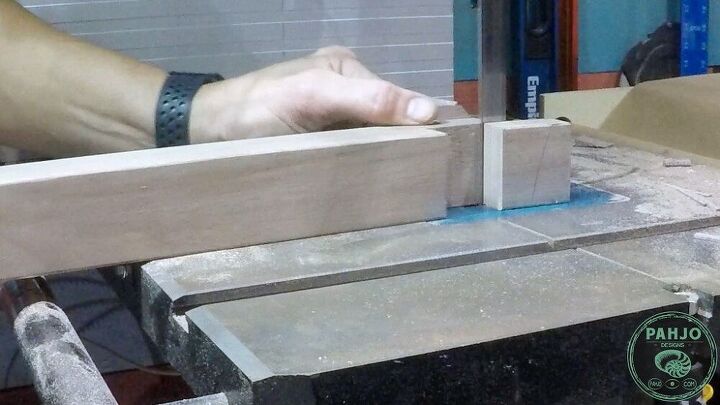
The other board (runner in this example) of the half-lap joint needs a notch. The notch needs to be half the thickness and the same width as the cross board.
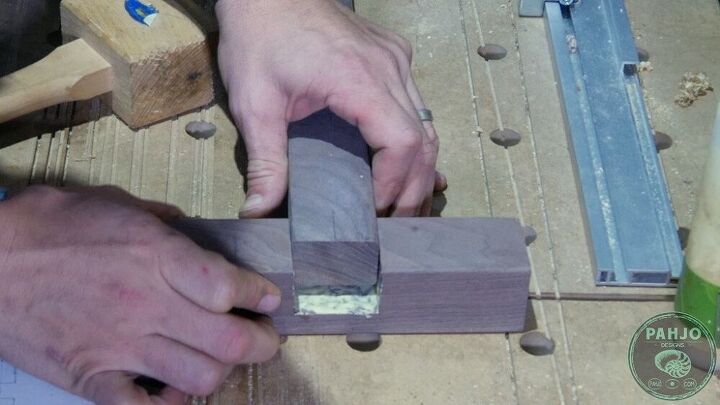
To complete the wood joint, apply glue and clamp it to allow the glue to dry. For extra strength, you could drive 2 screws through the bottom to hold the joint in place but this is not necessary.
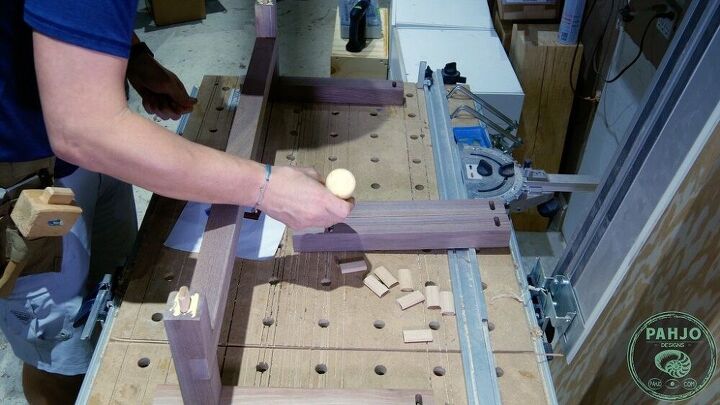
To attach the bench legs to the cross boards and runners, use the same joinery method you used to join the bench seat. In my case, I used dominos.

Next, make sure everything is square and clamp everything together so the glue will dry.
Since I need to ship this DIY dining table bench seat across the country, I designed the bench seat to easily detach from the bench bottom.
To attach the bench seat to the bench bottom, I used threaded inserts and connector blocks.
I find connector blocks (handmade pieces of wood) with threaded inserts make it easy to connect a table bench bottom to a bench seat.
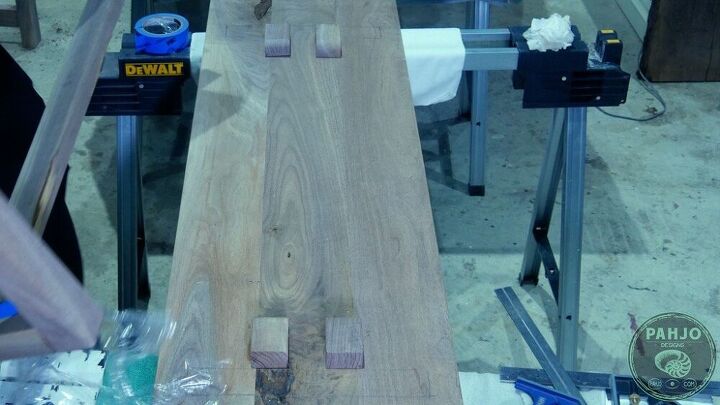
So, I used pieces of walnut wood to cut out 4 identical connector blocks.
Next, I used plastic wrap to prevent the connector blocks from sticking to the dining table bench bottom.
Then, I applied glue and placed the connector blocks in the ideal location.

Threaded Inserts work really well to connect pieces of furniture together.
First, I placed the bench bottom in position and marked the depth of my drill bit with a piece of electrical tape.
Next, I drilled through the connector block and into the middle cross bar slightly deeper than the length of the threaded insert.
Next, I removed the bench bottom and applied glue to the hole I drilled on the cross bar.
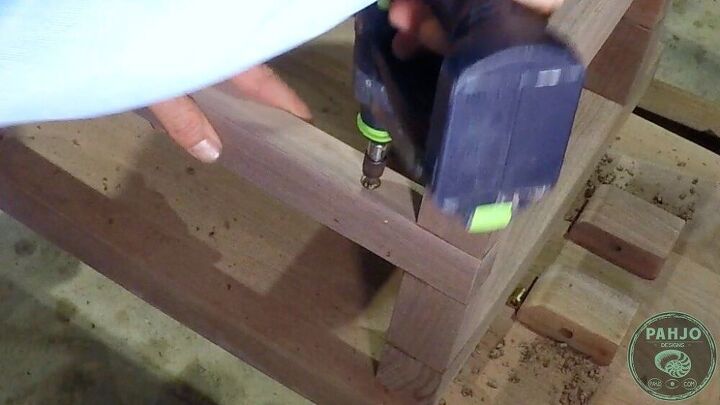
Then, I used my drill to secure the threaded insert in the hole very slowly in order to avoid stripping the hole.
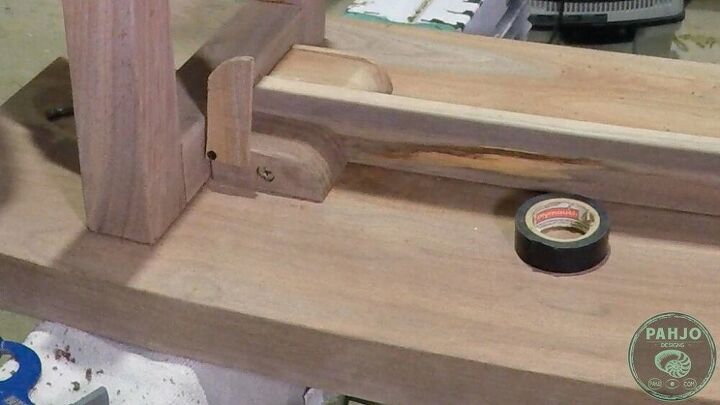
This step isn't necessary as it is more of a 'quick tip'.
To conceal the threaded insert, I cut a piece of walnut the same shape and size as the connector block.
I used a small black screw to secure it to the outside of the connector block. It opens and closes similar to a door.

My wife applied the finish to the bench seat and bottom. We used rubio monocoat oil plus 2c which is a 2 part finish. It only requires one coat and leaves a nice satin/matte sheen for a more natural look.
To detach the bench bottom from the bench seat, simply unscrew the screws and lift up. This makes it easy to ship furniture or to relocate it to different areas of your home. Since this bench is made with solid walnut wood, it is very very heavy.
In closing, I hope this HT tutorial provided you with value and the tips/techniques help you with other woodworking projects you may take on. Please leave a comment down below if you have any questions.
Resources for this project:
See all materials


Comments
Join the conversation
-
Absolutely gorgeous!
-
Thank you!


Frequently asked questions
Have a question about this project?