


Easy DIY How To: Paint a Half Round Shape on a Wall
Who would've thought it would be so easy to paint cool shapes on your walls?! This super fun DIY will spruce up any dull interior in an hour!
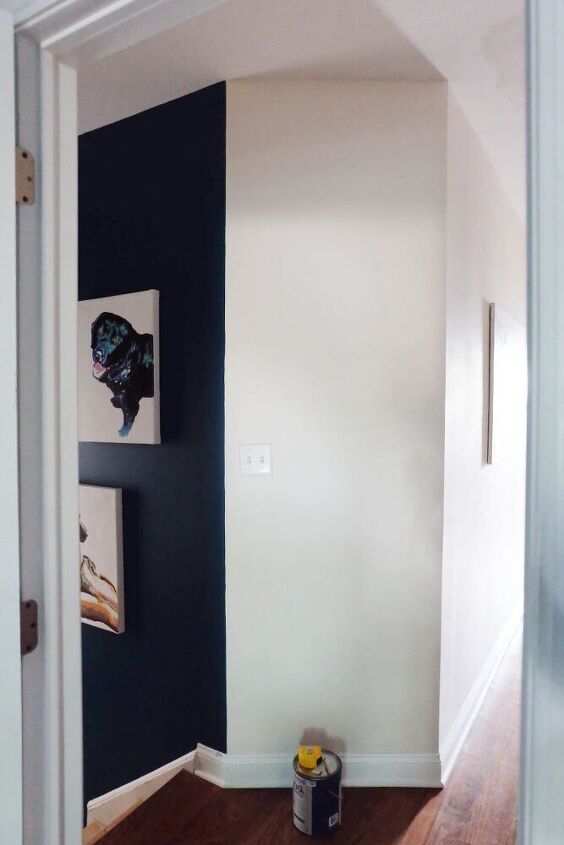
So my hand is forced, it's time, after seven years, to do the main stair. My husband has put his foot down, "no new major projects until it's done!" That's fair.
To start, I repainted the walls with one of the most awesome colors ever invented, Classic Teal by Valspar. What. A. Color. Wow.
But the transition from the stair to the upstairs hall was a weak game so out of nowhere came the idea to paint a half moon shape to tie the two together better.

This process is sooo super easy and takes practically no time at all to do; you can let your arc shape imagination run wild and transform room in a snap.
Start by finding your center point if you were painting a full circle. Take out your tape measure and stretch it out to find your half round radius, in my case 2'-7".
Be sure to swing by the blog, Flipping the Flip, for more info on this project as well as so many other fun ones!
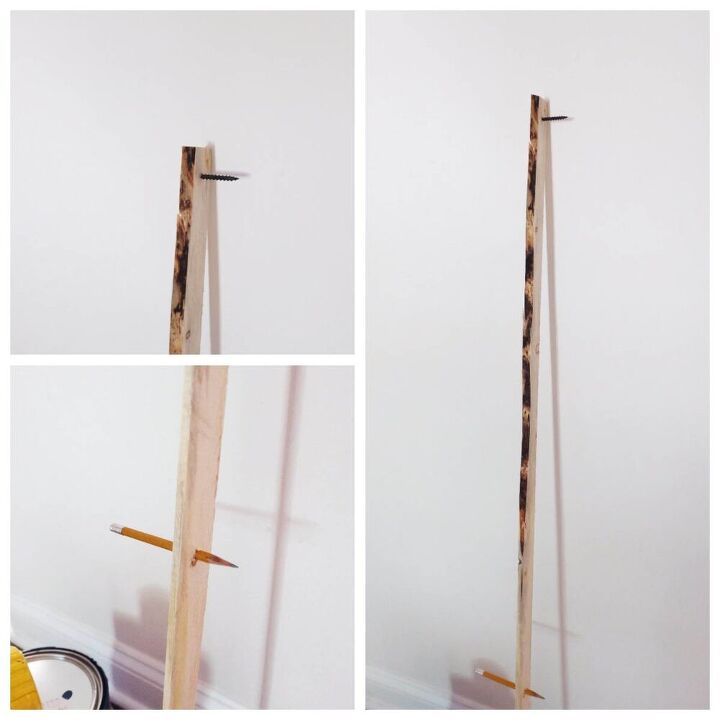
Next, find a lightweight piece of wood that's long enough. In my case, I used a wood lath slat which you can pick up at the home improvement store for cheap. Or use a yard stick even.
Drill a small hole and put through a pointy thing like a screw or a nail.
Measure from the center of that hole out to your radius hole, mark it, and drill a 1/4" hole for a pencil. Make sure the pencil hole is loose enough for the pencil to get in there but tight enough that the pencil does not move.
Yes, you can use string and a pencil but I find the pencil has too much room to wiggle that way.
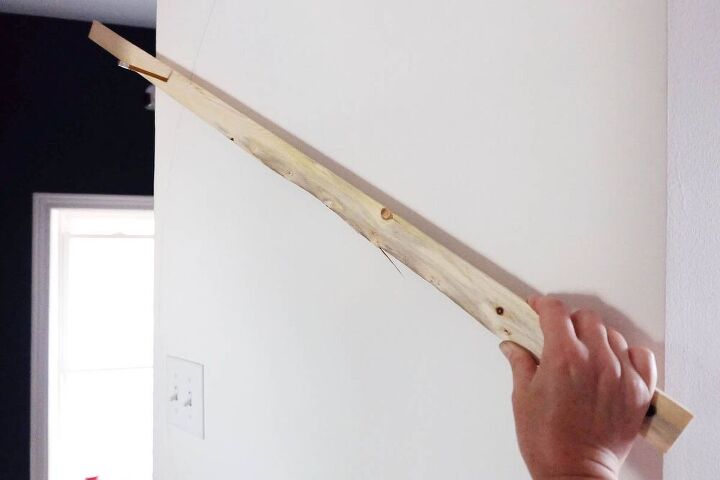
Easy peasy lemon squeezy, put the sharp point on your center marker, hold firm, then sweep your drawing tool around to draw the shape. It's so easy to do, I did it one handed while holding a camera!
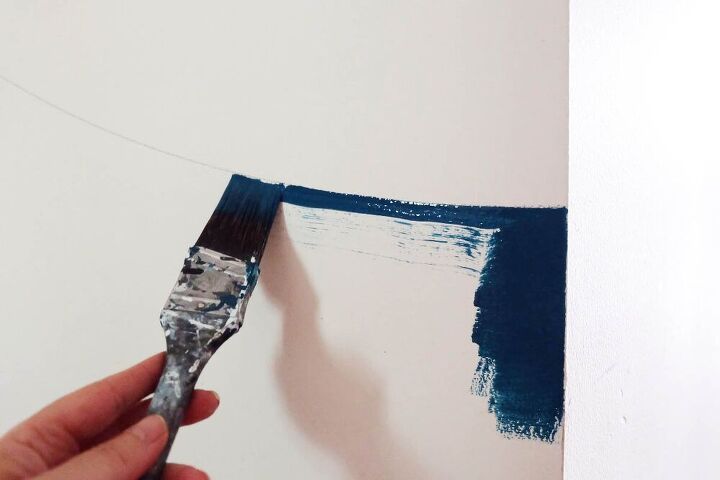
This is the only tricky part. Because it's a curve, painters tape is out so you need a steady hand to cut in the paint edge. Go slow. Practice many times first if need be, but trust me, you can do this. Slow and steady.
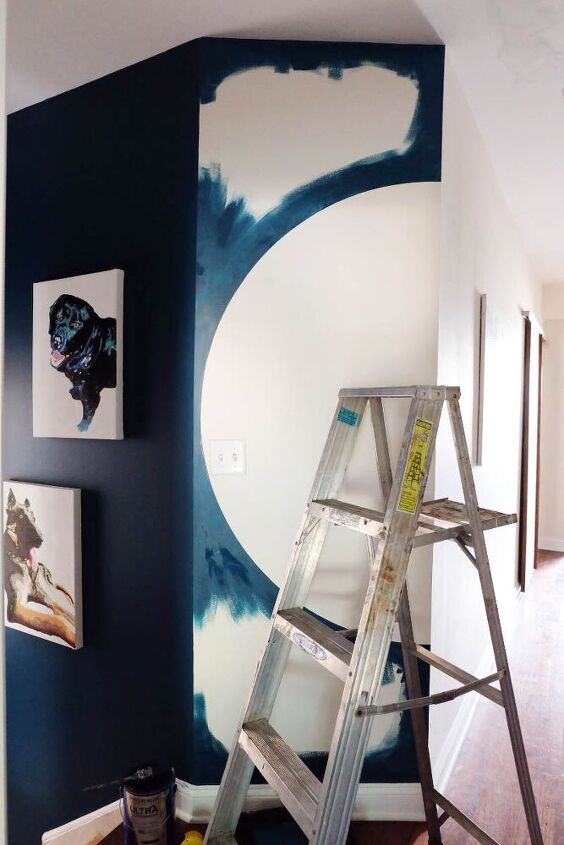
Once all the edges are done, just fill in the rest with a roller!
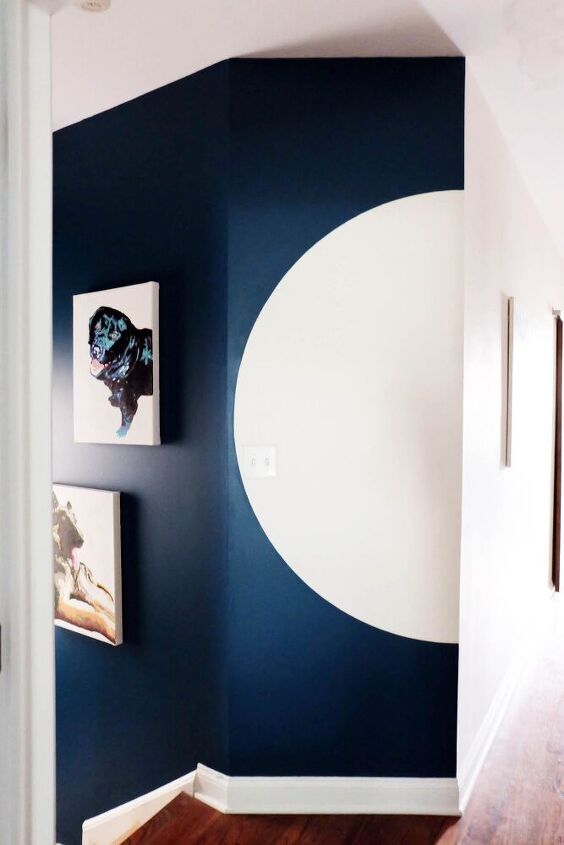
Tada! Now the transition between the stair and the hall makes much more sense. Until my husband saw it and suddenly had another idea (that's coming soon).
Can't resist the full story on this project? Me neither, so come swing by to read more!
Resources for this project:
See all materials


Comments
Join the conversation
-
Love it. I did that in my place too
-
Very creative and effective!


Frequently asked questions
Have a question about this project?
Saw whole picture on your site. What is going on with the corner of the floor? were you also laying laminate?