


Upcycling a Shopping Bag Into Beautiful Wall Art

Okay so we have all been cleaning out closets, sorting, tossing and re-evaluating our priorities throughout this pandemic, right? Well I had a trip down memory lane when I got to one of my drawers, you see we loved our trip to Jasper National Park and we planned a trip there again soon. What sparked my attention in the drawer? Reusable shopping bags with iconic scenes of Jasper and Lake Louise....ahhhhh if only to be there again now! The wheels started to turn in my head...I should make something with these it's a waste to have them hidden in a drawer!
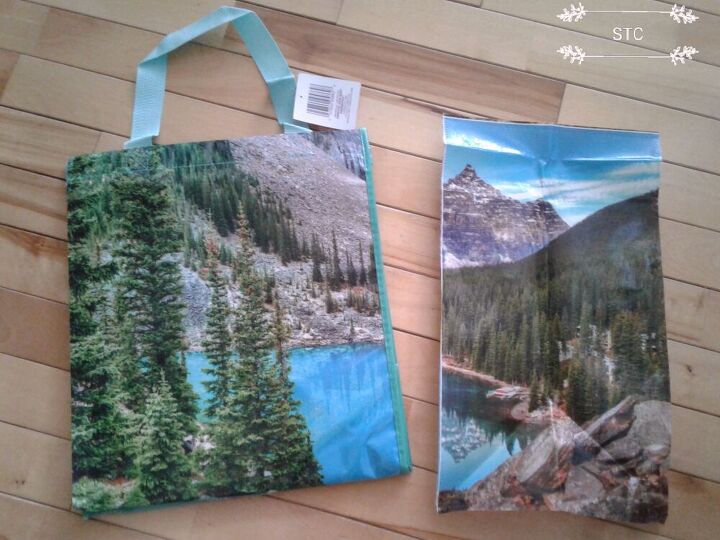
So in order to see what I really had to work with I took it all apart first, I used a seam ripper but any sharp blade will do to cut the threads at the seams. I didnt rip because I was afraid of tearing or distorting the scenery.
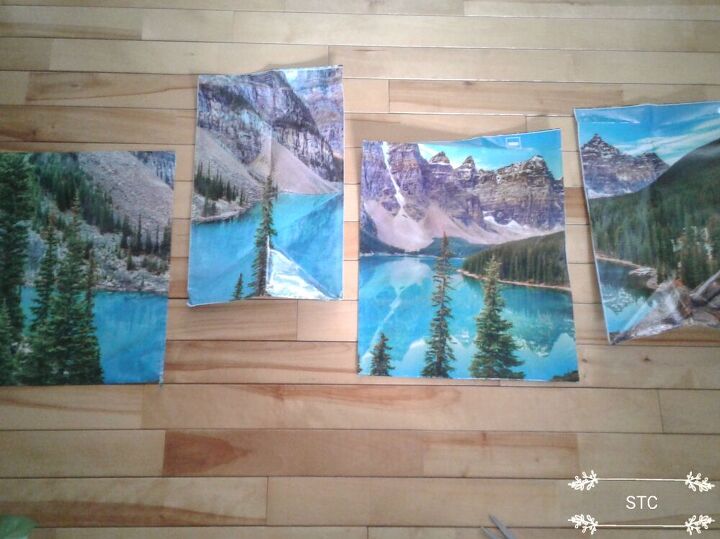
So heres how the scene looked all spread out, they all line up perfectly to create a bigger picture. What can I do with them? Well if you are like me you have a stash of dollar store canvases to use up! This was the time when craft supply hoarding was a very smart idea....I see you nodding and grinning!
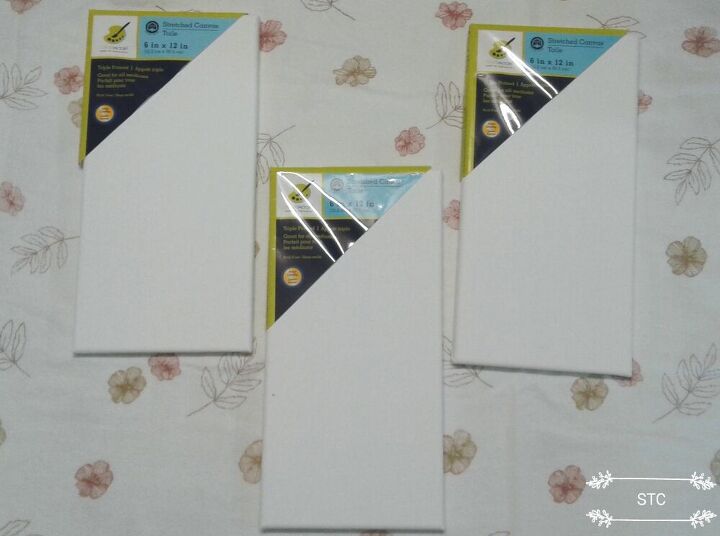
I had three of these to work with so I thus had to pick 3 of the best panels out from the group of four to create my canvas art.
The center panel was always flat but the sides had folds due to the design of the bag, hmmm how do I get those out? Oil of Olay can't help me here! Maybe, just maybe I could iron them out? Nothing ventured...nothing gained besides I had a spare shopping bag to fall back on.
So the video explains the process, carefully and slowly work your way up in your temperature settings until you hit that sweet spot that will iron it flat yet not melt the plastic!

Panels are flattened, glue gun heated up and my workspace is ready so let's begin.
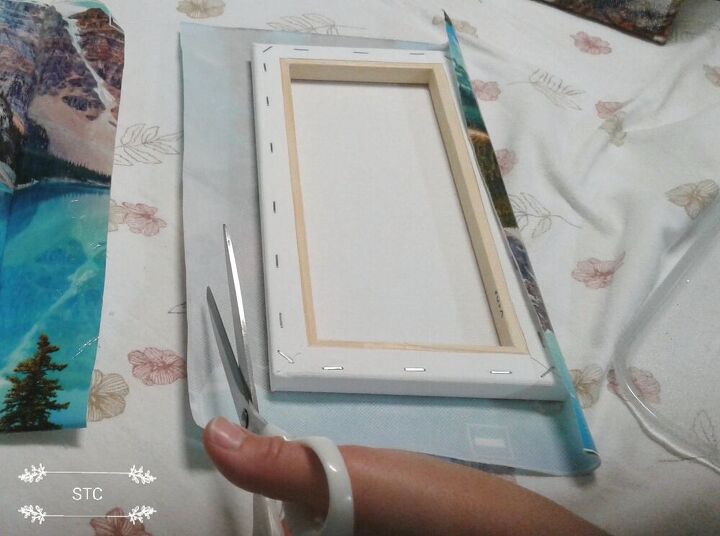
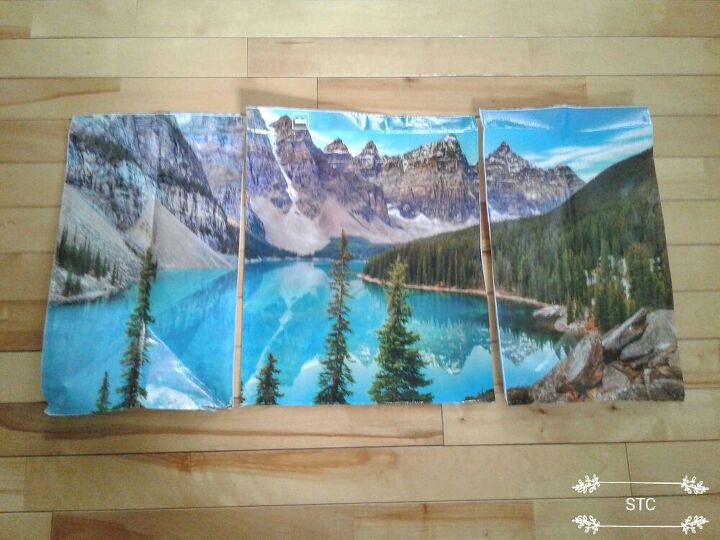
So as you probably noticed the middle panel was wider so I trimmed it down but this created a new dilemma! Now there would be a chunk of the scene missing and it would make the connection to the next canvas way off. .
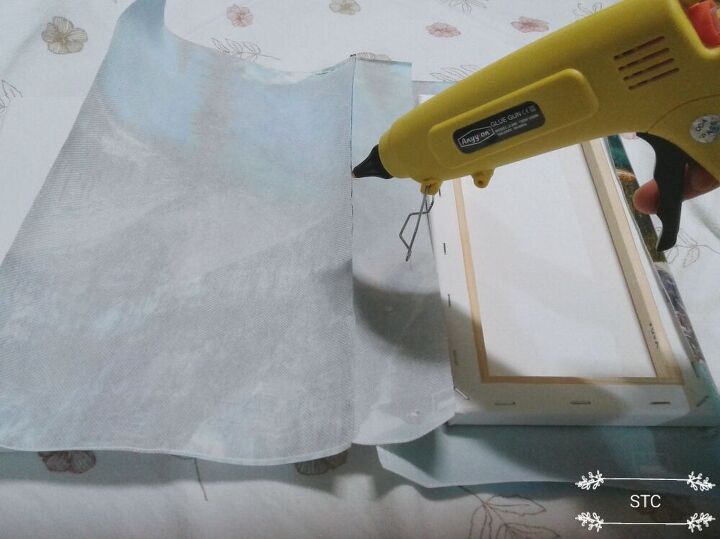
I took the salvage that I had just cut off and glued it to the next panel to somehow lessen the overall image gap. I know there will be a big seam now...no, no I have a plan to hide it but still gain the some width of the total image.

I had a straight seam to place along the straight side of the canvas, I positioned it to sit right at the back edge. This extra width allows me to not lose any of the next panel that I'd need to wrap around and glue at the back. I know it's only a few cm. but for the overall picture it was a big help.
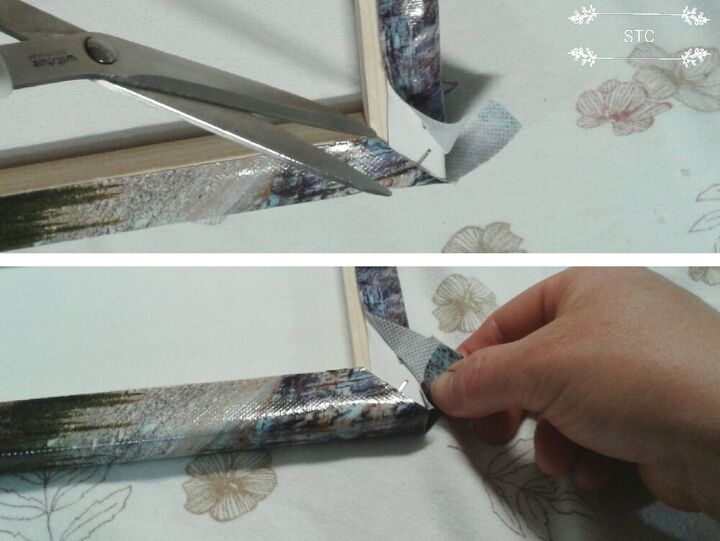
As with upholstery projects you glue opposing sides first then flip it around and glue the next set of opposing sides working your way step by step to the corners. I dont have a great description of what I did but I managed through trial and error. I snipped the corner to remove bulk on the fold but being careful to keep enough to fold the raw edge in for the final glue seal.
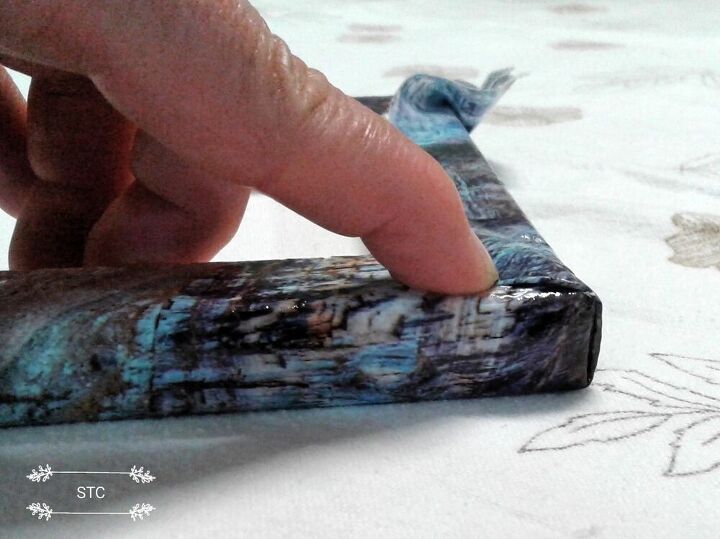
I was very careful to fold the raw edge to rest just inside the outside corner, pull taut and press into the glue. Lets just say I wasn't Goldfinger but Glue Finger! Yes staples are a great option too but I went with my glue gun, I have more experience using it that's all.
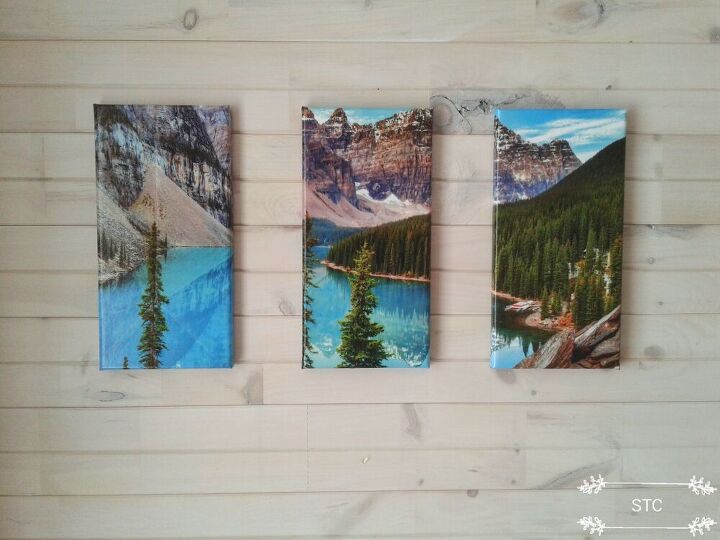
Not bad hey for something that was stashed away in drawers? They are super lightweight so I thought they would make great art to hang in a camper. They would also be cheap and easy to package and ship as a gift too!
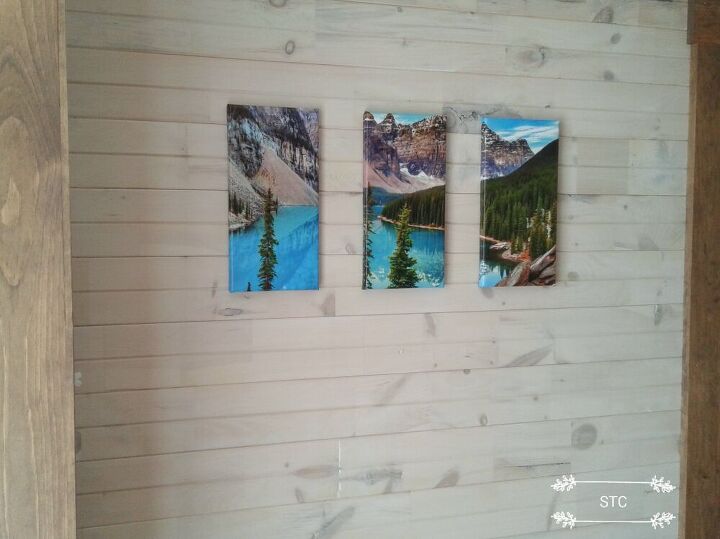
They would also make a great addition to any narrow walls you might have where you want to hang something but you'd need a small scale piece to fit the space. I look at them here and I think I'll get my husband to build a three paneled frame to insert them into that I'll stain dark like my trim work here. That will give it more impact and save me from always rechecking to see if they are hanging squish! 😄
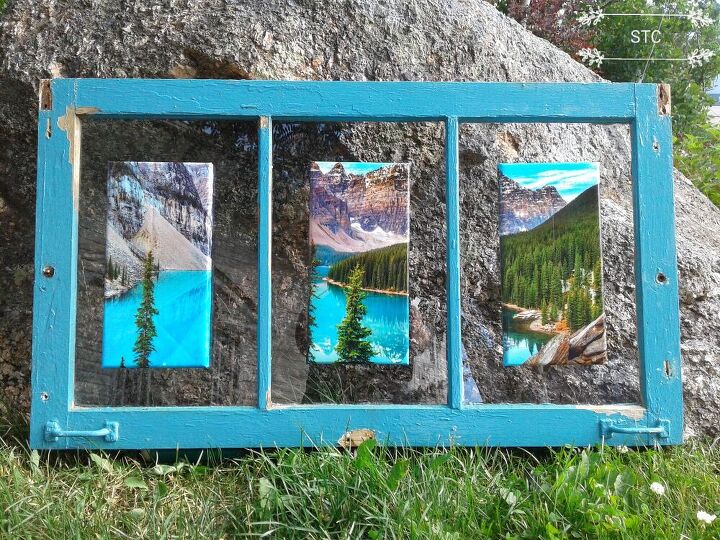
Of course I had multiple ideas for them and I just had to share this one that I fluked into! I used double sided tape and adhered them into this vintage window that was resting in my storage shed. As coincidence would have it the window was turquoise like the Glacial lake in the picture and it had 3 panes of glass for my 3 canvases, how cool is that?
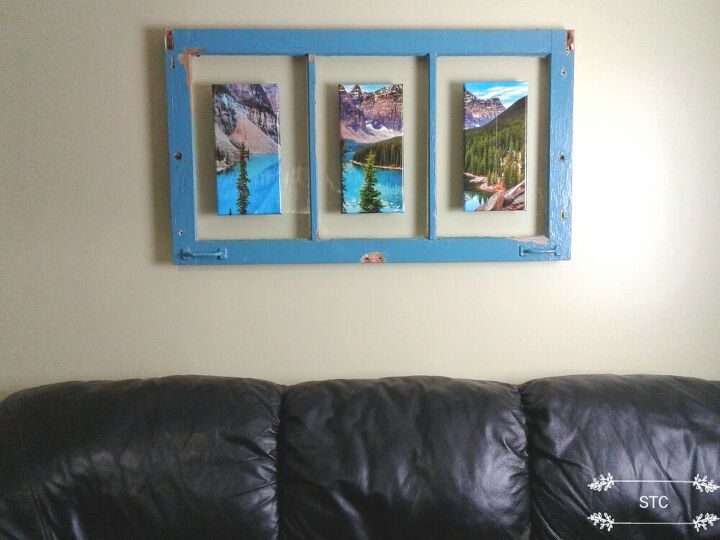
It's hung here in my rec room just to give you an idea, it's not permanent for me because I have epoxy plans for the window.
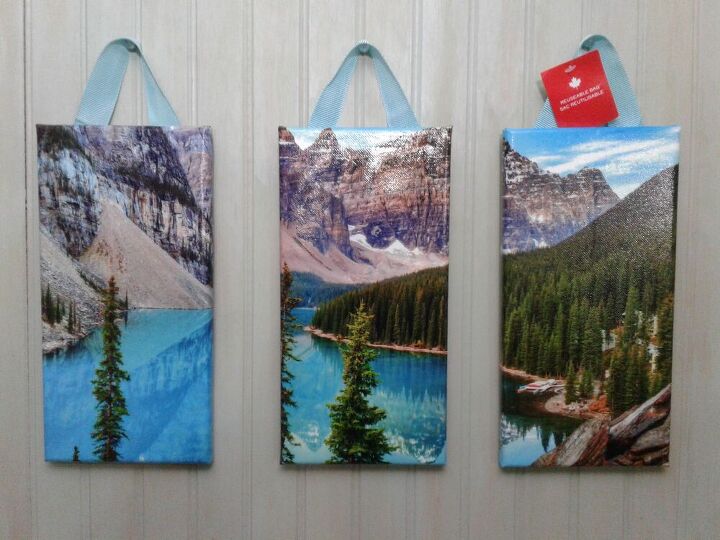
Who knew I could have this much fun with an empty shopping bag? I even lastly added the original handles as hangers for the artwork. I love creating but even more so I love reaching out and sharing my ideas to hopefully inspire some of you! Now go dig out those closets and drawers and see what you'll find to have fun and get those creative ideas flowing! Happy crafting
Resources for this project:
See all materials


Comments
Join the conversation
-
I love landscape artwork! Looking at them you can envision being there. Aaaaaah! Wonderful and ingenious use of the shopping bag! Great job! Thanks for sharing this.
-
Great idea. Bags are being made with wide variety of designs making finding your favorite design/colors easy task. Don’t forget press cloth when ironing. I use old cotton, not terry dish cloth. Works great and no loss if melted plastic gets on it. I also use press cloth against ironing board too to keep melted plastic off ironing board cover Press cloths allow you to start at a bit high temp when ironing and steam really helps too


Frequently asked questions
Have a question about this project?
What a unique idea. However if you went to all that trouble to have continuation of the scene be consistent, would you perhaps think the pics might look more fluid if they were closer together? Great job otherwise!
This is so pretty! I like the old window idea! Just thought if it had been found before putting the bag on canvases, how pretty it would be just placed onto the glass panes!
You said you use double sided tape to adhere it to the glass, dont you see the tape?