


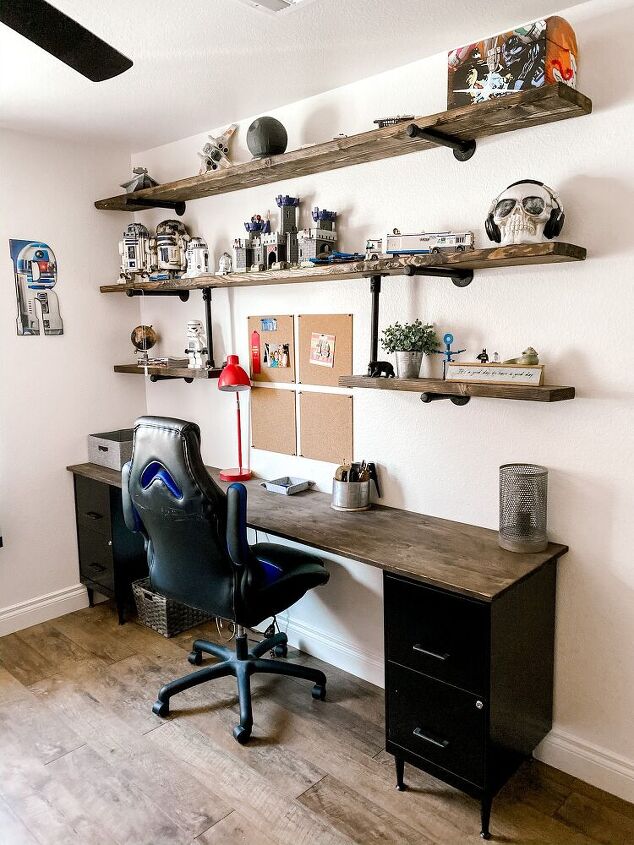
Teen DIY Industrial Desk

My son loves to play video games on his laptop. I wanted him to have a space he loves and also a spot to hold some of his treasures.
This whole project was less than $300 for the first 7 items on the supply list. We already had 7-13. This desk took only a few hours to put together after you have all the supplies.
Now, this isn't the first industrial desk built out there in this big ol' world, but I wanted this one to be a lot easier to build than some of the others. My goal was to make a big impact but with as little supplies as possible & little or no damage to the floor and walls. Buying the metal pipes on amazon is so much cheaper then buying them at Home Depot, just FYI. I also searched everywhere for budget friendly filing cabinets, they are so expensive. If you find a better deal let me know in the comments.
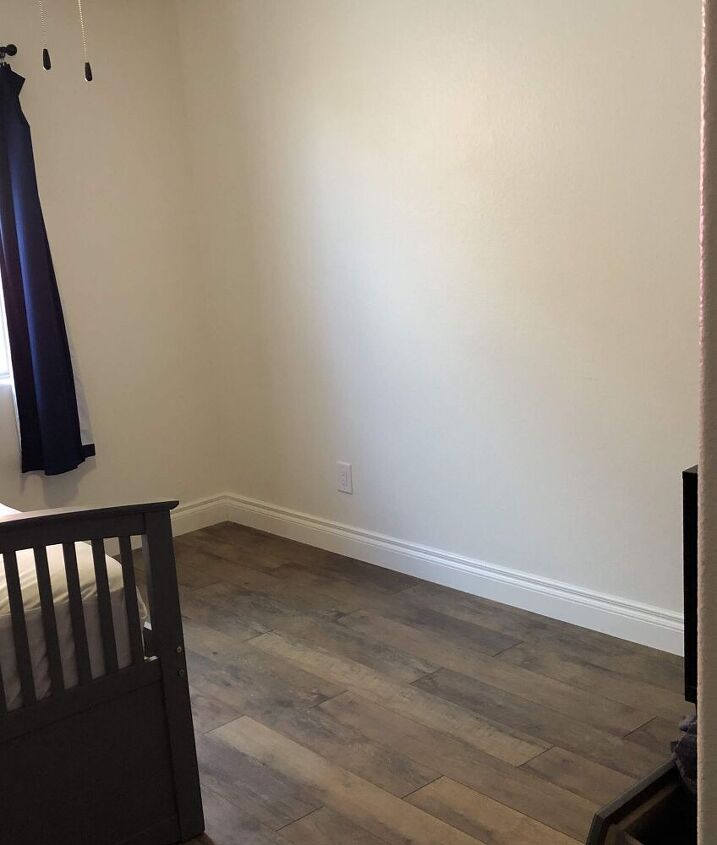
You might not have 8' of space to work with, which is okay. You can make this desk smaller, just not longer. Home Depot will cut all the wood for you, for free. So before picking up the supplies make sure you measure how long you want the desk first.
Step 1:
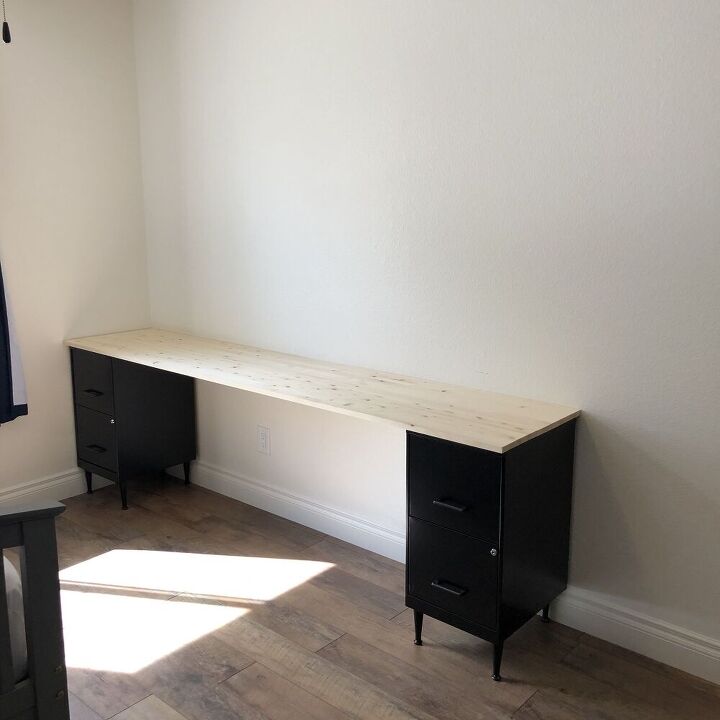
Spray paint the 8 legs matte black. I wanted these legs to blend in with the file cabinets to make it look like they came that way. When the legs are dry my husband flipped the cabinets up side down to attach the legs. The back legs were positioned slight different then the front (you will see). Set the cabinets in place.
Step 2:
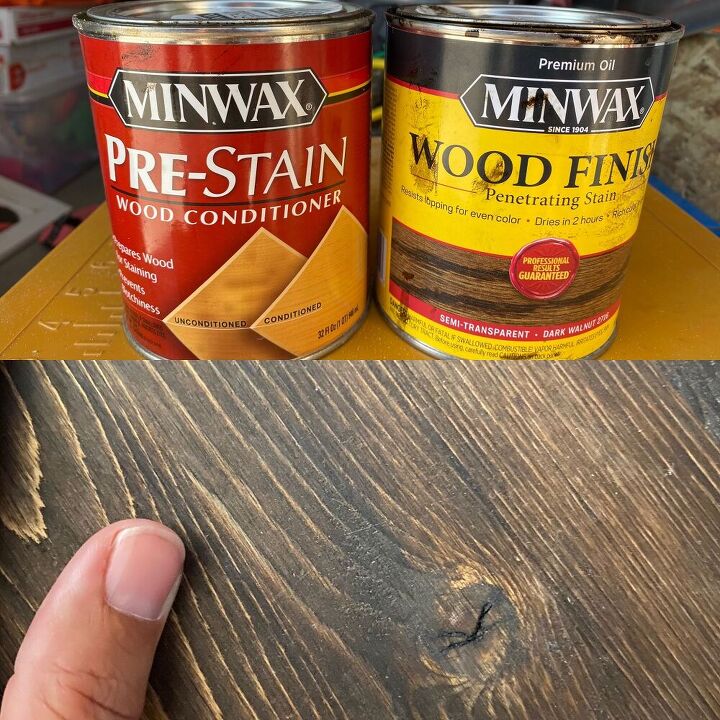
Being that the top piece of plywood was 8' we didn't need to cut it. I sanded it down real good and rounded the edges a bit before applying my favorite stain. Once that's done, we set the desk top on the cabinets. Next, we took the top drawer out and used 1/2" screws to secure the wood to the metal cabinet from inside. The plywood is 3/4" so 1/2" screws will be perfect to secure it. We use 4 screws for each cabinet in each corner.
Step 3:
Now the 2x10's will defiantly need to be cut down. They were origally 10' so we cut ours to 8'. Home depot will do this for you.
The bottom shelf I wanted broken up so I could hang stuff on the wall and give the space a little more character. This is totally up to you. If you want to save a little bit of time and money you can make it the same as the top two shelves and you won't have to buy numbers 5 & 6 in the supply list. We cut the bottom board to 32" each.
Step 4:
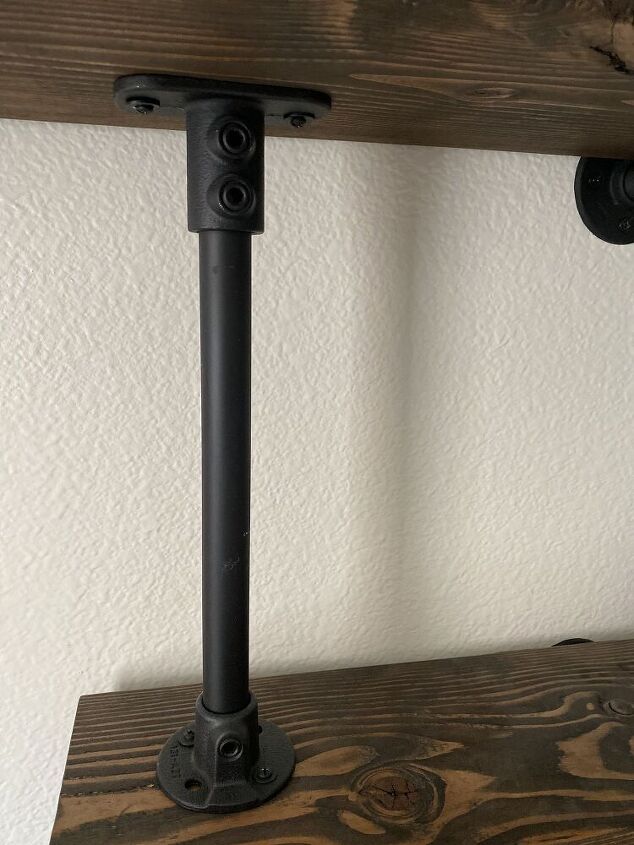
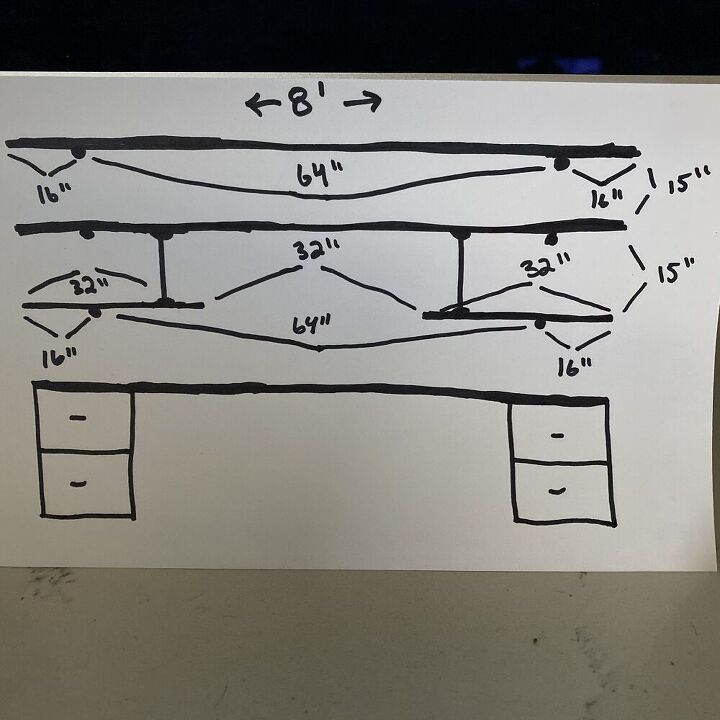
Hang your piping. Your measurement would be the same if you are building the 8' desk. It doesn't have to be started in a corner like we did. We choose these measurements based on the studs in the wall, so make sure you find the studs and mark them. I would try and base your desk layout on those studs.
I like seeing things drawn out so here are the measurements we used. It's not a perfect diagram but it should do.
Supplies List:
2. Pipe brackets (screws included)
3. 3 -2x10
4. 8 - 7.5 in. Wood Round Taper Table Leg
5. 10Pcs 3/4-inch Floor Flange Pipe
6. Pipe Decor 3/4” x 12”
7. Desk Top
8. Dark Walnut Stain (or your favorite)
9. Matte black spray paint
10. Electric sander
11. cordless screw driver (you can use a reg one but it will be a lot more work!)
12. 1/2" screws
13. Measure tape/ level


Comments
Join the conversation
-
Nicely done!! Great info!
-
I love this! I've been looking for a way to "grow up" my son's room as he moves to middle school. This is beautifully done & will grow with him. Can't wait to start!


Frequently asked questions
Have a question about this project?
What type of legs did you purchase on the filing cabinets? Where can I buy them?
Thanks Jessie-- I am trying to build the exact same shelves as you did. When i click on # 2 under the supply list- it links to 3 size options- do i need the 12 inch packet and how many total do i need?
The 2 vertical pipes--- How tall are they? I don't see a link for them specifically. - think you refer to these in #'s 5 and 6. The end cap- the flange and the top fitting seem different than the other flanges. Do you have a link for those 2 products?
Hello so crazy question but I don't see it mentioned in the actual steps but where did you use the pipe brackets? I assume they are around the pipes drilled into the board to help give the look of the shelf sitting on top of the pipes. They help secure them so they aren't just loose sitting on the pipes.