


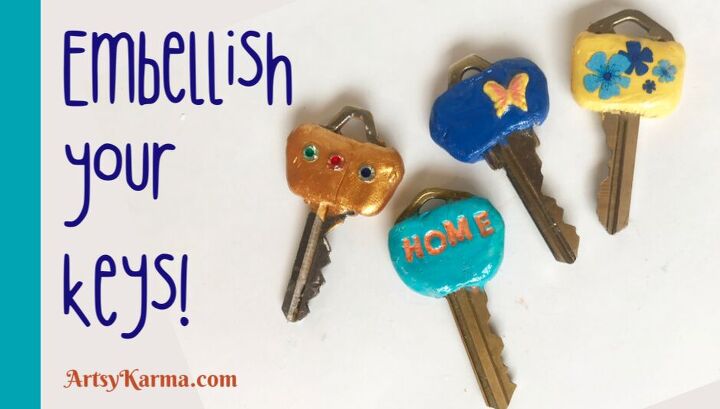
How to Make Embellished Clay Key Covers

Let’s figure out how to finally identify our keys by making the cutest, funnest key covers.
These key covers are made with polymer clay, which is very easy to use. And once you add a few fun differences, you’re key ring will be a colorful conversation piece. As well as a way to stop fumbling in the dark, looking for the right key.
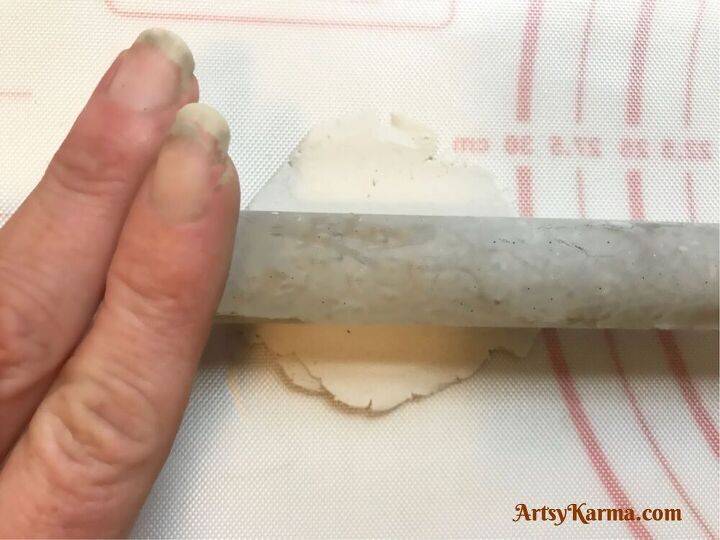
Step 1
Roll out some polymer clay to about the thickness of the key. Maybe a little more.
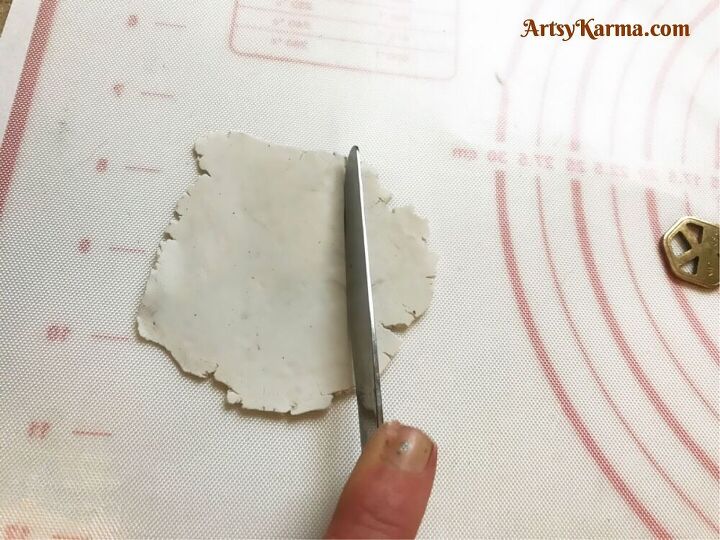
Step 2
Cut a straight edge out of the clay.
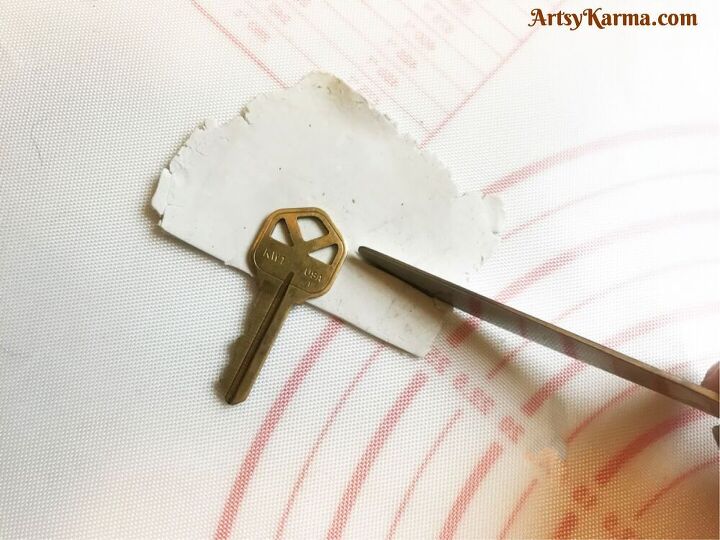
Step 3
Line up your key with the edge to measure and cut another line to right under the hook on your key - you still want to be able to put them on your key ring.
Remove the key and continue cutting straight.Remove the key and continue cutting straight.
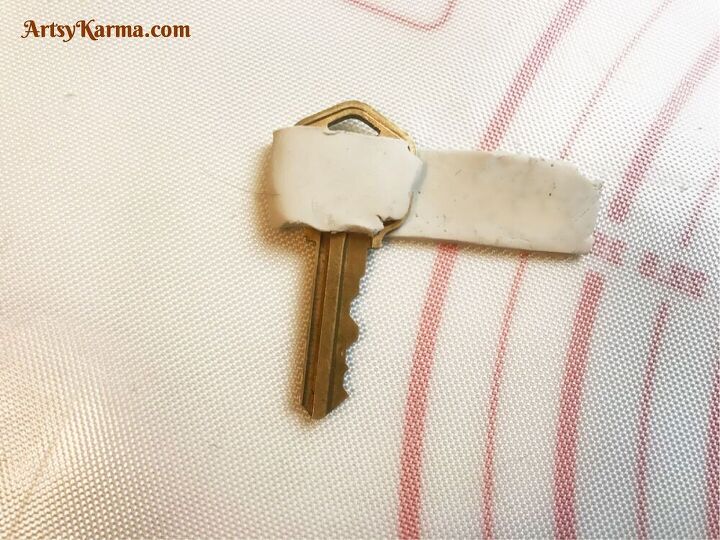
Step 4:
Wrap the clay around the key.
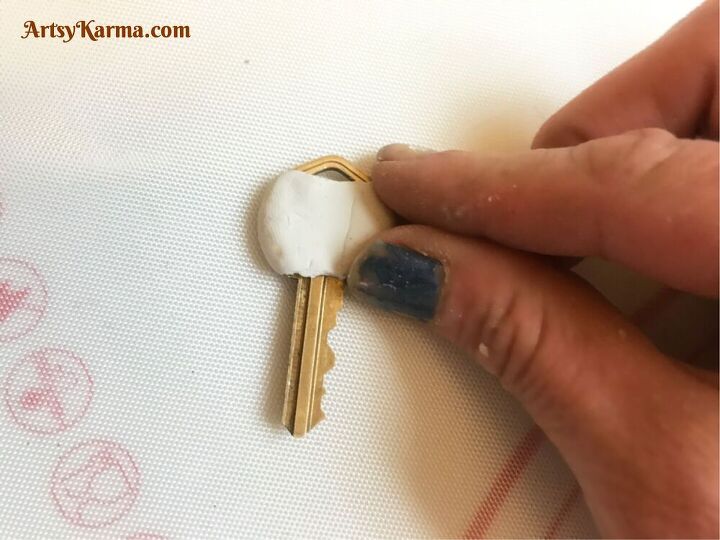
Step 5
Using your fingers, shape the clay around the key so it’s covered evenly on all sides and the top and bottom are smooth.
Make sure you leave room for the key to go on the ring.
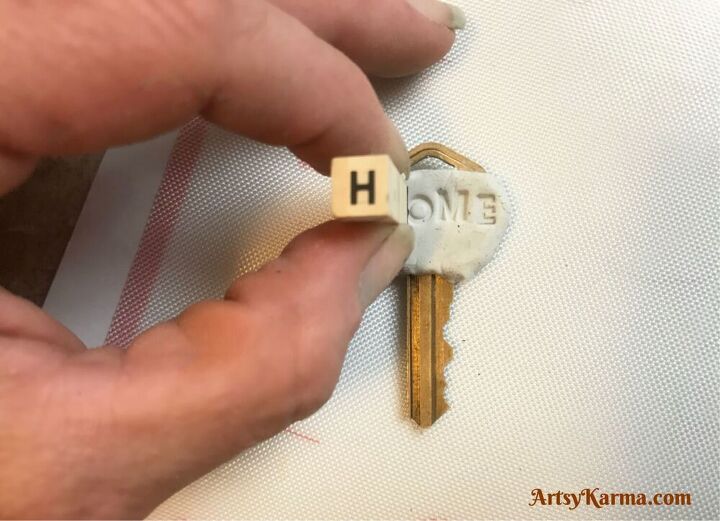
Step 6
Grab your small alphabet stamps - you can get them in the $1 bin at Michaels sometimes. Carefully stamp the word “home” across your key.
You could also stamp the letters of your initials.
Step 7
Bake the key as the polymer clay package suggests.
I believe it's 20 mins per 1/4 inch. I baked mine for 30 minutes.
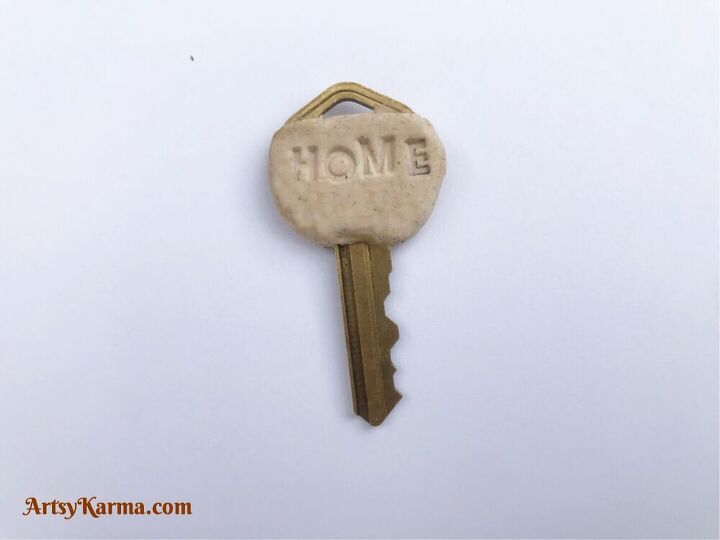
After baking

Step 8:
Paint the polymer clay.
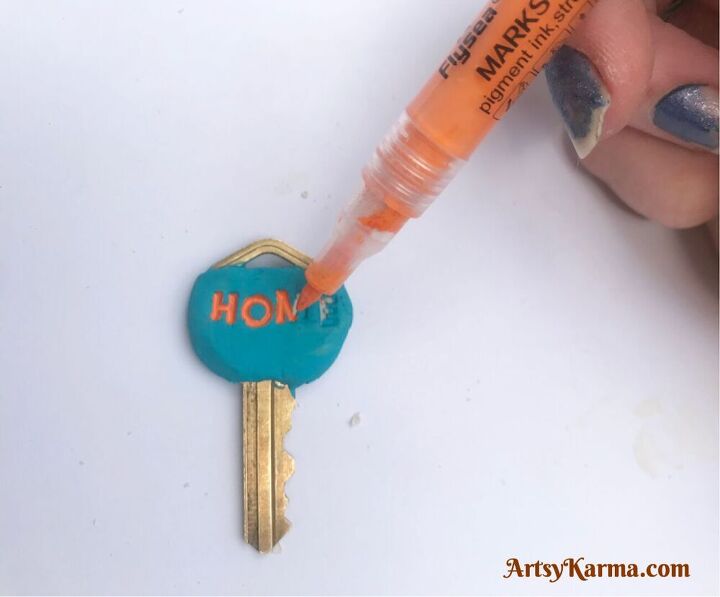
Step 9:
Use a paint pen to fill in the letters.
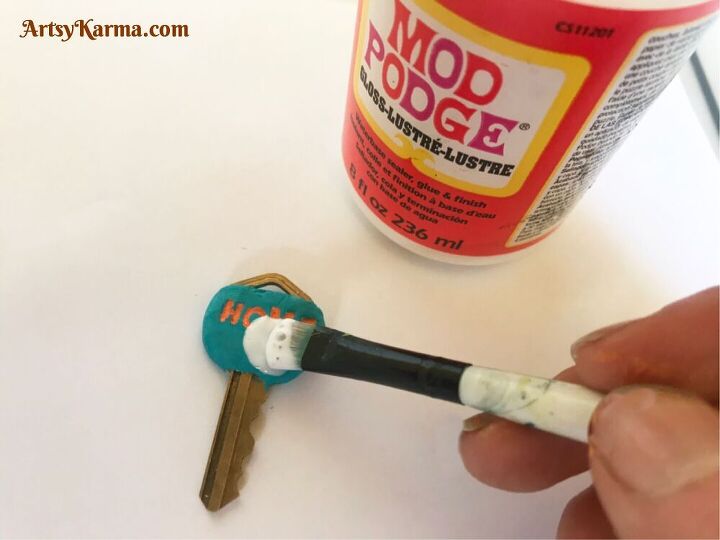
Step 10:
Coat the key with Mod Podge.
JEWELED KEY:
Step 1:
Wrap the clay around the key like the previous key.

Step 2:
Before baking it, use a metallic colored paint to paint the clay and let dry.
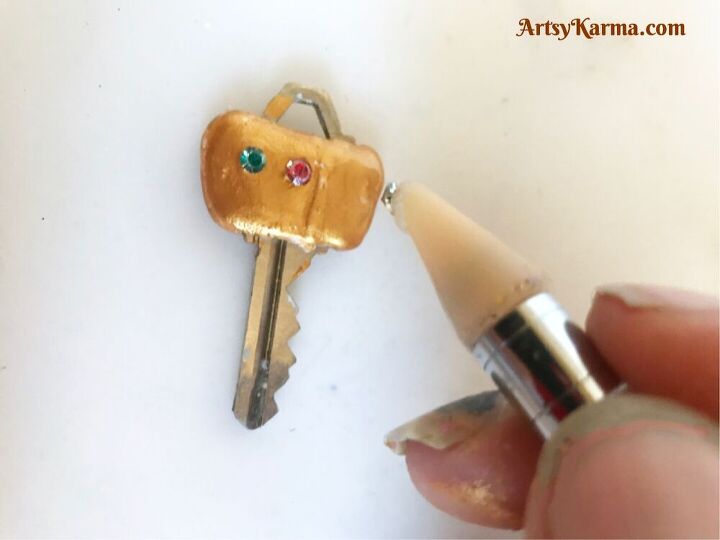
Step 3:
Press rhinestones into the clay.
Step 4:
Bake per directions.
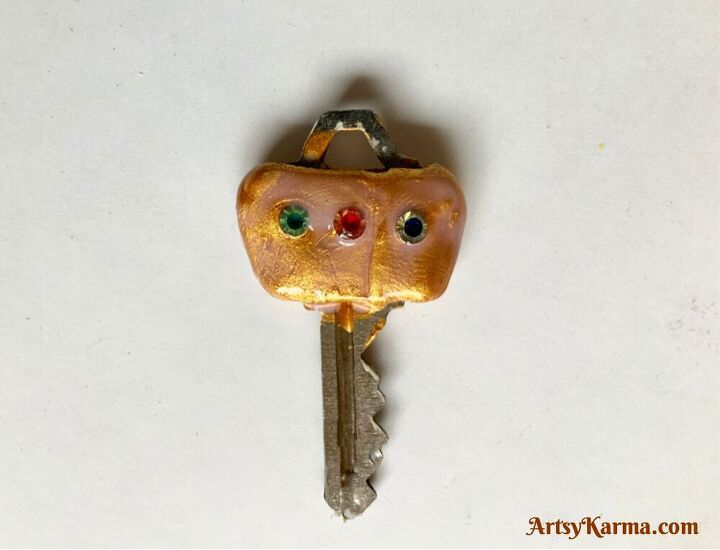
Step 5:
Coat with Mod Podge.
EMBELLISHED KEY
Step 1:
Wrap the clay around the key like the previous keys.
Step 2:
Bake per directions.
Step 3:
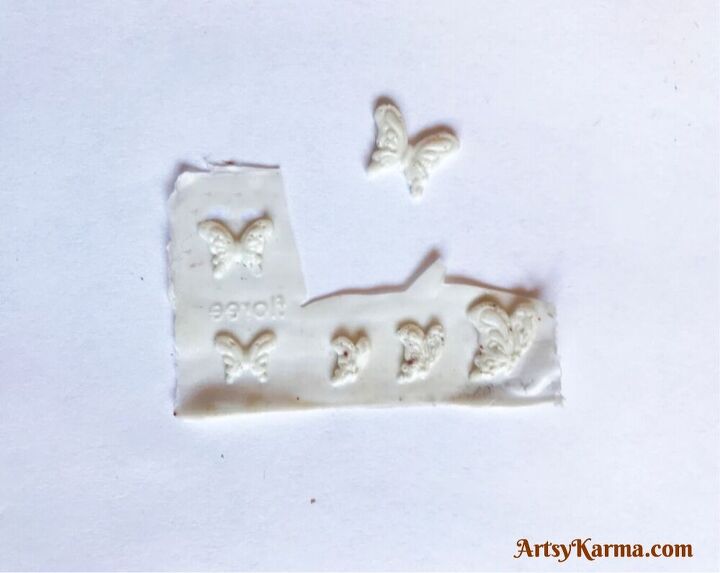
Create an embellishment using a small mold (or just use a small embellishment you have.)
I created my butterfly using a mold and plumbing mastic. It makes the molded piece flexible, so easier to add to things.
Step 4:
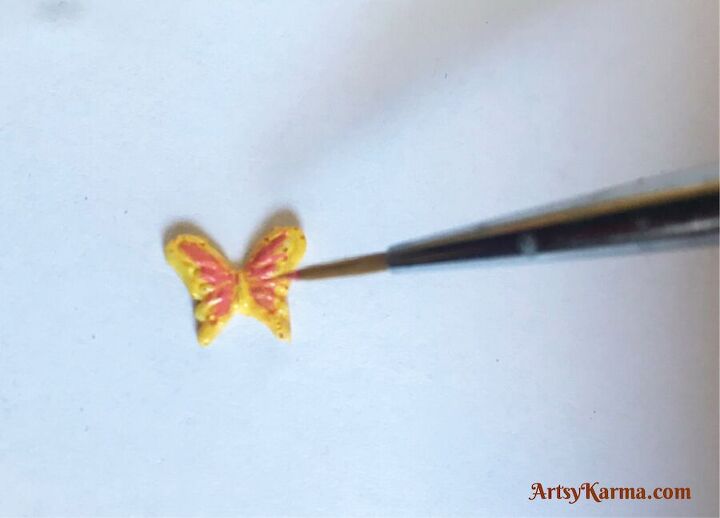
Paint the embellishment if needed.
Step 5:
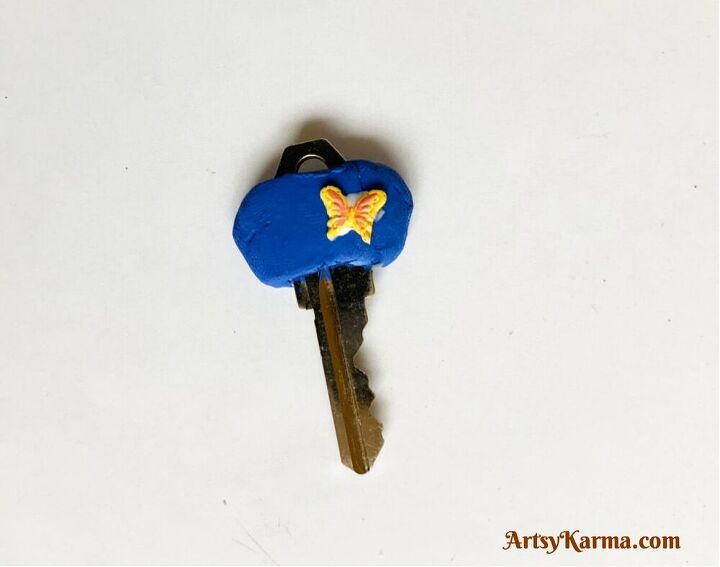
Paint the clay on the key.
Step 6:
Attach the embellishment with glue.
Step 7:
Coat with Mod Podge
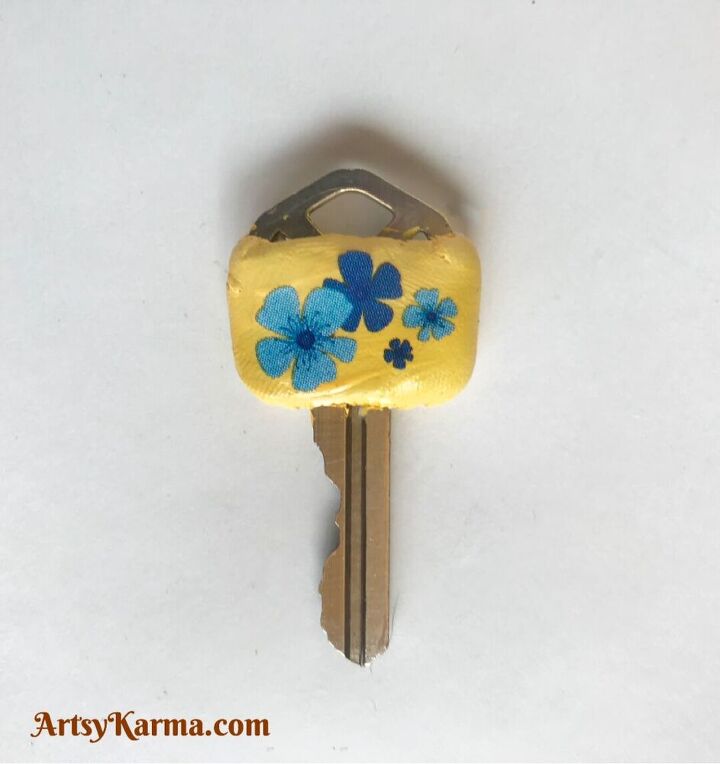
RUB ON KEY COVER
Step 1:
Wrap the clay around the key like the previous keys.
Step 2:
Bake per directions.
Step 3:
Paint the clay a light color.
Step 4:
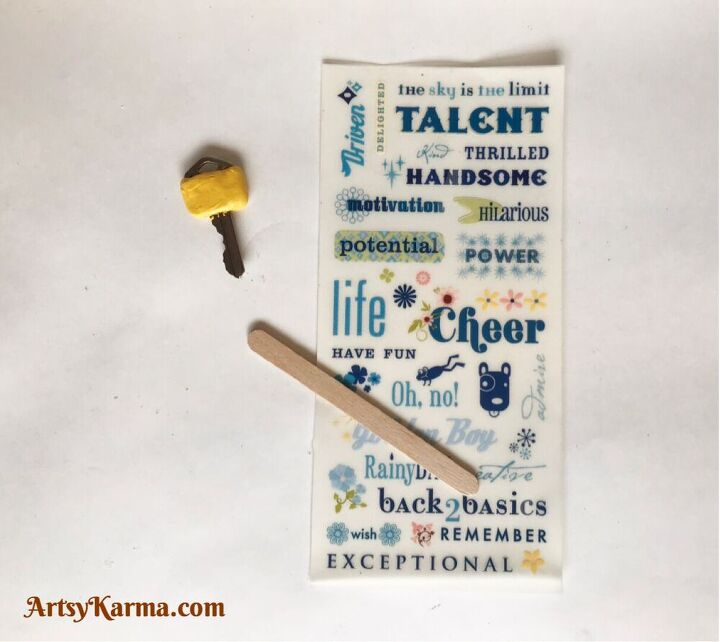
Use a rub-on image on the painted clay.
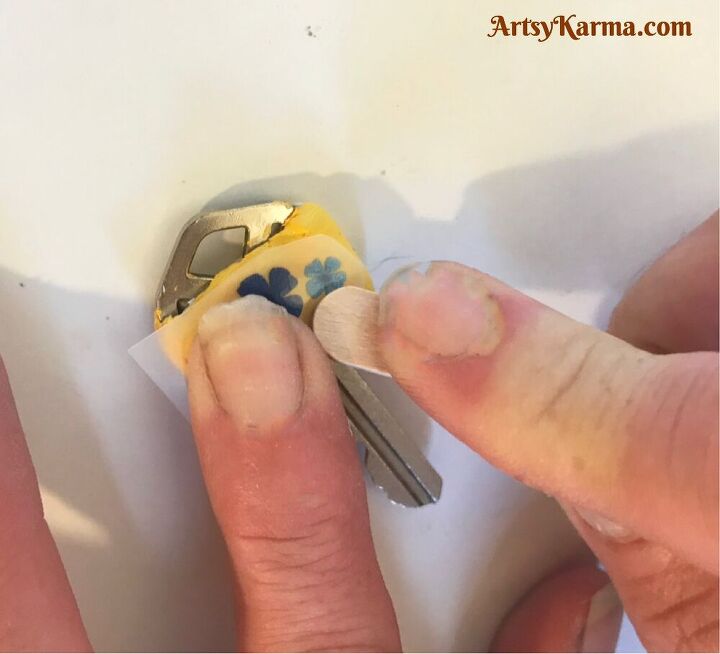
Step 5:
Coat with Mod Podge
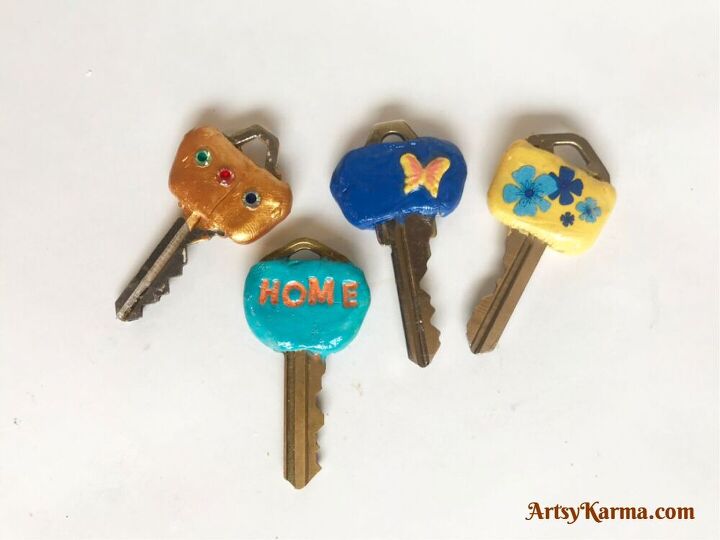
And there you have it! Four different ways to make super cute clay key covers!
Resources for this project:
See all materials


Comments
Join the conversation
-
This is such a cute, doable little project.🥰


Frequently asked questions
Have a question about this project?