


DIY Farmhouse Dresser/Changing Table

Hey there! If you saw my post about our DIY Farmhouse Crib a few months back, this is the dresser/changing table we built to go with it for our little one on the way! We used plans from Shanty2Chic for this dresser, so I won't go into too much detail, but we did make a couple changes.
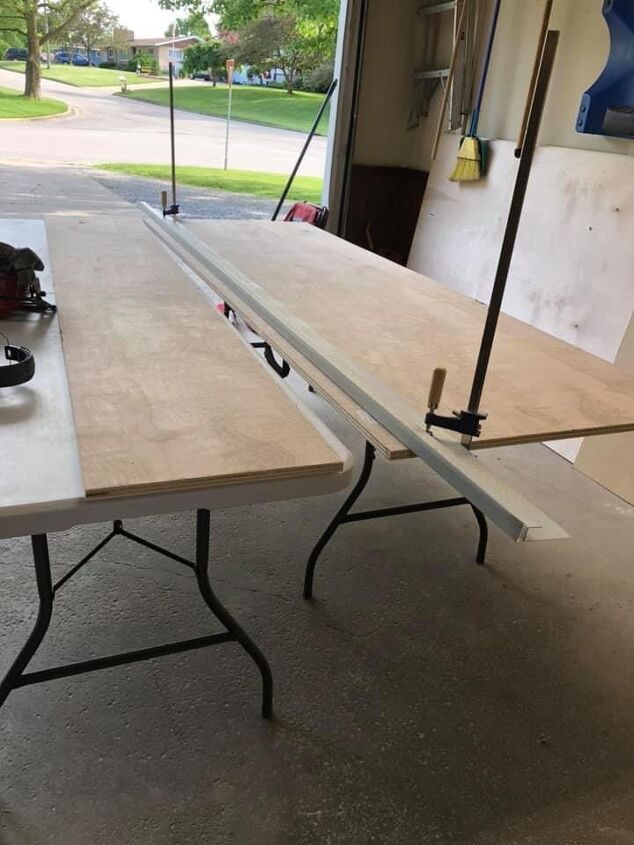
The plans for this dresser call for a lot of wood that needs to be ripped down. So, this is probably a project I would not want to tackle myself. It's definitely easier with 2 people! Something I don't usually see people share, is their process for ripping down large boards. We have a table saw, but it isn't big enough to easily rip down a 4'x8' piece of plywood, so we set up 2 portable tables and used a piece of metal as our straight edge and ripped all our large pieces with our circular saw. We also made sure to purchase a new super fine blade, so it didn't make any nasty cuts.
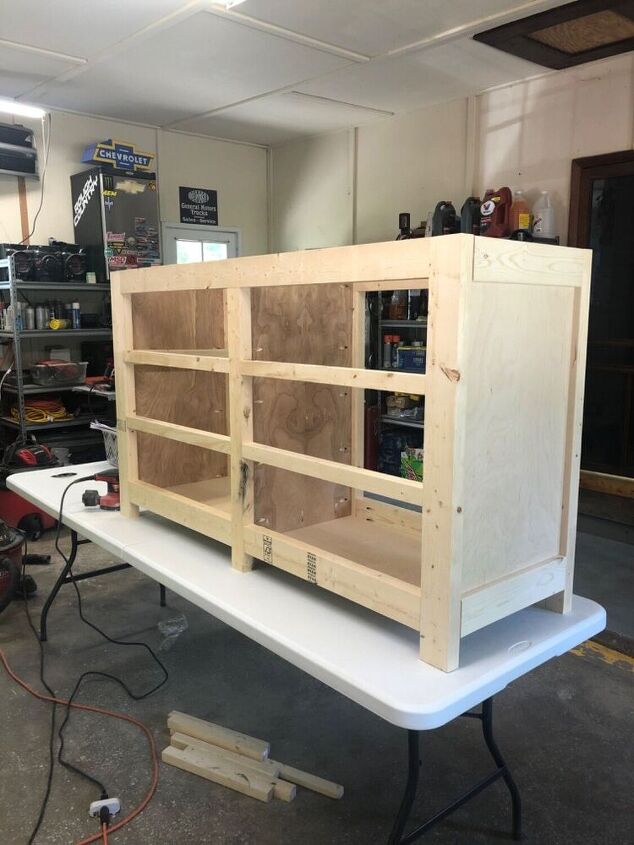
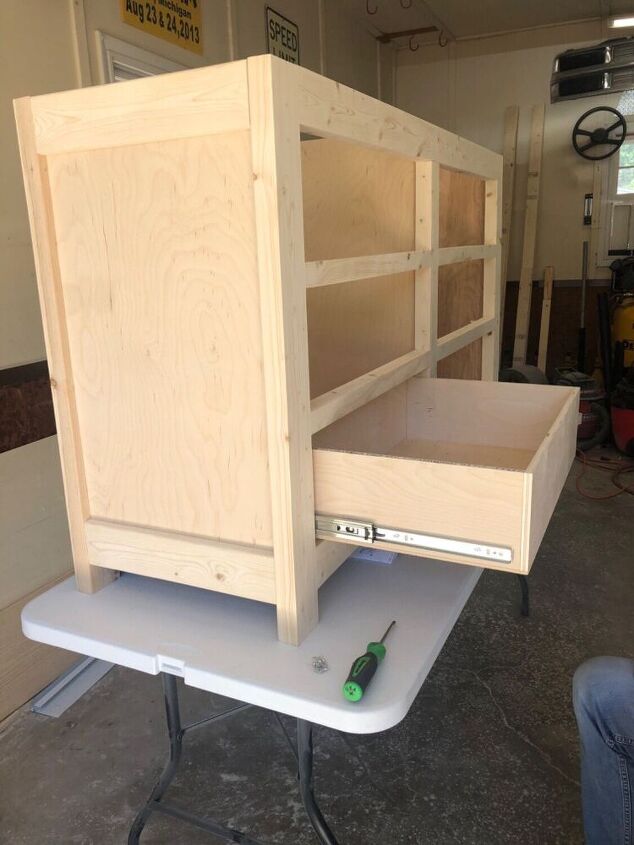
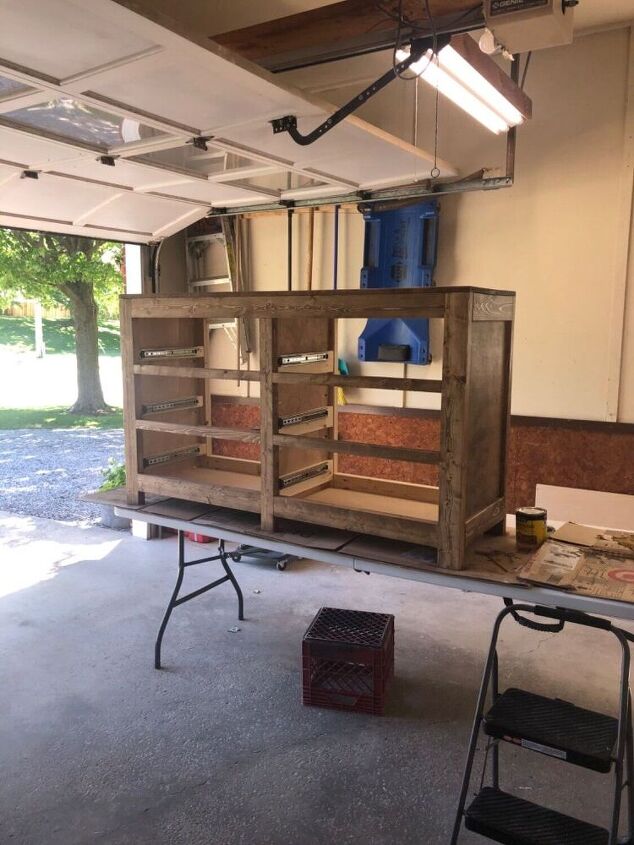
The plans will have you build a front frame and back frame first, and then attach the frames with the side and bottom pieces, which is what is shown here. Next, the plans show to add the support pieces for the drawer boxes inside the dresser, but we chose to wait until we had the drawer boxes assembled to install those.
So, we skipped ahead a bit and built our drawer boxes from 1/2" birch plywood. Make sure to use a lot of wood glue!
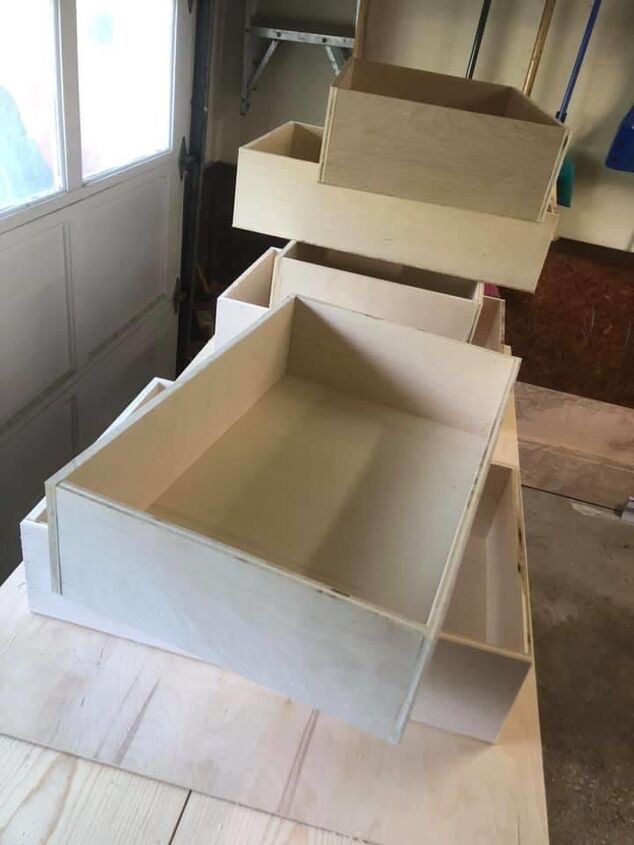
The plans show to use staples for the bottom of the drawer boxes, which is 1/4" birch plywood, but our nail gun doesn't take staples and the birch plywood was too hard for a manual staple gun to get the staple all the way through, so we just used a good amount of wood glue and 5/8" brad nails. We also turned the pressure down on our nail gun, so it didn't countersink the nails so far in.
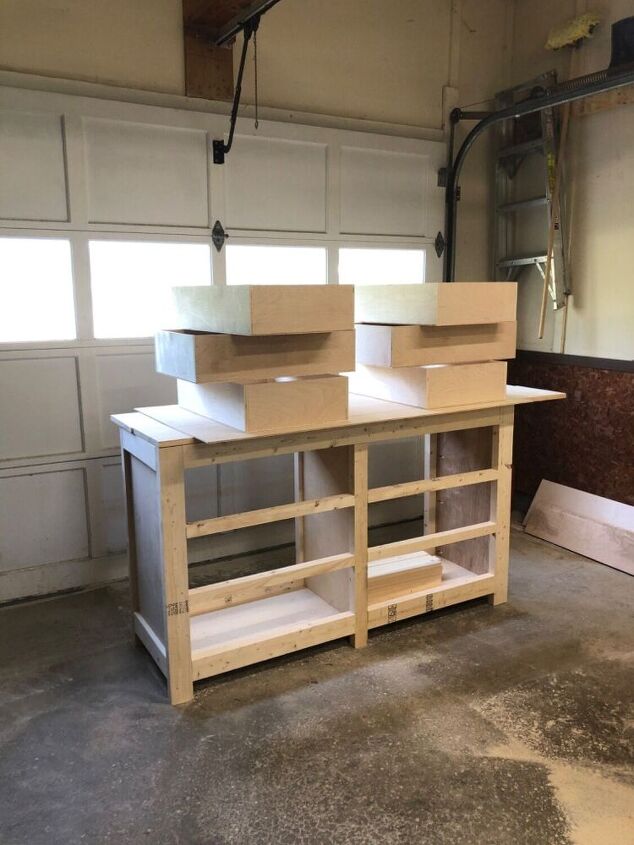
We installed the support pieces at this point - we wanted to wait in case any of the supports needed to be shaved down or shimmed to ensure we would have enough clearance for our drawer boxes and drawer slides to fit. It's a lot easier to change the support pieces than to change the drawer boxes.
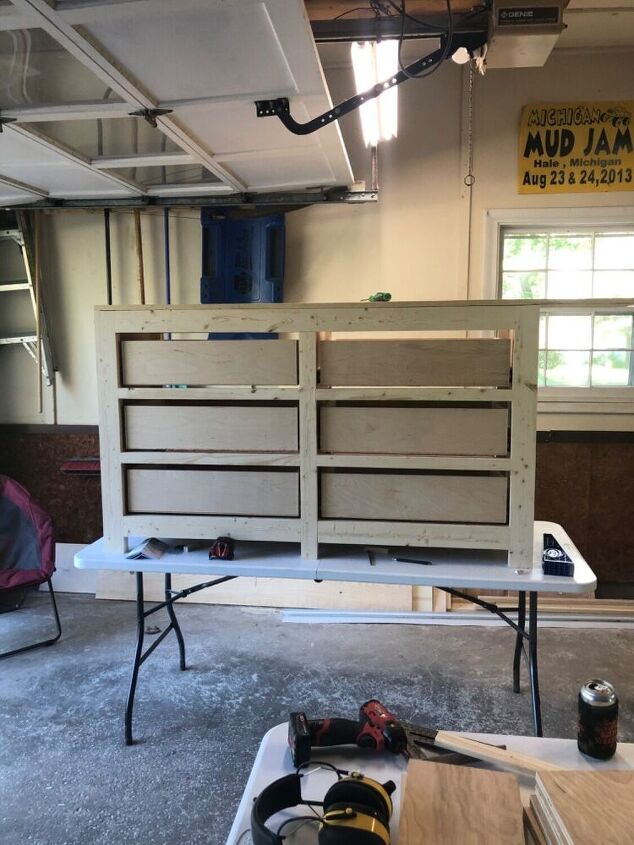
Here's a look at all the drawer boxes installed!
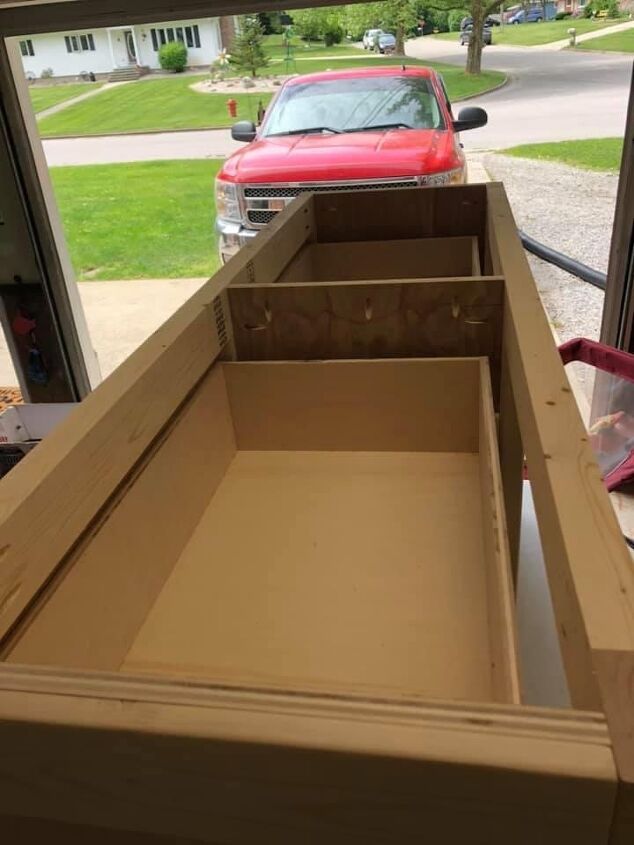
For the top of the dresser, the plans show to use a 19"x60" project panel, but we couldn't find one that large at our Home Depot when we purchased lumber. Instead, we purchased 2 1"x12"x8" boards and ripped them down to the right size. We used pocket holes to mend them together in the middle. Then to attach the top to the dresser, the plans, have you run screws from the bottom of the top 2"x4"s on the front and back frames with 3.5" screws, but we added pocket holes to the top of the side and middle pieces of plywood (shown above) and used 1.25" screw to attached the top of the dresser from the bottom. Since the drawers are on drawer slides, they are easily removable, so you have plenty of room to reach inside the dresser.
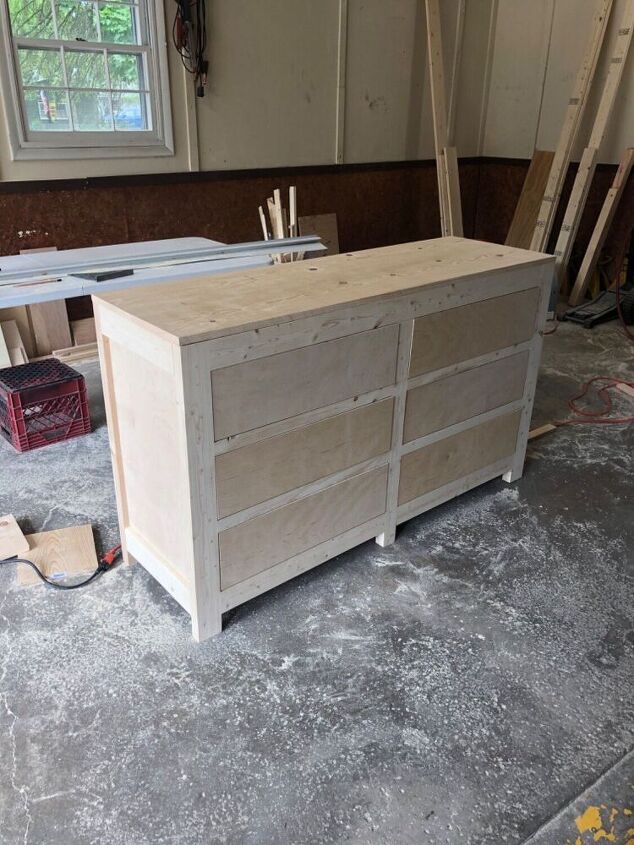
At this point, we had the top installed with the drawer fronts cut and tacked into place as well. The drawer slides will need to be adjusted slightly to get your drawer fronts even with the front of the dresser, so don't be alarmed if things aren't aligning perfectly at first!
Next we sanded everything super good and stained the whole thing Minwax Special Walnut to match our crib. I also did 2 coats of Minwax Polycrylic in clear satin over the whole dresser and then did an extra coat on just the top.
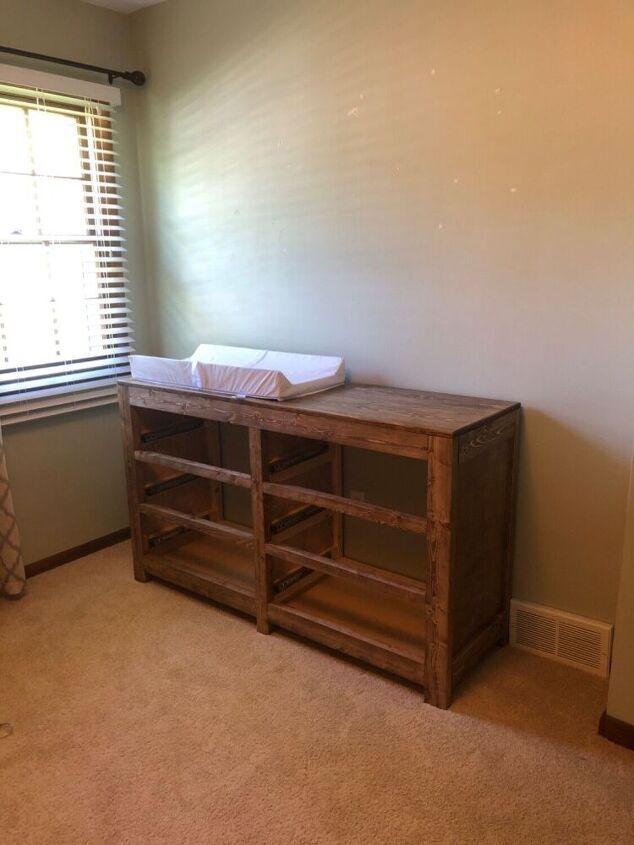
We brought the dresser into the nursery without the drawers and nailed the back piece of 1/4" plywood on to keep dust out, but I forgot to get a picture.
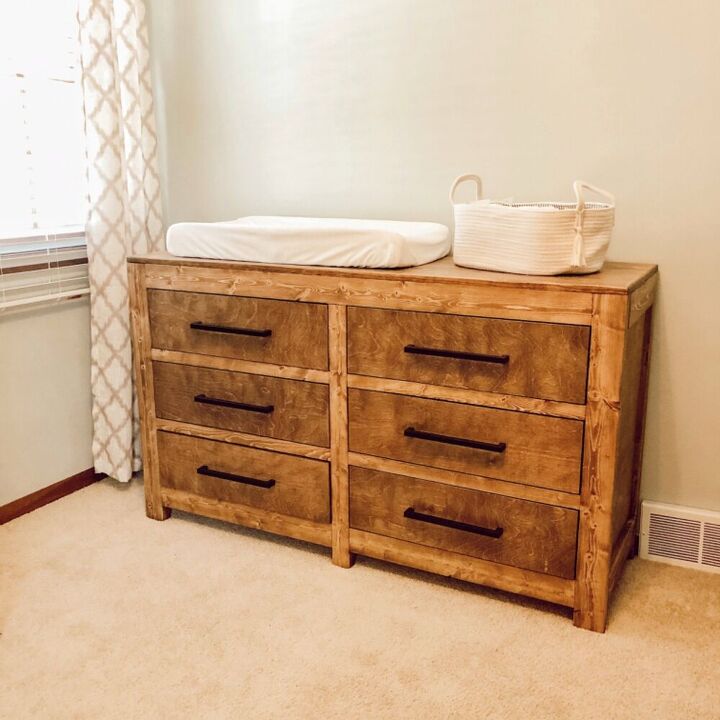
& here's the finished product!
Resources for this project:
See all materials


Comments
Join the conversation
-
Great looking dresser. I'm not into farmhouse style but it doesn't look that way and would fit in any decor
-
Wow that looks fantastic!


Frequently asked questions
Have a question about this project?