


Easy Fan Update - Without Uninstalling!
See the process of updating an outdated fan light fixture with no need to uninstall it!
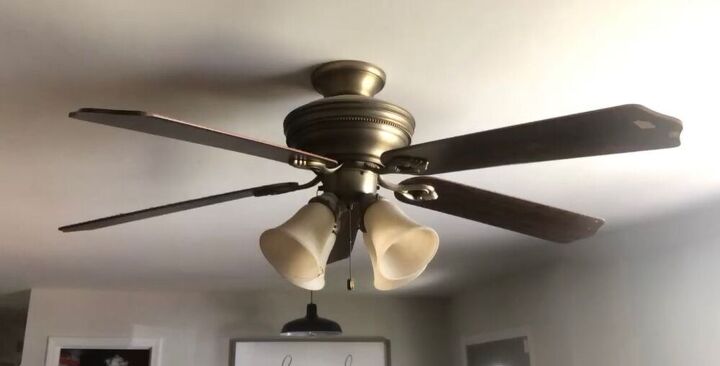
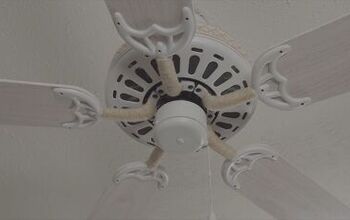
Over the past year I have learned many things, including how to replace a light fixture. But replacing a fan seemed too much for me to tackle. It has special switches and controls on the wall, and that alone intimidated me enough to not want to mess with it. Along with the fact that it actually wasn't that old of a fan, that worked great, it just didn't look as good as it could.

So, I set out on making a plan to update the fan in our living room, without replacing it or taking it down. I really loved how it turned out in the the end, plus it was a quick, easy and cheap update... which makes it 10x better of an update for me!
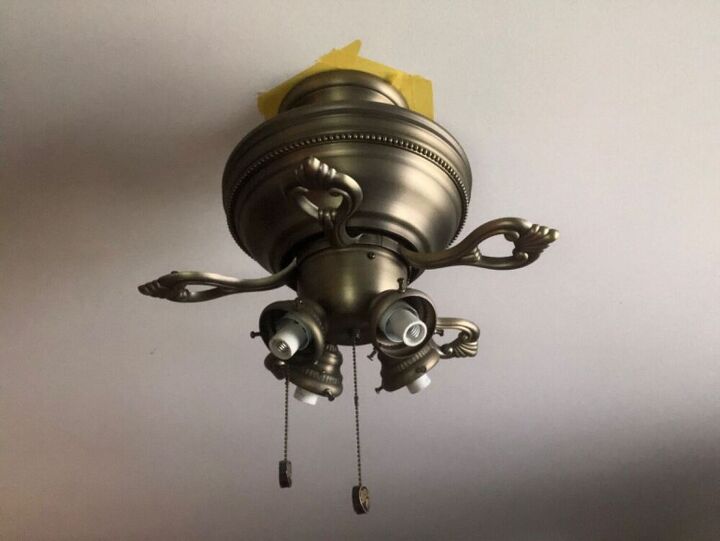
First I vacuumed and wiped down everything. Then, I deconstructed. I took the bulbs, shades and fan blades off.
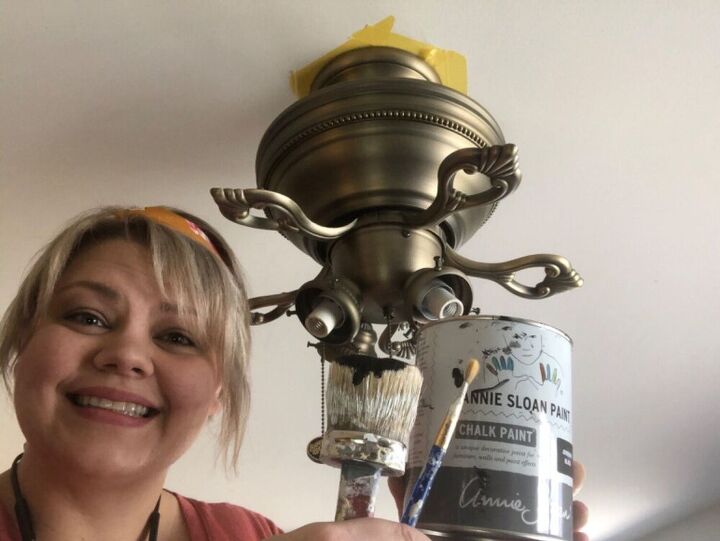
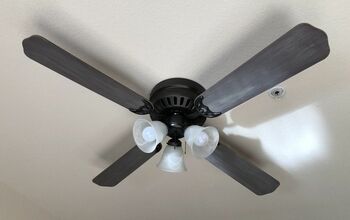
Next, I taped off the ceiling and painted everything that was brass with Annie Sloan Athenian Black. Annie Sloan paint can adhere to all sorts of surfaces without prep work. Perfect for this situation! Athenian Black is a jet black that resembles matte black fixtures.
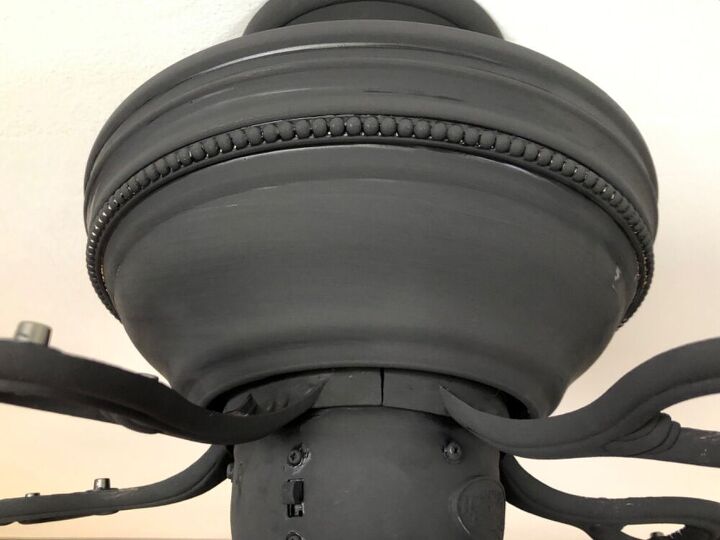
You will need two coats, but they dry really fast. You do not need to wax this unless you want to. No one really touches your fan and eventually the paint will cure out on its own to a harder finish.
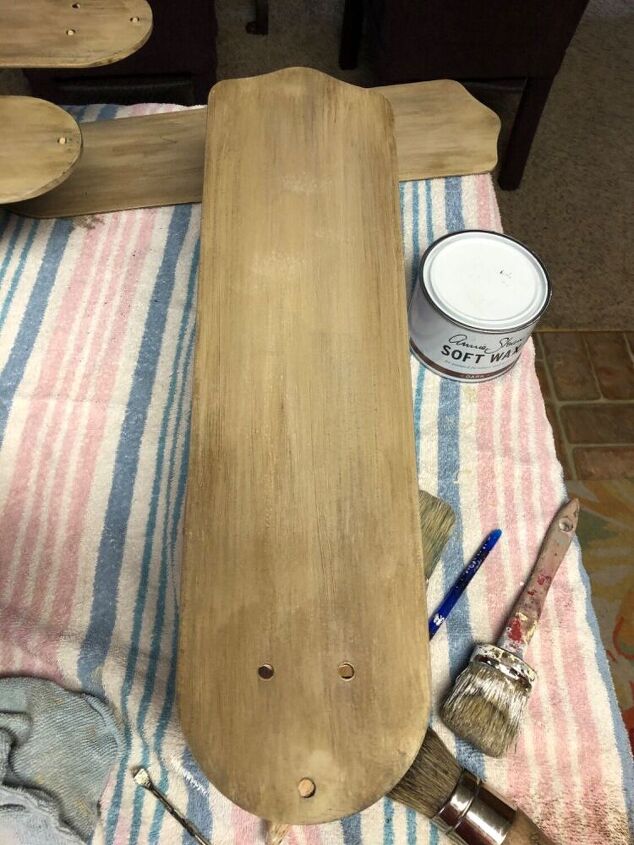
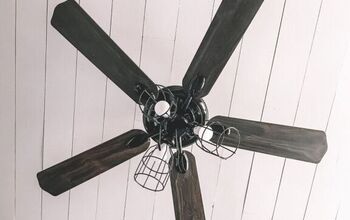
With the fan blades I wanted to create a natural worn wood look, a light wood look. It is one of my favorite finishes for the style of our home and you can find it throughout.
I created a tutorial on it when I did it on the master bathroom revive. You can watch how here. Then I reinstalled the blades.
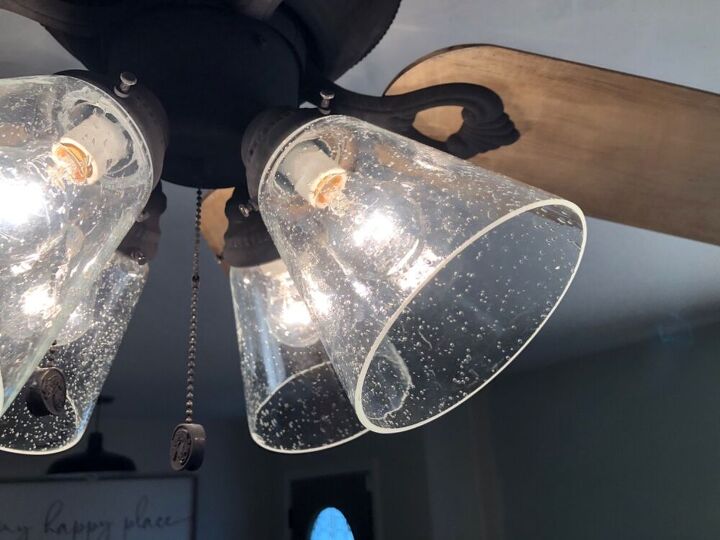
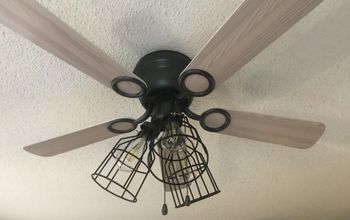
And for the last magical moment of bringing this "new" fixture together... new globes! This is the only thing I actually spent money on (since I have a hoard of paint) I purchased these ones from Lowes.
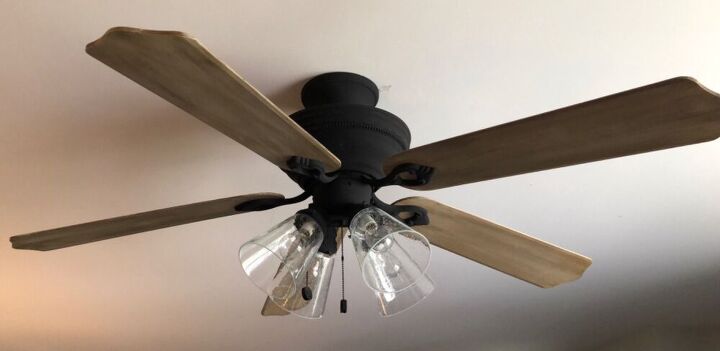
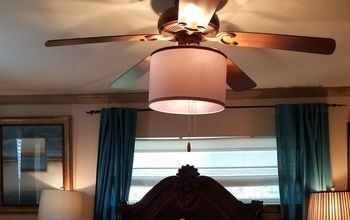
Now admire the “new” light! Hope you enjoyed this quick, easy, fan update!


Comments
Join the conversation
-
Thank you so much, it is still useable. just one speed. I am holding out for brass to come back in!! LOL
-
Awesome! I absolutely appreciate all the tips and pictures. Great job! Repurpose, Recycle and /or Renew! Just fabulous. LOVE the glass globes.


Frequently asked questions
Have a question about this project?
Absolutely clever!! I have been trying to figure out how to paint some lights that I don’t want to remove. Do you think any chalk paint will work or only the one you used? How long ago did you do this and how has it held up? Also, I want to paint around the outside of my glass fireplace doors, do you think chalk paint is an option? Thanks!
Where did you get the clear glass globes, mine are white, but clear would lighten my room more!