


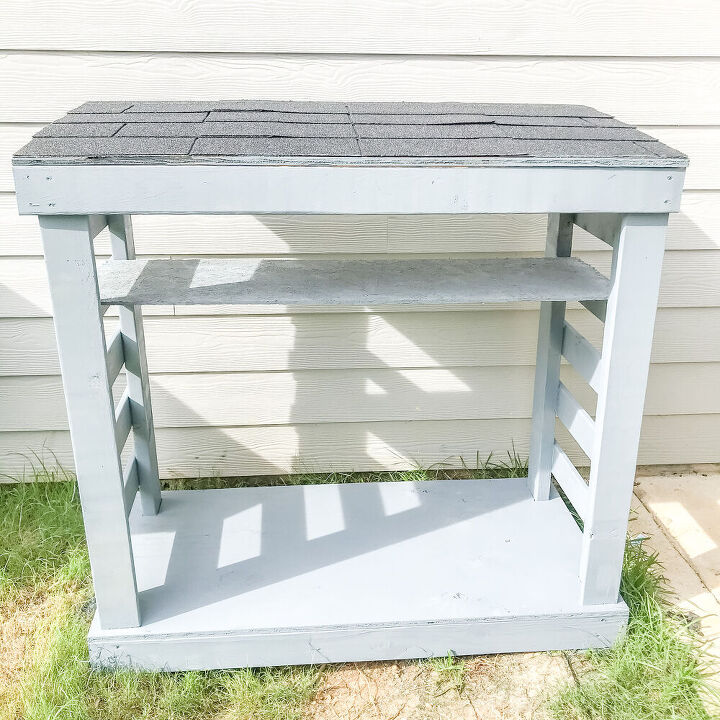
DIY Firewood Rack
Rome wasn’t built in a day but this DIY firewood rack was! Yepp it’s that simple to make & it looks so good. We desperately needed a space to store all of our firewood because it was looking like a hot mess.
The best part is that this cute little rack matches the exterior of our home & looks so good. Even the shingles match, (wait until you see how I pulled that off). The entire build cost about $50 & now all of our bonfire wood has a cozy, covered place to hang out until we are ready for it!
- 1/2″ Plywood
- (2) 2x4s
- (4) 1x3s
- Exterior Paint
- Shingles
- Chalk Line
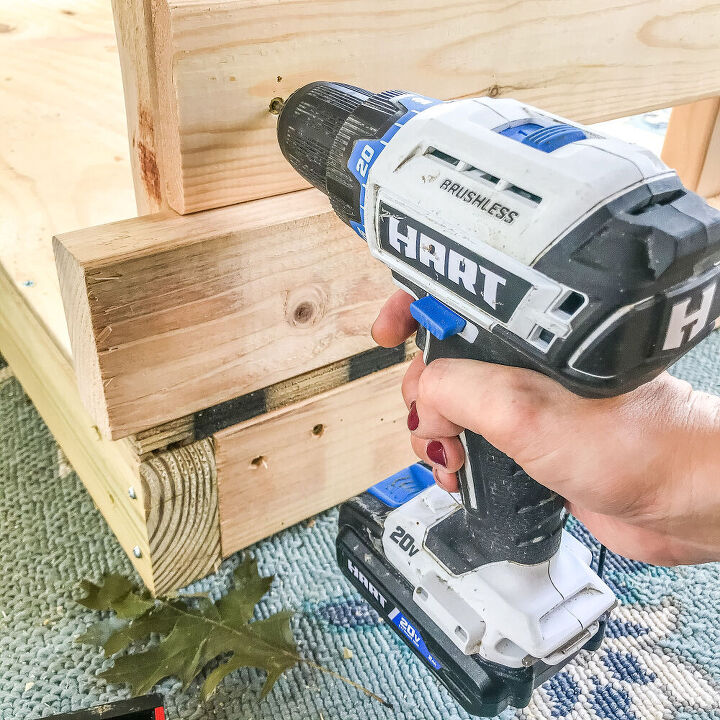
- Hart 20V Drill
- Hart Tape Measure
- Hart Gloves
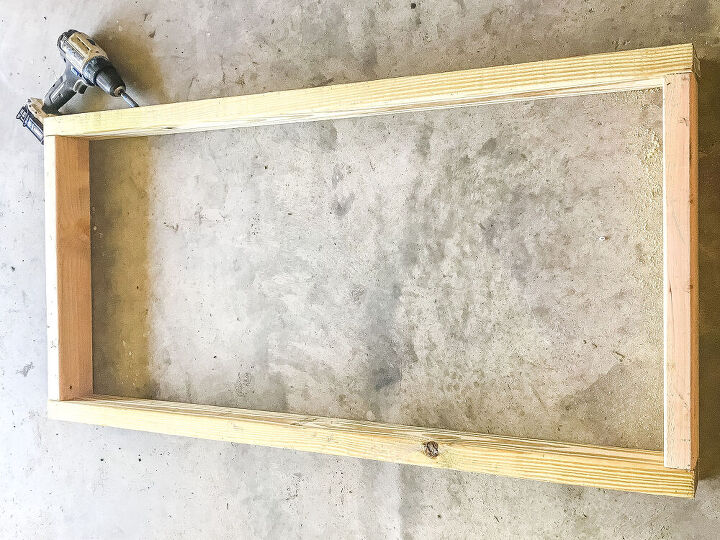
This DIY firewood rack is 4ft long & 2ft wide. The first step is to build the base frame for the rack. I made ours out of 2x4s & attached with 2″ wood screws.
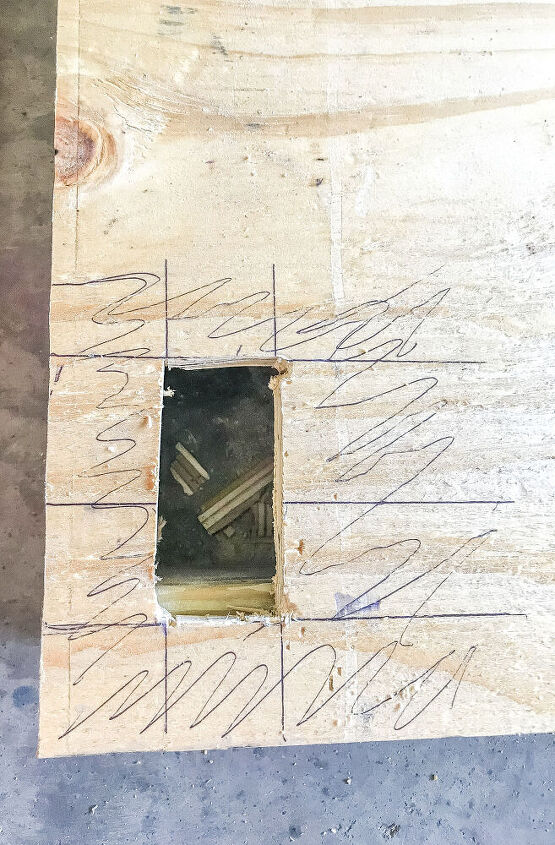
Next, I cut a plywood base to fit on top of the frame. Using a jigsaw I cut out slots for the 2x4s to fit into.
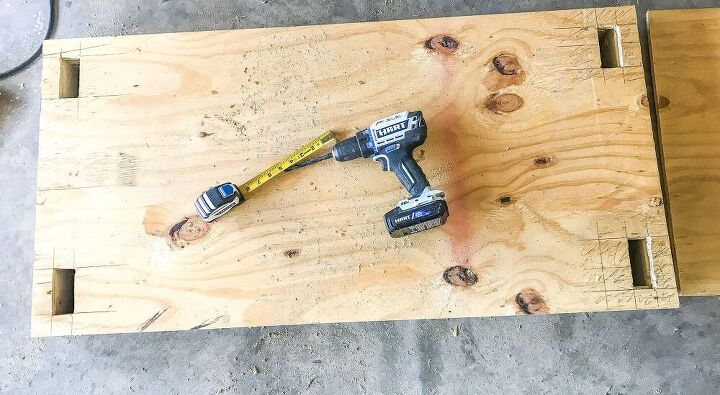
Now that all 4 slots are cut screw the plywood into the 2×4 base.
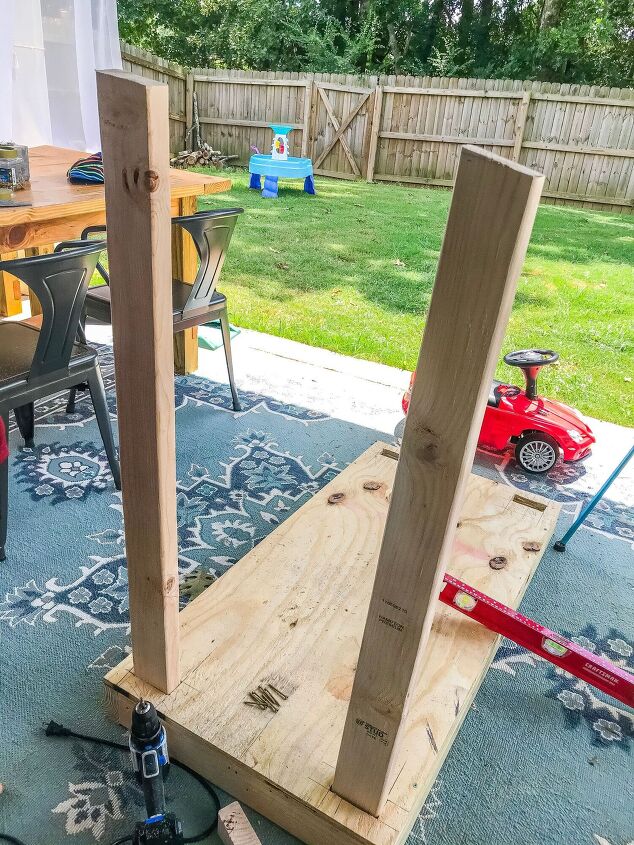
Next, inset the 2x4s into the slots. The 2x4s are cut at 4′ a piece.
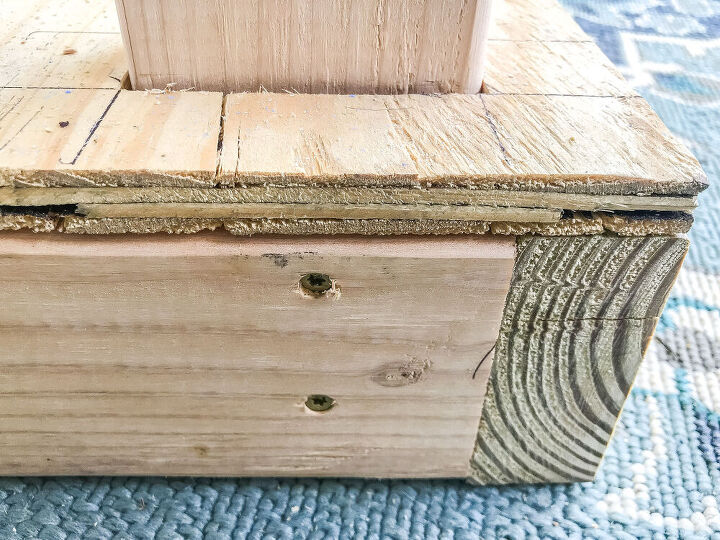
Secure the 2x4s with wood screws from the outside.
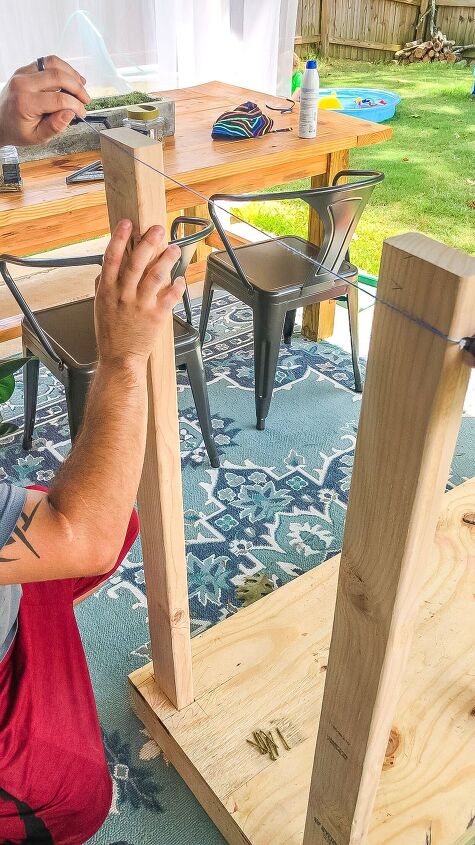
Now that the 2x4s are secured its time to cut the top at an angle for the roof to sit on. We used a chalk line to mark the angle & a circular saw to cut it.
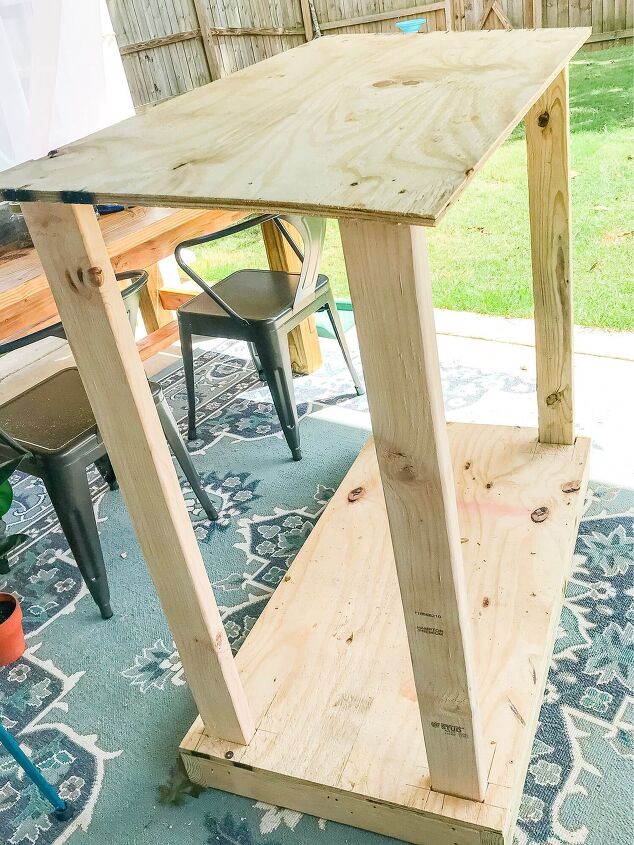
After the angles are cut you can attach the plywood top. I attached the top using 2″ wood screws.
Now that the base is put together its time to attach slats to the sides. For the slats, I used 1×3 pieces & a 2×4 as a spacer (probably my favorite lazy girl hack).
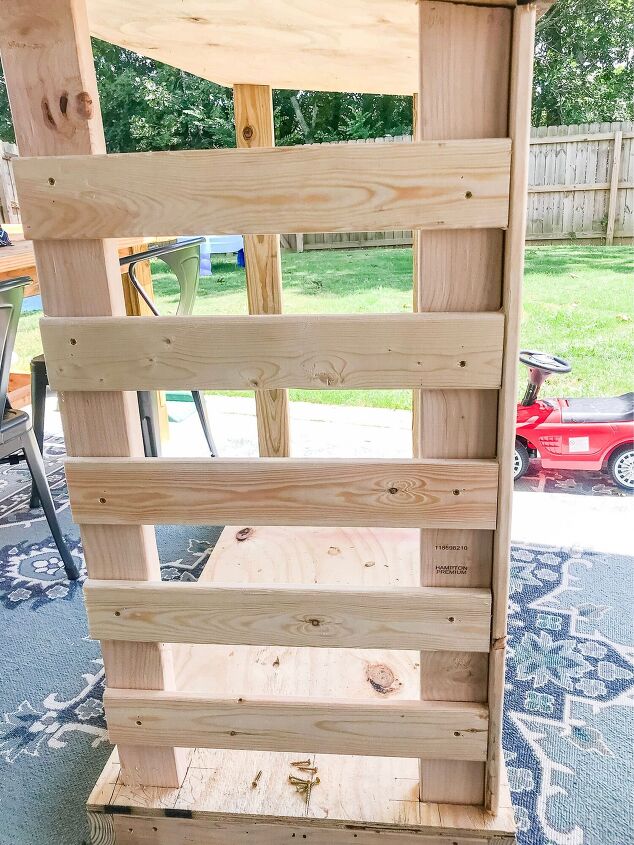
Each side got 5 slats total & I attached them with 1 1/2″ wood screws.
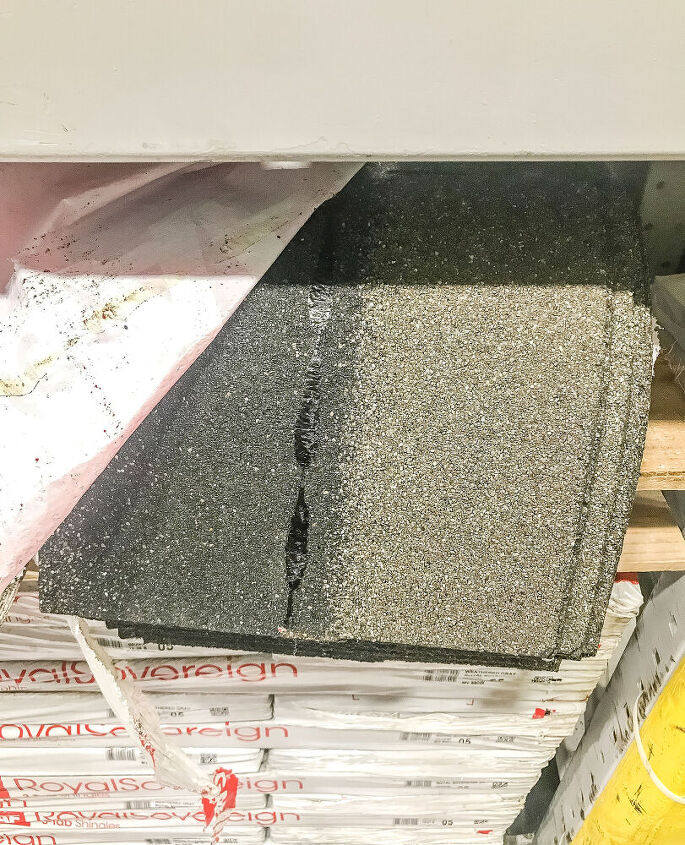
Did you know you could buy small packs of shingles from Lowes?! It’s true just make sure you grab the right color 😉 If you happen to grab the wrong color (cough cough..like me) don’t stress I have a hack for that!
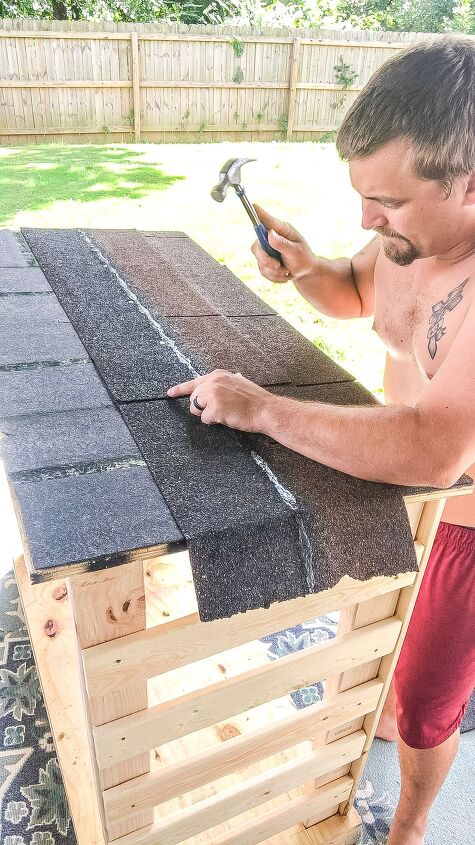
Finally, it’s time to attach the shingles which is really simple, just hammer them on using roofing nails. This pack was $24 & the most expensive part of the project, but I feel like it really finished off the rack.
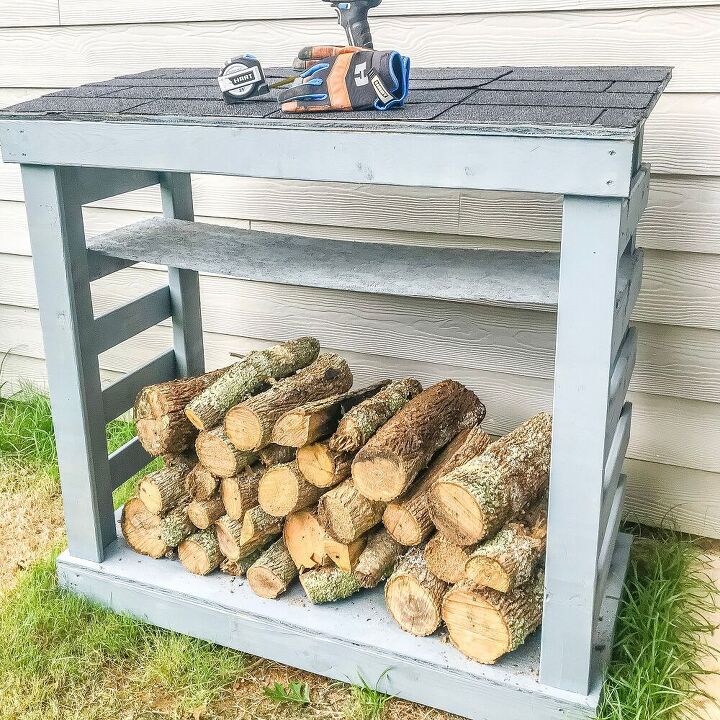
So I accidentally bought red shingles & I really needed black to match our roof. It turns out you can simply spray paint the shingles (who knew)! The color of the firewood holder (Valspar Iron Frost) is a pretty close match to the house which was the plan. I wanted it to look like an extension of the house.
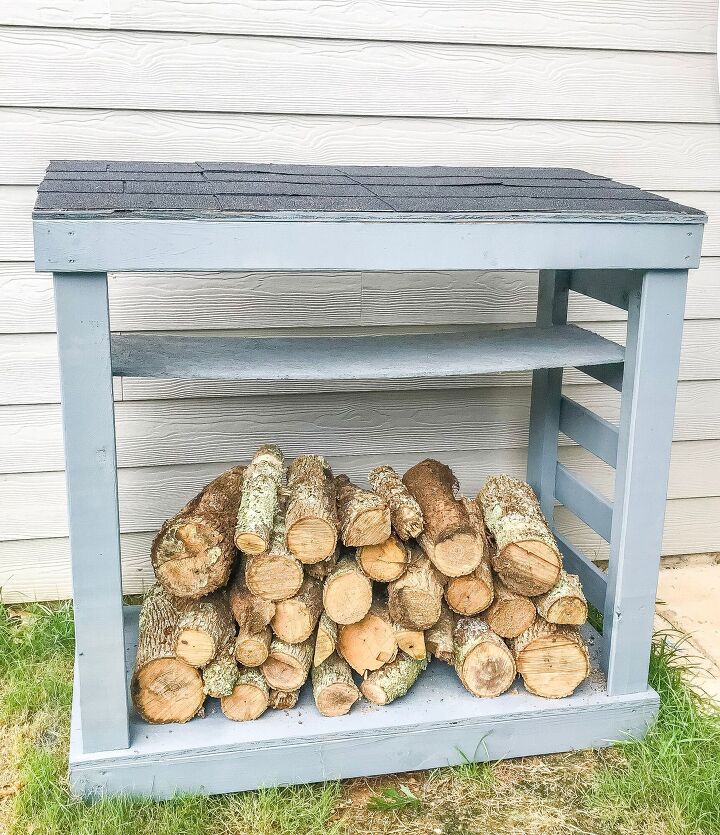
I think we nailed it what do y’all think? This was such a simple build & now our firewood has a home of its own. Justin also added another shelf for our small pieces of wood & fire starters, he wanted it to be extra fancy 😉
Want to see more of my DIY outdoor projects?! Head this way!


Comments
Join the conversation
-
Looks great. Don't you hate having logs chunks all over the yard. Then you have to mow the yard. So when your mowing you have become the grass champion and defender of the lawn. The lawn mower have become a fire arm. Any one who happens to bein the yard at that time or any where near the yard get hits with wood bullets. Lol wood boxes are very nice to have. Yours looks great. You took care in how it looks. Not just some wood thrown together to protect wood.
-
Very cute but you mustn't burn very much. Most people buy a cord of wood at a time. Not near big enoughn but for a porch where you put enough for one or two fires it is sufficient.


Frequently asked questions
Have a question about this project?