


Marbled Seashells With Nail Polish
Add a little extra color to those seashells you collected on summer vacation with this easy marbelizing technique. It's a great way to display those shells in a bowl or tray on your dresser or table.
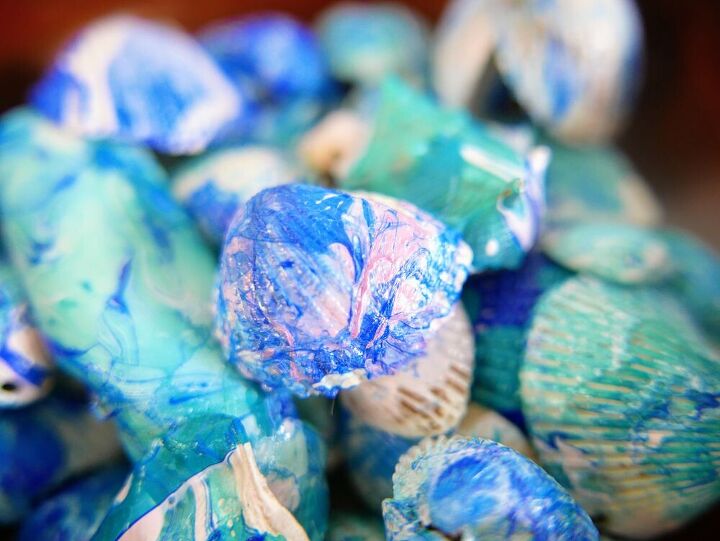
Shells are definitely beautiful on their own. But sometimes you find some that look a little grey or not too pretty. This is a fun way to add color to those shells!
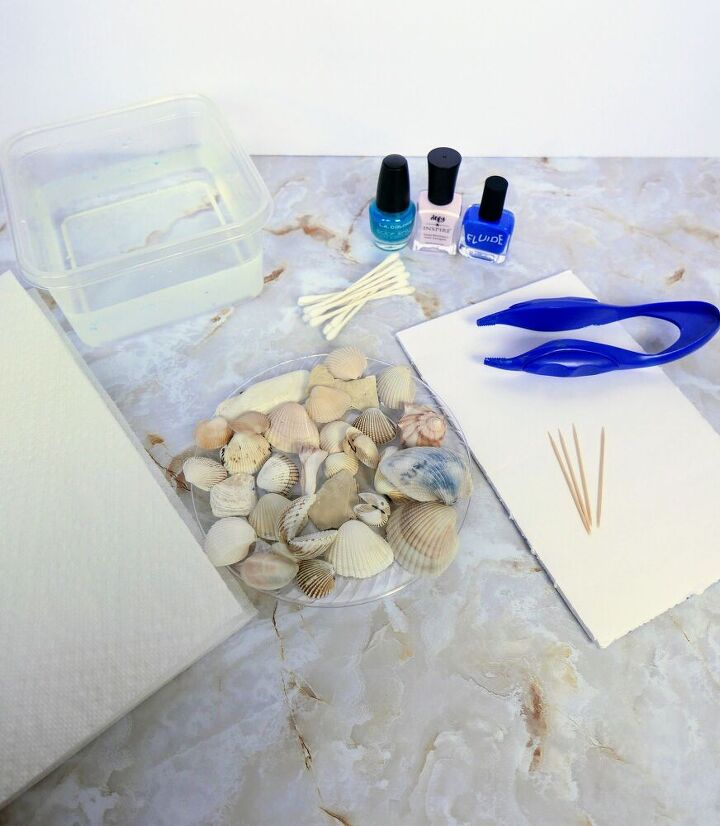
● Medium bowl of lukewarm water
● Seashells in all shapes and sizes
● Tweezers (I used a large plastic pair from the Dollar Tree)
● Cotton swabs and toothpicks
● Paper towels
● Scrap piece of foam board, or plate covered in wax paper
● Nail polish in varying colors
Start by filling a medium bowl with lukewarm water. If the water is too cold, the nail polish won’t spread easily.
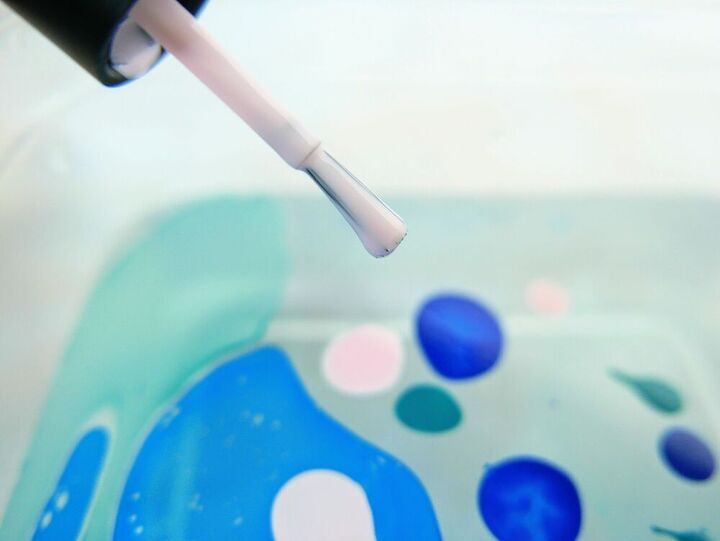
Open the lid to each nail polish you will be using. The nail polish dries on the surface of the water very quickly, so it’s important to work as fast as possible, and having the nail polish open helps speed up the process.
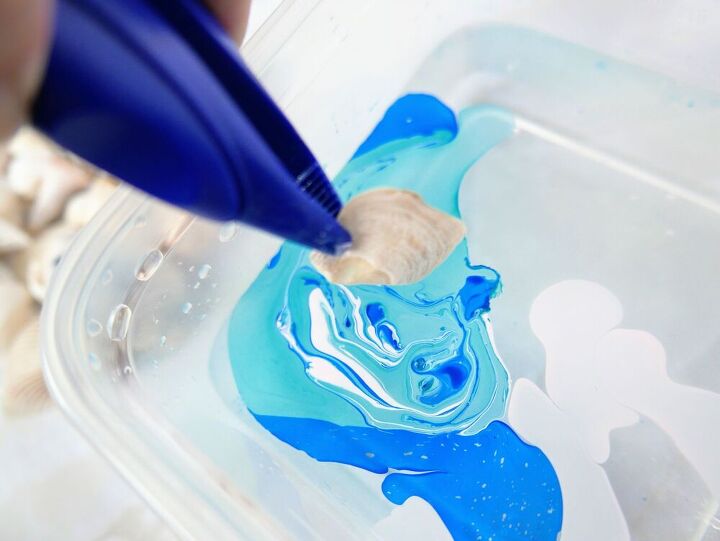
Starting with your first bottle of nail polish, hold the brush as close to the water as possible, and shake gently until the nail polish drips on the surface. If you drop the polish from too far above, it will sink to the bottom. Add additional colors to the water.

Using a toothpick, swirl the colors together to make a marble pattern.
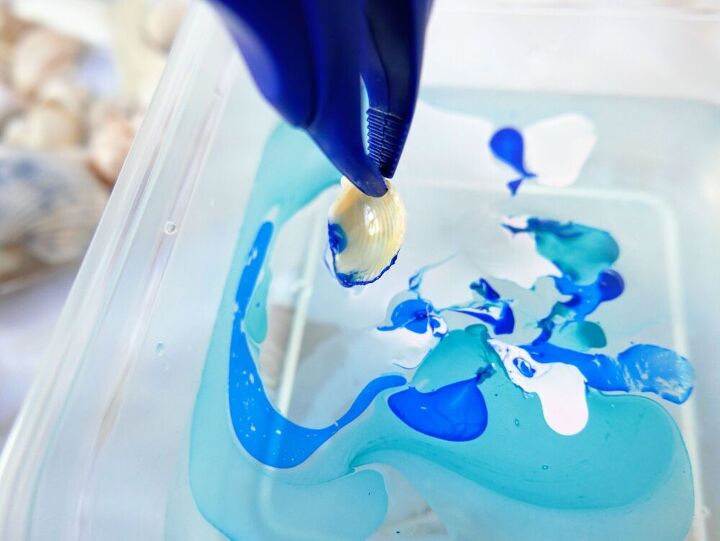
Remember the nail polish will dry rather quickly, so as soon as you finish swirling, hold the seashell with tweezers, dip into the water, then remove and place on the foam board to dry.
I was able to dip 1-2 seashells at a time before the nail polish dried on the surface of the water.
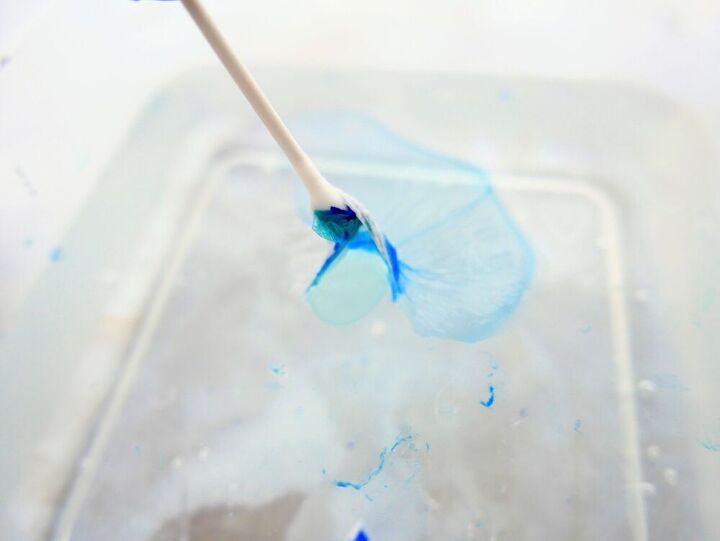
Once you have dipped the seashells, use a toothpick or cotton swab stick to swirl the remaining nail polish off the surface, and discard on a paper towel.
Do the previous steps as often as you need to color all your shells.
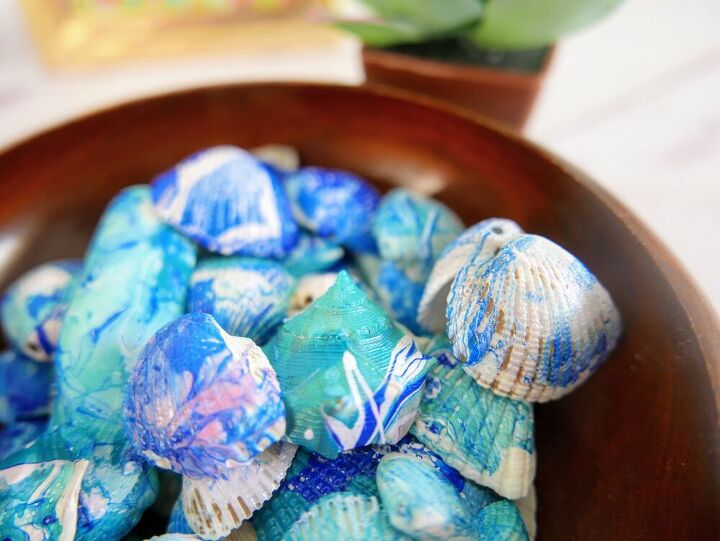
After drying completely, display your shells however you'd like. We added them to a bowl to keep on our entryway table.
Check out more of my easy crafts. And lots of my budget decorating ideas.


Frequently asked questions
Have a question about this project?