


DIY Vintage Jewelry Magnets
Have you ever wished there was something you could do with some of the vintage jewelry you have laying around? If so, check out this incredibly easy tutorial on how to make your own vintage jewelry magnets.
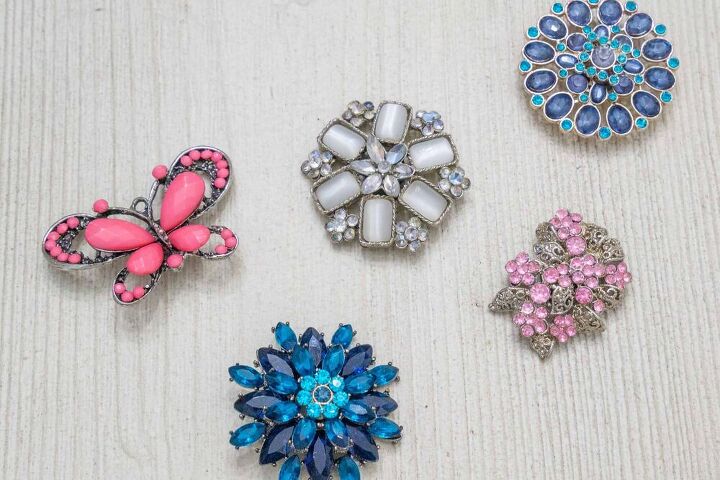
I have recently been on a decluttering kick. This seems to happen around my house about once or twice a year. I start going through cabinets, drawers, closets - nothing is safe really - and get rid of anything I don't feel like I need anymore. I have a jewelry chest in my bedroom that holds most of the jewelry that I own. At the moment, my 14 month old is obsessed with opening the drawers and pulling out all of the boxes. This has prompted a bit of a jewelry clean out, and it also got my wheels turning. I had a number of pieces, mostly brooches, that have just been sitting in my jewelry chest for years now unused. They are gorgeous pieces, I just don't typically wear brooches. So, there they sat.
While trying to decide what to make as my DIY gift for this week, inspiration struck. I could turn the brooches into vintage jewelry magnets. Then, they could be displayed and actually enjoyed, instead of being hidden away in a drawer.Not only is this something that I would love for my own refrigerator, but it would make a lovely gift, as well. Everyone uses magnets, right? So, give them something beautiful, that they can actually use! If you don't want to give away your own pieces, you could easily pick some up for cheap at goodwill or yard sales. A couple of the ones I made came from a local goodwill. While the process for making them is super simple, I definitely learned a few things along the way.
(This post contains affiliate links.)

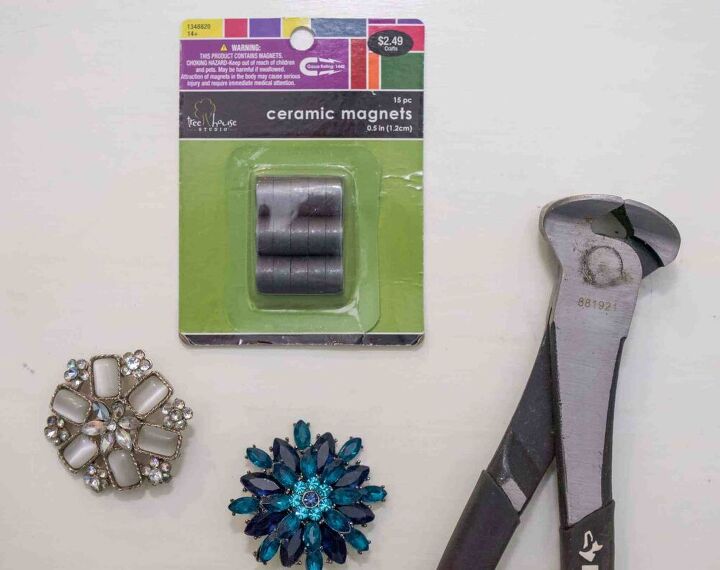
- Old brooches (or necklaces with large pendants)
- Pliers
- Craft magnets
- E6000 glue
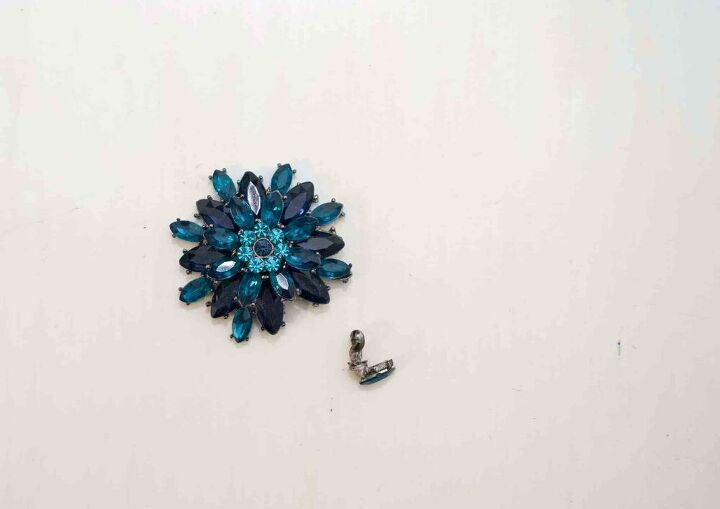
The first thing you need to do is remove the clasps from the back. I actually used a pair of wire cutters, but I did not cutthe clasp off. I took ahold of one side of the clasp and very gently twisted back and forth until it popped off of the brooch. So, a pair of pliers would work just as well.Here is where I learned the first lesson though. Don't twist too hard or you may pull a piece off of the brooch. Oops! Fortunately, I was able to repair this with a bit of glue.
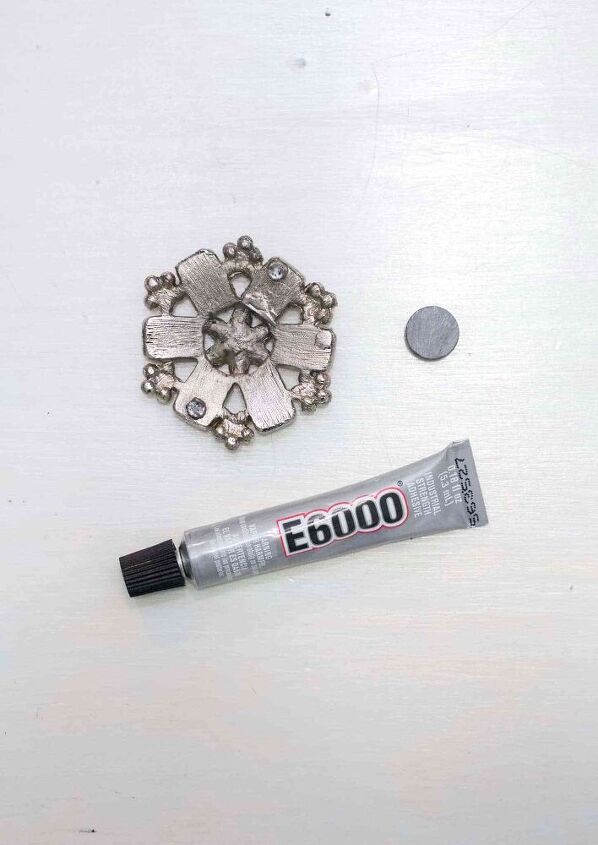
The second, and final step, is to simply glue the craft magnet onto the back of the brooch.I learned a couple more lessons during this step. I was originally just going to use super glue to attach the magnets because that's what I had on hand. Unfortunately, the backs of the brooches were not totally flat. So, there was not enough surface area for the super glue to adhere to. Then, I tried hot glue, even though I didn't have much hope of it working, because it was the only other thing I had on hand. That didn't well stick at all.
So, I headed to my local Michael's. After speaking to a sales associate, I purchased some E6000. The sales associate raved about its strength and bonding powers, and she said that the texture was much like hot glue. It sounded perfect for what I needed. And it was! I was even able to repair the brooch that I broke. :)
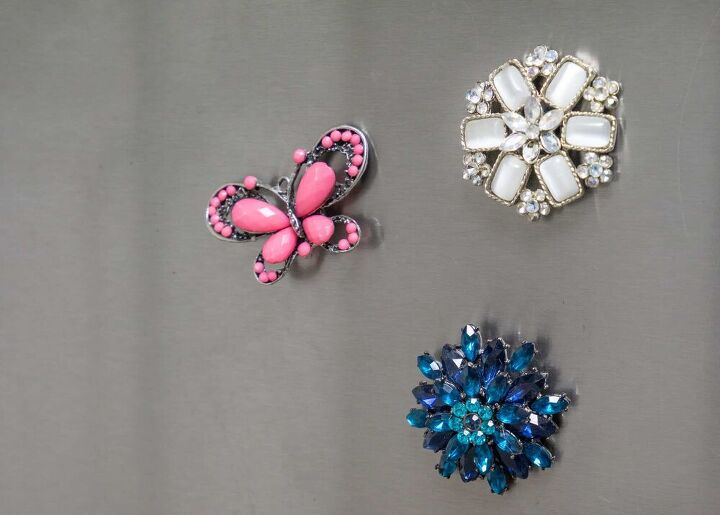
I applied a generous amount of glue to the craft magnets, then put them in place on the back of the brooches. The tube of glue says to let it cure for 24-48. So, I let them set upside down and untouched for a couple of days, and then they were ready to go. Two simple steps for gorgeous vintage jewelry magnets!
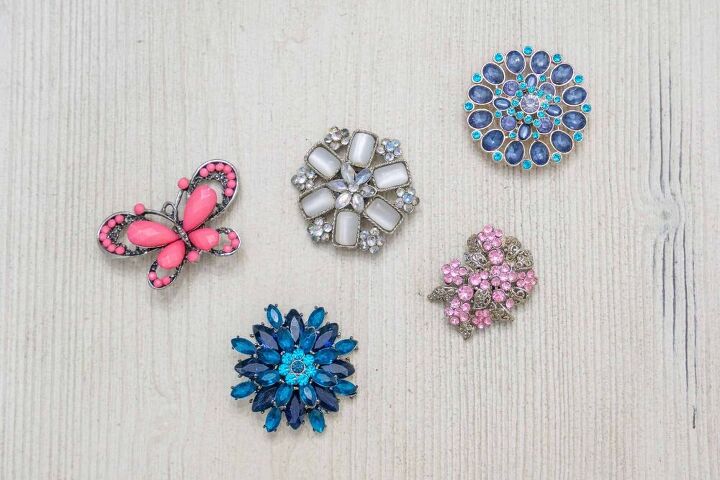
I love the little bit of glamour and sparkle that these add to my refrigerator. Everyone has magnets on their refrigerator. Why not make them beautiful?


Frequently asked questions
Have a question about this project?