


Repurposed Childhood Kitchen Cabinet
This upcycle project is near and dear to my heart. This is an old kitchen cabinet salvaged from my childhood home. My Mom and Dad their kitchen. About 3 months after that, they decided to sell their home and move out to the country. I grew up in this home. We moved in when I was 12 and they have lived in the home every sense. So, selling was sort of a sad time for us kids. I was so glad that I was able to save one of the kitchen cabinets to repurpose.

I needed a cabinet for my office to display décor and also to store my books and magazines. I knew this would be perfect for the space, because it was not very bulky.
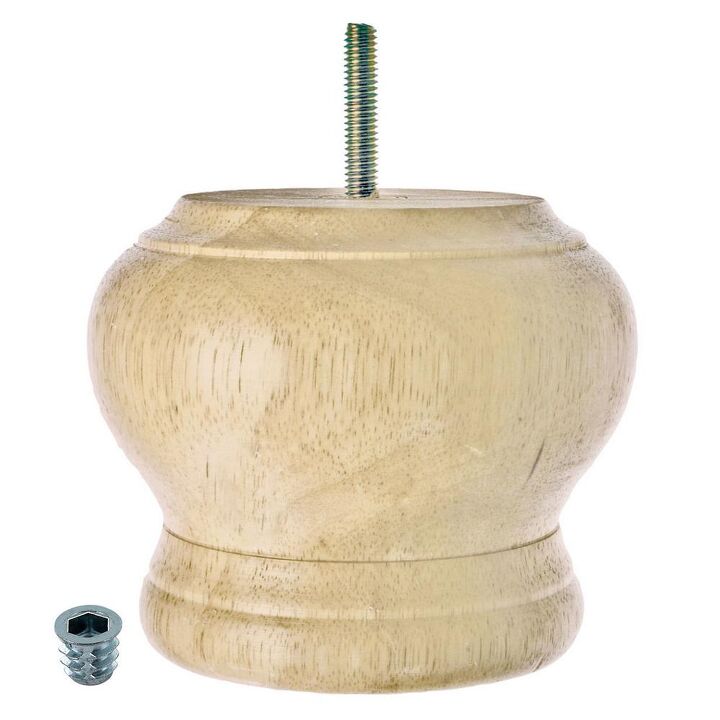
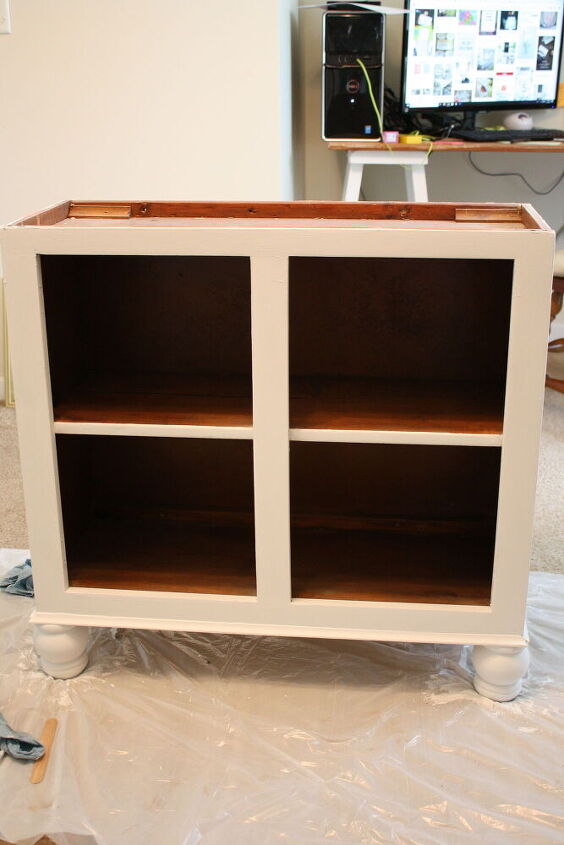
After going through my stash, I found 4 furniture legs that I had purchased for another project that I had never used. These would be perfect to add some height to the cabinet.
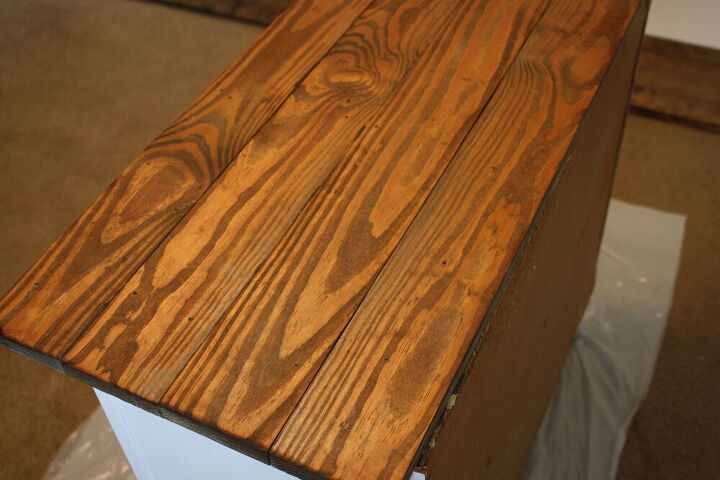
The Hubs would add a planked wood top for me out of a few 1x4 scraps he had in his shop. They had to be trimmed slightly with the chop saw so they fit vertically on top of the cabinet.
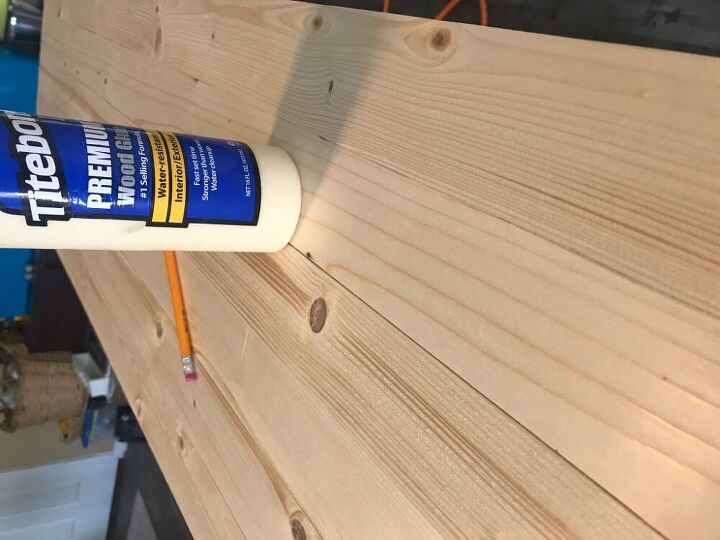
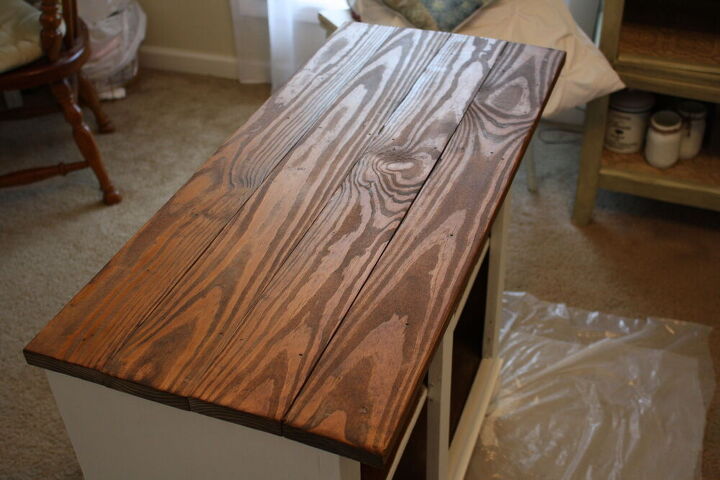
After he trimmed the boards, I sanded them with 220-grit sandpaper. I then removed the sanding dust with my tack cloth and applied one coat of English Chestnut stain to the wood pieces. I set them aside to dry overnight.
The feet were added by screwing in to the corner of each cabinet. I gave the cabinet a good cleaning. I wiped it down with a Lysol wipe, and then dried it with a clean rag. I decided that the inside just needed a fresh coat of stain. I used a cloth and applied one coat of the English Chestnut stain and allowed it to dry overnight. You can see the inside is freshly stained.
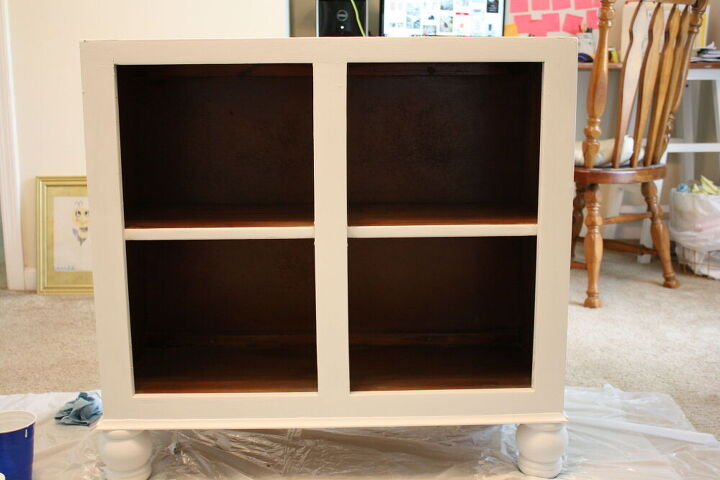
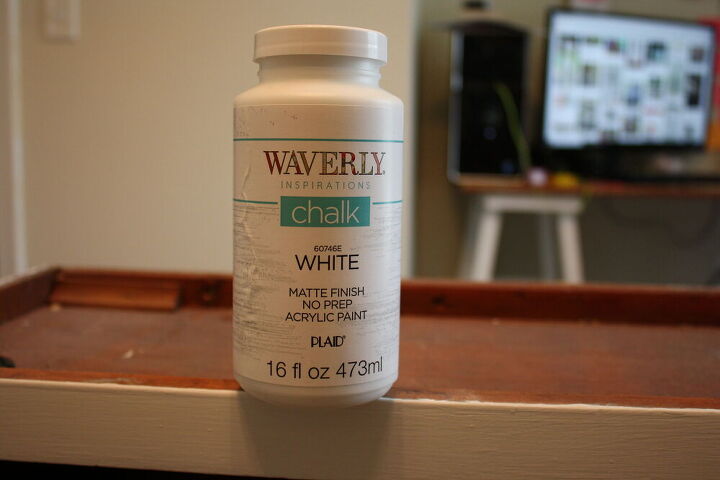
The next day I gave the entire cabinet and the feet two coats of my Waverly White Chalk Paint, allowing about 2-3 hours of drying time in between coats.
After the paint had dried completely, the Hubs attached the planked wood pieces to the top by using small screws and wood glue.
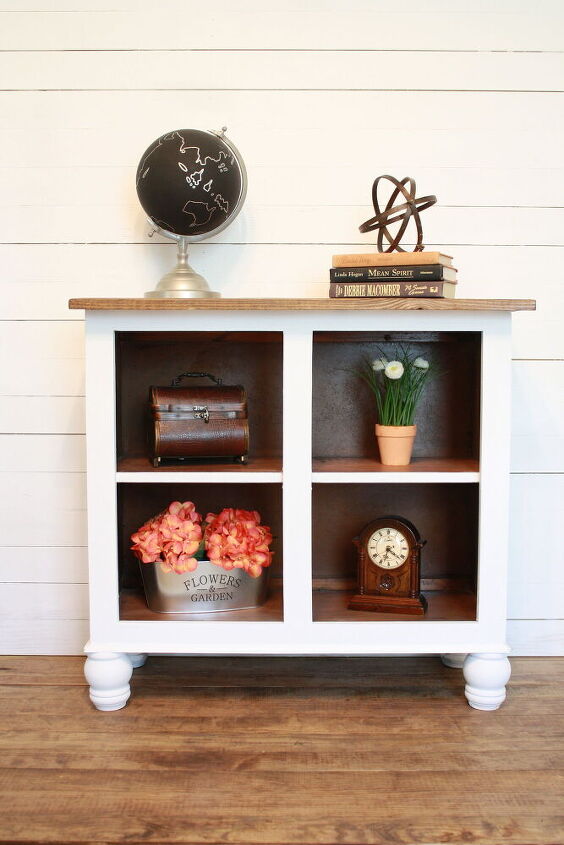
To seal the piece, I applied one coat of Polycrylic to the cabinet and the new planked top.
I am so happy with the way this cabinet came out. I now have a piece of my childhood home in my home. I will always remember the wonderful memories we made in that house every time I see my upcycled cabinet.
Resources for this project:


Comments
Join the conversation
-
This is such an adorable cabinet for displaying some of your favorite knick-knack pieces, a plant or a couple of your favorite family treasures. Love the refinished piece. The ball feet really adds to this piece.
-
I have two solid oak nightstands with broken doors this project is perfect for. Will paint black. Perfect for a media center for my son’s first apartment. The nightstands were from my boys’ bedroom furniture. I was working myself up to facing their loss as we downsize our empty nest. Thanks for helping me save the memories!


Frequently asked questions
Have a question about this project?
Did you put the top on as separate boards or are they attached to each other?
Lucky you had some good quality cabinets in your family home. Lol. Looks better than my current home cabinets. 🤣 But honestly, this is a very good way to keep a piece of your memories alive and probably can pass down the cabinet and stories to your kids.🙂
What is the base seen sitting between the legs and bottom of the cabinet?