


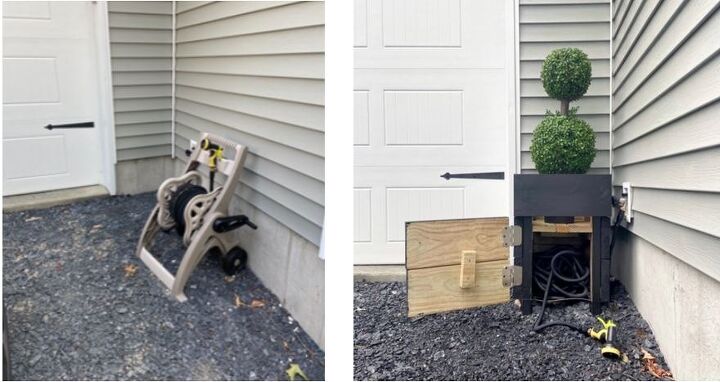
DIY Planter to Hide Hose

As practical as a hose reel is, frankly it's just not that nice to look at. When I was making these planters for the side of our garage, I realized that because of their size, they would be a perfect place to hide the hose!
This is my second planter box tutorial. You will see very similar steps in my first one, but this box was intended to hide our hose so it's a little different. If you're looking for a simple, plain old planter box, click here. If you are looking for one to hide the hose, you're in the right place.
To recap, this was using extra wood from when we built our deck. The first few steps are the same as my plain planter box tutorial, but you can see where it gets a little different in step 4...

What I used:
2x8s
2x4s
5/4 in. x 6 in deck boards
Screws
Steel remesh and fence staples (leftover from our garden)
Hinges (leftover from when we swapped interior door hardware)
Paint
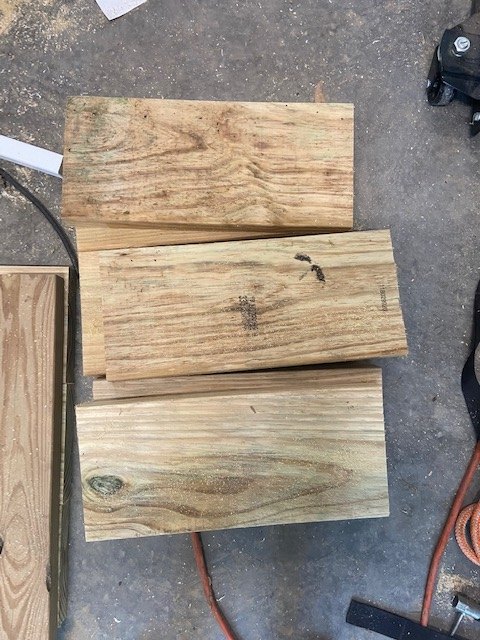
Step 1: Plan and cut material
I used a miter saw to cut my materials. I cut 12 pieces of 2x8 to 17 inches each, and I cut 2 pieces of 2x4 to 24 inches each.
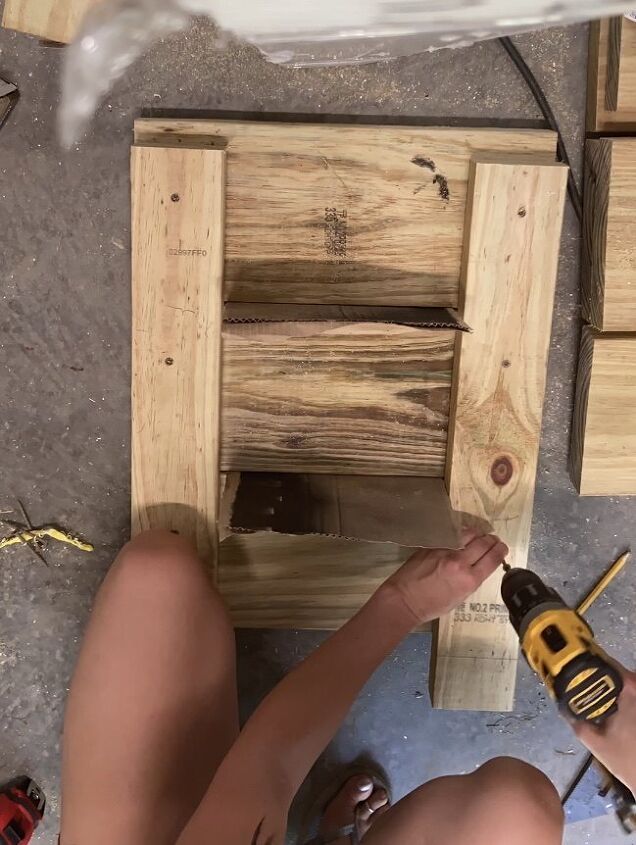
Step 2: Assemble side panels
I laid out three 2x8 pieces and connected them with my 2x4s, leaving that 2.5 inch overhang at the bottom for the feet. I used cardboard to help space my 2x8s, but you don't need to do this - I just liked how it looked with a little space. I connected these using leftover 2.5 inch decking screws, and repeated this process two times - one for each side.
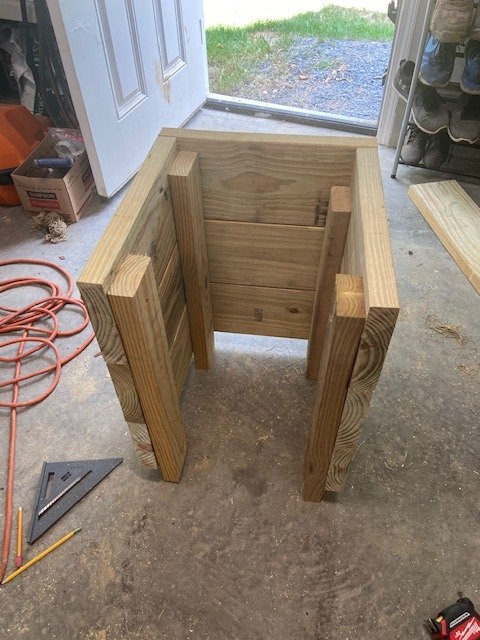
Step 3: Attach back and top front piece.
Next, I connected three 2x8s for the back using the same decking screws. Then I added on only the top 2x8 on the front of the planter (seen below).
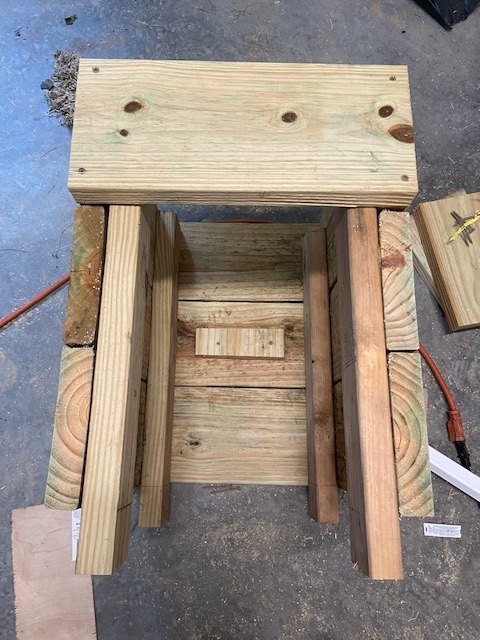
Step 4: Attach the base supports
I then attached scrap 2x8s to the back and two sides, as supports for the base of the planter. In the first, plain old planter, I attached only 2 supports to the front and back, but because the front of this planter was going to be a door, I put my supports on the 3 other sides.
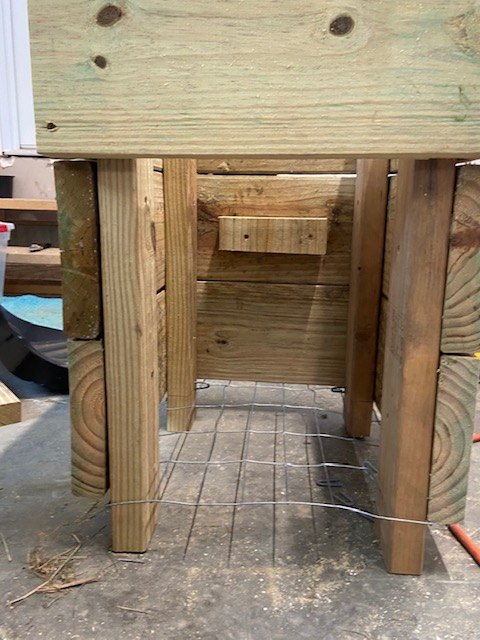
Step 5: Attach wire to base
I measured the base of the planter and cut out my wire remesh, then used leftover fence staples to attach it to the base of the planter. This is where the hose now sits.
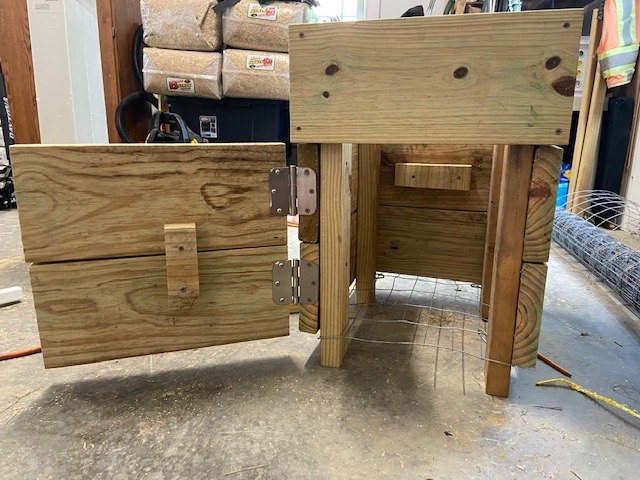
Step 6: Create door
I used my last two 2x8s to create a little door. I attached them to each other using scrap 2x8 to ensure they would open/close together as one door (not two), then I used old door hinges to attach them to the planter.
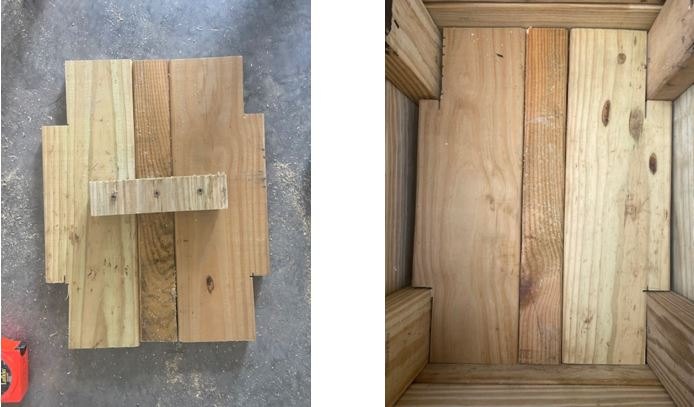
Step 7: Create and attach base
I measured the inside of the planter and cut my deck boards to size. I notched out the corners for the 2x4s, laid a filler strip down the middle, and attached all of three of the pieces with a scrap piece of 2x8.

Step 8: Paint (optional)
I chose to paint these black to match the other accents on the outside of our home. Once they dried, I threw some plants inside and ran my hose up the mesh at the bottom.
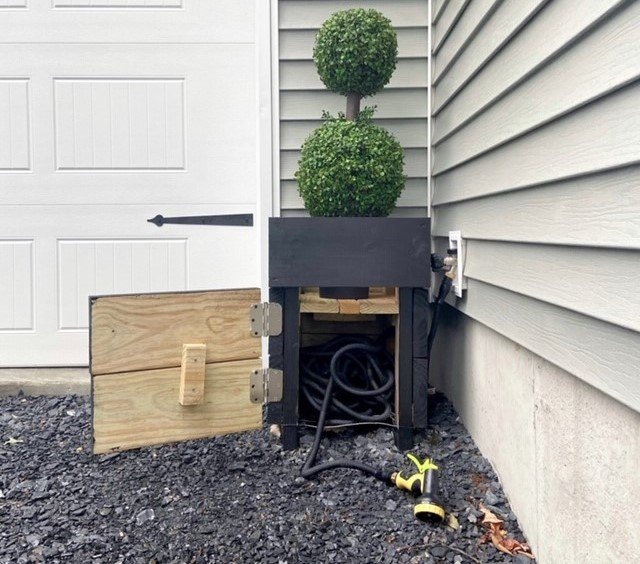
The one downside to this project was that because I used pressure treated wood from our deck, these planters are HEAVY. I don't mind because I don't plan on moving them around much, but it's something to keep in mind.
Overall I'm so pleased with these! Much better to look at than a hose reel, if you ask me!!
More Gorgeous Garden Projects


Comments
Join the conversation
-
I love it, looks great, well done.
-
I love this idea and am going to copy it.


Frequently asked questions
Have a question about this project?
What can you do with broken terra cotta pots?
Seems it would be difficult to return the hose to the box??
Does the whole hose and reel fit inside then?