


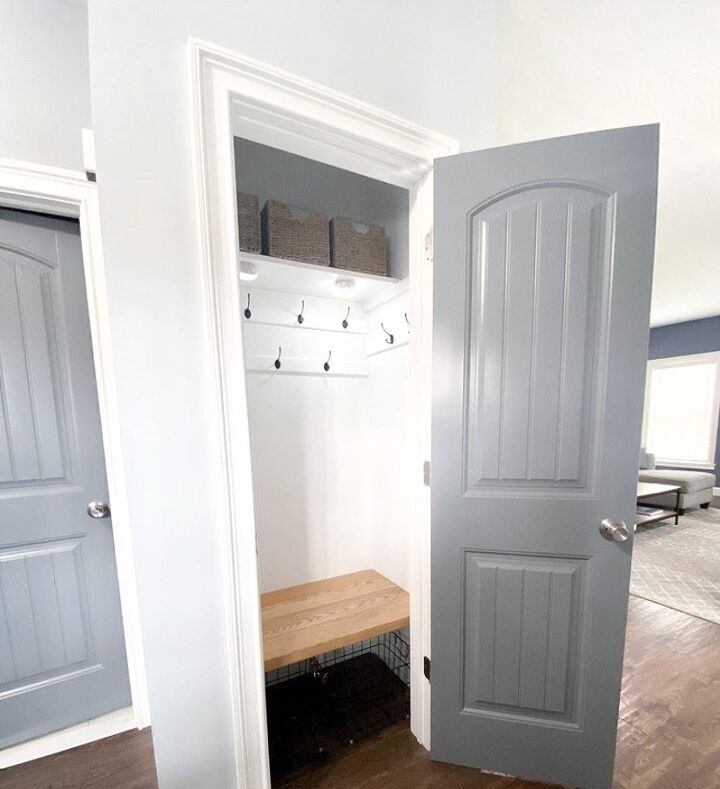
Coat Closet Makeover

Builder grade closets have become the bane of my existence. Plus, I'm sure we all know the valuable time lost when you actually need to put your coat ON A HANGER. After a few short months of living with our disaster of a coat closet, we knew we needed to do something about it. (If you want more small closet makeovers, check out my wire shelving pantry closet makeover!)
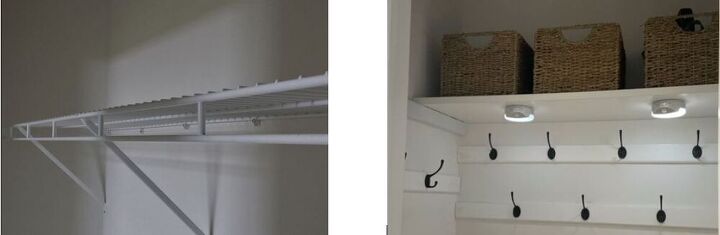
I was so excited about this project that I forgot to take a before picture showing how messy this thing was. Imagine a typical, small, crammed coat closet, with things falling off of hangers and shoes scattered everywhere... it was horrible! We of course started by removing the wire shelf and cleaning the floors.
My parents basement is full of scrap wood from different projects my dad has done over the years, so when we decided to tackle this coat closet we raided his stash. We lucked out because he already had everything we needed, and he even had some nice pieces that were stained/painted, so we took full advantage.
What we used:
Leftover laminate wood shelving (can also use plywood)
Leftover trim pieces (can also use 1x2s or 1x3s)
1x2s
2x4s
2x6s
Hooks
Puck lights
Wire and woven baskets
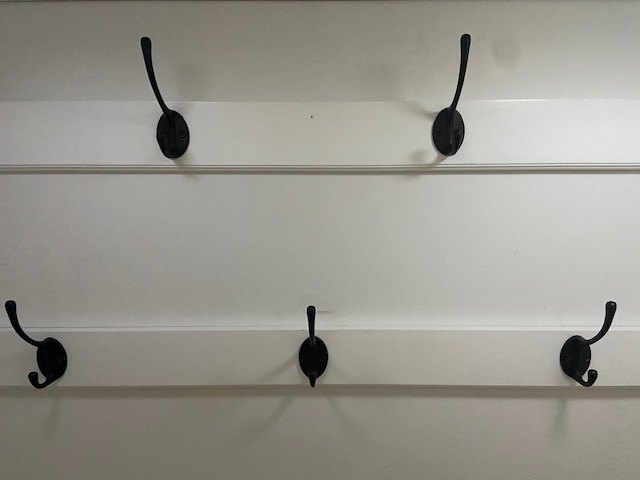
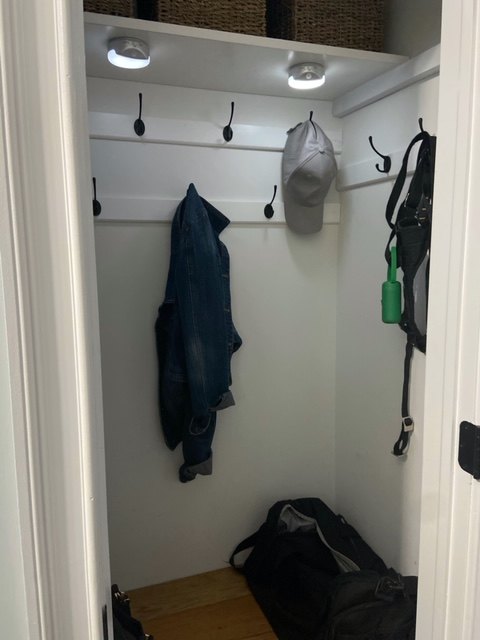
Step 1: Add hooks
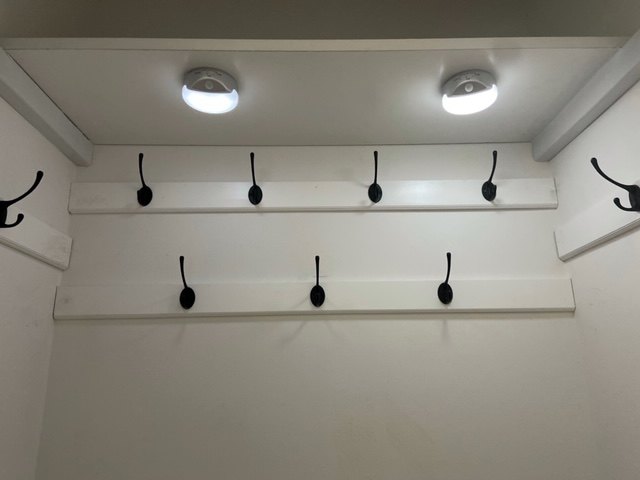
I knew hooks were going to be the main change in this closet. The ones I purchased came with short screws and we were nervous about them holding onto the drywall with heavy coats hanging on them, so we decided to first screw them into some leftover trim pieces (a 1x2 or 1x3 would also be fine here!). We measured and cut our trim to size, evenly spaced hooks across them, and then screwed the trim into the studs in the closet. We wanted as many hooks as possible, so we went with 2 rows of hooks across the back of the closet, and one along either side.
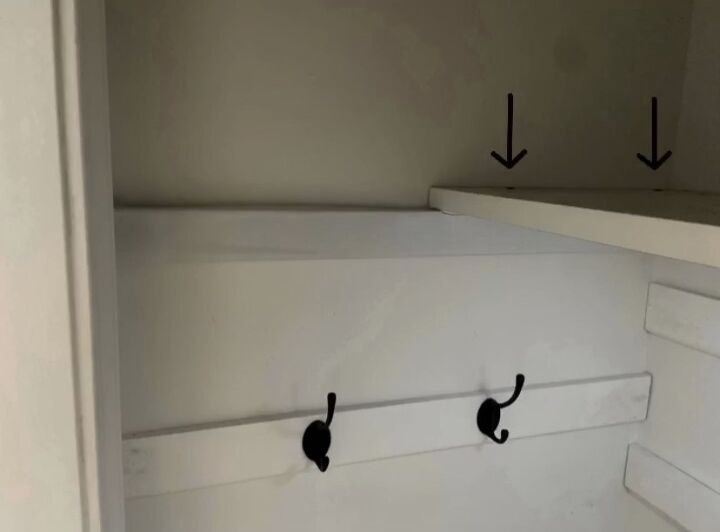
Step 2: Add top shelf
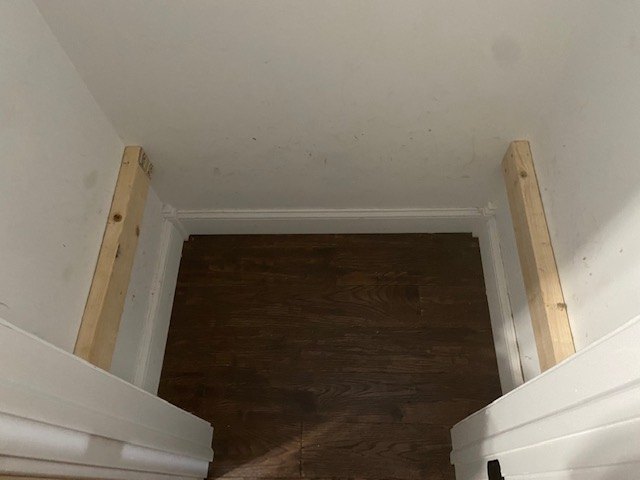
Next we measured and cut our 1x2 and our laminate shelf to size (you can also use plywood for the shelf). Even though the shelf was only half the depth of the closet, we decided to have the 1x2s run the full wall. We did this to be sure we hit the studs, and to match the trim pieces with the hooks.
We attached the 1x2s to either side of the closet (again, making sure we hit studs), and placed the shelf on top of it. We screwed the shelf down into the 1x2s for some extra support and stability (screws went where the two arrows are).
Step 3: Create bench
We wanted a place to sit and put our shoes on, so we copied the process for our top shelf for our bench, but we used 2x4s and 2x6s this time. We cut our 2x4s and screwed them into the studs on the side of the closet.
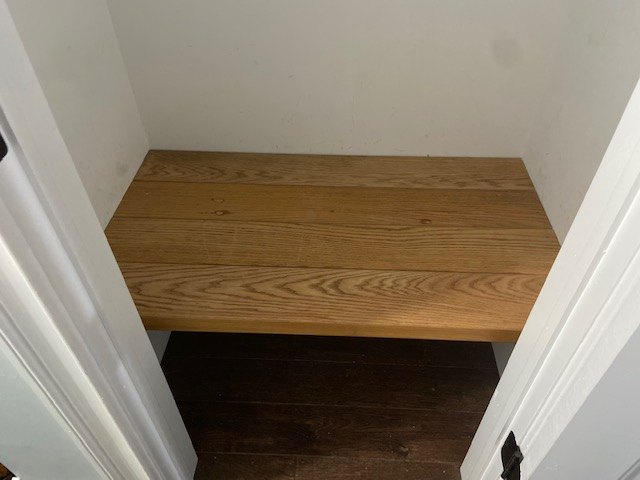
Then we measured and cut our (prestained) 2x6s. We laid 4 of them across the 2x4s but didn't screw them down. They were pretty heavy, and since they ran the entire depth of the closet, so we didn't feel we needed to.
Step 4: Add lights
Small closets with no lighting can get pretty dark, so we added in two motion activated puck lights. We attached these to the bottom of our shelf using the stickies they came with.
Step 4: Add organizational items
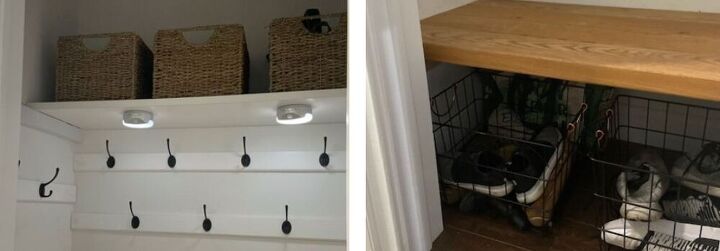
Finally, we bought two wire baskets to put under our bench for shoes, and three woven baskets to store items on the shelf above.
It’s much easier to throw a jacket on a hook than it is to hang it up, plus having a little seat to put your shoes on has been so nice! This has by far been one of the most functional DIYs we've done. It was so quick and easy. I would definitely recommend it, especially if you can't stand to see another jacket thrown over your stair rail banister!
Comments
Join the conversation
-
This is great! I am sure everything is much easier to keep organised now.


Frequently asked questions
Have a question about this project?
What size hooks are those? I ordered some but they came in too small