


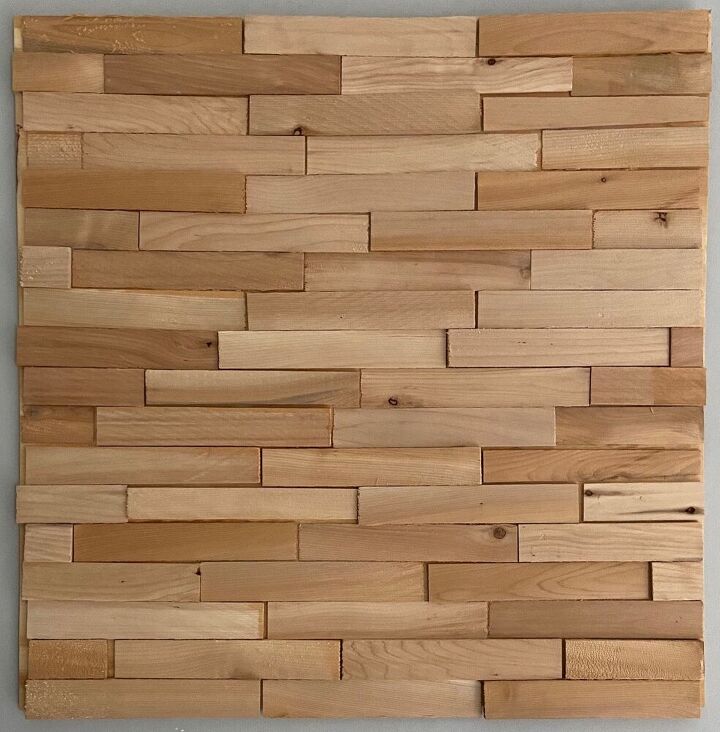
Wood Shim DIY Wall Art

I've been learning about the importance of texture in a home, and I've been trying to find more ways to incorporate it into ours. I came across this wood shim art and decided to give it a try because shims are pretty inexpensive! If you've been here a while, you know I love a good, cheap DIY.
It took me 5 packs of wood shims to cover my 2x2 plywood, but obviously the quantity you need will vary based on the size of your art piece. This whole project cost me less than $15, but you may be able to do it cheaper if you don't go with the precut plywood (and again, of course depending on the size).
What I used:
2x2 pre-cut plywood
Wood shims (8 in)
Liquid nails (wood glue would also work)
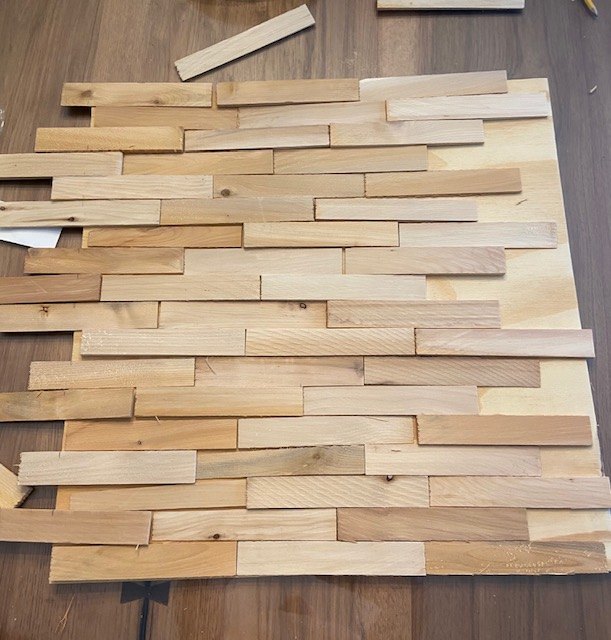
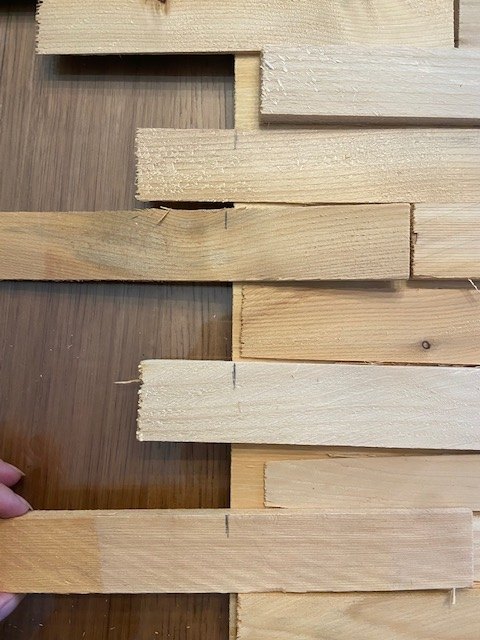
Step 1: Decide on layout
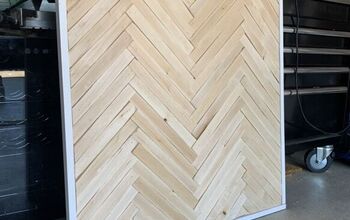
I played around with a few different orientations until I was happy. I tried herringbone, one arrow, and stripes. I laid out the pieces exactly as I wanted them to be. I tried to spread out shims with similar colors, widths, and lengths. I also tried to vary where I had the seams to give it a more "random" look.
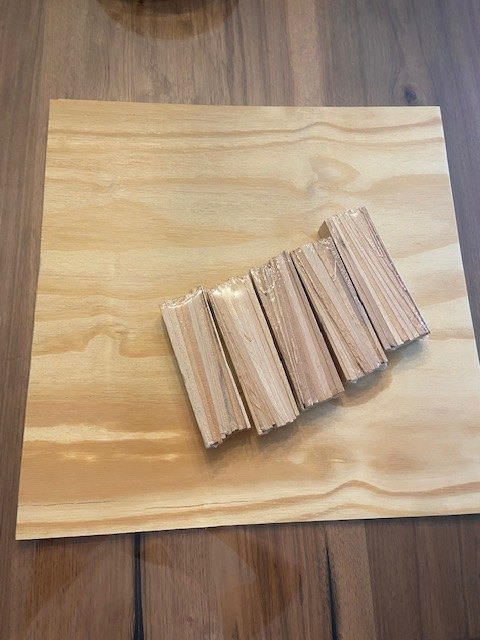
Step 2: Cut shims
I used a miter saw to cut my shims. My project worked out so that 3 shims fit perfectly across the board (8 inch shims, 24 inch plywood). Because of this, after each cut I marked both halves of the shim with the same number. This was so that when I glued my shims down, I could place both cut portions in the same row, keeping a full 24 inch row.
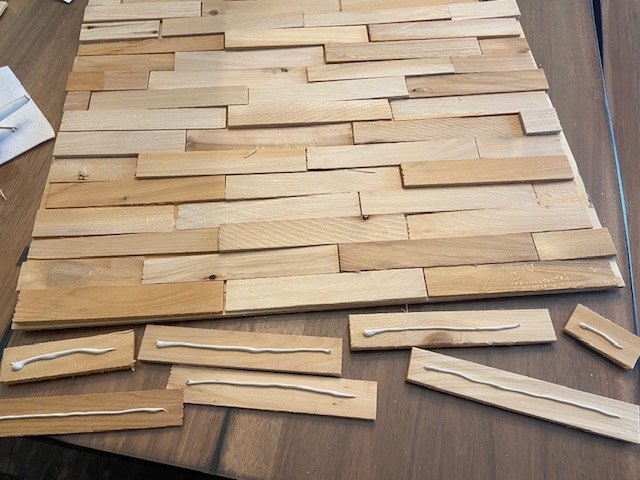
Step 3: Glue
I glued mine down using liquid nails because I had some on hand, but wood glue would also work just fine.
Step 4: Hang (optional)
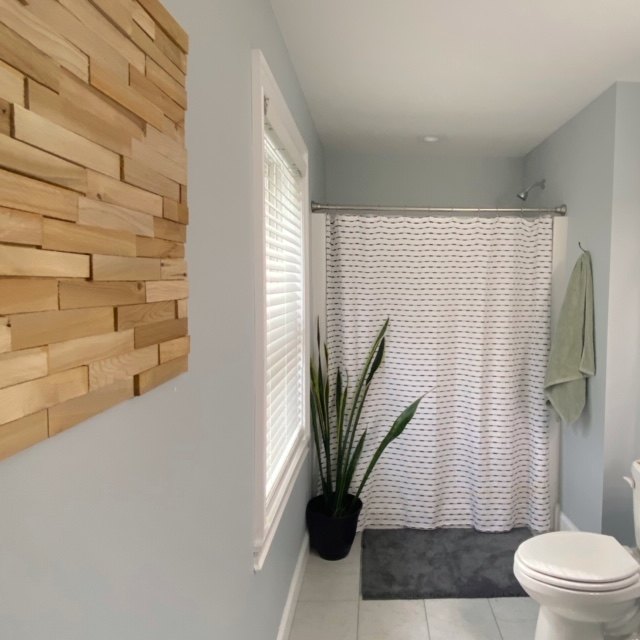
I added a saw tooth hanger which I pulled off of an old frame I wasn't using. I screwed it into the back of the art, and hung it up!
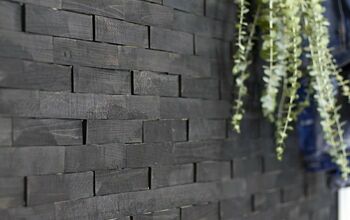
You can also paint/stain your pieces. I've seen cool examples where some shims are stained a different color randomly throughout the piece. I'm still debating on doing this. I'm also thinking about making a frame for it to give it a more finished look, but that’s all TBD.
This was a great way to add some more interest and dimension to a room, and all for only $15!


Comments
Join the conversation
-
Great Idea! Love that it's a piece that rests your eyes, but still says something. It works with boho, modern, minimalist, natural, or eclectic, if it's different colors, Just Awesome!!! ❤️
-
They become great dust collectors. I would seal them with a poly or a varnish so it can be easily dusted. Many HGTV shows are doing this cheap wall art. So glad you glued yours. On the TV shows, they show them being nailed, and they never fill in the nail holes, making the wall art look real cheap when not finished properly. You can also stain these strips. The different strips will take the stain all differently, making it more interesting to look at. Since you did not have even edges, I would have trimmed it out to cover that.


Frequently asked questions
Have a question about this project?
Could these be glued right onto vinyl behind countertop as a backsplash?
I guess I didn’t read what the backing was??? What did you glue it to again? Ty
if you prep your wall, why can't you just glue to your sheetrock?? I guess because if you remove this, it will remove the paper from the sheetrock. if I do a whole wall the board is going to be mighty heavy?? got to be a better way????