


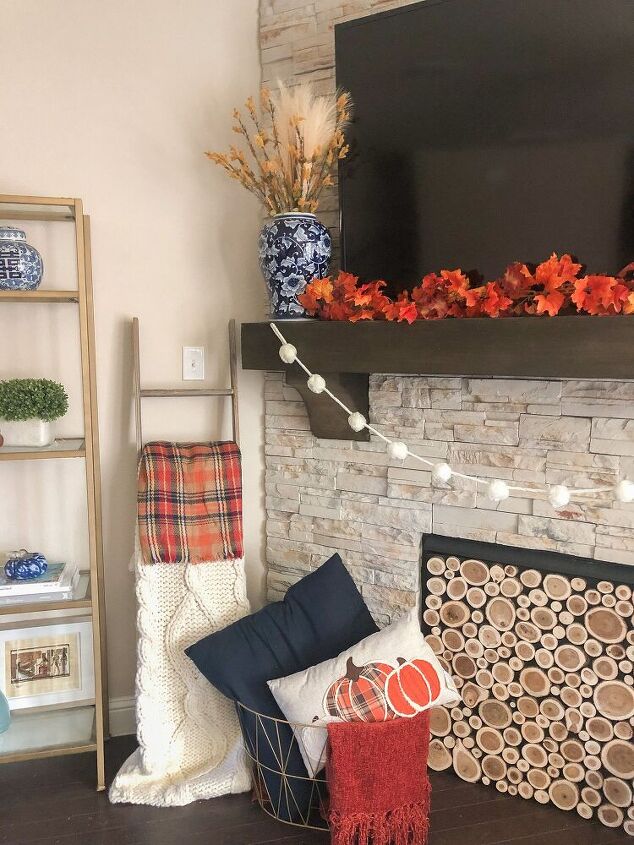
Fireplace Stacked Logs
I've been seeing this stacked log fireplace insert all over Instagram and I love it. Having the television over the fireplace is difficult for decorating and also results in two black boxes that take up most of the fireplace. So this is the perfect solution for me! I was all on board for buying one of these on Etsy, but $200 seemed ridiculous. I managed to make my own for around $75!
One thing you should know about me is that I'm all for the quick, easy, simple DIYs. If it requires more than 5 steps, odds are I'm not going to accomplish it. Luckily, this DIY is crazy easy and requires no experience or skill whatsoever!
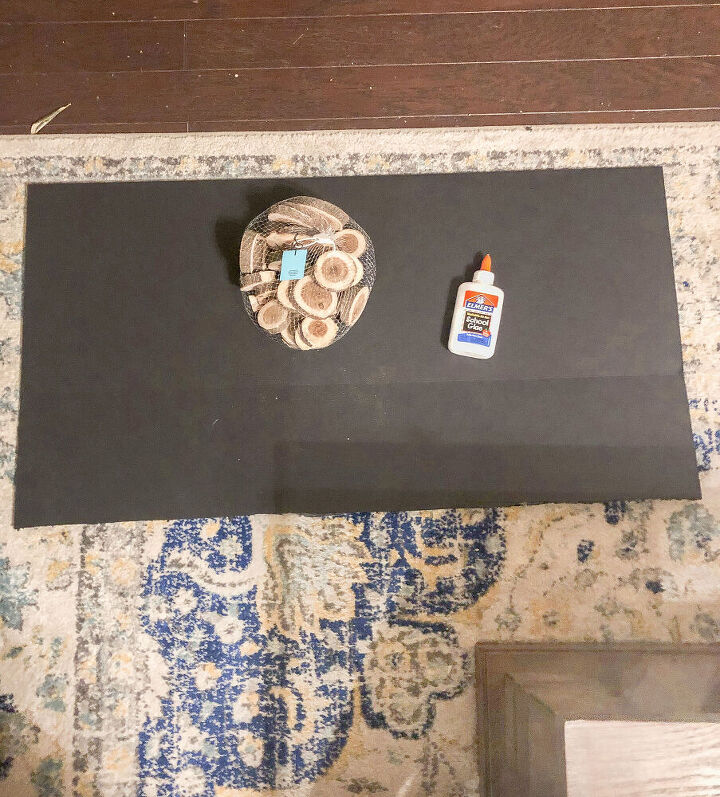
Measure your fireplace (using a tape measure) and cut the black foam board to the exact dimensions of your fireplace. My only tip for this step is to not try to cut through the foam board, that's an easy way to tear up your floors and your box cutter. Instead cut about halfway through the board, then crease it and cut through the back side.
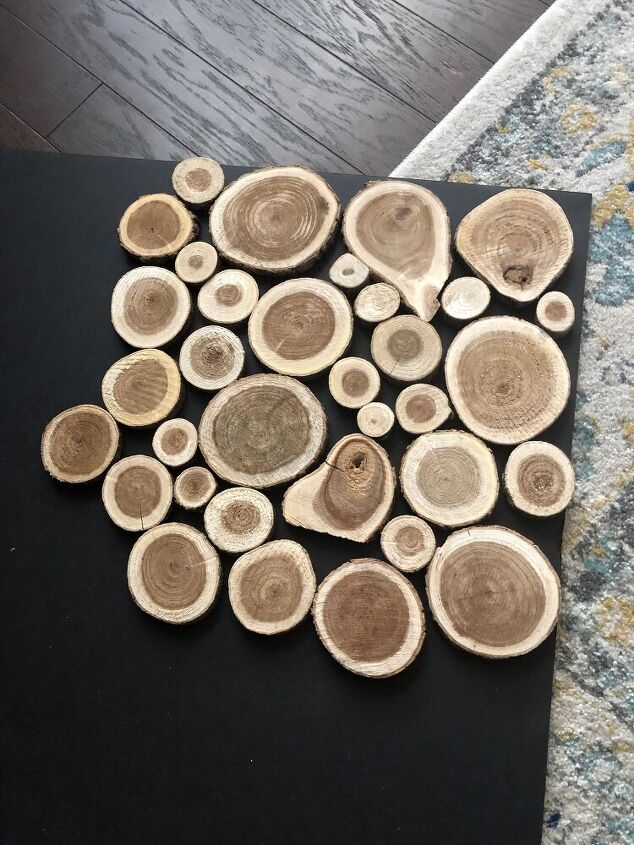
Lay out your wood slices on the newly cut foam board. This surprisingly took less skill than I thought it would. I didn't have a plan going into this step, I just went for it and started laying pieces down. One trick I did learn was to scatter out the larger pieces first then work around them with the smaller pieces.

Once you have all your wood pieces laid out, take a step back and look at it from far away. If anything doesn't look quite right, make adjustments. For example: if you have section that has too many small wood pieces and not enough big ones, adjust it. Or if you have too many large pieces clumped together, switch them out for the smaller ones. This step is all about what looks good to your eye.
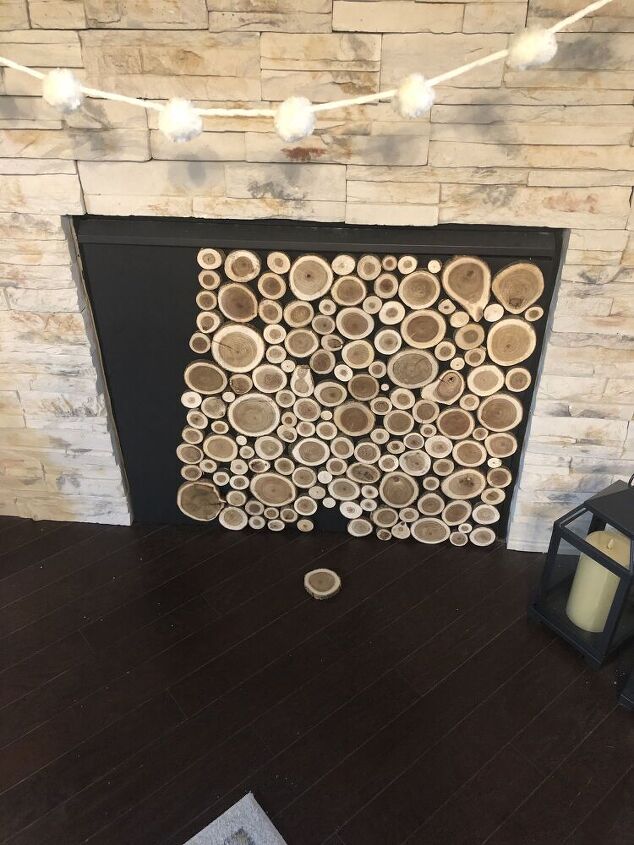
Glue it all down. No tricks here, just put glue all over the backside of the wood slices and start laying them down. I made sure to let it dry overnight to make sure everything was dried.
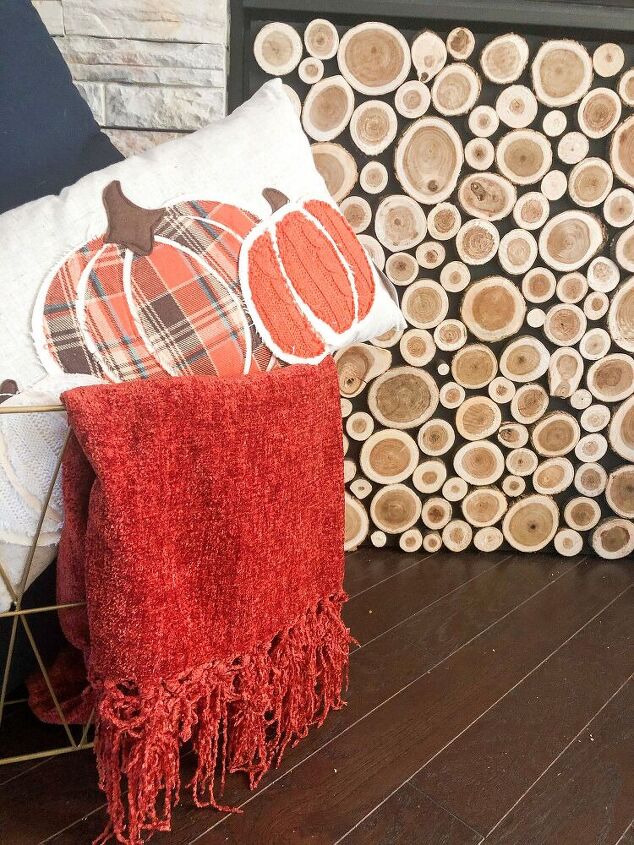
Sit it up against the fireplace. I thought this step would be a little more difficult and require me to attach this to the fireplace, but mine is able to lean up against it with no problem. Also, it's very possible that you'll miss a couple pieces that you forgot to glue down :)
Resources for this project:
See all materials


Comments
Join the conversation
-
Love it
-
Now you can hide stuff in the box. Lol lools great.


Frequently asked questions
Have a question about this project?