


Vinyl Plank Floor Install Tips and Tricks

This is going to be more of an experience than a tutorial, and may be lengthy, but will be full of tricks and tips we learned along our way, on how my husband and I, as first time floor installers, got our existing carpet up and out and vinyl plank floors INSTALLED in two days time! Let me preface this and disclose that my husband and I are in NO WAY professionals, that's why I'm just offering my experience rather than a step by step guide on how to do these floors. There are many more qualified individuals than myself for that. I highly recommend doing your research prior to purchasing any product! There are tons of options out there! I watched DOZENS of videos, and did tons of research on flooring options before we finally decided to dive in. We went with MSI vinyl plank flooring, it is a floating floor, comes with the underlayment already attached so it is a truly one step floor. It is waterproof, scratch, stain and slip resistant and is a tongue and groove, click and lock, type installation, these were the key factors that decided our purchase! We have an active 6 year old and a large excitable dog, so this floor is going to take a beating! Are you ready for what we learned?! Let’s go!
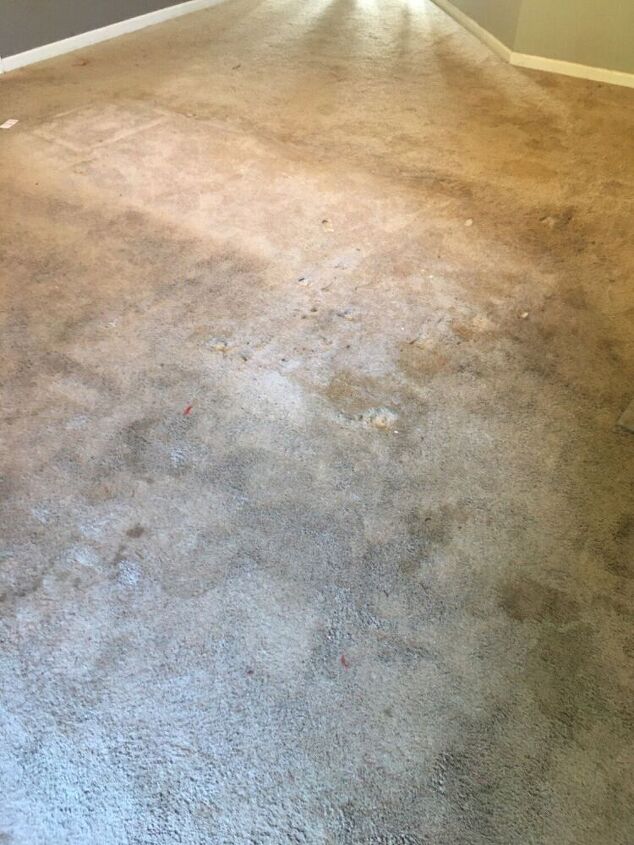
Goodness.... GROSS
Talk about airing out the dirty laundry.... or carpet in this case... This carpet as seen is fair share of abuse, as you can clearly see. We have tried cleaning it but the stains always resurfaced. We had on older dog, who clearly had his fair share of accidents, and even with deligent spot cleaning the stains were deep and set in. It was time to finally rip this nasty carpet out! Wear gloves, a mask, and ideally eye protection for this part, you will be shocked at the amount of trapped dust and dirt in the carpet padding.
I don't have any photos of the carpet removal, but it was surprisingly easy! Use a sharp utility knife to cut through the carpet, we started about 4 feet from the wall, then from the cut edge start pulling the carpet up and back, be careful for tack trips around walls and doorways! The smaller the cut strip the easier it will be for you to move, carpet is a lot heavier than I had expected it to be!
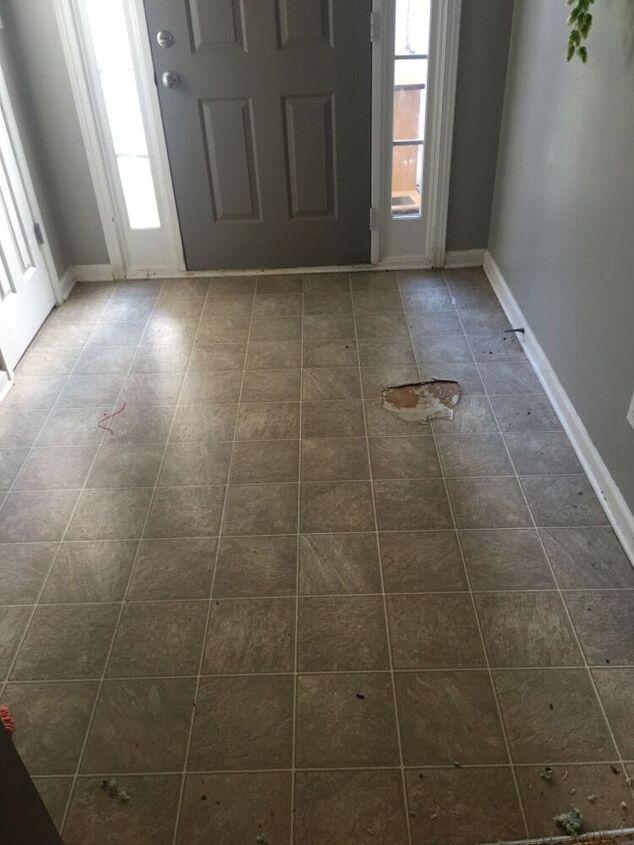
Also.... this!
Oooooh the eaten floor. Yes.... EATEN. Our pittie ate the floor when she was a puppy, because, well.... puppies! So we have been clever with furniture placement and rugs for almost 5 years now, so glad to get rid of this floor hole! The vinyl plank flooring can be placed over existing hard surface floor, ie tile, linoleum, concrete, etc, but it has to be smooth and level, and with that hole there, we definitely didn't have a level surface. This was fairly easy to take out, but glued down linoleum can be difficult, I watched some videos with flame guns and all sorts of chemical agents you can use to get it up, luckily we didn't have to do any of that, a few cuts with the utility knife and some brute strength from my husband and they came right up. We did have to get a chisel and get up a few stubborn spots of adhesive but nothing too serious!
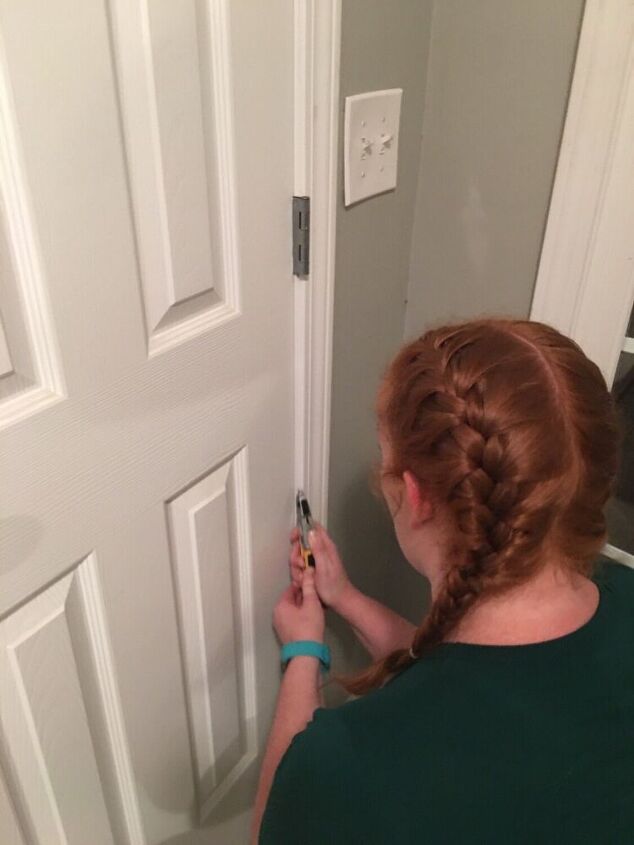
Remove trim
We removed the door casing and baseboards around most of the area, we did leave one wall worth of baseboard because it had plenty of space left at the floor to install our planks, but it the baseboards sit flush to the floor you will want to remove those! Simply cut the caulk with your utility knife, take you time with this! I had to use both hands because they arent the steadiest, but the more careful you are the more likely you will be able to reinstall the same trim after all is said and done. Once the caulk is cut use a pry bar to gently lift the casing off. Trim nails are LONG, 2 inches to be exact, so be careful for those also! If you plan on reusing your trim, put it out of the way to ensure no one steps on them, we don't need and trips to the ER in the middle of our DIY's, do we?
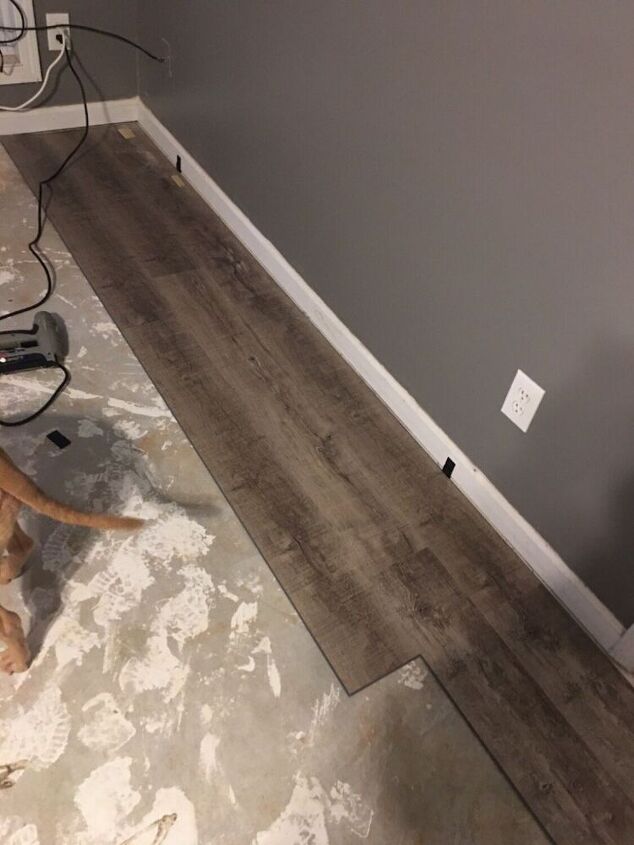
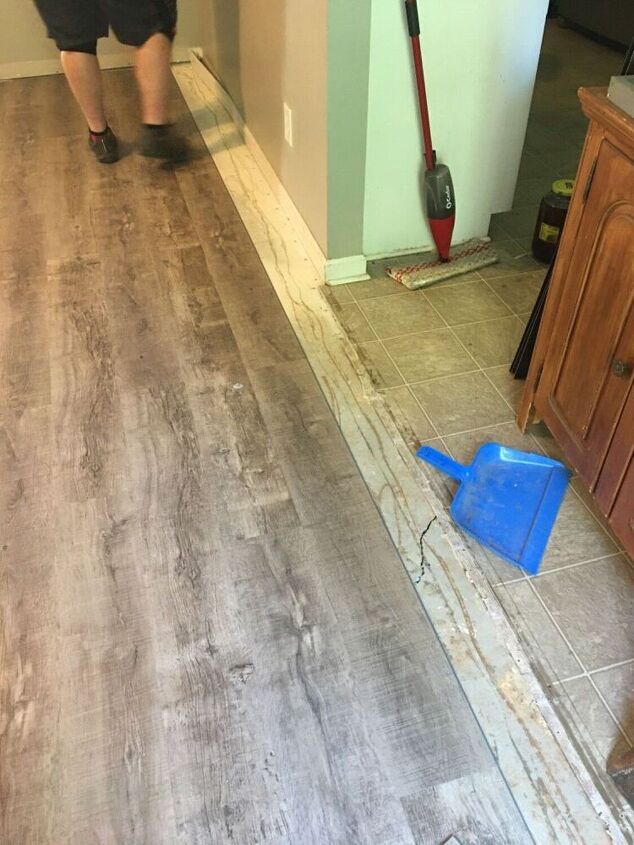
Use spacers!
Once all the old flooring is removed and everything is cleaned up your ready to start laying the floors! I didn't take any pictures of the cleanup phase because we were knee deep in dirt and tack strips and it wasn't fun! We used a combination of a flat shovel and a chisel to remove any stubborn spots of adhesive/ carpet padding/ debris from concrete sub-floor and cleaned well with a broom and a shop vac. Since this floor is floating we didn't have to clean the concrete with any cleaning solutions prior to laying the panels, just make sure it is as clean as possible! The flooring manufacture recommends leaving a 1/4 inch space at any wall to allow for expansion, I'm not entirely sure if they are talking about the flooring product or the foundation itself.... but better safe than sorry! We used my brad nailer to take the spacers (the little black square on the baseboard) directly to the baseboard or wall around the room.
You will also want to measure your room, if your going to end on a partial board on one end its better to split the distance on both exterior walls of the room than to have one side with a board off size, leads to a more symmetrical finish. We were lucky and ended on a whole board so we started with a whole board without having to cut off width.
Trim as needed!
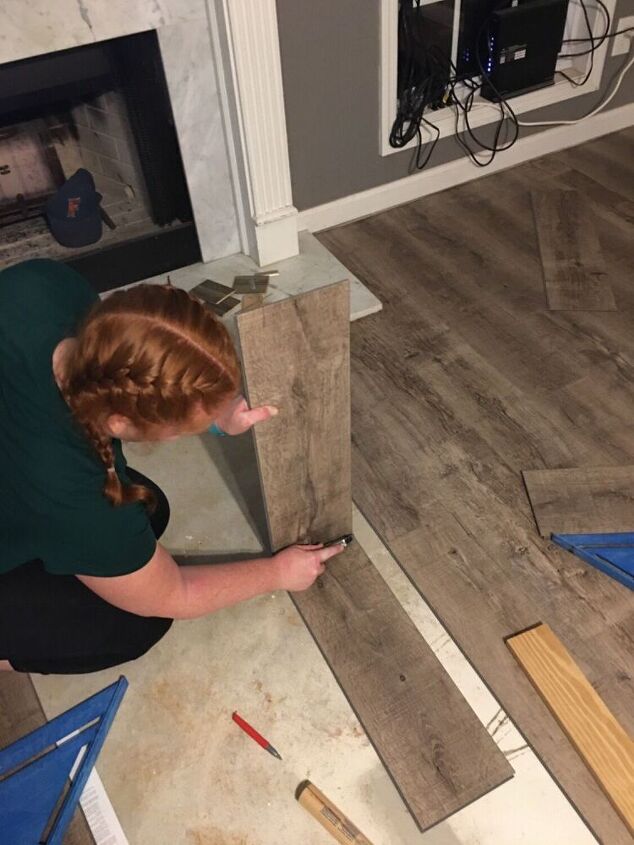
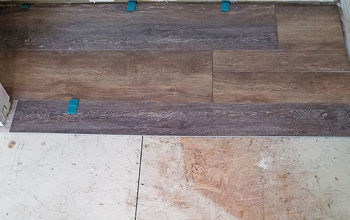
Obviously the seams need to be staggered in order to stay in place, you don’t want any boards less than 8 inches in length. We cut ours at 12 “ and started the second row there. They reccomend a simple scour and snap technique. Using a straight edge measure, mark, scour and snap! We found it easier to scour the back padding, snap it, then cut the vinyl along the line. The utility knife would tend to slip when trying to scour the vinyl side and we were getting uneven cuts.
Tip!
Wear knee pads... hubby had a pair he kept offering, but I'm stubborn and insisted that I did not need them, my bruised knees by the end of the weekend may beg to differ.
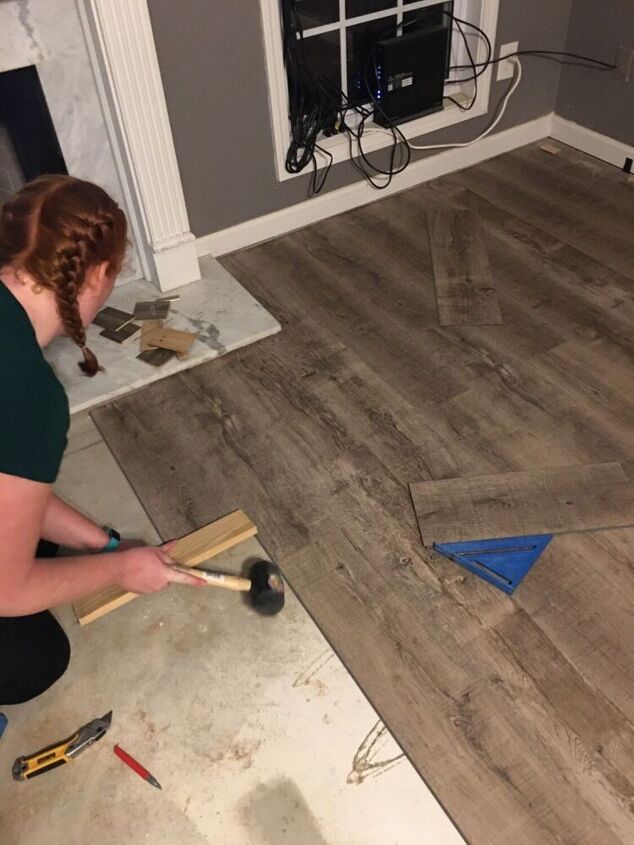
Tap them in!
Use the edge of a board to lightly tap the plank into place. Be careful and make sure you over the tongue/groove an on the hard vinyl top layer, if you tap it into place by the tongue/groove you risk damaging that layer and it won't connect properly to the next board, and we don't need that! We did learn by trial and error with this part, just take your time, line up the seams and gently tap tap, as we got farther along into the project we found that as long as you like it up nice and snug we really didn't need to tap it in, it just locked on its own!
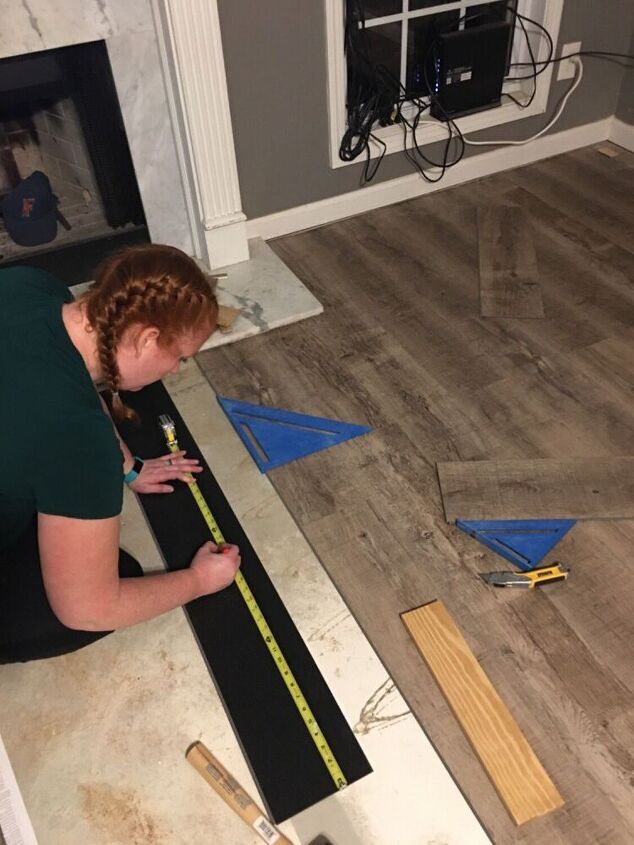
This corner!
This is where I struggle... angles. Thank goodness hubby is a math man and taught me some useful hacks!
Measure from the ending board to the longest point, mark it on the board, measure from the ending point to the shortest point, mark it on the board, then use the speed squard to determine your angle and you only have to do the math once! Unless of course you have multiple angles!
And finally!
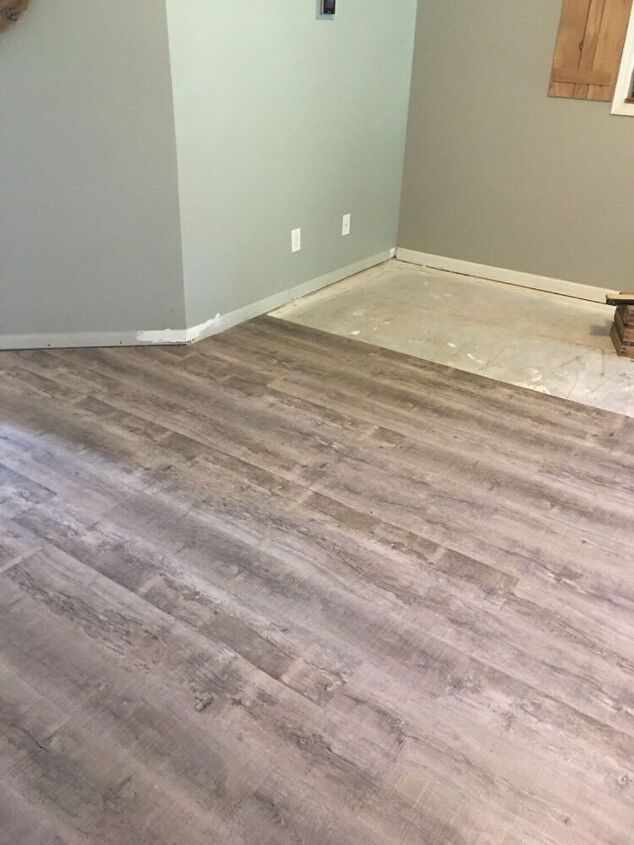
We ended on a whole board, which I'm not going to lie, was a little tricky to get locked into place. I had to do this row on my own, hubby's hand were to big to manuever the boards into the right place! We ended where the kitchen started for now, so you will need to place a transition at the doorway in this case! We will eventually be doing our whole house! So if at any point we discover any new hacks I will update this post as needed!
Hope you learned at least a few tricks, and if you have any that may help us out, please comment below! I welcome advice as well as corrective criticism!
Until next time! Stay crafty!


Frequently asked questions
Have a question about this project?