


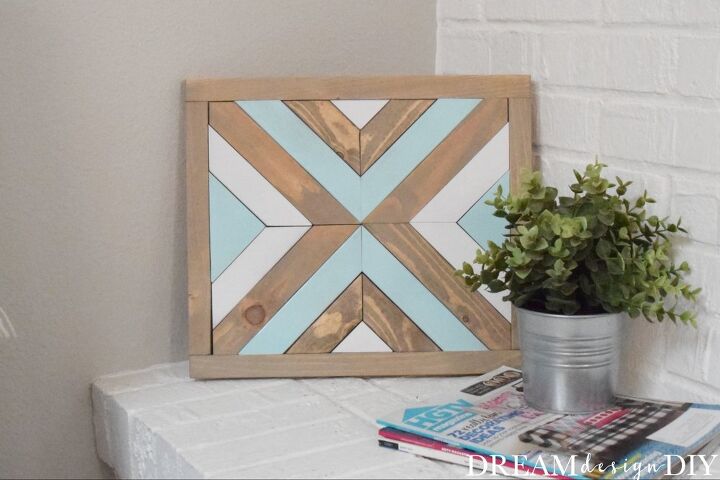
Simple DIY Wood Art Using Scrap Wood
Need a quick and simple way to update a wall or fix an empty space?
Make this simple DIY wood wall art for free using scrap wood. I used scrap 1 x 2s for the chevron pieces and rip cut a 3/4 inch thick board to 1 inch wide pieces for the frame. For the back I used two pieces of thin 1/8 inch plywood scrap.
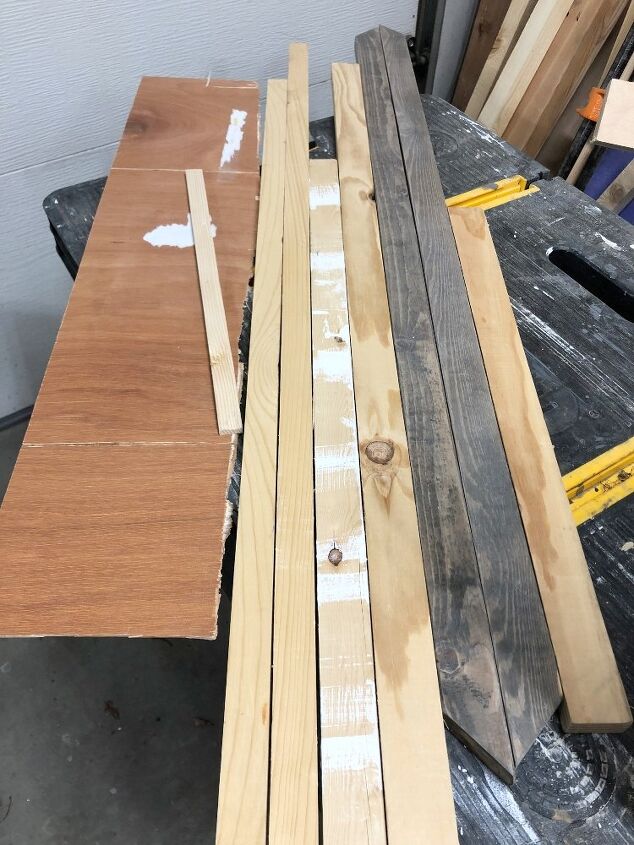
Here were my scraps.
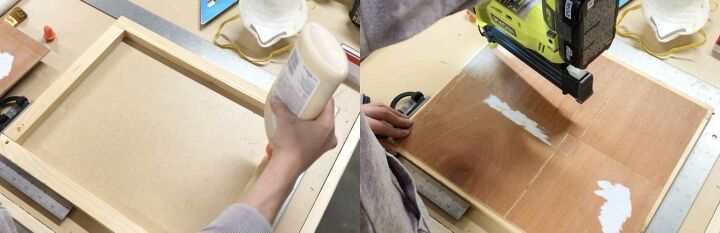
Start out by making the frame. Arrange your frame pieces with the backside facing up. Use a square to keep it aligned. Add the plywood backing using wood glue and brad nails or finishing nails. For the back piece, I had a smaller strip of plywood to work with so I cut it in half and trimmed both pieces the same length. The two pieces covered the back of my frame.
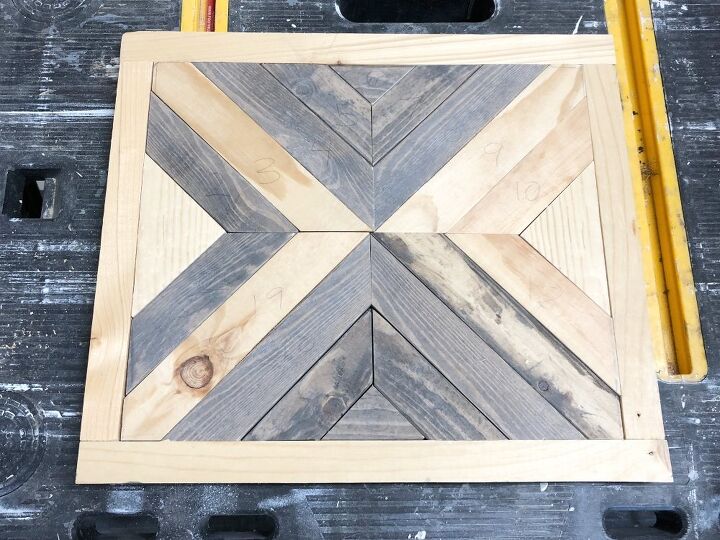
Cut and add the chevron pieces. The length and amount of chevron pieces vary depending on the overall size of your frame. Measure and mark center. Cut one end at 45 degrees. Place the point at center and mark the other end for another 45-degree miter cut. It may take a few cuts to get the correct length. Repeat this until the frame is filled. Dry fit all the chevron pieces.

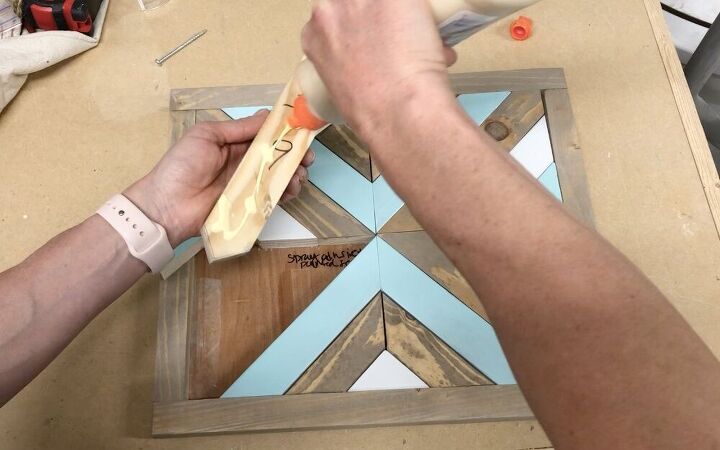
Choose your paint or stain color. I numbered each piece and marked the backside with the intended color/stain for easy retrieval. I stained the frame by layering Varathane Sunbleached and Mixwax Early American. I used the same stain for a few chevron pieces and the other pieces I used Rustoleum flat white and Krylon satin Sea Glass. Allow the stain/paint to dry.
Glue your pieces in place. Apply wood glue to the back of each chevron piece and put in place. I left most of the pieces in place and glued a couple at a time. This makes it easier for placement. Allow to dry. Add hanging hardware if hanging, or lean it against a wall.
If you are wanting to make other free or cheap wood projects check out these scrap wood projects.
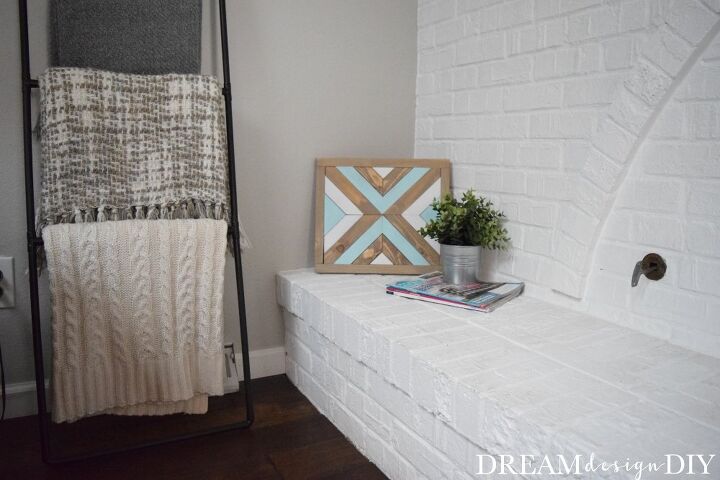
This modern blanket ladder is another project you can do to spruce up an empty space.
Thanks for checking out this post. Stop by and say "hi" below at Dream Design DIY.
Tiffany
Resources for this project:
See all materials


Comments
Join the conversation
-
It’s impossible to follow directions when the reader doesn’t know what Is being made. It is an attractive result.
-
Looks close to the one I made. Love making these. Now I have another design to try. Thank you for the post. Good job.👍


Frequently asked questions
Have a question about this project?