


How to Restore Leather in 4 Easy Steps

Save money and time by learning how to restore leather furniture, leather shoes, leather purses, leather jackets, leather pants, or really leather anything in 4 easy steps with this DIY tutorial!
To find more DIY inspiration for the home and family visit us at Hammers N Hugs!
A while ago our family took a road trip to pick up one of my Facebook Marketplace finds for our current fixer upper - the French Country Cottage.
I had been simultaneously selling our current furniture and buying “new” furniture that would work better in the space.
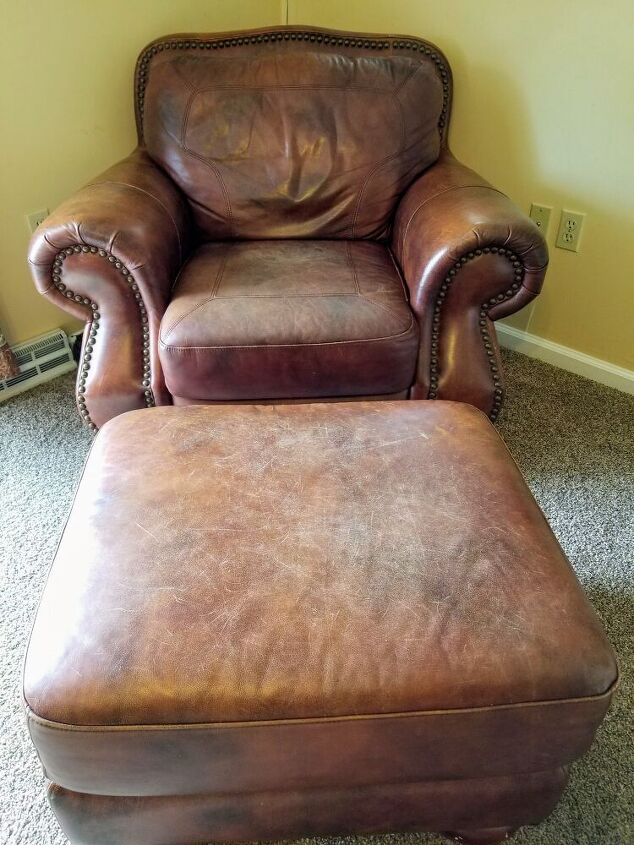
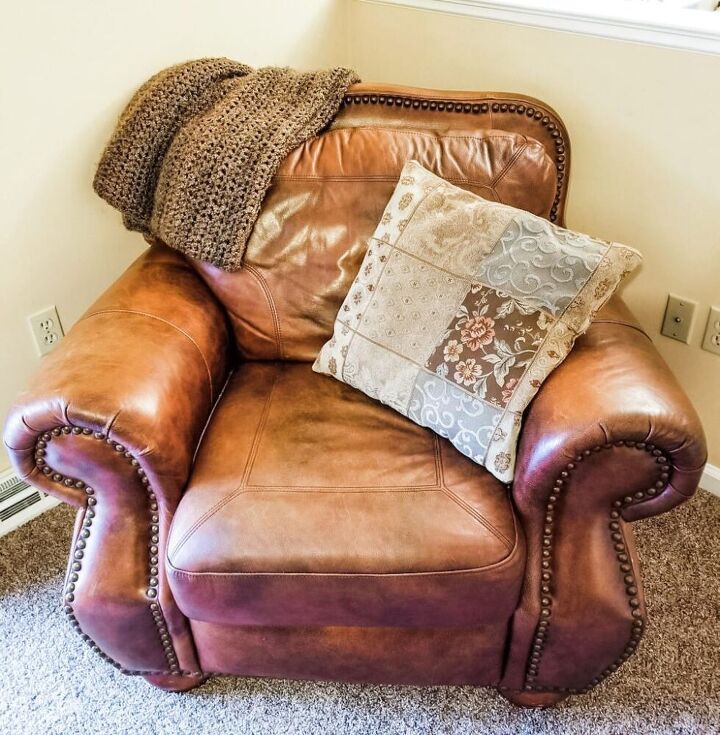
One of these amazing finds was a 4 piece set of leather living room furniture. The seller assured me that there were no major tears, and other than having been used for many years the cushions and leather were all in good shape.
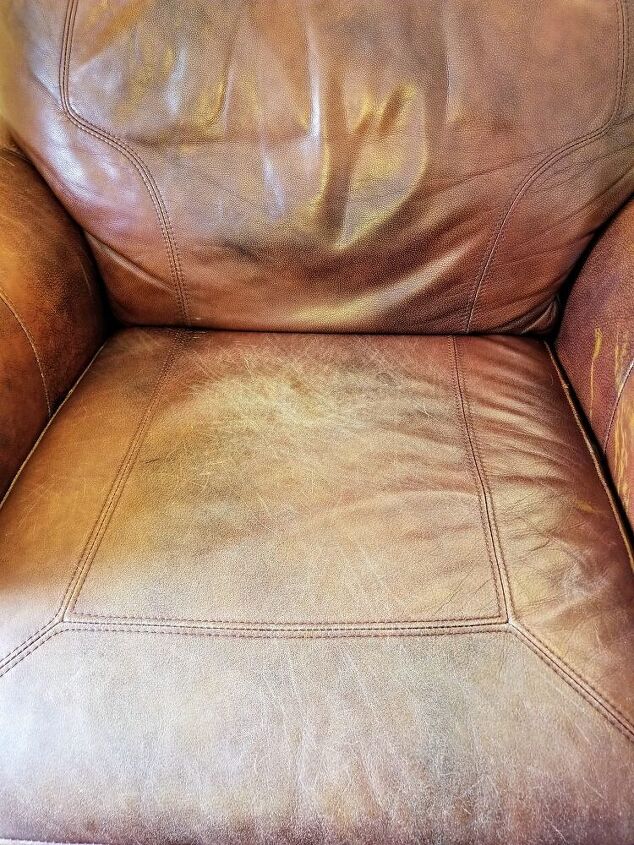
This is the seat on the chair. You can see how unbelievably dry it is.
Leather is basically skin. Literally. Animal skin.
It is supposed to stay conditioned and moisturized in order to stay soft and avoid cracking.
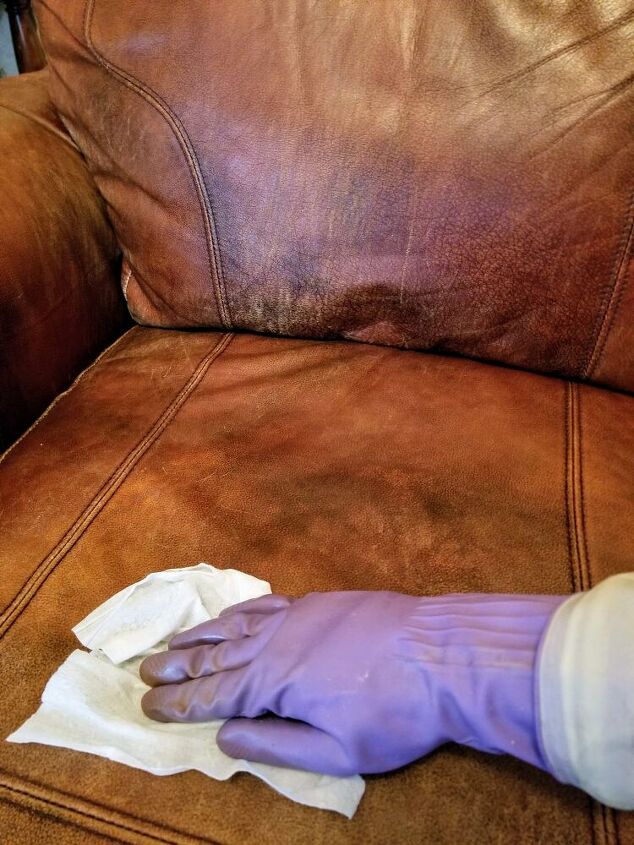
Dilute approximately 2 T of the Leather Honey Cleaner in one cup or 8oz of lukewarm water.
I used baby wipes dipped in the cleaning solution to wipe down the leather.
Make sure you let the leather completely dry for several hours. It should not feel damp to touch.
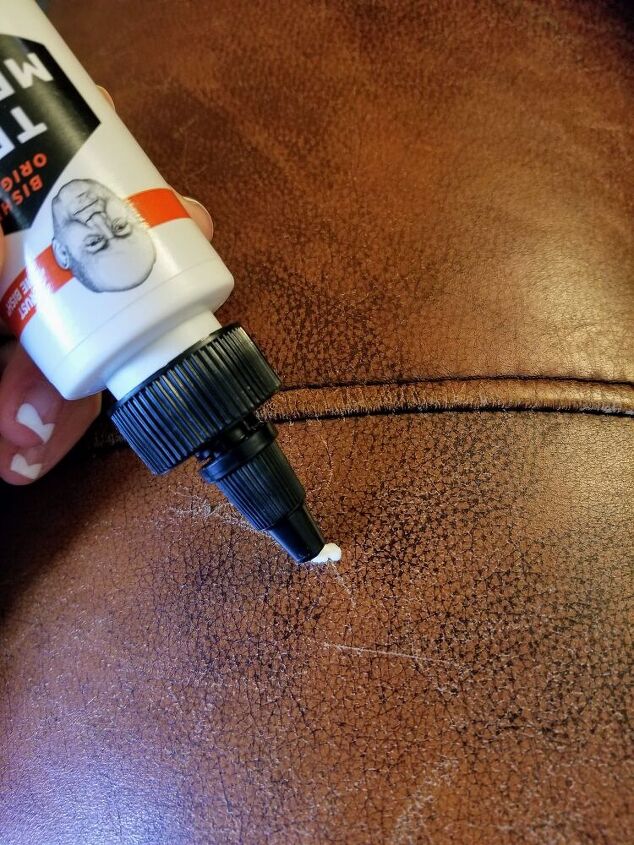
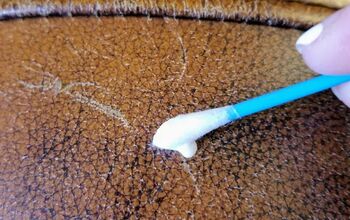
Inspect the leather for any tears or rips.
For larger cuts and tears consider a larger tear mender kit.
To use the small tear mender bottle I simply took a tweezers, held the tear in place while gluing the edges together.
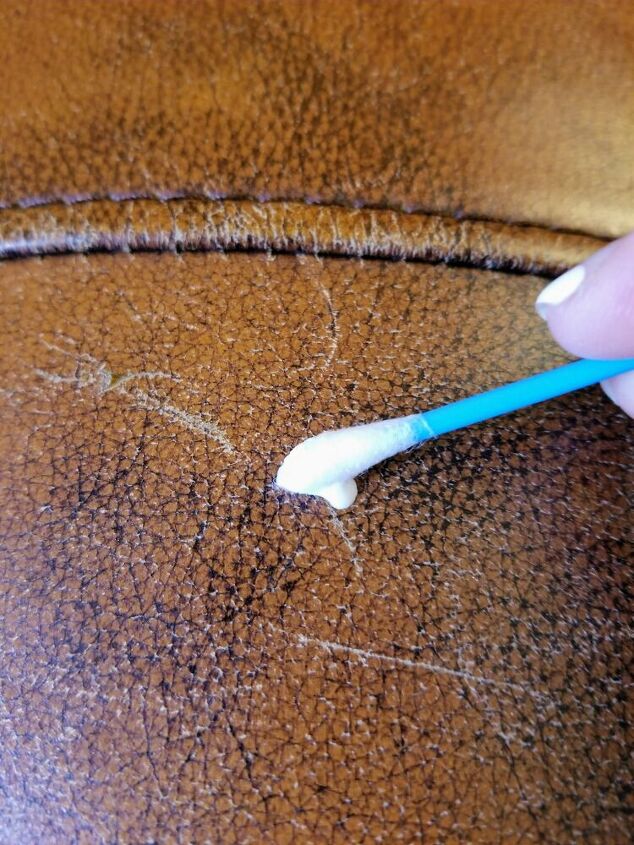
I took a Qtip to wipe off any excess or drips.
Allow to dry according to directions on the bottle.
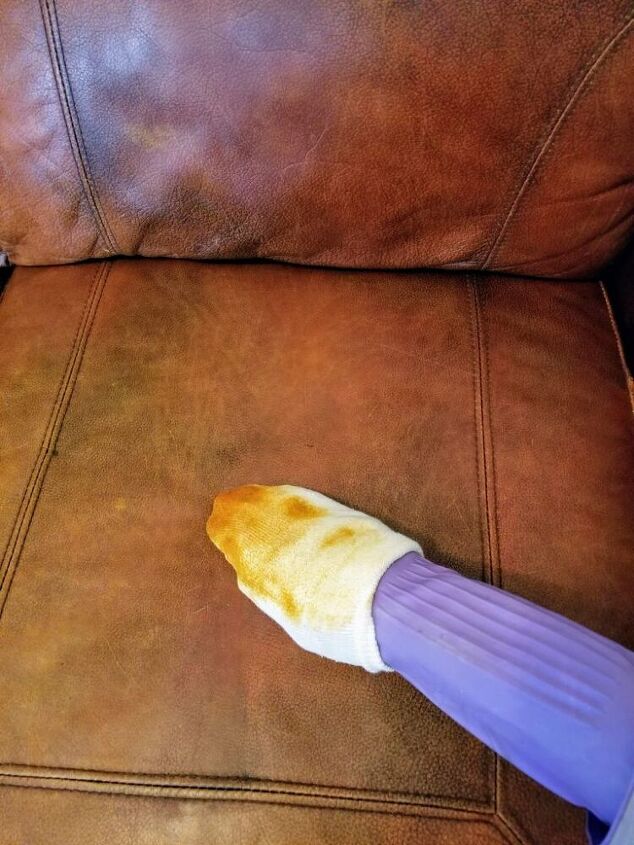
The Kiwi Shoe Polish comes in tan, black, white, brown, blue etc. Find the color that is closest to the color of your leather.
Take a clean, old sock and apply the polish to your piece.
I used the polish on all of the leather because of how worn and cracked it was, but you can also just use it as touch up as needed.
BTW, here is a tip on how to open these cans. I have two masters degrees, and I had to YouTube how the heck to open these metal shoe polish cans.
The bottom line is that you twist the metal piece along the side to catch under the lip of the lid and pop the top off. Then you just press the top back on when done!
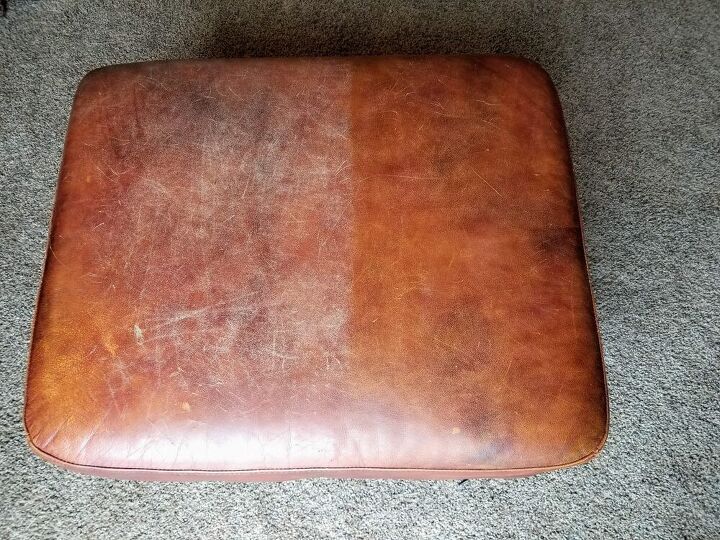
You can see the difference just the shoe polish makes.
Let the shoe polish set overnight and then move to the last step.
Using Leather Honey’s Leather Conditioner put a small amount on another clean, old sock or the Leather Honey Lint Free Cloth and rub into the leather.
A little will go a long way, but if the leather is really dry as these piece were, you may need to go over an area a couple times.
Again, leather is skin and needs to be moisturized so rub it in as you would rub lotion onto your arm.
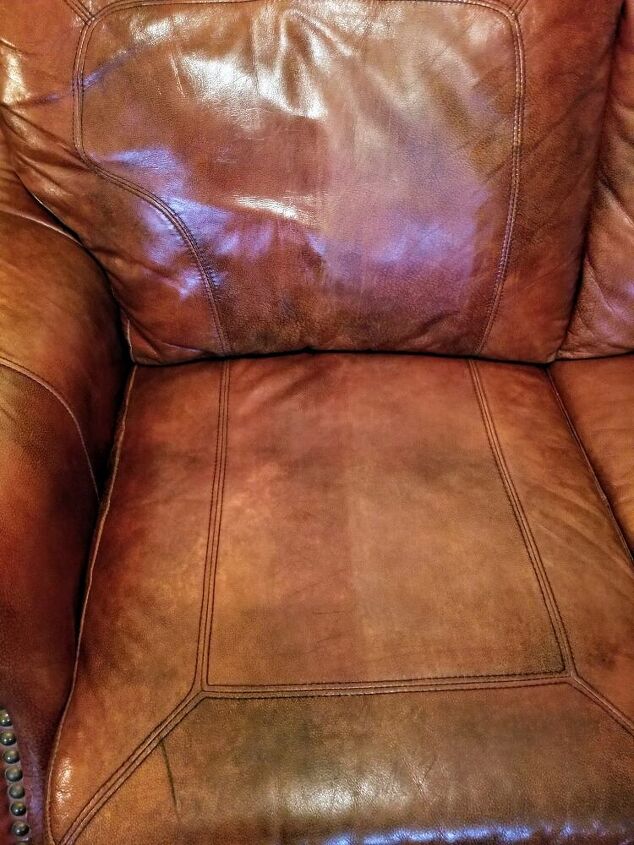
This is my favorite step. I mean look how much healthier it looks!
Resources for this project:
See all materials


Comments
Join the conversation
-
Leather conditioning
-
Leather restoring


Frequently asked questions
Have a question about this project?