


$1 Pumpkin Farmhouse Makeover
How to turn $1 pumpkins into 7 different farmhouse, vintage inspired pumpkins.
For detailed step by step, watch the tutorial here ---> https://youtu.be/fmE1JYnbB7o
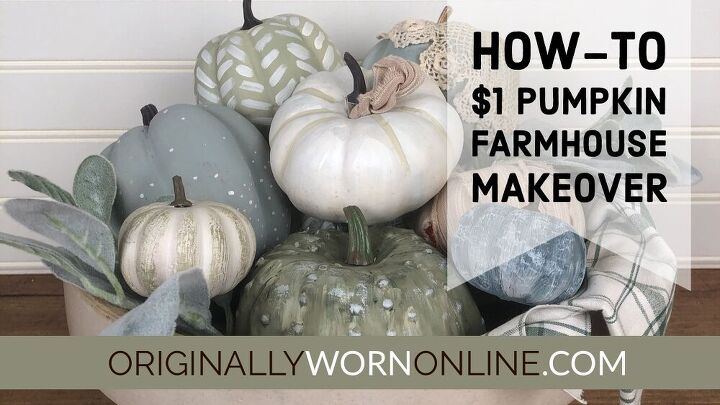
Hello friends! I love the muted colors for fall that this arrangement creates!
Here are the supplies you will need. (You can certainly choose your own brands and colors of paints, this is just what I did.)
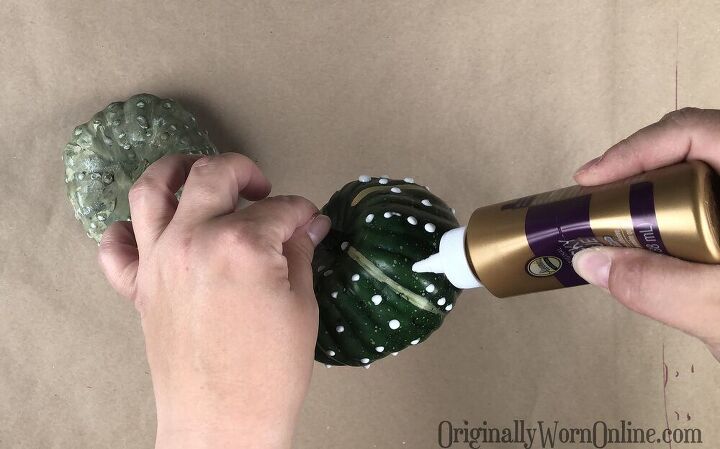
-Glue: Mod Podge & Tacky
-Annie Sloan Chalk Paint in: Old White, Versailles, Duck Egg Blue, Olive, & Aubusson Blue
-Fabric: Scrap lace or dollies & scrap cotton
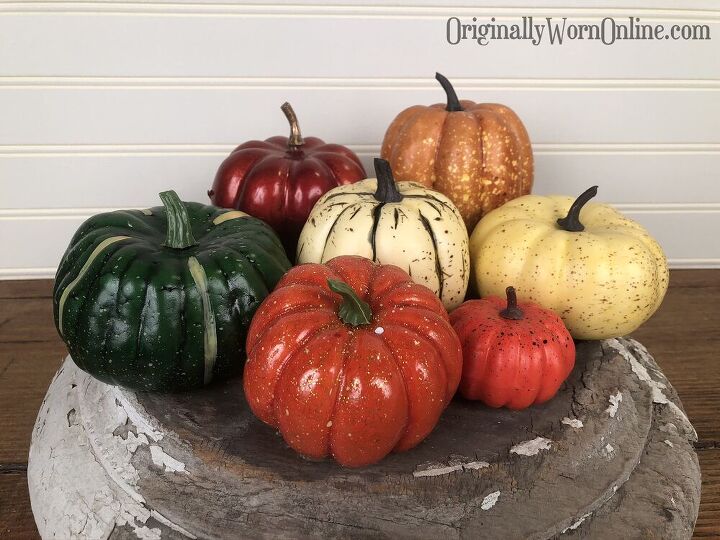
Here are the pumpkins I started with. All were purchased from the Dollar Tree or Walmart. None are terrible, just not the color scheme I was going for.
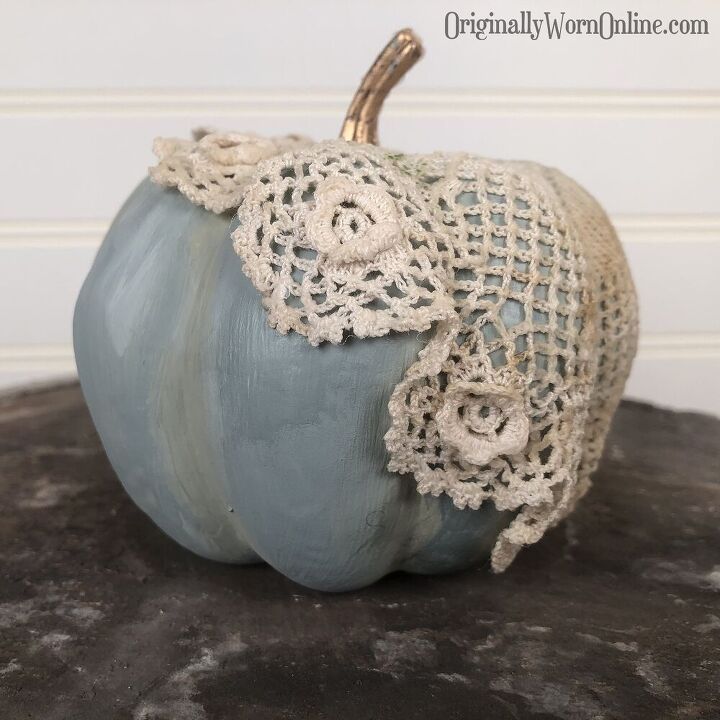
This is the first pumpkin I created. To make this one you will need to paint a layer of Annie Sloan Duck Egg Blue all over. Let dry.
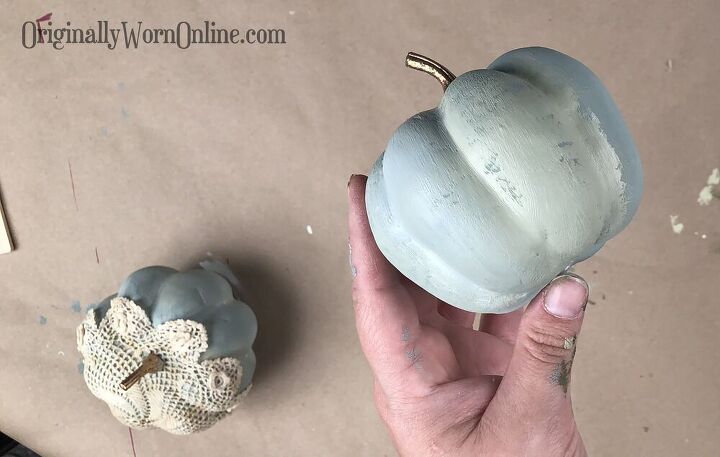
Then paint a layer of Annie Sloan Duck Egg Blue, Versailles, and Old White all at the same time, while all the colors are wet. This will allow you to blend the colors together to create a varied blue/green pumpkin. Let Dry.
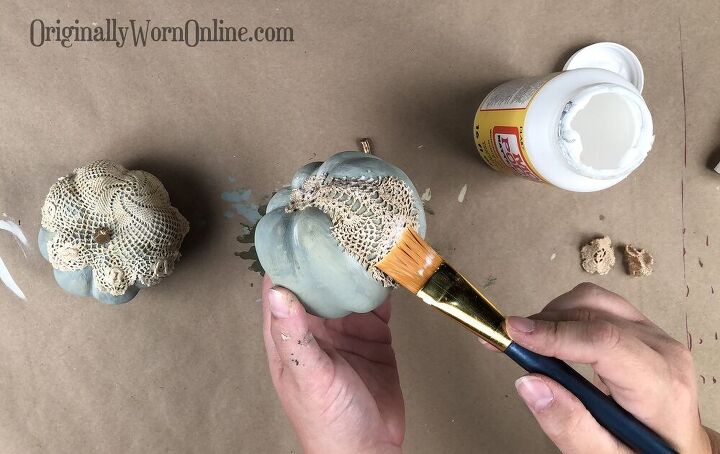
Then take dollies or piece of lace and mod podge into place, forming around the pumpkin. Let Dry.
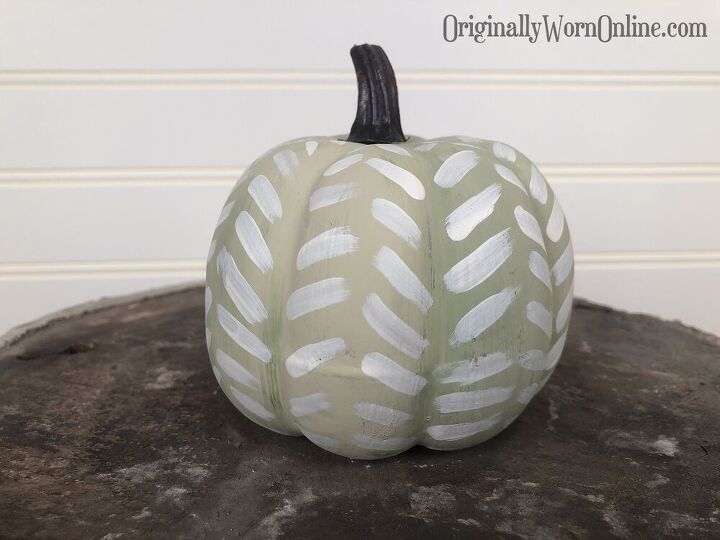
For this pumpkin, I painted a layer of Annie Sloan Versailles all over. Let Dry. Then painted Annie Sloan Versailles and Olive at the same time, to give the color variation. Let Dry.
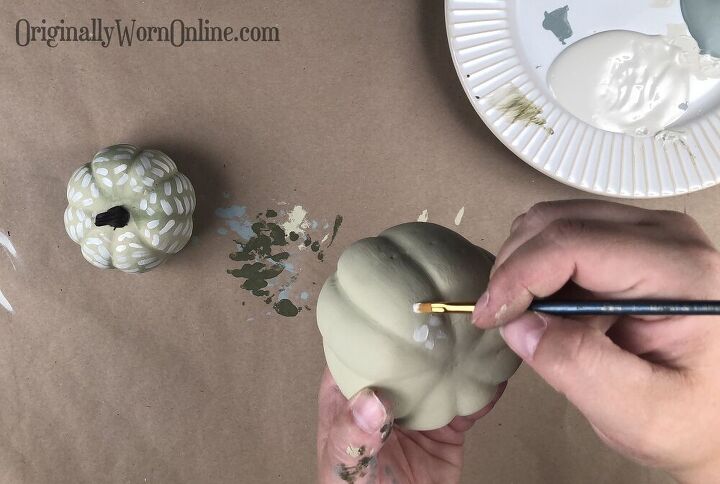
Next, take Annie Sloan Old White and a flat tipped paint brush and paint a herringbone pattern on each section of pumpkin. Let Dry
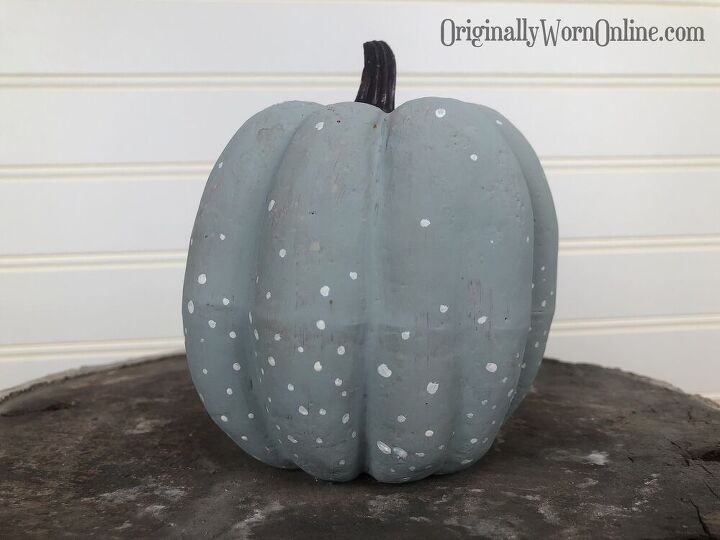
This pumpkin has one layer of Annie Sloan Duck Egg Blue painted all over, allowing some of the orange under color to peek through. Let Dry.
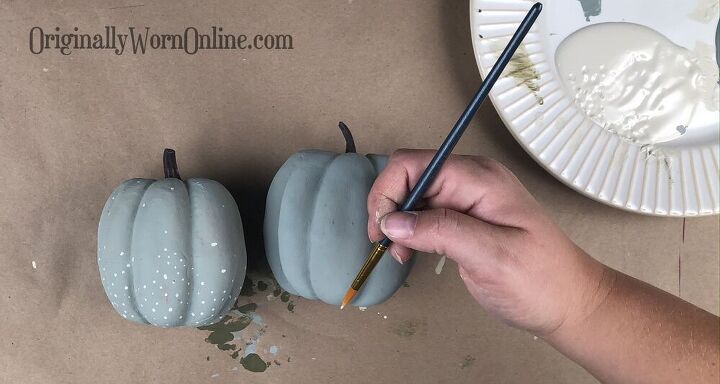
Then take a small pointed tip paint brush and add dots all over in Annie Sloan Old White. I made the dots heavier on the bottom, fading up. Let Dry.
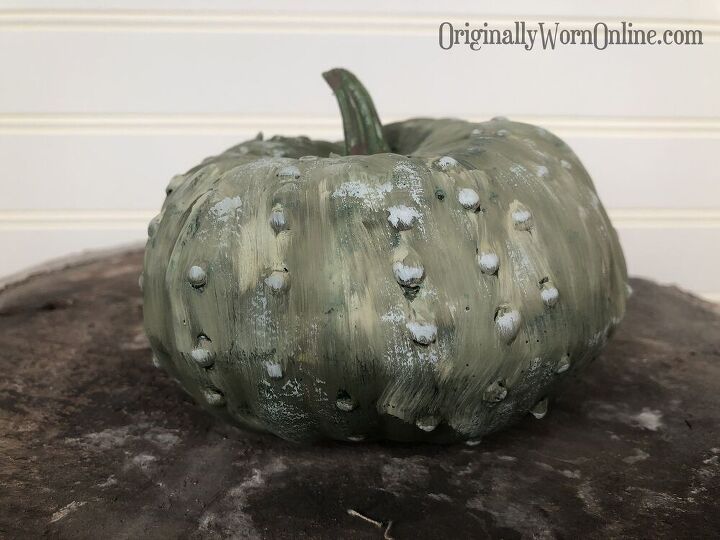
This pumpkin has an added step to make it even more special.
First, take tacky glue and place dots all over the pumpkin. I kept mine is rough rows. Once the glue is dry, paint a layer of Annie Sloan Olive. Let Dry. Then blend Annie Sloan Olive and Versailles in the next layer. Let Dry. Dry brush the glue bumps with Annie Sloan Old White. Let Dry.
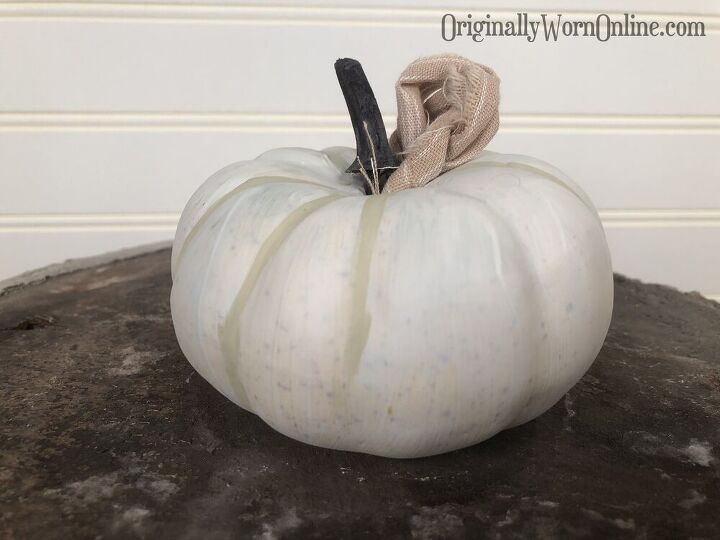
This little one is pretty simple. Paint a layer (or two) of Annie Sloan Old White. Let Dry.
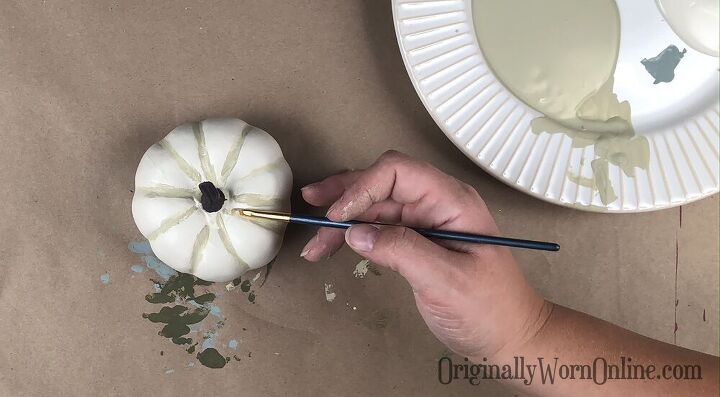
With Annie Sloan Versailles, paint the grooves in the top of the pumpkin, stopping part way down. Let Dry. Twist a scrap piece of fabric and stick into the stem hole.

These are super mini pumpkins that come 3 for $1 at Dollar Tree. For the pumpkin on the right, paint with Annie Sloan Aubusson Blue. Let dry. Dry brush Annie Sloan Old White. For the pumpkin on the left, paint with Annie Sloan Old White. Let Dry. Dry brush with Annie Sloan Olive.
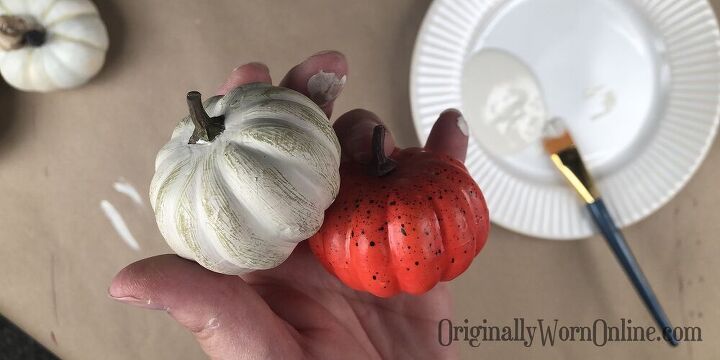
For the pumpkin on the left, paint with Annie Sloan Old White. Let Dry. Dry brush with Annie Sloan Olive.
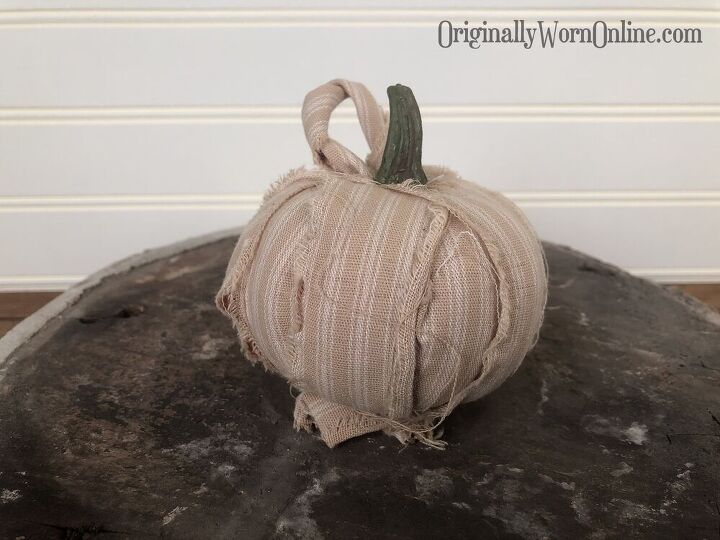
And last, but certainly not least. I have added a non painting option for a fun little added texture to the grouping.
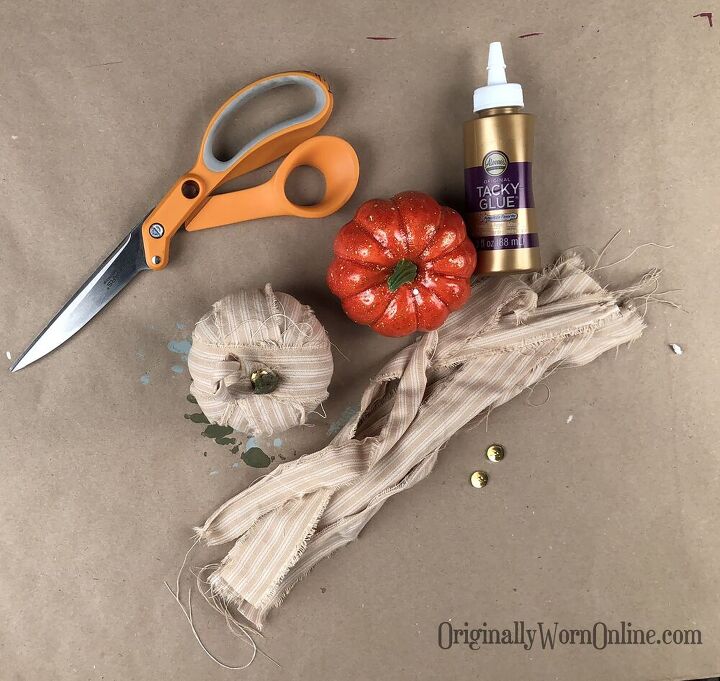
To create this pumpkin, tear fabric into strips that reach around the whole pumpkin. Wrap fabric, working around it. Secure it with a thumb tack. For the stem, twist a strip and tack it to the top, under the stem.
Resources for this project:
See all materials


Comments
Join the conversation
-
Thank you! I am sure you can find something equal to paint! :)
-
I love them all!


Frequently asked questions
Have a question about this project?