


DIY Succulent Picture Frames

Succulents are now one of my all-time favorite plants and I am apparently not alone! No wonder, since they are extremely easy to care for and at the same time so beautiful to look at. These plants become a very special eye-catcher in this unusual planter: a disused picture frame. This turns your wall into a “Living Wall”!
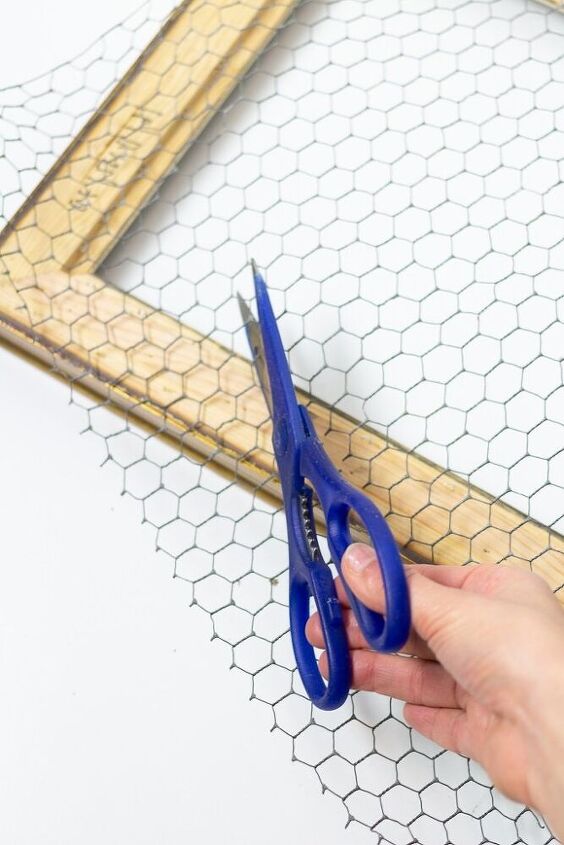
First cut the rabbit wire with the scissors to the size of the picture frame. A little bit of wire should still stick out on all sides.
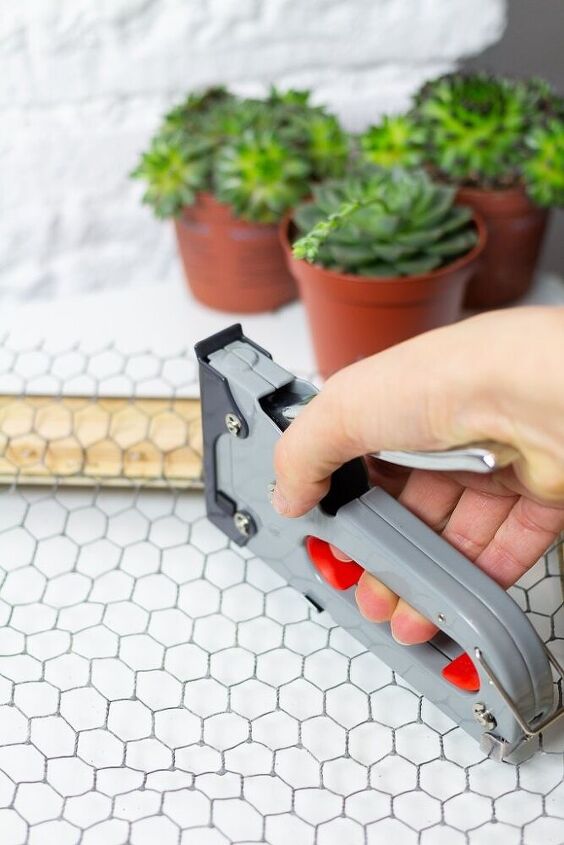
Turn the picture frame on its back and staple the wire to the inside edge of the frame. Make sure that the wire does not sag and that something is under tension. Once everything is in place, the excess wire edges are cut off.
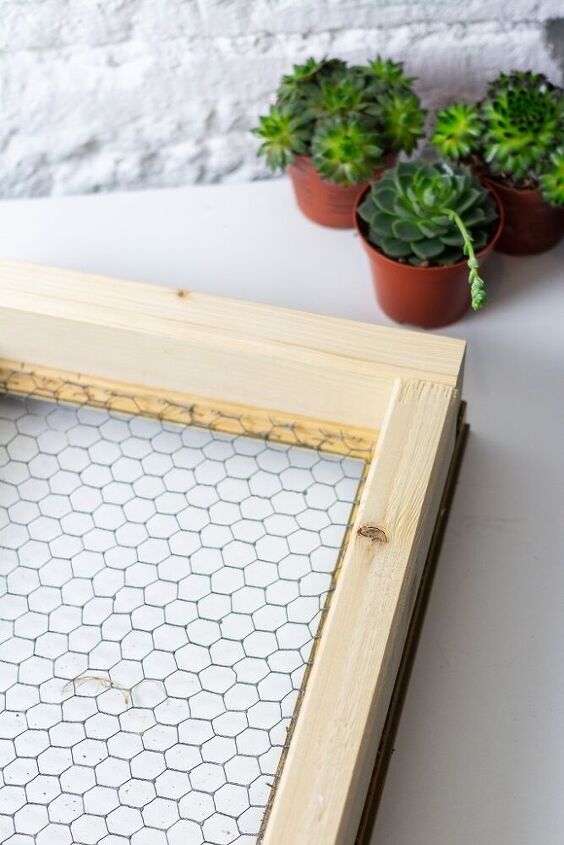
The wooden strips are attached to the back of the frame with the assembly adhesive from tesa. This creates a frame on the frame. To do this, apply the assembly adhesive over a large area and place the wooden strips on top. Press it down well and place a heavy object on it so that everything connects well.

Once everything is dry, lay out the moss panels in the frame on the wire with the green side down. Also cover the edges well and seal everything.
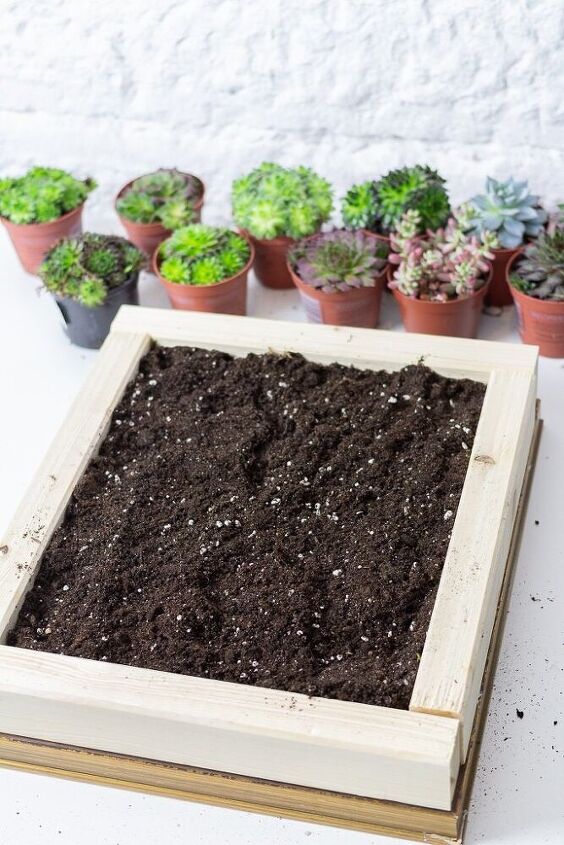
Spread the cactus soil generously on the moss so that the frame is filled to the top. Shake it a little and then press it down. Then the plywood lid comes on. This can be glued on or attached with small nails.
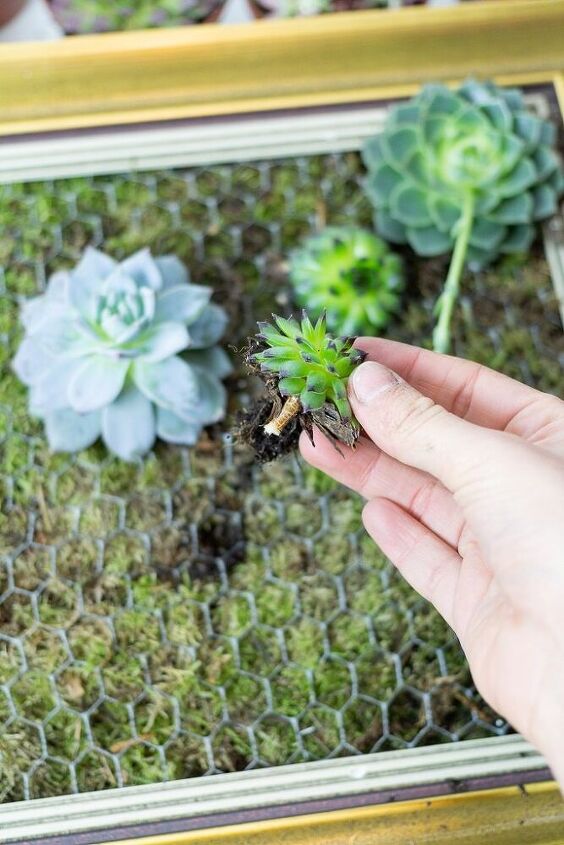
Carefully separate the succulent rosettes so that the longest possible root strands come out. Prick a planting hole with the screwdriver and insert the individual succulents. Turn a little and press in gently. Cut the wire a little for larger plants.
Tip: Alternate large and small plants and different shades of green.
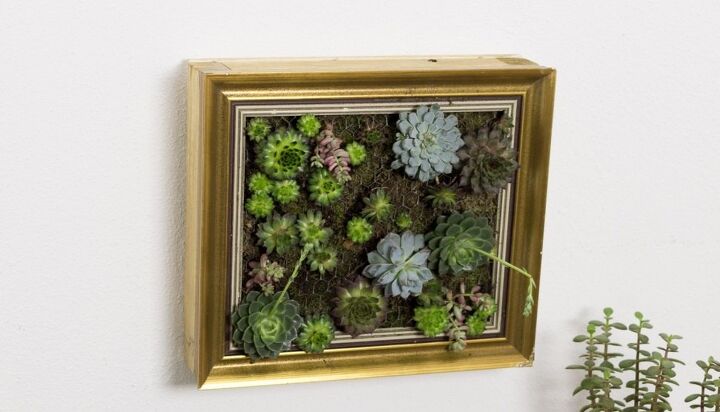
Before putting the picture frame on the wall, lightly spray the plants with water. Then carefully lift the frame and see whether all the succulents hold up well. Once the picture hangers are in place, the frame can be attached to the wall using the adhesive nails.
Resources for this project:
See all materials


Comments
Join the conversation
-
I was concerned about water it too. Maybe spray misting it would be sufficient. Idk


Frequently asked questions
Have a question about this project?
Dirt doesn't fall out? How do you water it without getting water all over?
Do the plants attract gnats?
Love this idea--but do you know of a way to put Fake chicken wire or something like chicken wire that is not so hard to handle(on my hands) as the chicken wire??? I am making earring holders and putting wire on Picture frames w decorations on top wire. I am asking if anyone knows of a product that is not wire but appears to be Chicken wire type look???