


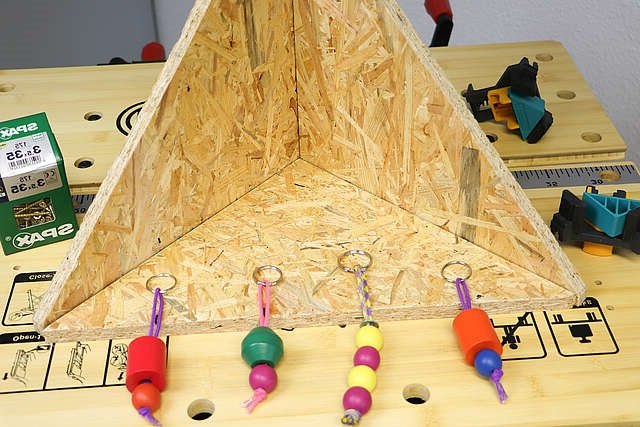
Keyboard for the Hallway
Keys misplaced? With our keyboard, you always have your keys at hand and you never have to call the key service again.
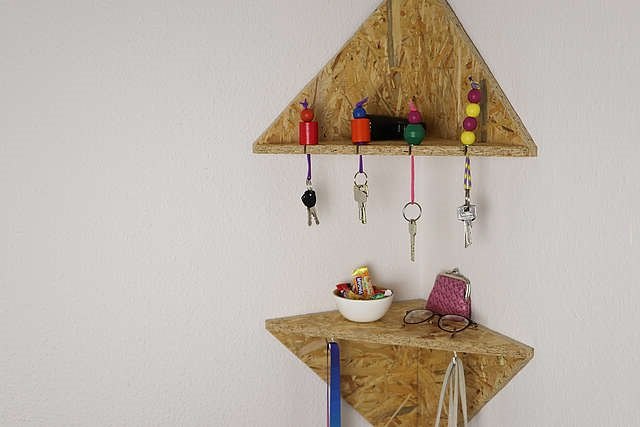
Many keys are lost every day. So that you don’t despair at home while searching, you should ensure a fixed place. Our keyboard with storage brings order to chaos. In addition, sunglasses, smartphones and wallets can be stored clearly.
Materials and tools for the keyboard:
- 3 x OSB plate: 15 mm x 36 x 30 cm (have it sawn in the DIY store)
- Screws 3.5 x 35 mm
- Lens head screws and drills, plugs for wall mounting
- 2 screw hooks 40 x 3.0 mm
- Inch stick, pencil, wooden strip
- Corner tensioners
- Grinding block with 120 sanding paper
- Clear lacquer for furniture, semi-gloss
- Colour tray, foam roll, roller holder
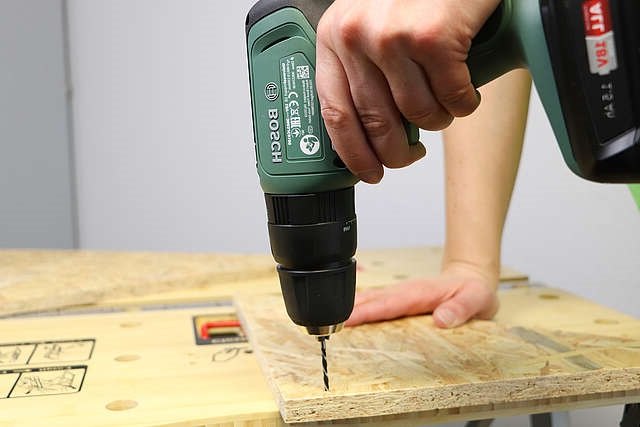
- Cordless impact drill with 4 mm wood drill
- Multi-grinder with 150 and 220 sanding paper
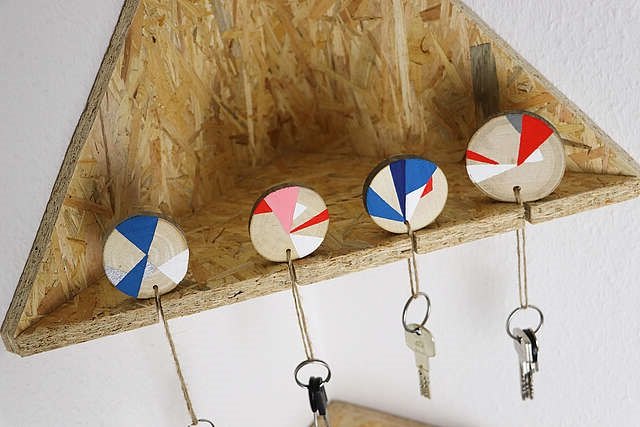
You can also use coated wood – then the surface treatment can be dispensed with. You can also paint the triangles, picken them or paint them in a strong hue. Beautiful accents can also be set with geometric patterns.

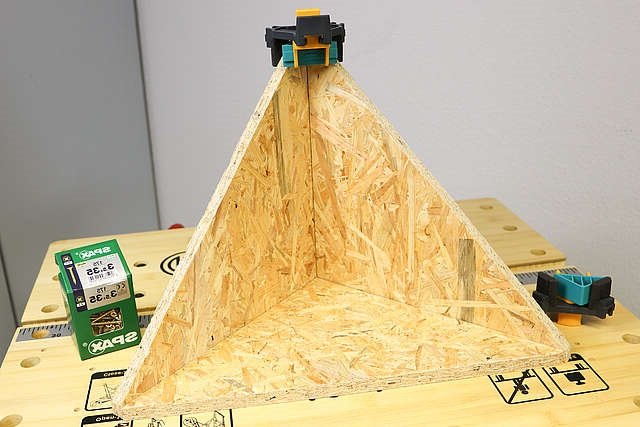
You need 3 triangles per element. Start with the bottom/lid (A): Draw a length of 30 cm on two straight edges and connect these markings diagonally with the help of a bar and pencil.
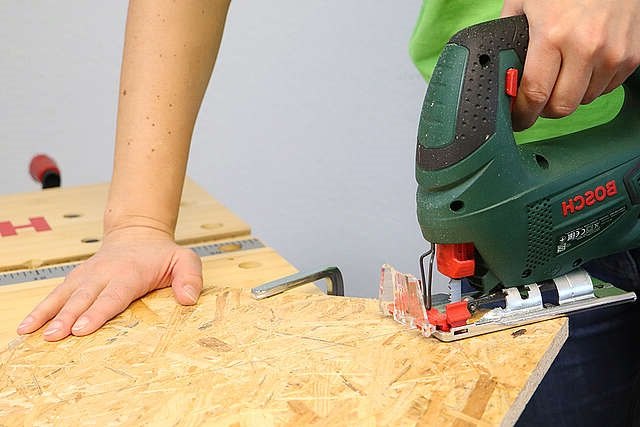
Then securely fix and saw the plate with a screw clamp. Then the two triangular sides are cut.
Here it is important that you plan the material thickness (15 mm) of the floor, which is between the side parts. Please note the additional material thickness of the first side part.
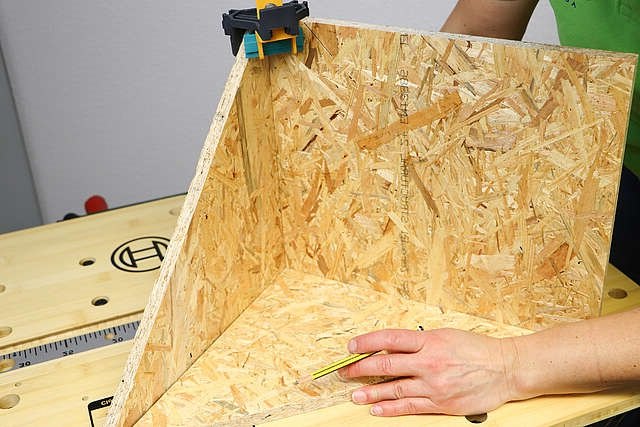
You also build the second element as described.
Mark 4 holes with a pencil on the bottom edge.
Important: The front borehole at the triangular tip should be at least 5 cm away from the outer edge. Then drill with the 4 mm wood drill and lower the screw holes from the back.
Now you draw on the lid the positions of the slots at equal distances (here: 8 cm).
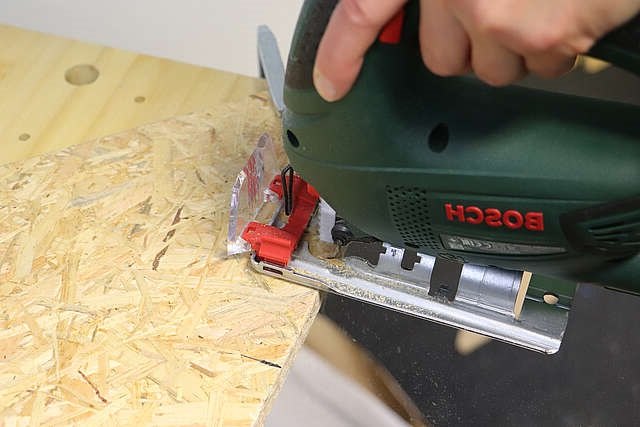
Then saw them about 2 cm deep and 4 mm wide.
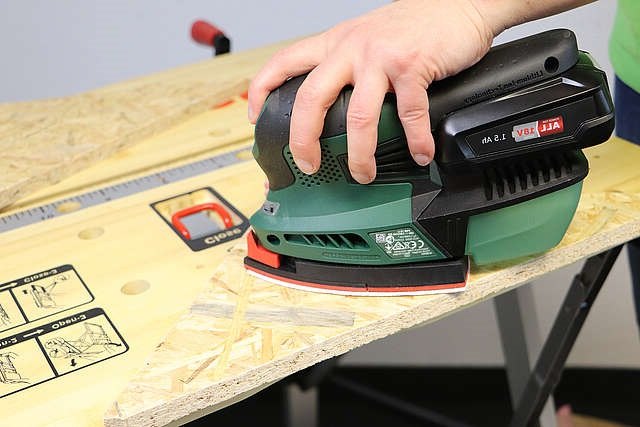
Finally, smooth the surfaces, edges and slots and carefully remove dust.
For protection, you apply the clear coat with a foam roll. Carefully paint both sides and the visible edges. After drying and an intermediate sanding with 220 sanding paper, you paint a second time. Then allow to dry well.
With the help of the corner tensioners, you now connect the individual components. Make sure the edges are flush. Then screw in.
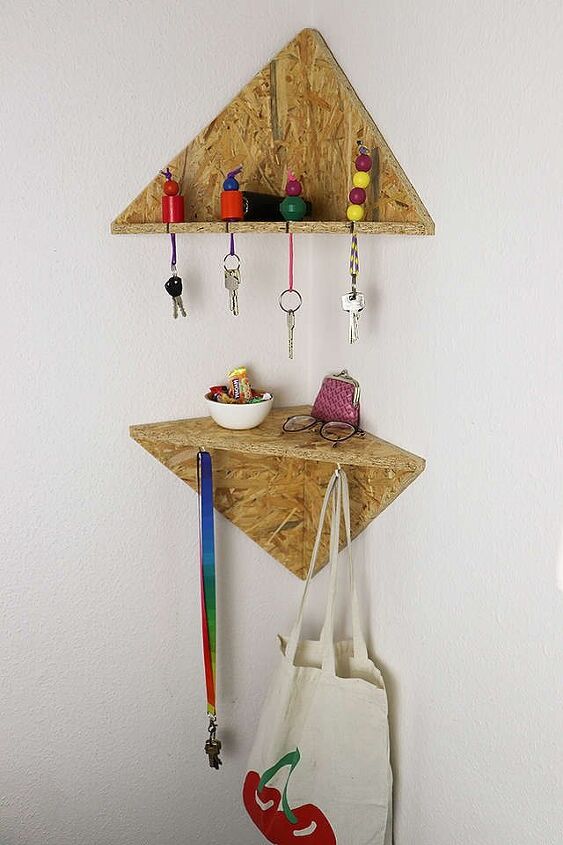
For the suspension, you drill two holes per triangle with a 4 mm wood drill into the sides. Then transfer the holes to the wall, drill, insert dowels and tighten the top triangle. The second triangle is mounted with a distance of about 30 cm mirrored under the first triangle on the wall. Finally, you tighten the two hooks, e.g. for pockets under the shelf.

Comments
Join the conversation
-
Now this is my type of project! Love the beads and the corner concept.


Frequently asked questions
Have a question about this project?