


How To: The Look For Less - Fall Decor Edition
I don't know about you but I LOVE a good knock off. Especially when I can DIY to get the look for less.
Last week I shared my fall decor favorites for the 2020 season and while most items were budget friendly, there is ONE item that I just couldn’t bring myself to purchase.
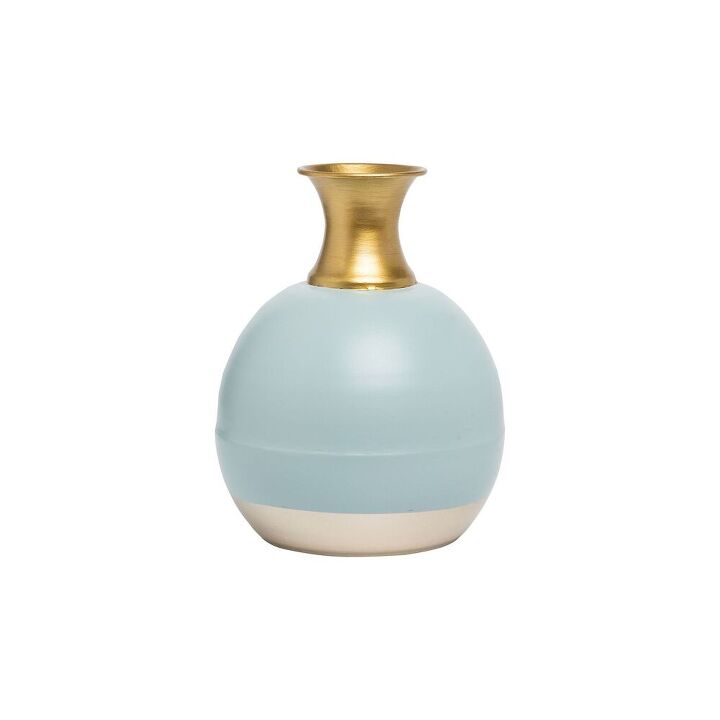
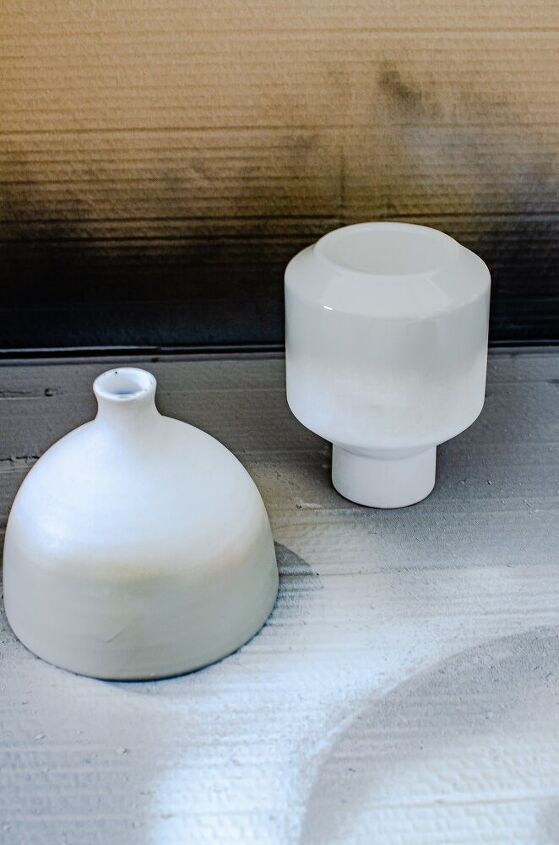
This particular vase is from Target and runs $44 retail. And its small, friends! YIKES!
If you are new here, Hi! I’m Kera. I am a blogger, home stylist and mom of 4. I have a colorful, collected eclectic style with pops of modern vintage and cottage boho. If you enjoy my content I would love to connect with you on Instagram where I share my daily projects and home inspiration!
Don’t Buy – DIY The Look For Less
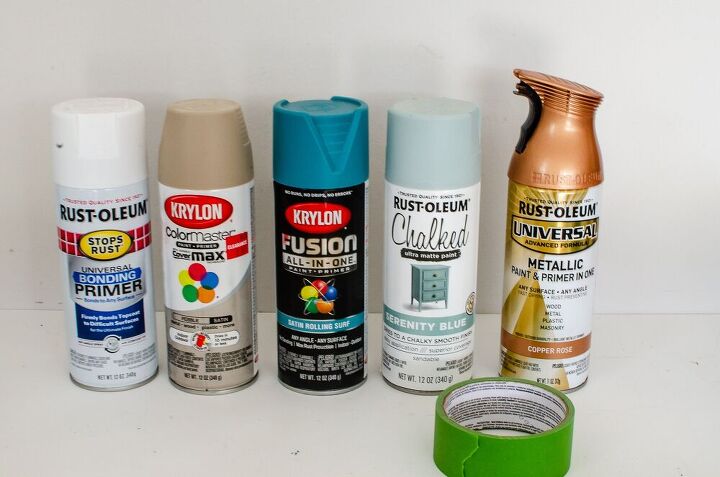
I knew immediately that I could grab some items around my house and DIY this same look for WAY less money. Who doesn’t have a random vase sitting around their house from 2010? I definitely did.My house also isn’t lacking in spray paint or painters tape. So with the purchase of just two new cans I was set to DIY.
Supply List
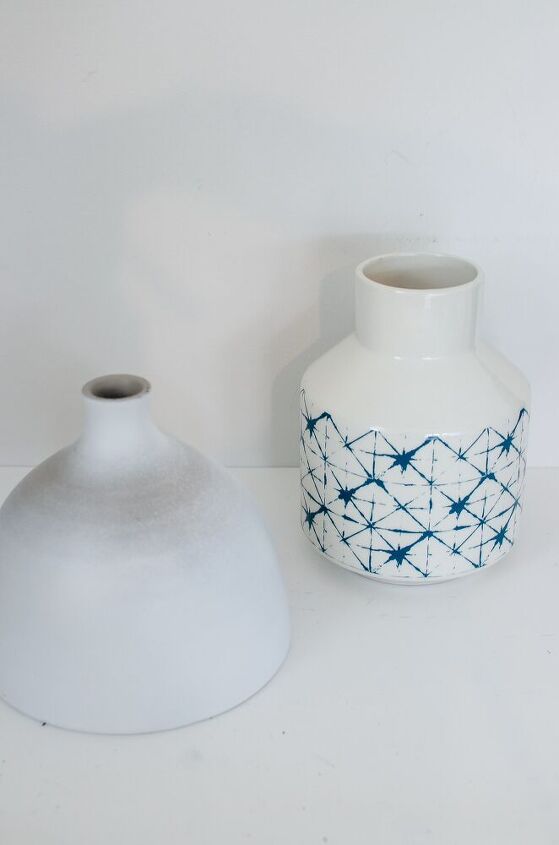
- An old vase that you just aren’t loving anymore. OR an inexpensive thrifted vase in a shape you like!
- Spray Primer
- Spray Paint in 3 colors. (I chose a color, a blue and a metallic copper) Look at what you already have on hand and then purchase what you need.
- Painters Tape
- Patience. This project isn’t hard but its a tad time consuming because layers. And drying time.
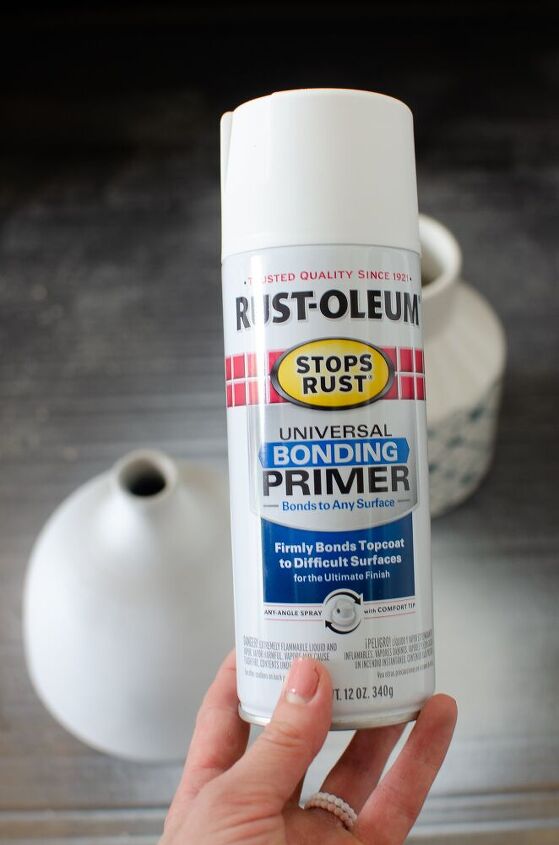
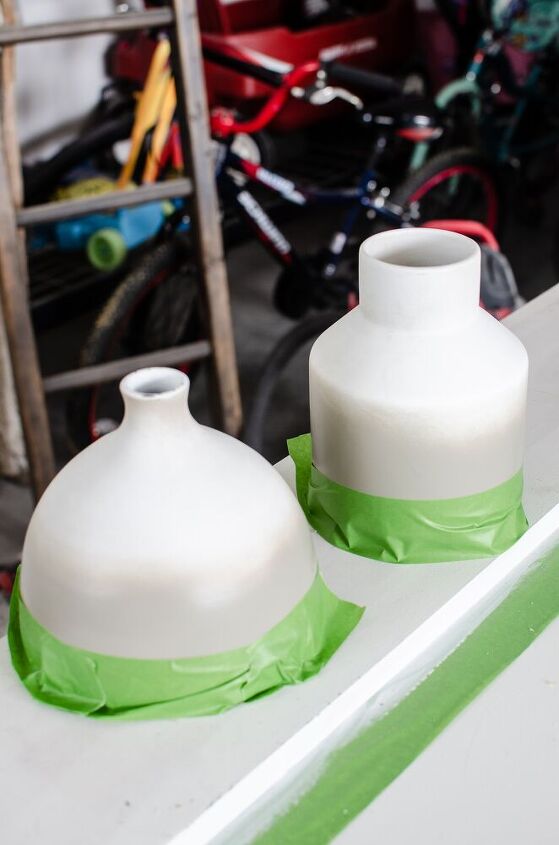
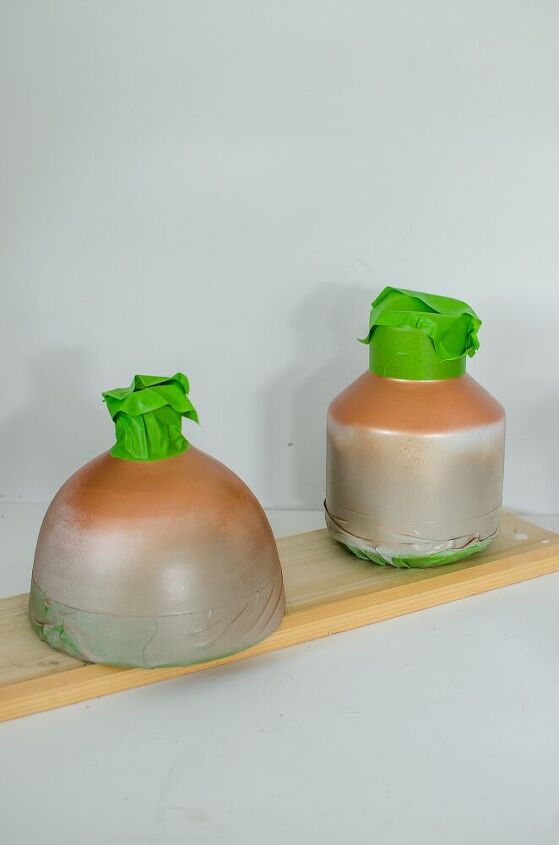
This may seem unnecessary, especially if you have spray paint with a built in primer. However, I feel in my heart of hearts that spray paint sticks better when it has real primer underneath.
That’s just my opinion. Take it or leave it. Bur for real, prime those things!
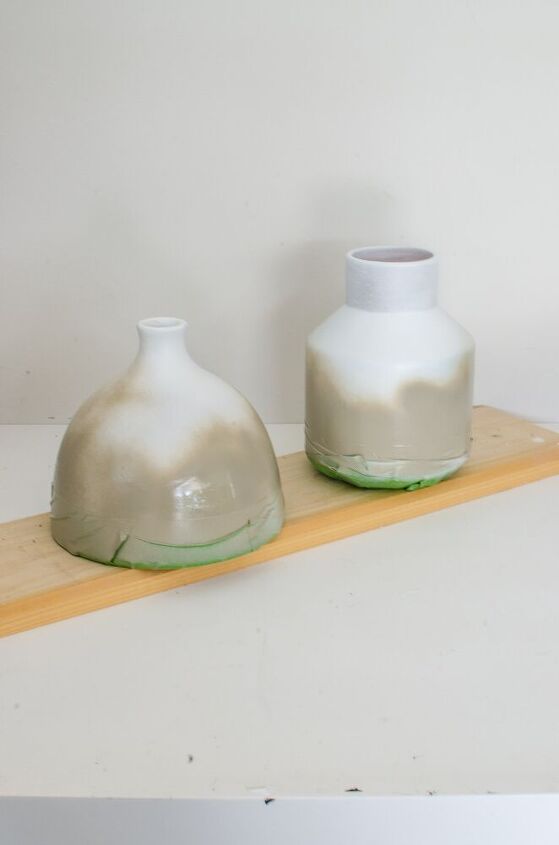
Flip that baby over and give the bottom portion a light coating of the bottom color. Let it dry then add a second coat to assure good coverage.
For the best results you will want to let this coat cure for several hours-overnight.
Remember when I said this project is a tad time consuming? This is why.
When the base color is cured its time to break out the painters tape.
I really didn’t care about it being perfect so I just eyeballed it and covered the portion that I wanted to remain the base color.
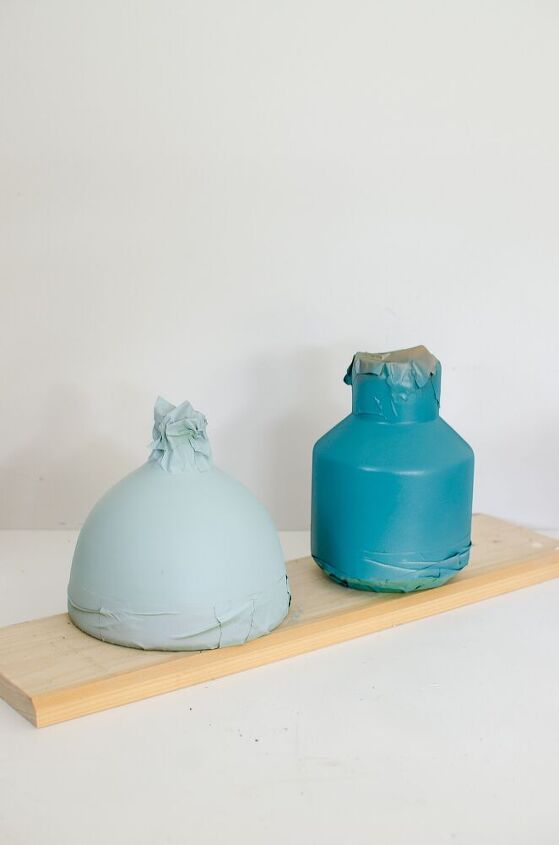
Spray the base color AGAIN! I know. You are probably thinking I’m crazy right now but guess what, this is a paint hack that will assure you get a clean crisp line with zero bleeding.
Spraying the base color on top of the tape line will seal the tape. Promise. Trust me. Just do it!
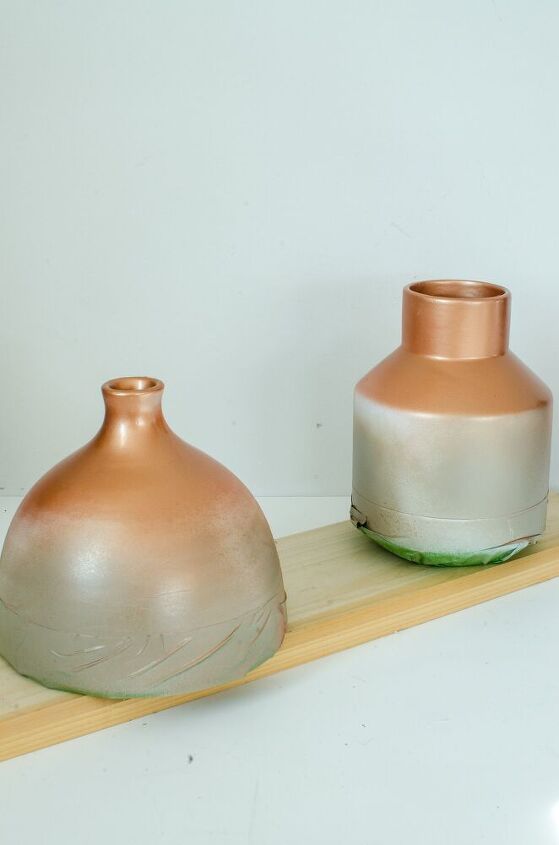
At this point it’s going to be easiest to skip the middle color and go straight to the top. Take you top color and repeat Steps 2-5.
Note: I have found that metallic spray paint takes a little longer to cure than other spray paints. For the best results, let it cure overnight.

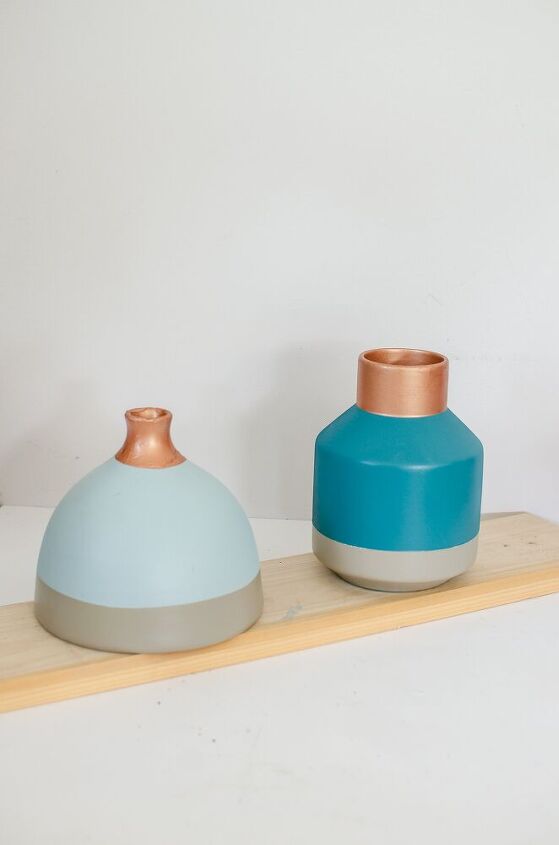
The only step left at this point is to add that middle color. I chose two shades of turquoise to give my vases a little variety.
Two light coats of paint should finish you up. Then again, just wait for it to dry.
Once the 234738 layers of spray paint are dry its time to peel off the tape! Your lines should be crisp because you added that extra layer of base color, right?!? So worth it!
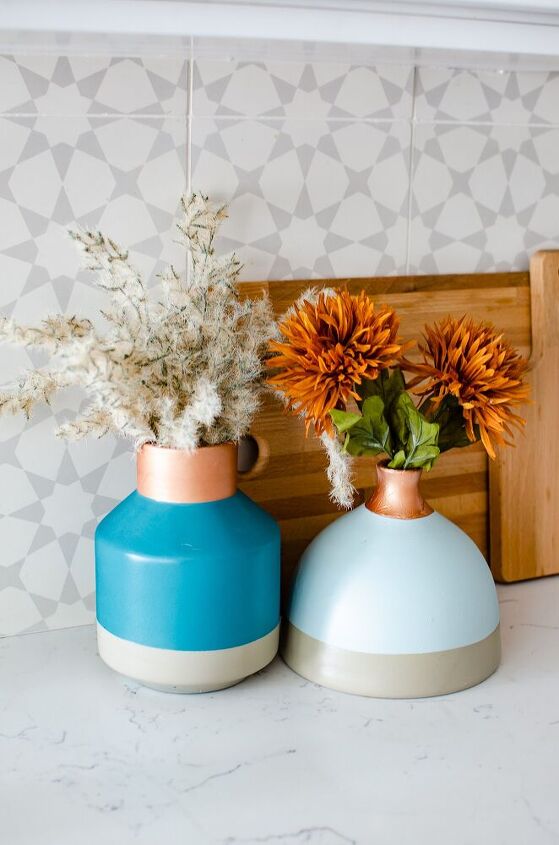
Give yourself a pat on the back for a job well done! Then run inside and grab a few fall floral stems and style those vases up!
Style them together or spread them throughout your home. Yay! You created a super fun look for less using items you (mostly) already own!
Resources for this project:
See all materials


Comments
Join the conversation
-
Its amazing how you can take something that is "junk" and turn it into something useful and cute. Nice Job!
-
Perfect!!


Frequently asked questions
Have a question about this project?
These look very nice. $44.00 I feel is little to much. Dont you just love how stores rape our wallets? I bet the person who created the item in the first place hardly got paid for such fine work. Its a shame really to. Any way your prices look great. Thank you for sharing. Have a wonderful day stay safe and healthy. Ugh the second wave if the covid is hitting uo here in the north. I live in NJ. Ny city is closing the schools gyms restaurants. Take out only. Just when people started going back to work. With life starting to get back to normal. Start buying potty paper.
Where did you get all the unique shape vases? I’ve never seen any in thrift shops or dollar stores.