


DIY Skull Pumpkin Decor
This week, I've decided to put together a tutorial for the easiest project imaginable. It's a piece I put together a few years ago and have been displaying every Halloween since! You might already have some of the materials for it, but if you don't, that's OK. Everything you'll need can be found at a craft and/or dollar store for a super affordable price.
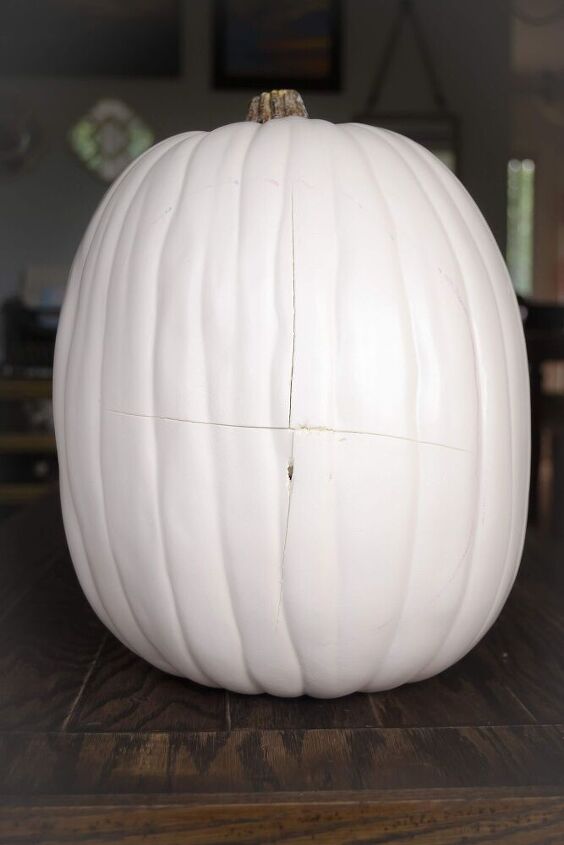
To start off this project, I marked a cross shape on the side of my pumpkin I wanted to serve as the front. Using an X-acto knife, I carefully cut along the two lines.
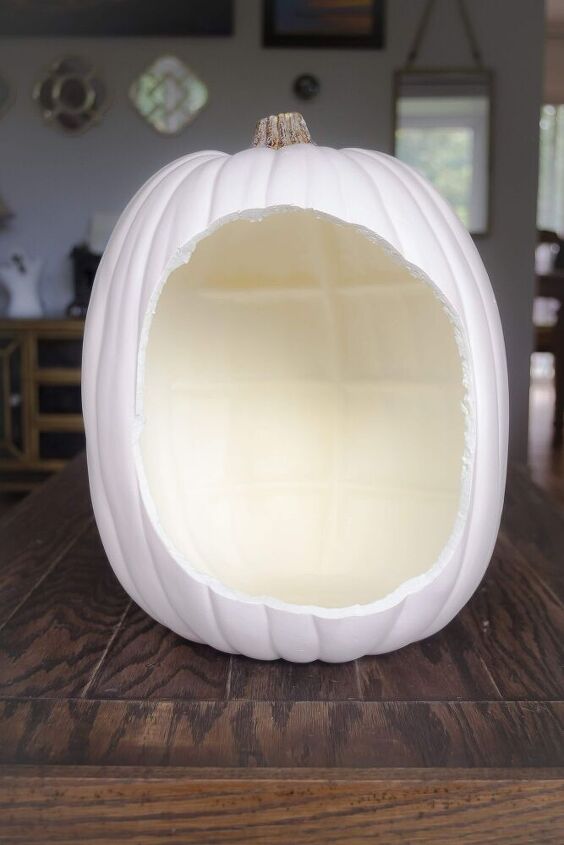
Next, I continued cutting in order to create an oval cutout, using the four points of my cross as connecting points as I made my way around the front of the pumpkin.

I then gathered all of my foam skulls and removed the ribbon hanger from each of them. I also placed my battery-operated tea light inside the pumpkin.
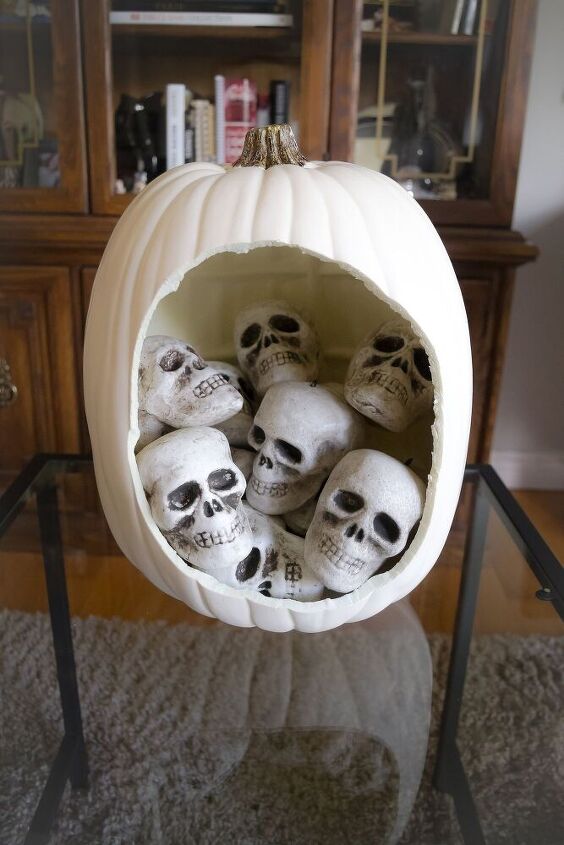
Finally, I stacked the foam skulls inside the carved hole and reworked their placement until I was happy with the overall look.
That's it! I told you it was easy! And in order to turn the tea light on/off, all I have to do is move one or two skulls in the display.
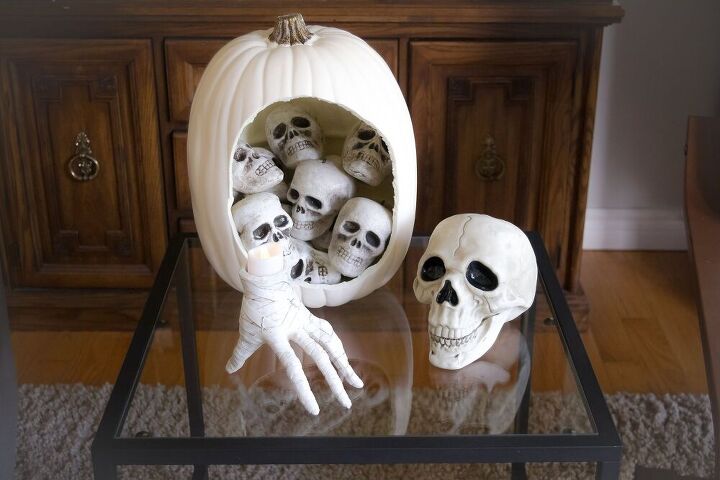
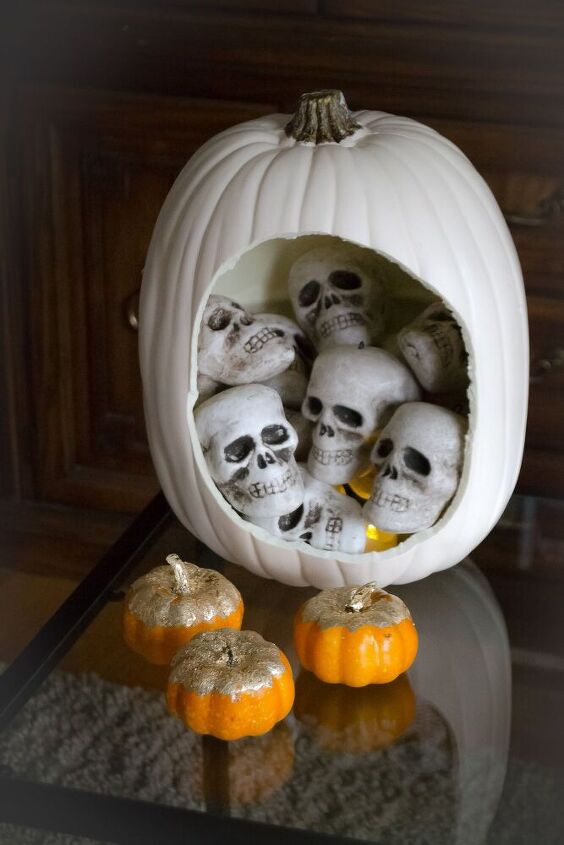
Every year, paired with some of my other Halloween-inspired projects, this skull-filled pumpkin is the perfect addition to my seasonal decor. It has been and will probably always be one of my favourite pieces.
Resources for this project:
See all materials


Comments
Join the conversation
-
Cool, I like this! Very cute!
-
I like it. Cheap and easy. Pretty cool.


Frequently asked questions
Have a question about this project?
Very cute! Did you do the creepy hand as well?