


Painting Kitchen Cabinets BLUE!

Wait until you see what bold paint and hardware did to this boring kitchen. For under $100!
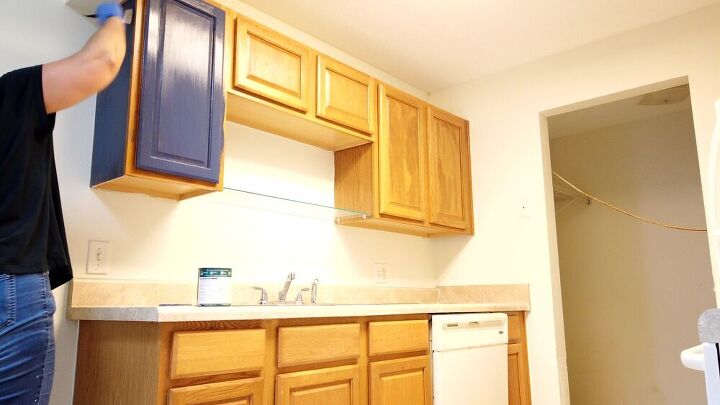
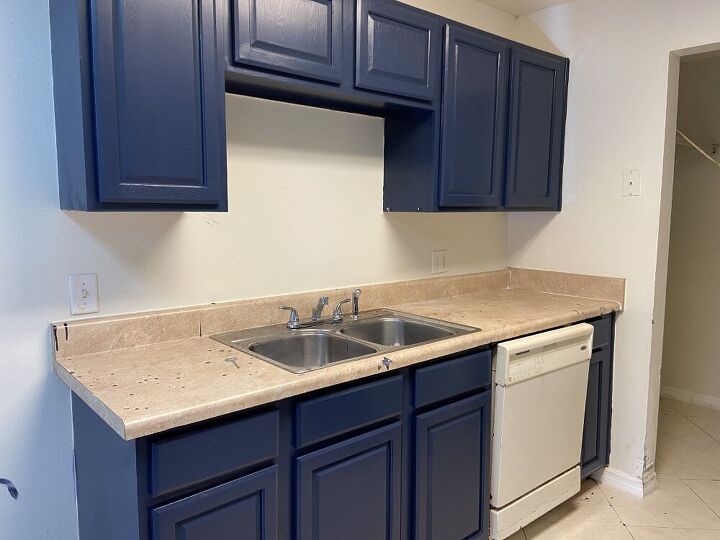
We saved money during a recent condo flip by painting the kitchen cabinets. The cabinets had years of grime on them, but the insides were in good condition and we knew we could update them. Here’s a look at how the kitchen and cabinets looked before.
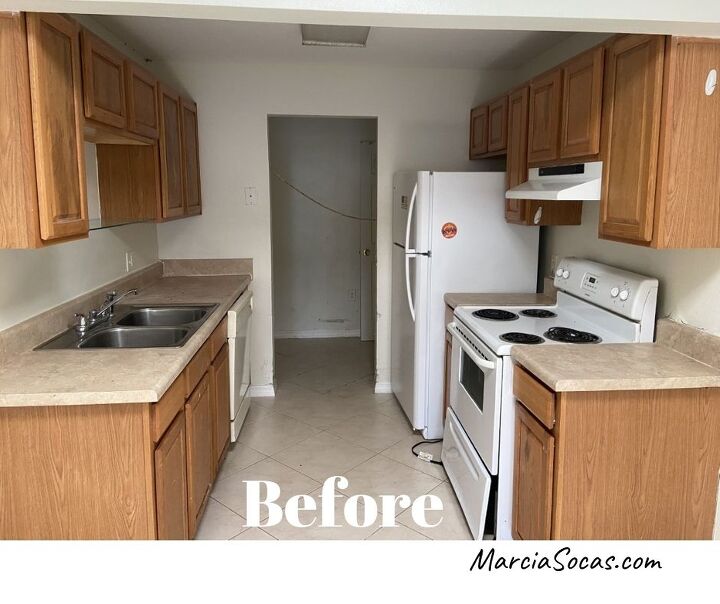
Cabinet painting works well on a kitchen like this where the cabinets themselves are in good condition. They're wood surfaced and function well. The color and blandness are really the main problem here.
In this project, I chose a color that was much more bold and bright than my usual condo flip. For the prior two condo flips we had redone kitchens in all white cabinetry, which was beautiful, but was getting a little boring. This particular condo I was working on is a small one bedroom condo that doesn’t have a whole lot to it. I thought the addition of color to the kitchen would make it very Interesting. The color is a showstopper.
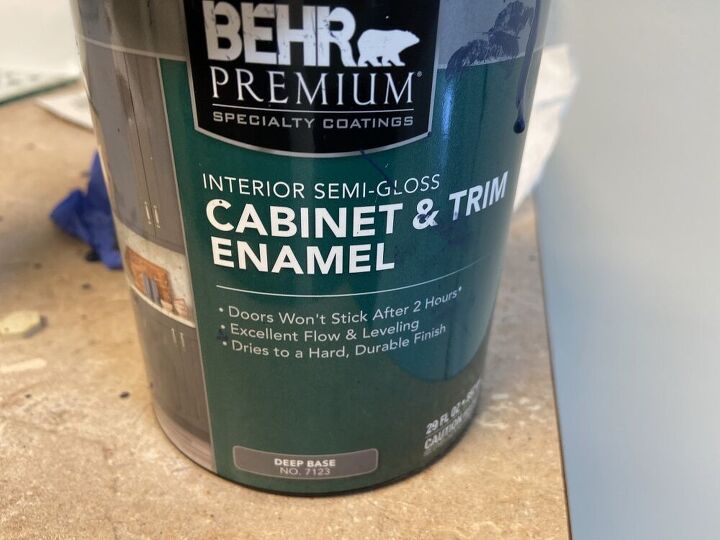
The color I chose was Sherwin Williams Naval (their 2020 color of the year). The finish was semi-gloss. I wanted the blue to have a nice shine at the end. When you want a shine on the surface, semi gloss is a great choice. If you prefer a matte finish then you'll change your finish type accordingly.
I thought it would be a lot of fun to see how this bold blue color looked together with a gray and white granite and beautiful new large cabinet pulls.
This was my first time using the Behr paint. I really liked the way it went on. I was able to layer it easily and it also leveled out very smoothly and had a a great shine.
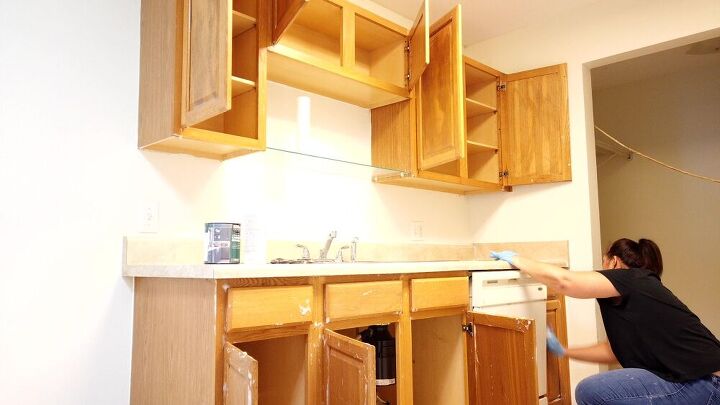
Use Deglosser to remove all of the grease and grime from the cabinets. I’ll provide a link to the Deglosser that I used for your reference. I put it on with a sponge that had a scouring pad at the back. So I put the deglosser on with the spongy side I let it soak in a bit and I scrubbed it with the scrubby side of the sponge. Some cabinets were very heavily soiled. On those, I went through the cleaning process twice to make sure that I had a good clean surface for the paint to adhere to.
When you use the deglosser, apply it with one of those sponges with the scrubby backs. Apply with the sponge and then rub the cabinet with the scrub side. Alternatively, you can use a scouring pad. The idea is to take off all of the grime and anything sticky on the cabinets.
Some sources caution you not to overdo it with the deglosser as it may open up the pores on the wood. I, personally, have not had any issues using the deglosser generously. It does wonders to clean the cabinet.
This photo shows the process of cleaning the cabinets with the deglosser. Notice the suds on the cabinets on the left side of the photo. I use the deglosser generously, allow it to sit a bit while I'm applying it on the other cabinets, and then I go back and scrub it.
As with any project, remember to take a photo before you start so you can document your amazing work!
On the first coat of paint, remember not to be heavy-handed. This is just the very first pass at these cabinets and you don’t want to overdo it with the amount of paint. You just really want to focus on getting into the grooves and corners of the door fronts with a light coating. There’s nothing worse than having drips later.
Wait for the paint to dry. For me, when I started on one side of the kitchen and got all the way to the other, the paint was essentially dry enough for me to begin on the second coat. I did not wait an entire day for the second coating. Just make sure that your first coat was light and that you don’t have any thick areas of paint. If you do have thick areas of paint and go over it too quickly, you will start to streak away the first layer of paint and it’ll start to look a bit like a gooey mess. So just remember keep it light. If the paint is still wet, wait before applying that second coat.
Do you want to paint the inside of your cabinets?
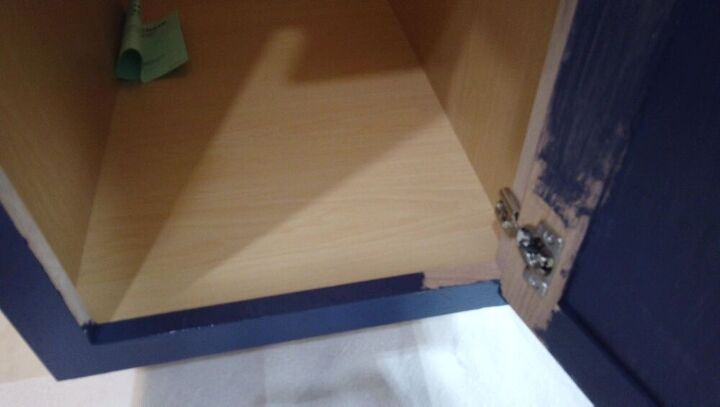
It depends on the color you're using. When we have redone kitchens in white, I always paint the inside of the cabinets. However, when using this blue paint, I thought it would make the cabinets far too dark. So in this case, I chose to leave the inside wood color and only paint the exterior box frame and cabinet fronts.
You can see the dividing line between the cabinet front and the "inside" pretty easily. You can see here where I've painted the bottom part of the frame, but the left side isn't painted yet:
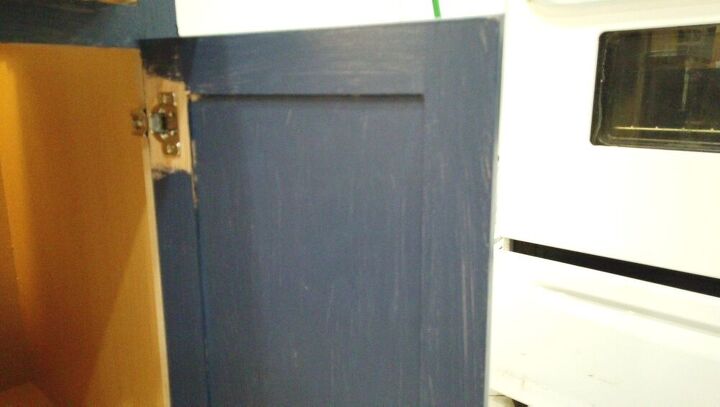
Pay attention to the hinges. A lot of people will tell you that you should remove all of the doors and hinges and paint those separately. It is your choice. I don’t like the time it takes to take off the doors and I really don’t like taking them off, carrying them around, and putting them back on. I feel like I can do a great job with coverage right where they are, Just be careful around the hinges so that you can get a professional finished look without any paint over the hinge pieces. Take it slowly and you can do it. Take a look at the video and you’ll see that this really wasn’t difficult at all.
This photo shows the hinges after just my first coat of paint. That's why the doors look so unfinished. They don't have enough paint on them yet. But I wanted you to see the hinge and see that it is possible to paint around the hinges completely and avoid painting over them.
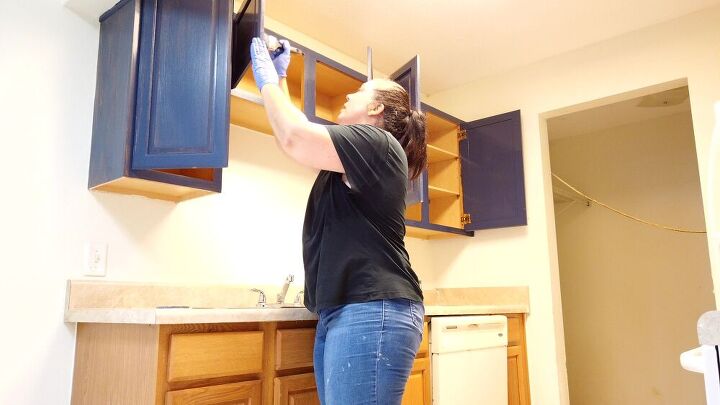
Apply a Second Coat. After all, that first coat was just to get into the grooves and around the hinges and to get some light coverage. The second coat is where it'll start to look like something beautiful. So apply that second coat and then wait.
I recommend waiting overnight before doing anything further. This will let you take a new look at your project with a fresh pair of eyes and make sure that you haven’t missed anything important or any sides of drawers or sides of cabinet doors. I added a third coat of paint after waiting a day on these blue cabinets. It was a light coat but I wanted to make sure that I had great coverage and lots of shine on the cabinet.
Here's how my condo flip cabinets looked after the second coat.

Sealing. You may choose to seal your cabinets with polyurethane. Alternatively, you may experiment with glazes.
Cleanup. You’ll notice in my video and maybe even in some of my pictures, that I didn’t worry too much about paint falling on the tile floor. This paint, once left to dry, ends up peeling off pretty quickly and easily with a scraper from the tile floor. Alternatively, you can use a tarp or, I often use one of the tablecloths from the dollar store because they’re even cheaper than a tarp and easy to throw away at the end of the day.
Hardware. Once the cabinets are painted, the next step to really modernize them is to add the pulls. This step, to me, is essential. You can pick the pulls that go with the decor of your choice. We added 10 1/2 inch pulls on these cabinets and I think they look great. I’ll include a separate tutorial on installing the pulls. This will include the many mistakes that I made installing the pulls on this project and how I learned from them!
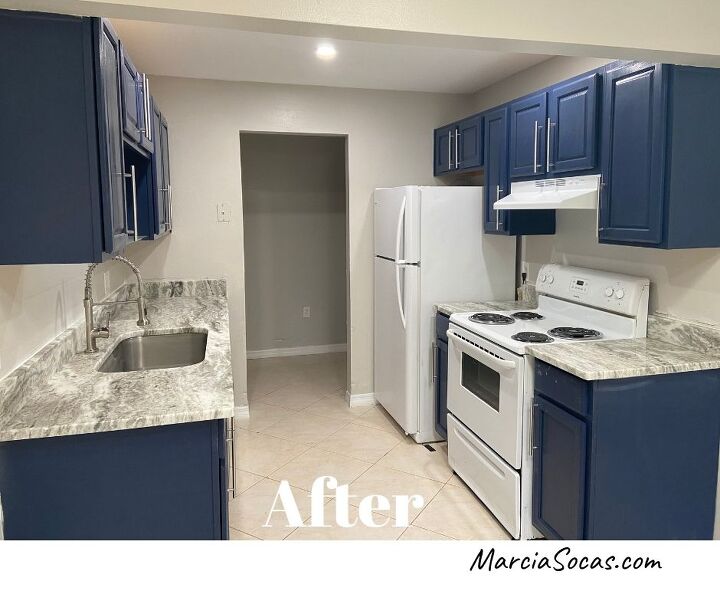
Here's a look at the final kitchen outcome.
If you'd like to see how we did on this condo flip, including the expenses and profit, just sign up for the blog and you'll be advised when that post comes out. Or feel free to look through my other posts to view the gains on other flips along with the specific costs and renovation steps.
If you'd like to walk through a condo flip I helped my son with, along with the DIY projects there and access to the income/expense sheet, you can view it here:
See the kitchen transformation with step by step instructions in under 5 minutes.
Resources for this project:
See all materials


Comments
Join the conversation
-
The replaced counter tops must have cost more than the budget allowed.
-
New faucets also. That definitely wasn't in the budget. Keep it honest and factual.


Frequently asked questions
Have a question about this project?
Hi, I enjoyed the video but you didn’t mention anything about the counters. Are they new?
Thank you!
Edrie
Can you paint a laminate surf ? My doors are wood but the cabinets are particleboard/laminate
I have seen so many cabinet paint DIY but No one has ever answered this question
Did you paint the underside of the cabinets? They don’t show in the finished photo but in the other photos they are the original color.