


DIY Candle Designs – 3 Variants

Today I will show you how you can design your own candles in no time at all – in three different versions: I stenciled, used the window color technique and painted on it freely, creating three different looks.
I think my very first creative encounter with candles came sometime in communion class in elementary school. We were allowed to stick wax flakes on candles and then, to be honest, the topic of “designing candles” disappeared deep into the mental drawer of children’s tinkering for me. Today I bring you three variants that I am very enthusiastic about, because you can conjure up the right decoration for every color concept very quickly.
If you don’t want to paint directly on the candles, but prefer to paint from a template, then the window color technique is perfect for you!
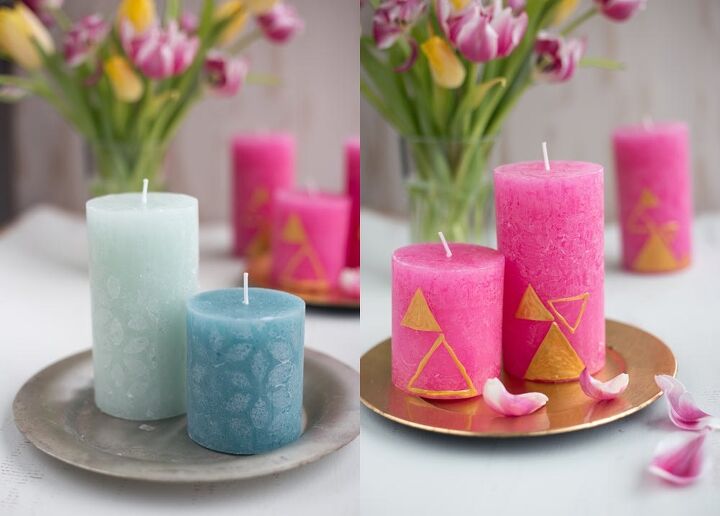
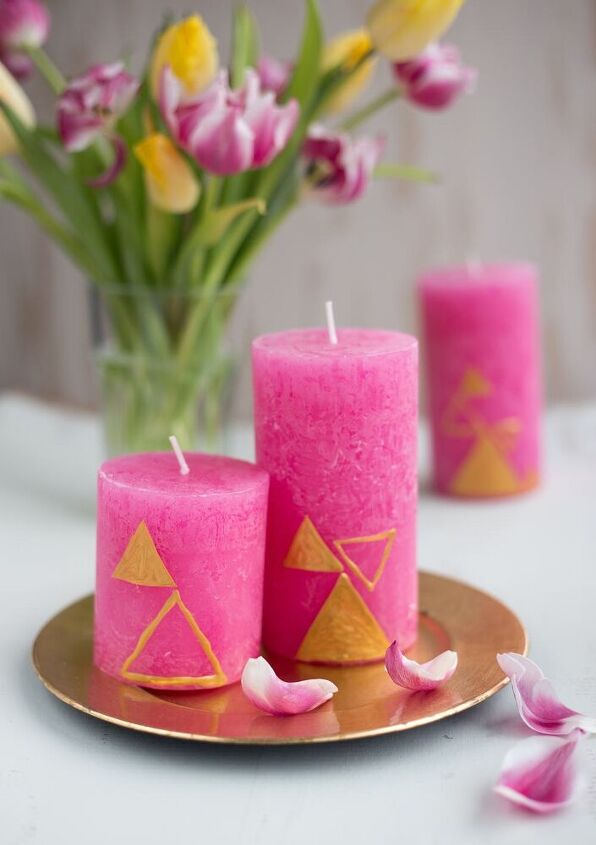
- Pink candles
- Candle liner metallic gold
- A sheet of plastic
- Paper and printer
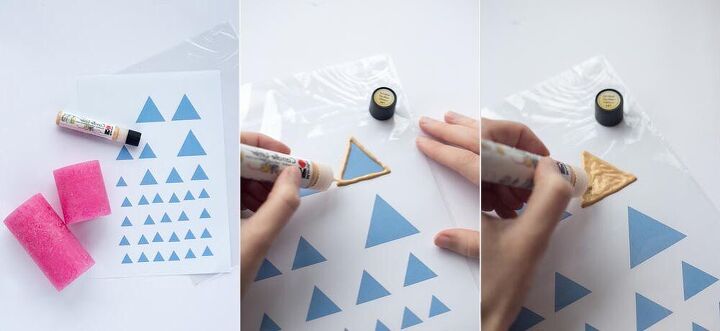
Print out your desired template or draw it out. With Word, for example, you can easily create templates for geometric shapes by selecting them via Insert -> Shapes and then dragging them to the desired size.
You then slide the sheet with the template into a transparent plastic sheet or under a sturdy plastic film. Now you can trace the shapes with the candle liner. Start with the outline, then fill in the shape.
Then let your template dry thoroughly before carefully removing the finished shapes from the foil. Then you can simply stick it onto the candle with a small blob from the candle liner!
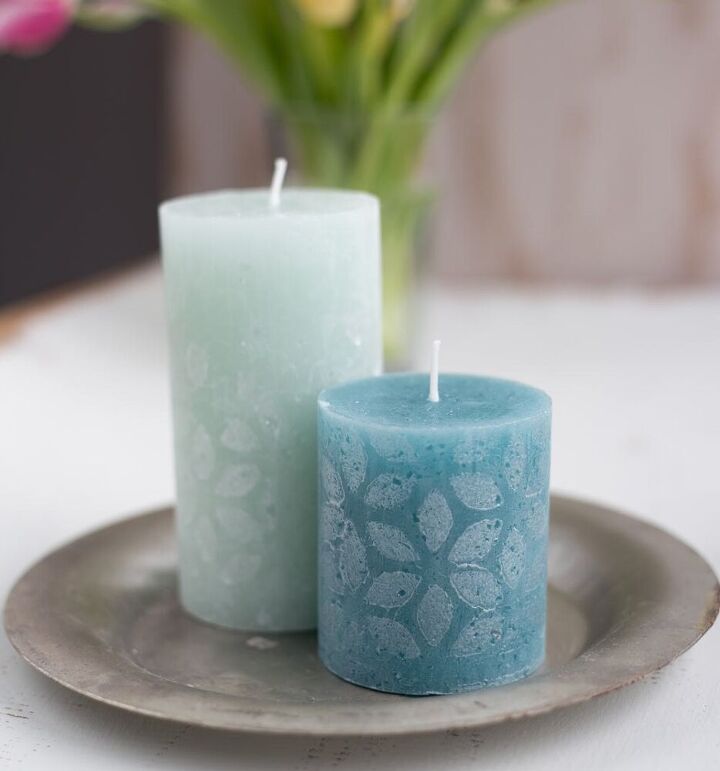
I provided the green candles with a very light silver pattern and simply used a template.
- Candles in shades of green
- Candle liner metallic silver
- Candle-Liner Glitter (Silver)
- A sponge
- Scissors
- Template
- Possibly masking tape to attach the stencil

If necessary, cut the template a little before you start. You can fix it to the candle with masking tape so that nothing slips. Then put some of the candle liner on a sponge and carefully dab the candle with it. Tip: You can also turn the candle liner all the way up and take out more color. I just dabbed on a very thin layer for a very light look. If you want, you can add a few glittering accents with the glitter candle liner after the paint has dried a little. I applied it very thinly to the light candle so that you can only really see it in the sun.
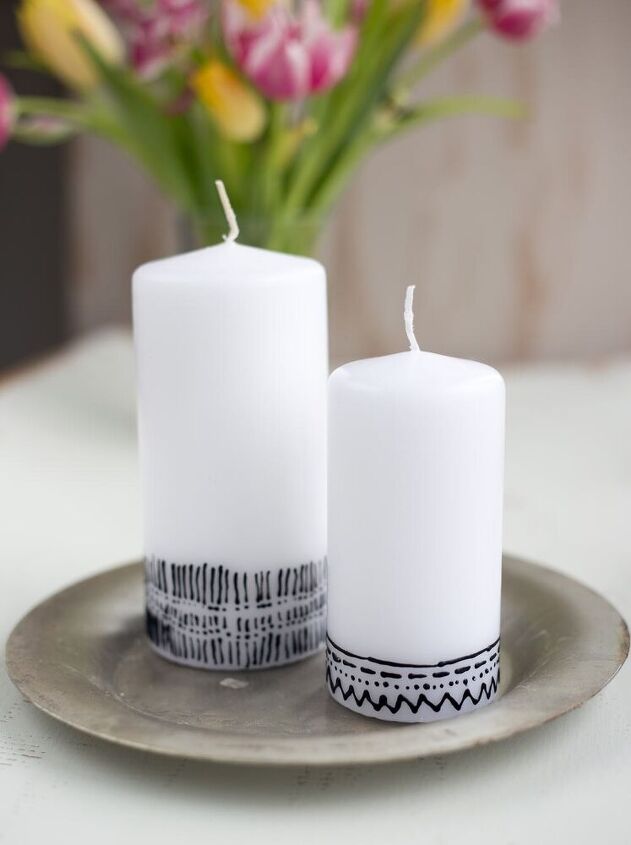
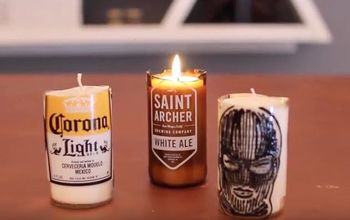
For the last variant you just need plain white candles, a black candle liner and a little patience!
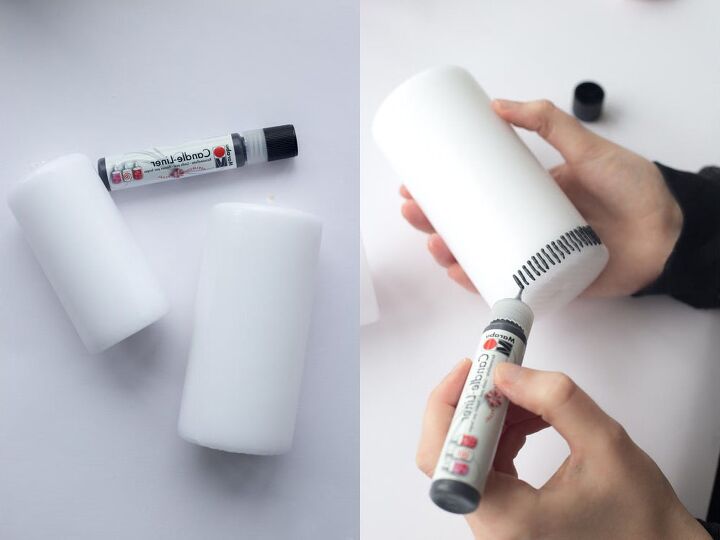
Use the candle liner to create fine decorations directly on the candle. Combines points, lines and triangles. Make sure that you can still grab the candle easily while working. If you want to design it completely, it’s best to let it dry out once in a while so that you don’t accidentally smudge your work of art with your hands.
Resources for this project:
See all materials


Comments
Join the conversation
-
love this, and i will be trying to make.
-
Another great creative idea!


Frequently asked questions
Have a question about this project?
What is "candle liner"?