


DIY Flower Pot.

The design of flower pots, especially in the low-cost segment, is rarely a high art piece.
The same type of stamped cylinders and cones are a dull sight, which even the lush greenery of our favorite plants cannot always correct the impression of.
Fortunately, you can DIY fancy flower pots and flower stands. You don't need anything special for this. Even leftover materials from repairs and what we usually consider garbage will do. Do-it-yourself flower pot How to make small pots we have already written before, but today we will focus on large-scale compositions for a garden, a greenhouse or a spacious house.
We will use ordinary cement as the base solution. The classic concrete recipe: 1 part cement, 2 parts sand, 3 parts filler, such as pebbles, shells, marble chips or colored aquarium soil.
Unusual pots made of beer bottles and concrete
You need trimming sheet plastic or linoleum:
- 6 ceramic tiles 20x60 cm or similar size tiles
- 15-20 glass bottles
- cement,
- sand
- water
- acrylic paint for concrete
- large plastic bowl
Work progress
- Mix the cement mortar.
- Roll up two plastic rings. The height of the rings should roughly match the length of the neck of the bottle, and the difference in diameter between the rings should be twice the diameter of the bottles.
- Place the smaller ring in the center of the larger one on the plastic wrap.
- Then place all the bottles in the space between the rings with the bottom up. Although it would be more convenient to pour the solution first.
- Fill the gap with the prepared mortar.
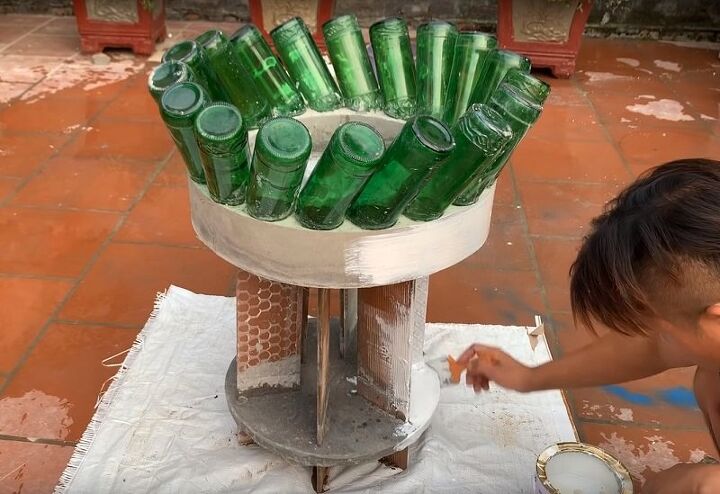
- Give the concrete time to harden, while filling the bowl 3/4 full with sand.
- Smooth and tamp the sand, then insert 6 ceramic tiles at the same distance from the center and perpendicular to the surface of the sand.
- Tamp sand around the tiles and cover the surface with a layer of mortar 4–5 centimeters thick.
- Let the solution solidify. After that, carefully remove the sand layer.
- Now we need to form the bottom of our planter and fix the tile stand in it. To do this, turn the concrete bottle ring upside down. Fill the inner circle pay for someone to do my homework with sand, slightly missing the edge of the ring, tamp the sand and insert the support of their tiles perpendicular to its surface.
- Pour a layer of cement mortar over the sand. Let it harden. Walk over the hardened concrete surface with a sander.
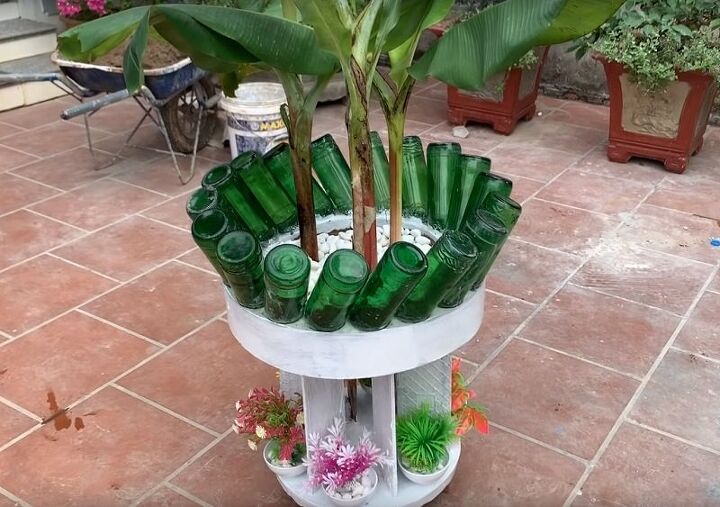
- Paint the flower stand with acrylic paint, which fills all the pores and covers any unevenness.
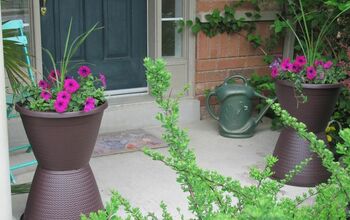
Fill the container with soil and transplant your favorite plants into it.
Even ... an old iron bed can serve as the basis for a wonderful flower bed in the country. The sides will act as a fence, and the back will become a support for climbing plants. Now you won't surprise anyone with an Alpine slide, but here everyone envy - a whole art object!
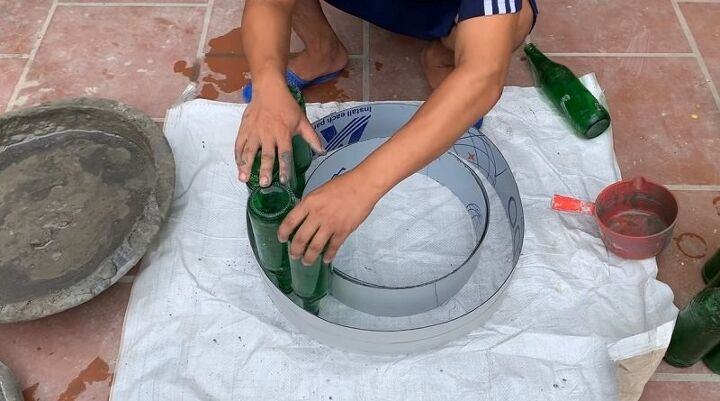
Place the smaller ring in the center of the larger one on the plastic wrap.

Fill the gap with the prepared mortar.

Smooth and tamp the sand, then insert 6 ceramic tiles at the same distance from the center and perpendicular to the surface of the sand.

Let the solution solidify. After that, carefully remove the sand layer
Paint the flower stand with acrylic paint, which fills all the pores and covers any unevenness.


Comments
Join the conversation
-
I would suggest putting the boards around the bottom boards wide side out and not have the knick-knacky stuff on the bottom. Then to finish it off, put a decorative trim around the bottom.
-
Instruction #10 says "pay for someone to do my homework with sand" . . .


Frequently asked questions
Have a question about this project?
Is there a way to fill in a pit created by dropping something heavy on my porcelain tile with resin or like substance instead of taking out and replacing the tile completely? The coloring of the tile is a beigh color, marble looking material...