


How to Give Epoxy a Flat Sheen
In this HT post, I show you how to give epoxy a flat finish sheen. Also, learn how to easily sand and refinish an epoxy surface for any sheen level.
Video Tutorial
There are several things which are difficult to fully explain with words and images, so be sure to watch the video tutorial below.
Be sure to subscribe to my YouTube channel for more DIY tutorials.
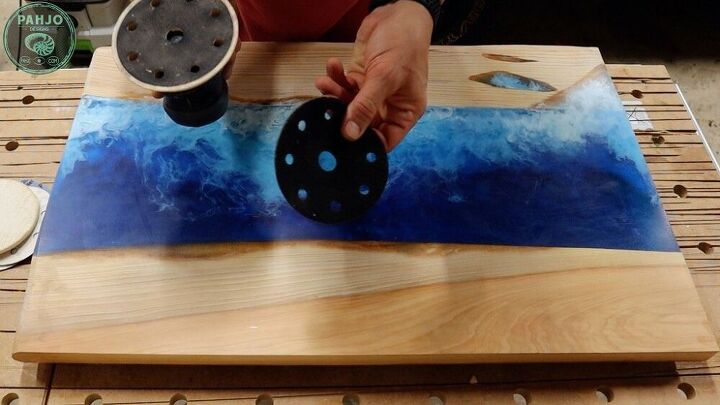
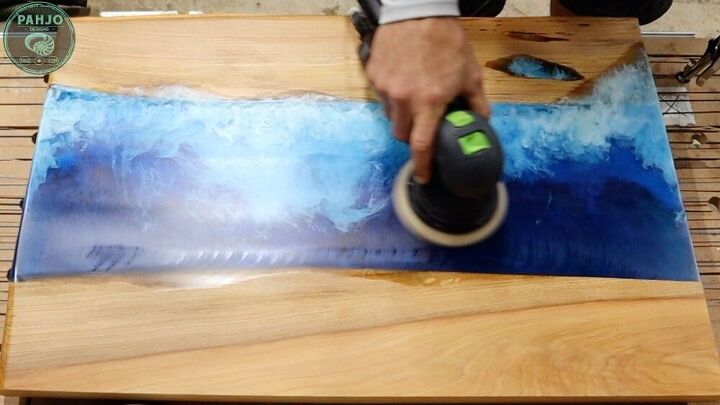
Sand Surface
For the sake of this tutorial, let's assume you are refinishing an existing epoxy table or epoxy surface.
First, I sand the surface with 120, 150, 180, 220, and 320 grit sandpaper. I use a specific sander and technique to sand epoxy resin. Also, I use a dust extractor attached to my sander to remove as much resin build up as possible which is important to avoid damage to the epoxy surface.
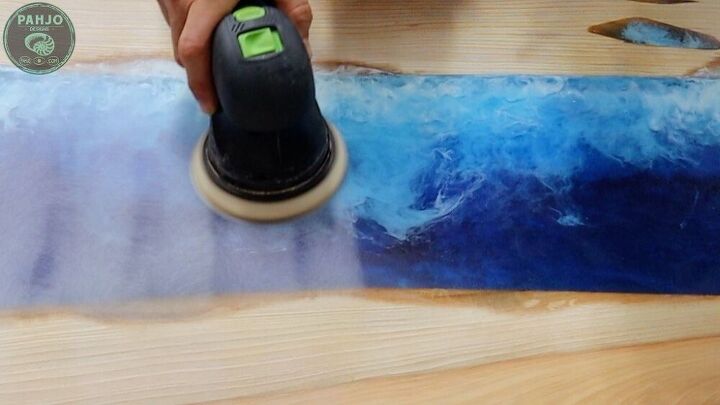
Sand Across
I sand across the surface with 1 or 2 passes while overlapping the previous pass by a few inches to prevent sanding lines.

Remove Resin Build Up
Next, I remove the resin build up on the sandpaper with an air compressor.
Sand Length (with Grain or longer side)
Then, I sand the epoxy surface in the opposite direction (with the grain or the longer direction).
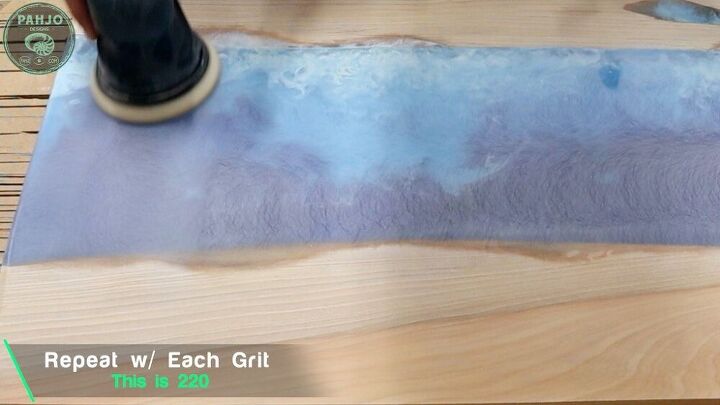
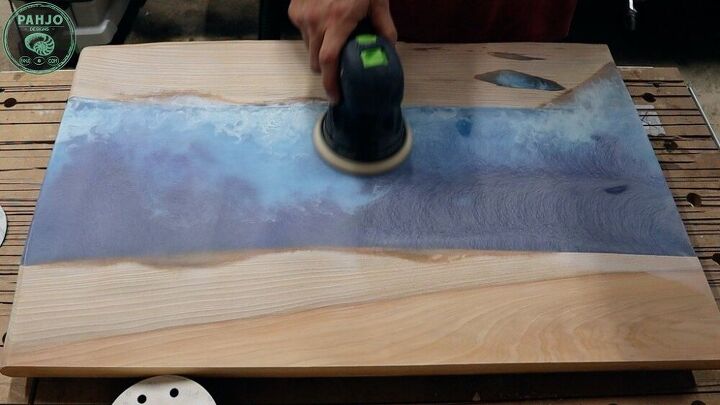
Repeat For Each Grit
Next, I repeat the previous 2 steps for each sandpaper grit.
Protection
Obviously, it is important to wear a dust mask when sanding epoxy or anything which produces fine particles. I live in Florida and spend as much time outside as I possibly can, so I always wear a neck gaiter to protect my skin from the sun. While neck gaiters aren't as good as respirators, they work well enough for me b/c I also have a HEPA vacuum attached to my sander.
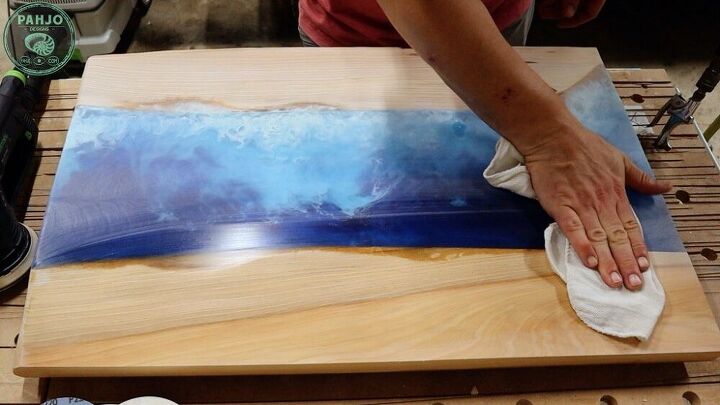
Clean Surface
To clean the surface after sanding, I use a damp cloth. Once I clean the surface, I verify no sanding swirls or pigtails exist on the epoxy.
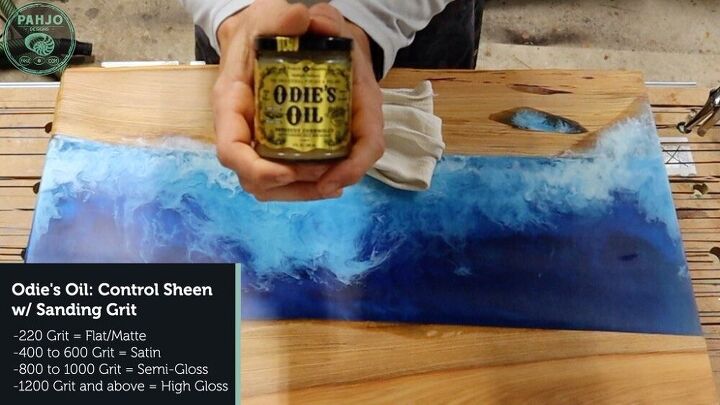
Sheen Level
The most important aspect of this project is sheen level. After all, the point of writing this tutorial is to teach you how to get a flat finish on epoxy.
First, I use Odie's Oil on epoxy surfaces when I want more control over sheen levels. Essentially, the final sanding grit determines the sheen level of Odie’s Oil.
Since I want to achieve a matte or flat finish on this epoxy table, my final sanding grit was 320 grit. I find any grit under 400 leaves a low sheen (flat or matte).
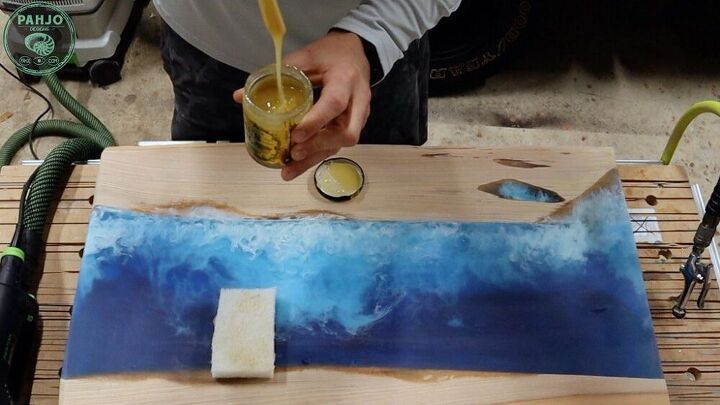
Stir Odie's Oil
Now it's time to apply the epoxy wood finish. First, I stirred Odie’s Oil until the consistency resembled honey.
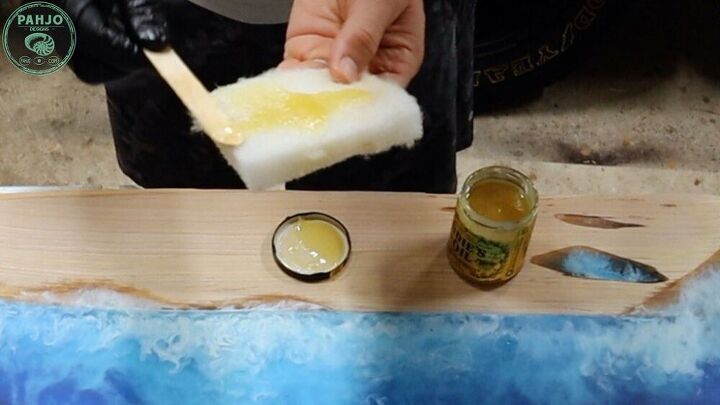
Saturate Pad
Next, I saturated a non-woven applicator pad with Odie’s Oil.
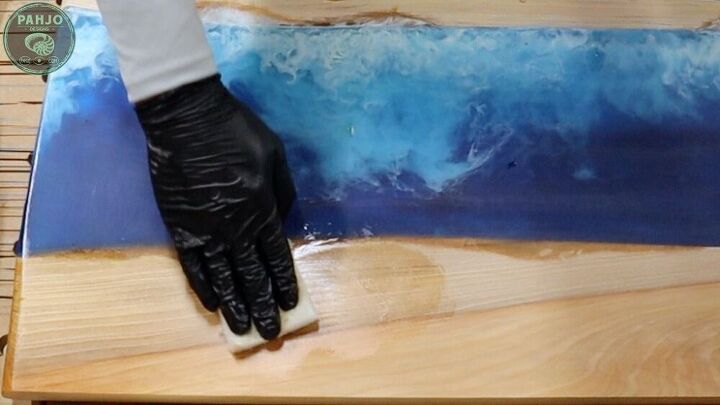
Apply Oil
To apply the Odie's Oil, I worked it into the surface - Mr. Miyagi style.
I allowed the Odie’s Oil to sit for about an hour.
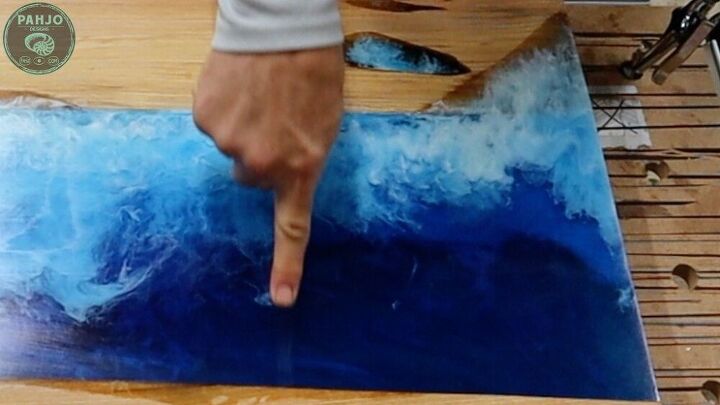
Test for Dryness
I performed the fingerprint test. Essentially, the oil is ready when I leave a mark across the surface after wiping my finger across it.
Wipe Excess Oil
To remove the excess Odie’s Oil, I wiped the epoxy surface with a terry towel.
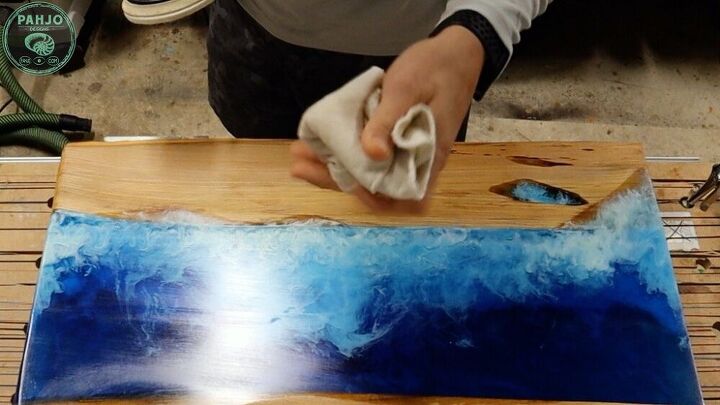
Buff Oil
Next, I used a felt pad to remove the remaining oil. The felt pad really helps bring the surface to life. Keep in mind, any car buffer or polisher works just as well.
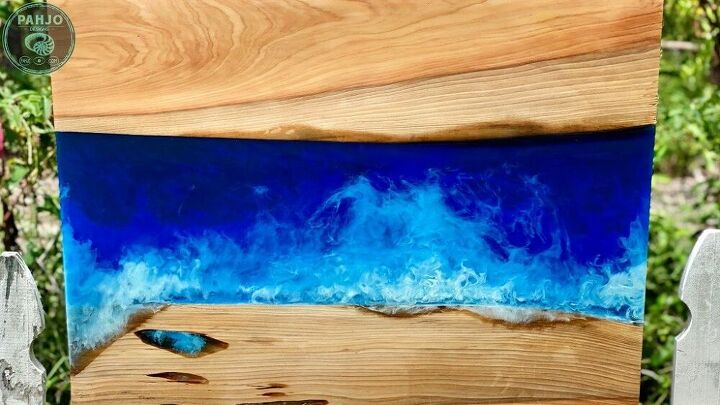
Conclusion
As you can see, this epoxy ocean art has a beautiful matte finish.
The combination of sanding with the correct sandpaper grit and using Odie’s Oil finish makes it possible to achieve multiple sheen levels easily on epoxy surfaces - even wood tables with an epoxy top coat.
In closing, I hope this HT tutorial provided you with value and the tips/techniques help you. Visit my blog for more DIY tutorials.
Resources for this project:
See all materials


Frequently asked questions
Have a question about this project?