


Recycled Wooden Spool
You know those wooden spools, the ones you can find on the side of the parking lot at your local electric company? Well at least that is where I found mine! What do you do with them?
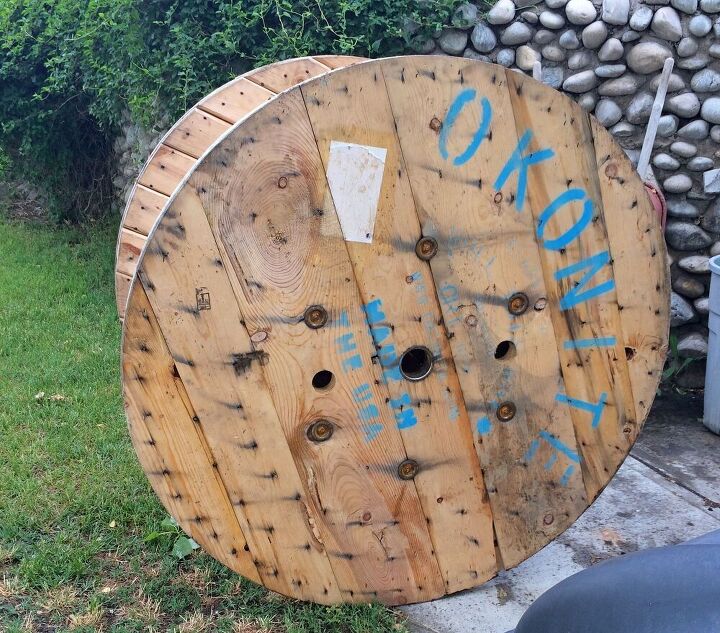
This bad boy is 4 feet tall and I will be making a clock soon but todays project is what we will be doing with the boards in between these two rounds.
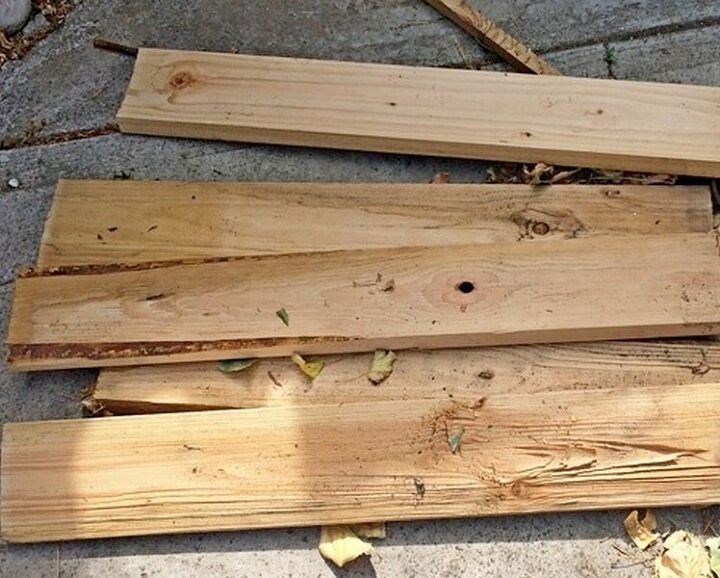
After you've taken the spool apart and sanded the pieces down, we are going to paint them. You will only need five of the boards or make two and give to a friend or sell one! These boards are curved but they are perfect for this project!
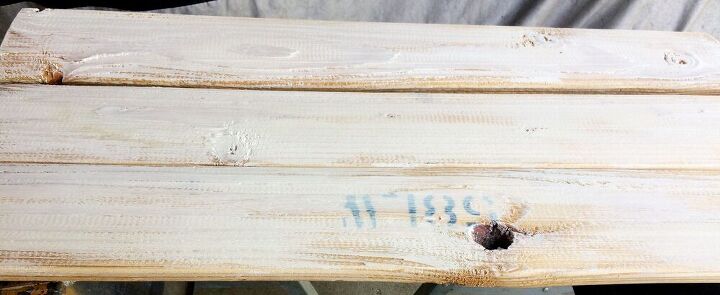
These boards had been stamped, which I love. So I decided to dry brush them with paint and try and keep as much of the numbers and lettering as possible. At this point I had a primer (Kilz) so that is what I used. I'm any white paint would work just as good.
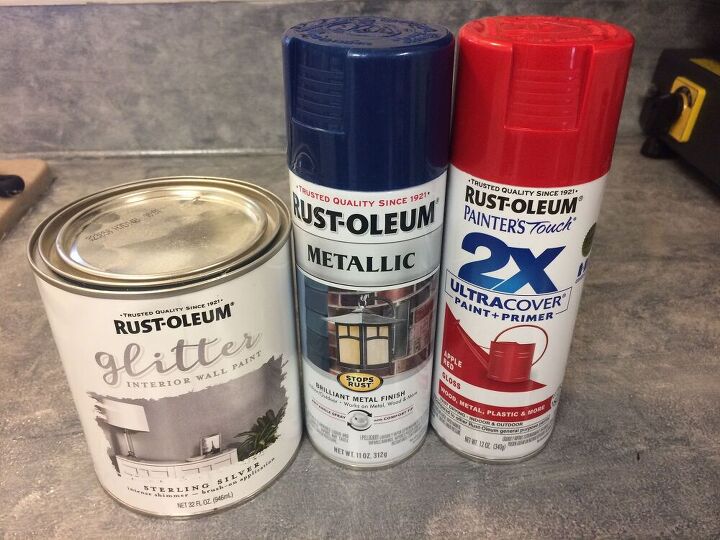
After the boards are dried, I used Rust-Oleum Apple Red for the stripes and the Rust-Oleum Metallic Blue for the square.
Both in Spray paint form.
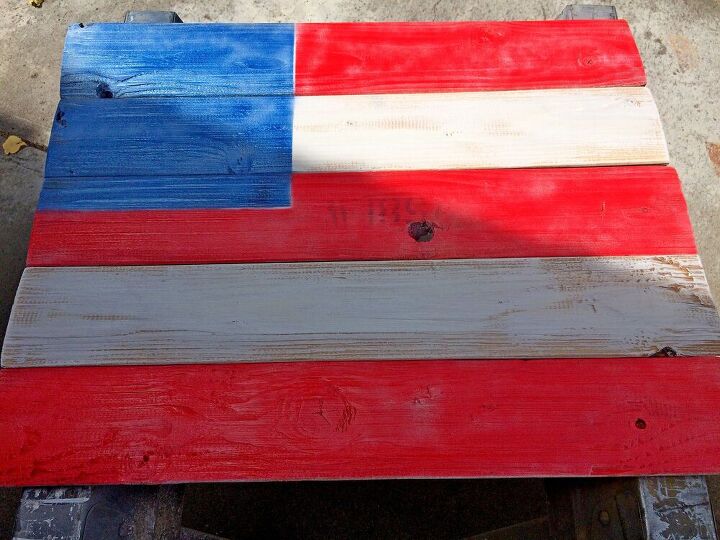
It isn’t the true measurements of a flag or the correct amount of stars but it did turn way cool! After letting the paint dry, I wanted it to look more worn.
I didn’t want to use stain, so what I did was mix some black paint with water.
It only takes a small amount of paint to water ratio.
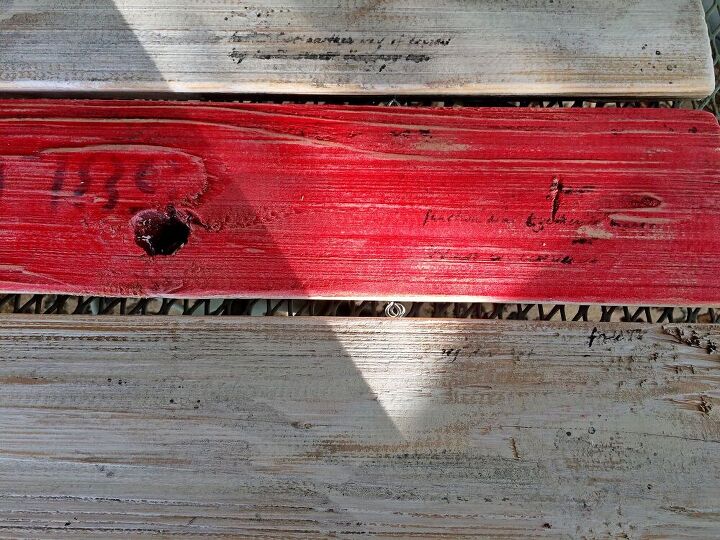
Then after I applied the watered-down paint, I used a rag to take it back off. Do this process until you are happy with the results. It took me a couple of times until I was happy with it.
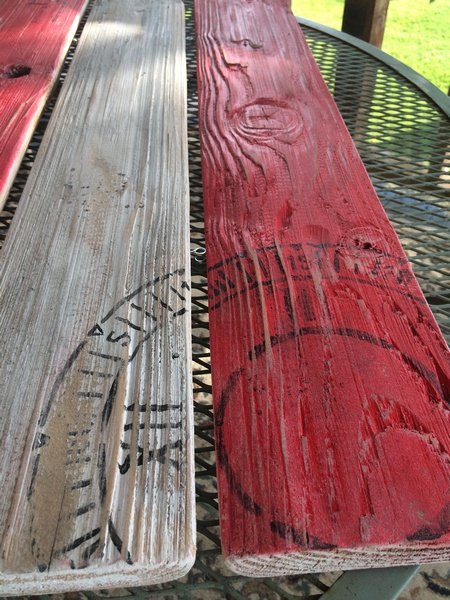
Next, you want to add stencils. Add anything you have really! I had a clock stencil and a stencil with writing so that is what I used.
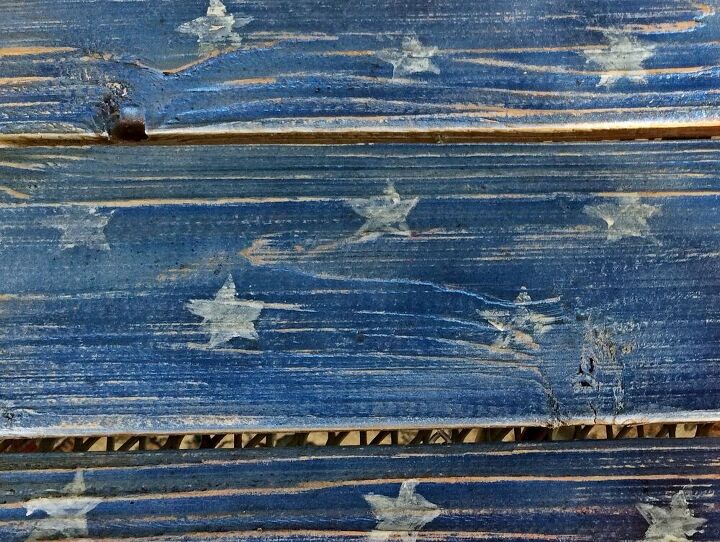
I didn’t have a stencil for the star but I did have a potato on hand, so I cut a star shape from it. You can go back and use a small paintbrush to apply more paint to the stars.
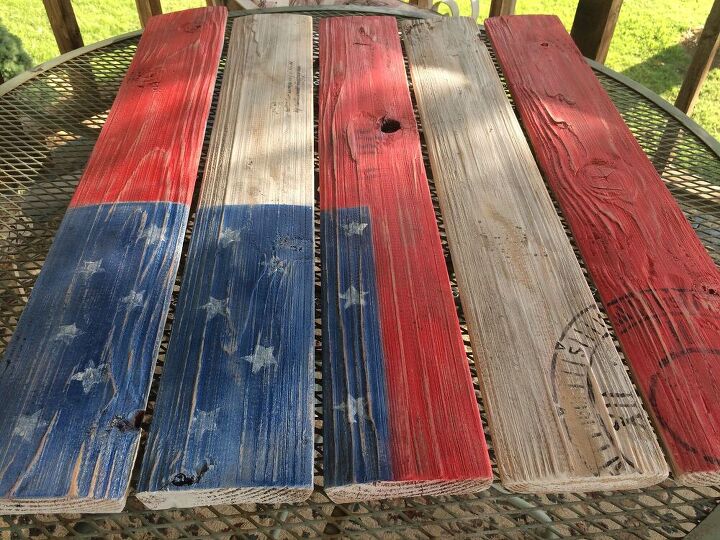
After you have all the elements you want on your flag, go back and sand it down.
Make it look worn.
Both sides of the flag are different.
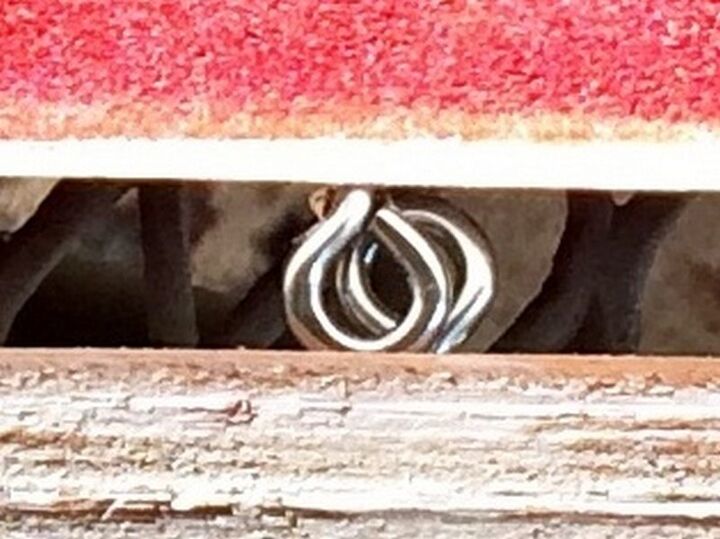
Next, you will want to add eye hooks to the boards.
Two on each side of the board, 4 per board total. Wrap wire around each loop and twist it together the best you can.
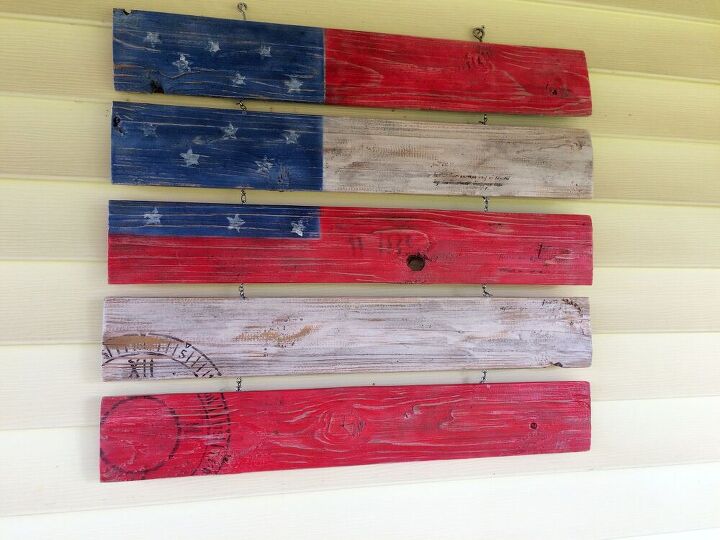
Then you are ready to hang it!!
Turned out cool.
Cost was just the two cans of paint.
And you get a great sing to hang outside.

Stop by Down Sprigg Lane to read the full post!


Comments
Join the conversation
-
Not to down play your beautiful flag, you could do this with a pallet. A lot less aggravation and way less heavy to move.
-
So cute! Great job!


Frequently asked questions
Have a question about this project?