15 Ways to Make an Expensive-Looking Fall Centerpiece
Looking to create stunning fall centerpieces for your home? These 15 DIY tutorials will guide you step-by-step to craft beautiful and budget-friendly decor pieces. From elegant arrangements with magnolia leaves to textured pumpkins using inexpensive materials, there's something for everyone.
Whether you prefer rustic cornucopias or chic mercury glass vases, these DIY fall decor projects will help you elevate your fall decor and impress your guests. Get ready to unleash your creativity and add a touch of autumn charm to your home.
If you're looking for something a little more spooky, discover these creepy and crafty DIY Halloween centerpieces.
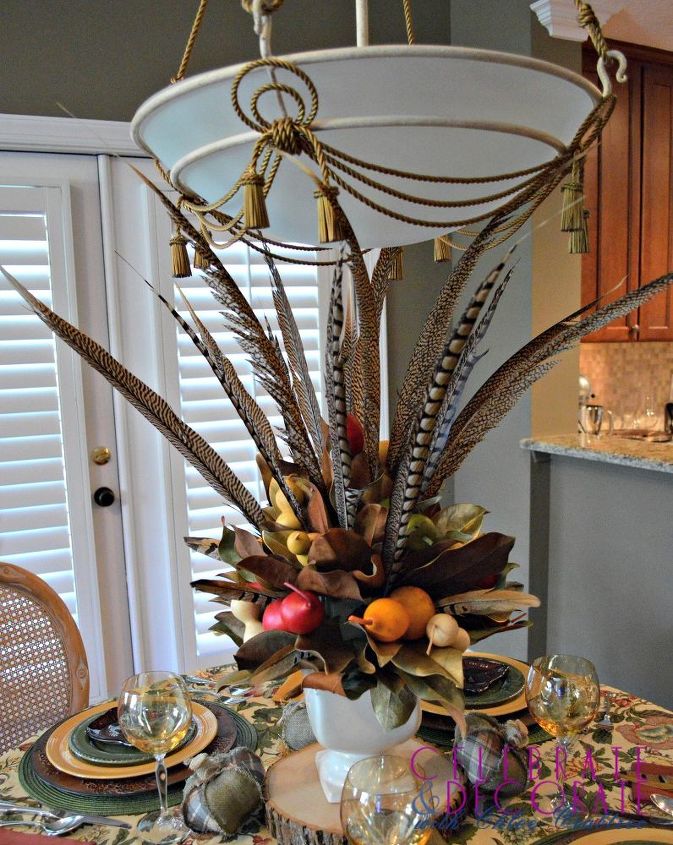
1. Fall centerpiece with magnolia leaves
In this tutorial, by Chloe, learn how to create a stunning fall centerpiece using magnolia leaves that will leave a lasting impression on your guests.
Gather magnolia leaves, paint the brown ones with metallic gold, and trim the stems. Insert dry floral foam into a neutral container and start layering the gold and green leaves from the top, working your way up. Add artificial gourds and feathers for extra flair.
Once complete, showcase your masterpiece on a side table and enjoy the admiration of your guests. Get tutorial here
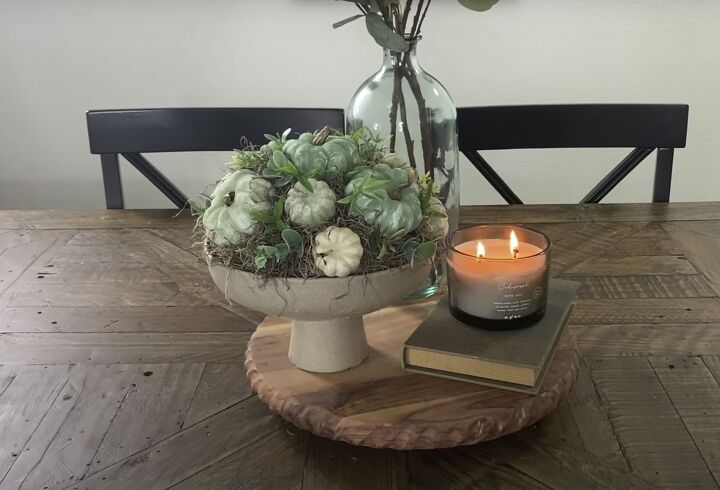
2. DIY pumpkin topiary centerpiece
Create a stunning DIY pumpkin topiary for your fall tablescape with just a few items and these instructions from Hayley.
Use a bowl and an old candle to make a tray, spray paint it for a cohesive look, and mix custom paint colors using acrylic paint and baking soda. Paint the faux pumpkins in various shades, add details with dry brushing, and assemble the topiary using foam, hot glue, and Spanish moss.
Finish off by adding herb picks for a lush green touch. The result is a cute and cohesive fall centerpiece that will impress your guests. Get tutorial here
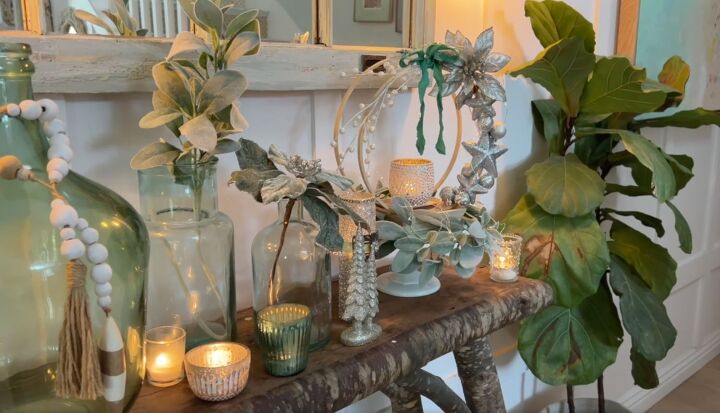
3. DIY embroidery hoop centerpiece
In this project by Bella, learn to create a stunning embroidery hoop centerpiece for Christmas using tongue depressors, ornaments, faux flowers, and a wooden tray.
Cut tongue depressors in half and attach them to pulled-apart embroidery hoops to create a stable base. Glue a wooden tray underneath the hoops for a finished look. Add ornaments to one side of the hoops, secure a faux flower and pearl branch, and finish off with a green bow. Add fairy lights for an extra magical touch.
Place the centerpiece on a flat platform and accessorize with a candle or figurines. This DIY project will add a beautiful focal point to your holiday table. Get tutorial here
4. Hot Wheels pumpkin centerpiece
Who would have guessed you can create fall decor using Hot Wheels tracks from Dollar Tree?
Gather four packs of Hot Wheels tracks and arrange them in a circular shape, securing them with hot glue. Attach a wooden dowel through the holes in the tracks and slide the tracks onto the dowel, alternating their direction. Use hot glue to hold the tracks in place and fold them over one by one, adjusting their shape as needed.
Attach the pumpkin to a base using hot glue and add floral foam to the center. Decorate the pumpkin with fall flowers, add a stem using a small branch, and cover the stem with a bow. Finish off by adding autumn leaves.
The result is an easy and inexpensive pumpkin centerpiece or home decor for the fall holidays. Get tutorial here

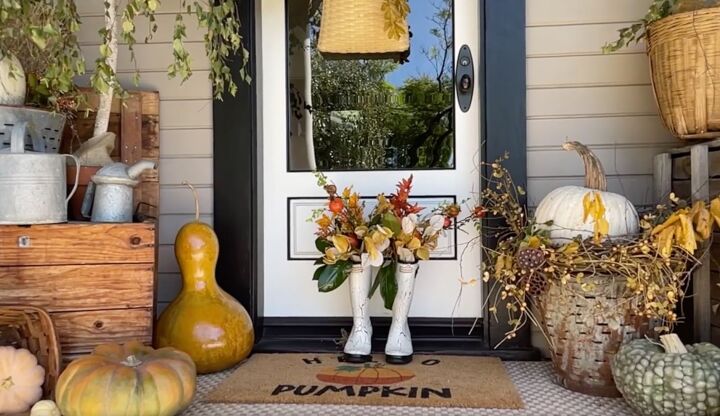
5. DIY rain boot planters
Transform your old rain boots into eye-catching planters with this DIY rain boot planter tutorial. Start by applying tape to mask off areas you don't want to paint, such as buckles and labels. Apply crackle medium for a textured effect, then paint the boots with off-white mineral paint.
After the paint dries, apply a top coat for protection. Remove the tape to reveal the finished boots. Fill the boots with half bricks to weigh them down, and then add floral arrangements to create stunning displays.
Explore fall arrangements with gold eucalyptus, gold berries, fall foliage, and magnolia leaves, or try a pink and white arrangement for a softer look. For Christmas, use frosted branches, Christmas greenery, white magnolias, and red pomegranates.
Place the rain boot planters on your porch, table, or as a centerpiece to add charm to your fall and holiday decor. Get tutorial here
6. DIY Tide Pods centerpiece
Turn trash into treasure with this Tide Pod container pumpkin project. Remove the label by soaking it in hot water, then remove the top piece.
Cut strings and glue them to the container to create depth for the pumpkin shape. Add more strings, trim them, and paint the container with bronze, tangerine yellow, and orange colors. Place floral foam inside the container to hold the arrangement.
Build a fall arrangement using leaves, sunflowers, mums, berries, and more. Make sure to cover the back of the arrangement as well. Display your beautiful fall arrangement in the repurposed Tide Pods container for a festive centerpiece. Get tutorial here
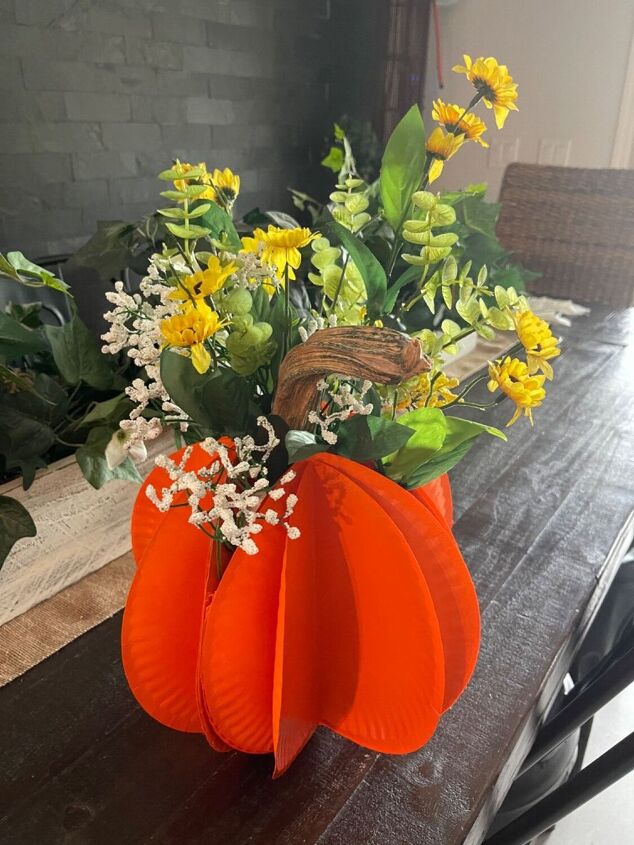
7. Paper plate fall pumpkin arrangement
Next, Shelly shows us how to create a cute and easy fall centerpiece using paper plates and an empty bottle. Glue two paper plates together to make sets, fold them in half, and glue them to the bottle to create a 3D pumpkin shape. Add more plates as needed to fill it up.
Spray paint the pumpkin orange and add a pumpkin stem. Fill the pumpkin with flowers to complete the fall arrangement. This project is perfect for a farmhouse table centerpiece and can be customized with different decorations. Get tutorial here
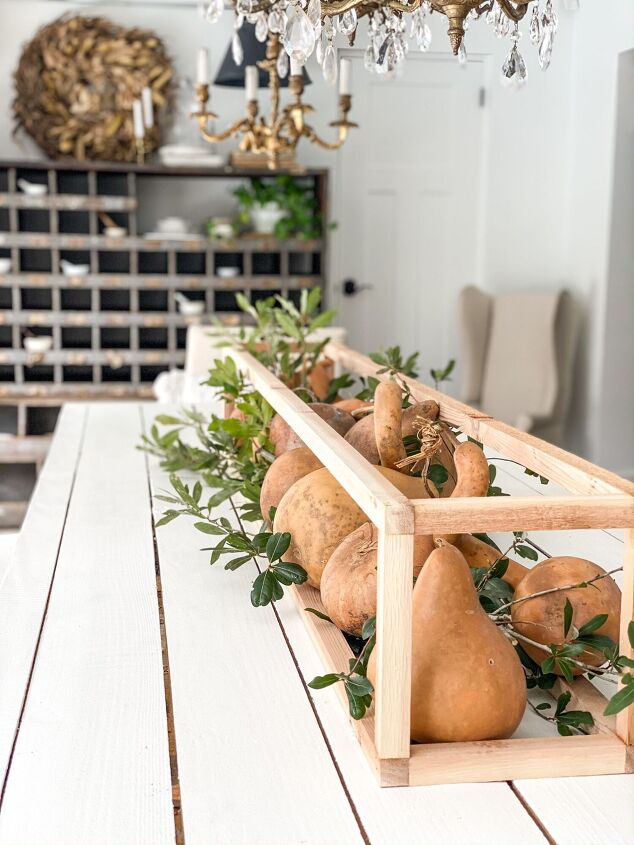
8. DIY wooden frame centerpiece
In this DIY project, Robyn demonstrates how to create a DIY table centerpiece using a wooden frame made from cut pieces of wood. The size and scale of the centerpiece can be customized based on your table and personal preference.
Consider using items like vintage pitchers, jars, bottles, or candlesticks to style the centerpiece. The DIY centerpiece allows for grouping various items for a beautiful statement.
Follow the steps of cutting, gluing, and assembling the wooden frame to create the centerpiece. It's a versatile and customizable project that can be used for different seasons and events. Get tutorial here
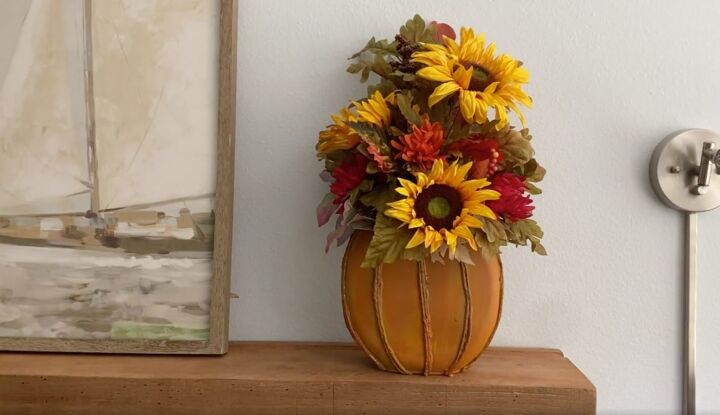
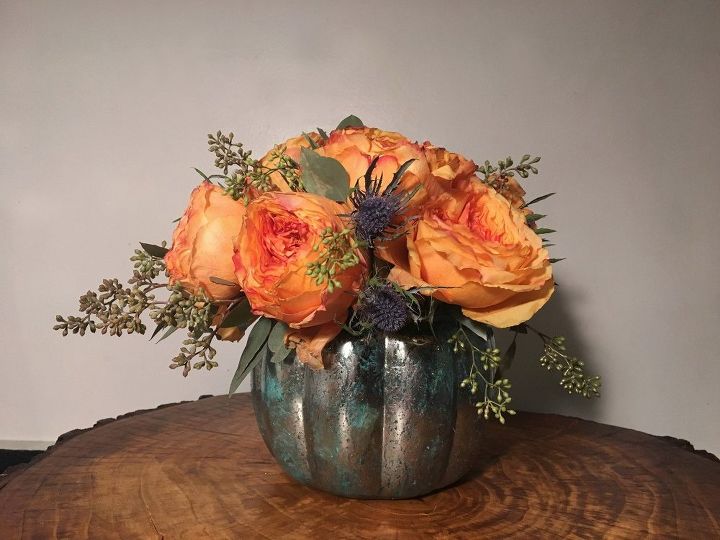
9. DIY mercury glass pumpkin centerpiece
This beautiful DIY mercury glass pumpkin vase is perfect for fall. Color the inside of a glass pumpkin jar with food coloring and Mod Podge, then bake it in the oven. After cooling, spray the jar with a water/vinegar mixture and mirror spray paint to achieve the mercury effect.
Add floral foam and arrange flowers inside the vase for a stunning centerpiece. This versatile project could also be used as a candy or treat jar. Get tutorial here
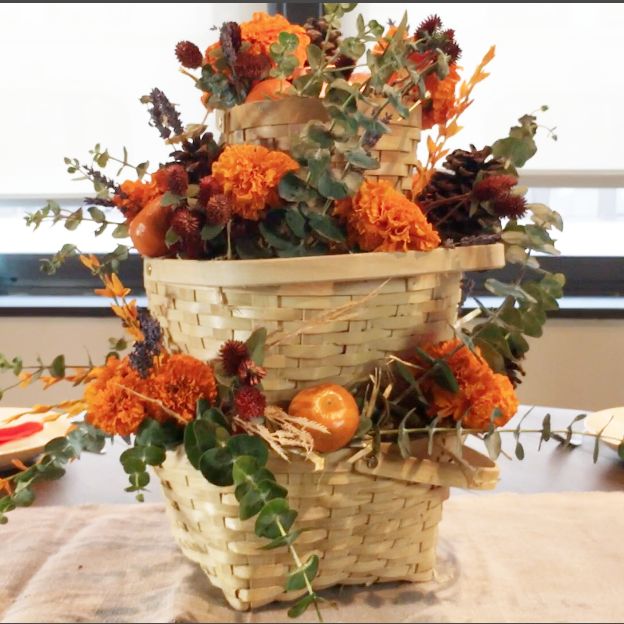
10. Fall basket centerpiece
Kara uses items from around her apartment to create a DIY basket centerpiece for fall. Stack and fill three baskets with straw, securing them with a dowel. Add a variety of greens, such as eucalyptus, and incorporate scented elements like oranges by skewering them to the baskets.
Finish off the centerpiece with additional fresh elements like lavender, marigolds, and pine cones, and place a candle on top. This customizable project can be adapted for different seasons and occasions. Get tutorial here
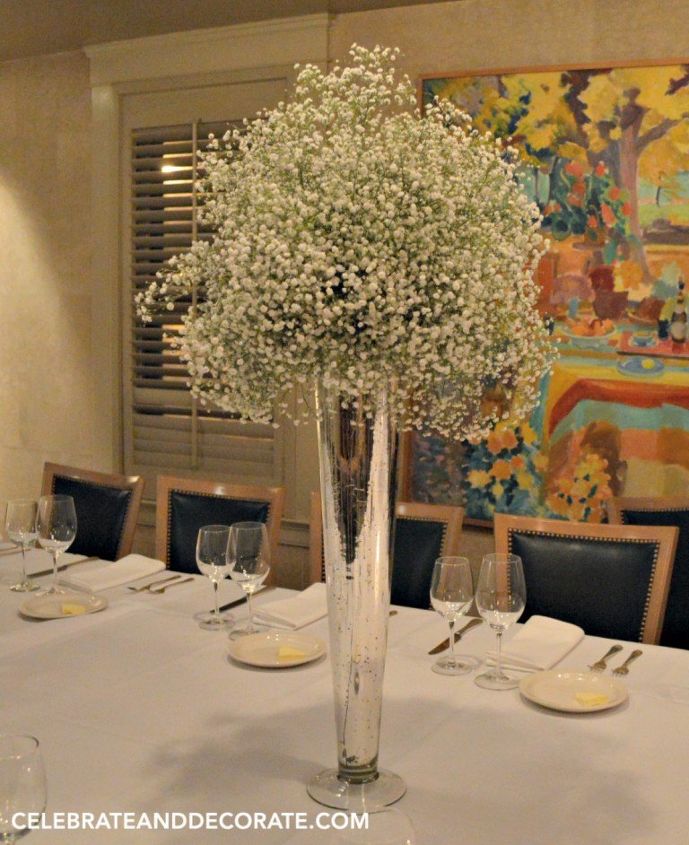
11. DIY baby's breath centerpiece
When in doubt, think simple. Chloe shows us how to create elegant centerpieces using tall silver mercury glass vases and baby's breath.
Soak floral foam in water and place it on top of the vases, then insert the baby's breath until the arrangement looks full. This classic centerpiece is perfect for a fall dinner celebration or any special occasion. Get tutorial here
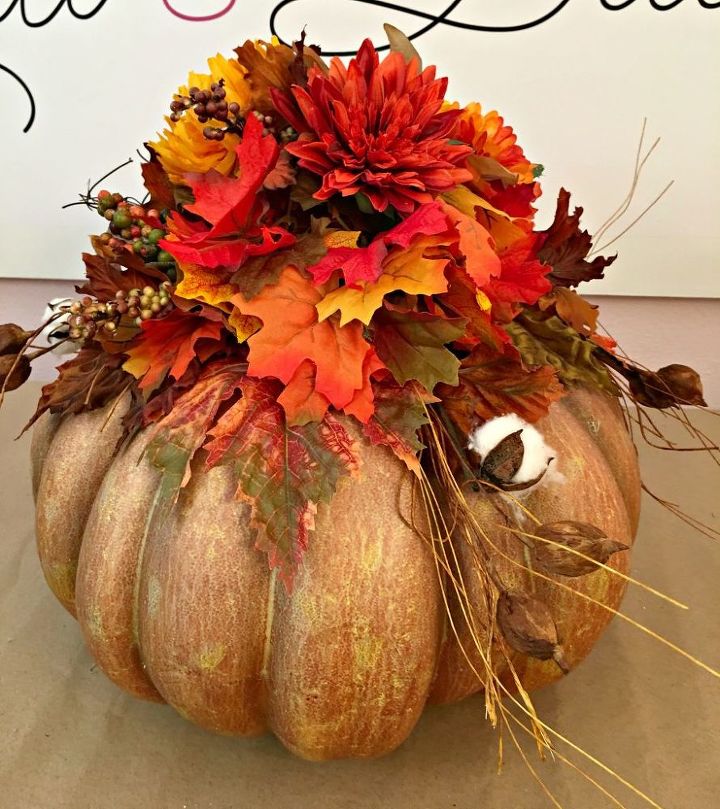
12. DIY pumpkin centerpiece
This is another great centerpiece by Chloe. This time, she demonstrates how to create a quick and easy fall decoration using a pumpkin, whether real or faux.
Cut a block of floral foam in half and secure it to the top of the pumpkin using floral anchor tape. Add fall florals, such as cotton pods, leaves, mums, and berries, to the foam, filling in the arrangement. Display and enjoy this festive decoration throughout the holiday season. Get tutorial here
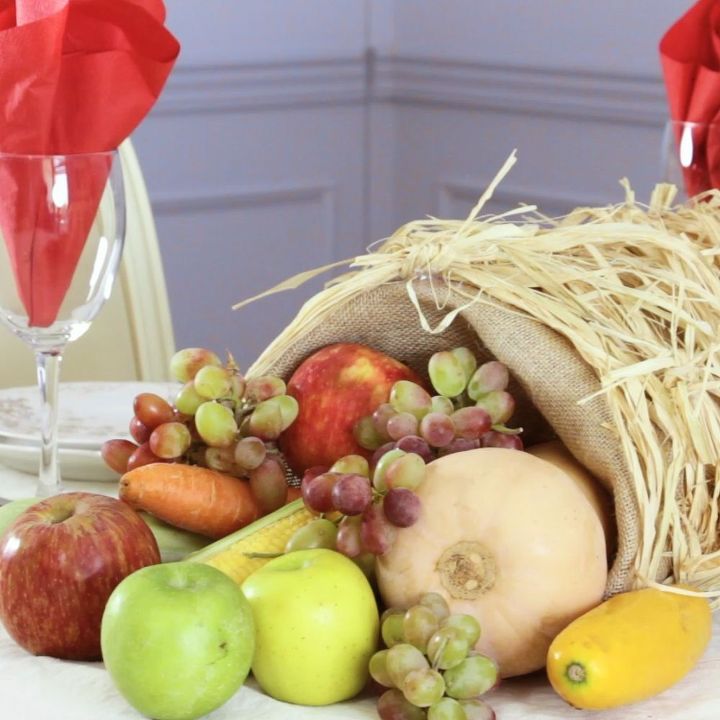
13. DIY fall cornucopia
Here's how to make a DIY fall cornucopia using chicken wire, burlap, raffia, and hot glue. Shape the chicken wire into a triangle, wrap it with burlap, and secure it with hot glue.
Tie the raffia into small bunches and attach it to the cornucopia using hot glue. Trim any excess raffia and admire your stunning centerpiece, perfect for fall and Thanksgiving gatherings. Get tutorial here
14. Waste paper basket centerpiece
Transform a wire trash can from the Dollar Store into a stunning fall decor piece by following this step-by-step project by Chloe.
Attach a piece of foam and chicken wire to the upside-down trash can, securing them with pipe cleaners. Build your fall arrangement by inserting stems and pumpkins into the foam, covering it completely with leaves and flowers.
Add bittersweet vine for an extra decorative touch. The result is a beautiful and budget-friendly fall centerpiece. Get tutorial here

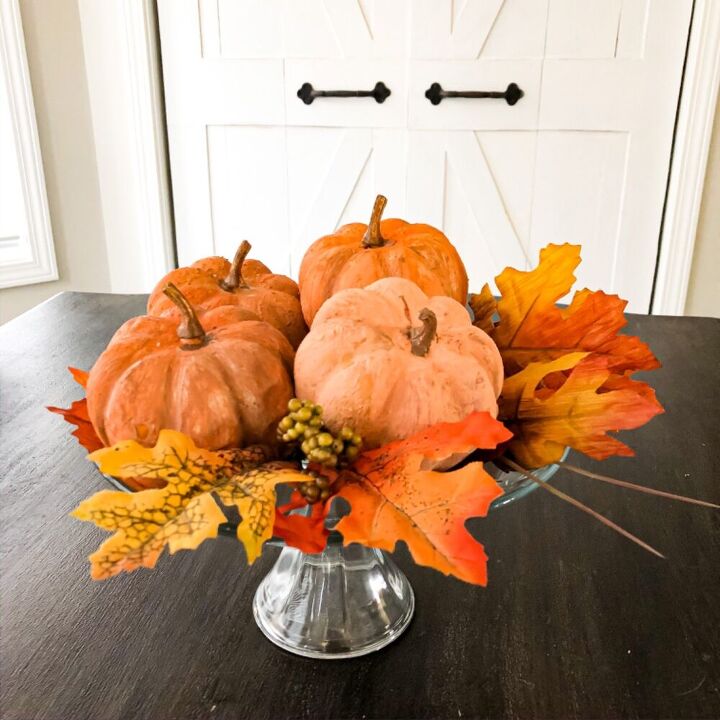
15. Textured pumpkin centerpiece
Katie creates realistic-looking pumpkins for her fall decor using inexpensive foam pumpkins from the dollar store.
Mix glue, baking soda, and paint to create a textured paint mixture. Apply the glue directly to the pumpkin, allowing it to drip and create a warty effect. Once the glue is tacky, brush on the paint mixture all over the pumpkin. Add dimension with a darker color and let it dry. Remove any loose pieces of paint.
Optionally, spray with a sealer for added protection. Arrange the pumpkins in a bowl or tray with leaves or greenery for a beautiful and cost-effective fall centerpiece. Get tutorial here