


New Driftwood Design- Humpback Whale Tail

I'm a beach comber and I'm also a creative therefore when you mix the two you never know what I'll come up with! Plus I always love to try something new and unique which lead me to attempt making a whale tail with small driftwood pieces that I had previously collected.
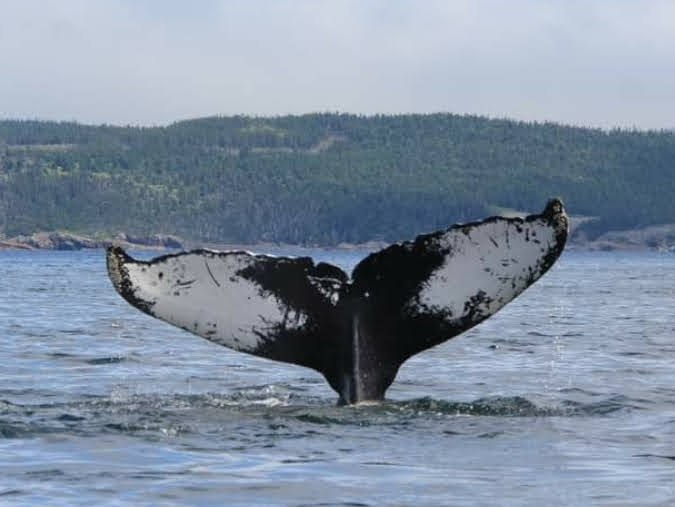
I got the opportunity to go whale watching and I even can sometimes watch them from the shoreline in the Summer. I'll often see their tail in the air like this as they plunge down for their next dive. I have a great respect and love of whales therefore my two loves of ocean life and crafting merged for this project.
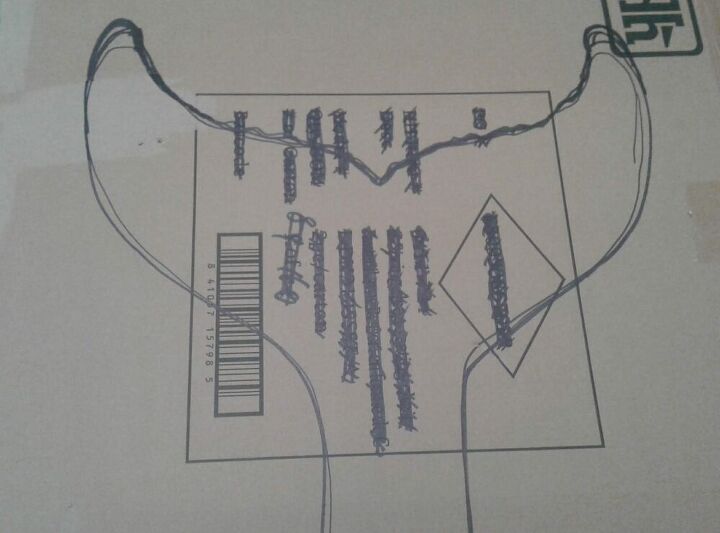
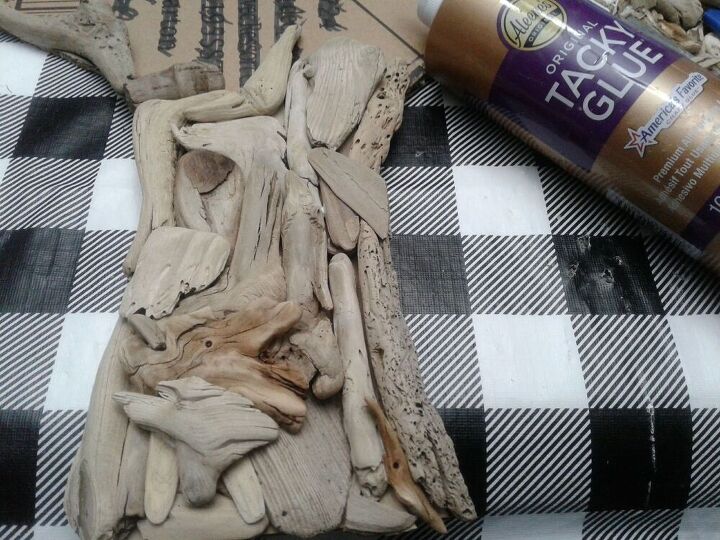
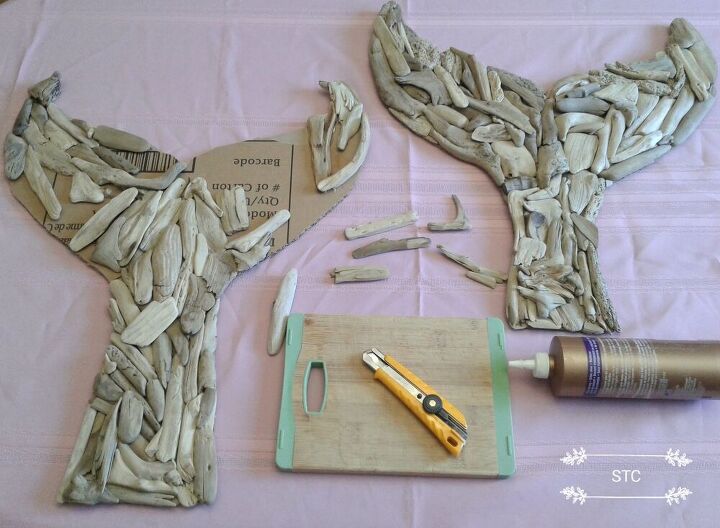
I have created hearts, starfish and other items in the past with driftwood and learned that a heavy duty cardboard is a great item to glue the small wood pieces onto. Luckily for me I bought some new chairs and mercy me I was as excited over the cardboard as I was the chairs! I read a quote that has me written all over it, " I don't think outside of the box, I think of what I'll make with the box!" Anyhow back to the task at hand, I just drew a tail outline onto the cardboard free hand after practicing with drawing a few on some paper first.
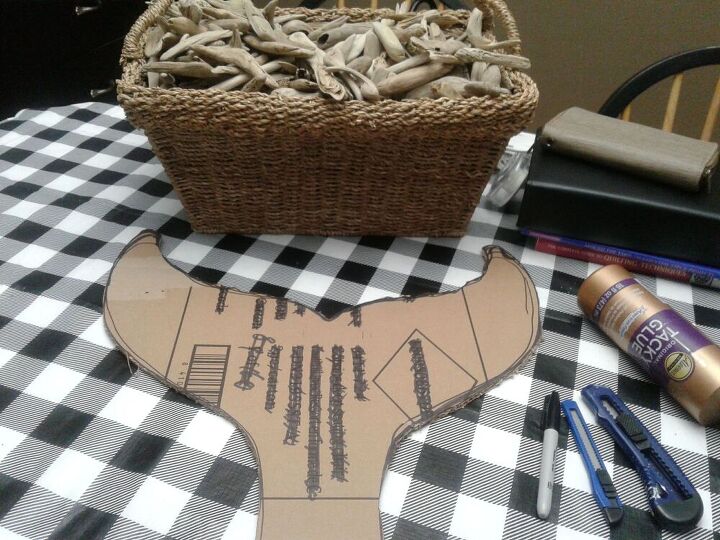
I carefully cut out the tail with a heavy duty utility knife, the larger one seen here in the photo. I'll be using Aleenes Tacky Glue to attach the wood pieces to the cardboard backing.
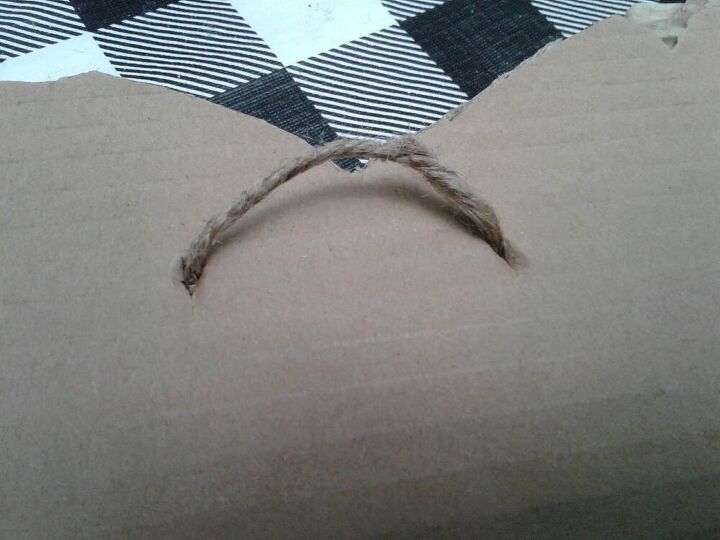
Find the center of the tail, mine was about 24" wide at the top so center was 12". At that mark I put a couple of small holes on either side to insert some jute string. It's nothing fancy but it works, tie the ends of it on the front side before puzzle piecing begins. It will all be concealed on the front with the driftwood, trust me.
Its much like putting together a puzzle, take a piece then wiggle and twist it until you find a good fit and glue it in place. The smaller the pieces the better it is for this project, you don't want thick bulk just good cardboard coverage. This glue dries clear so it's fine if some of it oozes out from the joins.
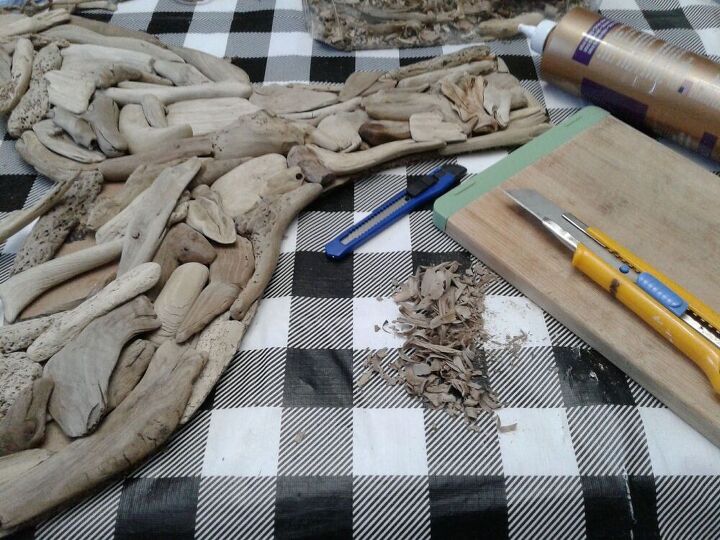
This is "not" a necessary step but for me I wanted the fits to be almost perfect so I would shave and cut some of the joins to fit the curves better or make them lock tight into a spot. But in the past I didn't attempt this step and the projects were fine, because the varied colors and textures of the wood conceal the imperfect joins. This was just a step up challenge for me using the utility knives and a wooden cutting board.
I worked at this project a little section at a time, making sure to give my eyes, back and neck a rest between sittings. Too, when you step away and come back to any project it gives you a fresh perspective to examine and maybe tweak the progress.
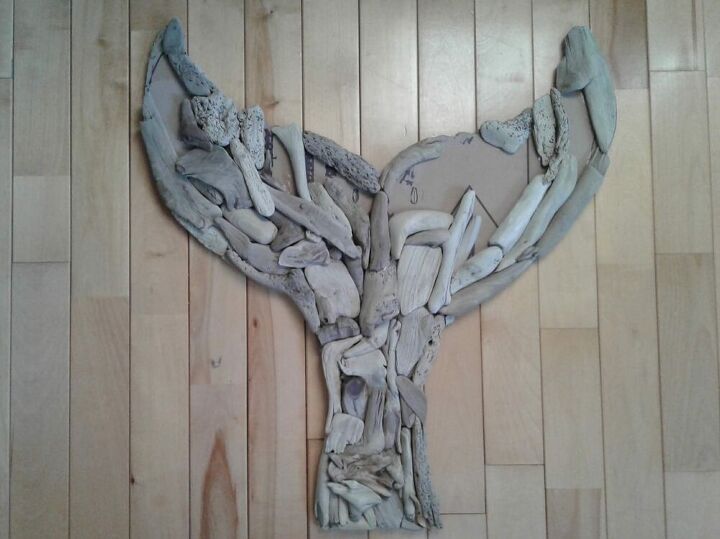
Here is the finished product, you'll notice the jute hanger is well concealed underneath the driftwood like I predicted. Its lightweight because of the cardboard backing, pretty cool huh?
Did I mention it's a little addictive like doing puzzles? I wanted a taller one this time and since it was fun, easy and relaxing why not make another one?
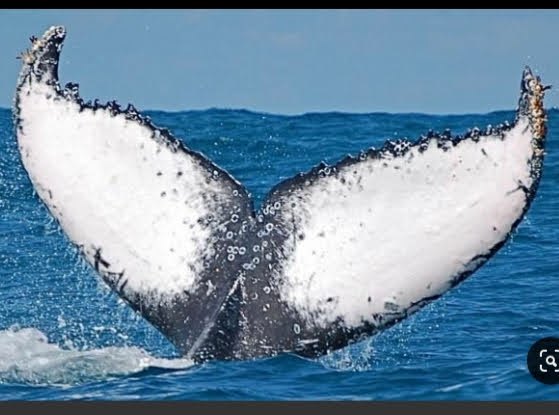
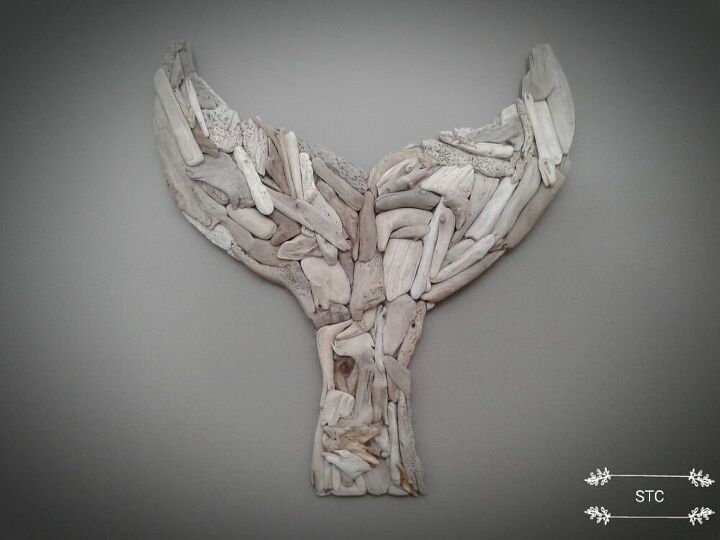
Do you see the pattern and coloring on the underside of the tail? No two are alike it's a means that researchers use to identify individual whales. That got me to thinking and wondering...about my whale tail, could I make it more realistic?
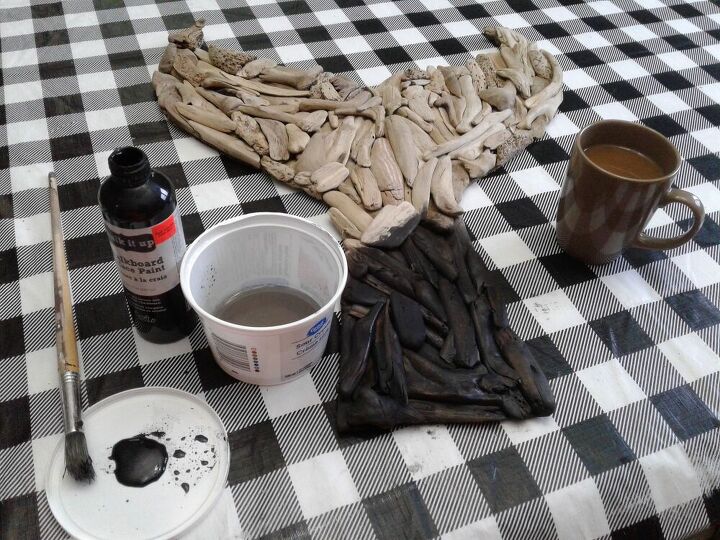
Why yes, yes I can make it more realistic, I'll stain the wood!! Coffee always brings about the best ideas! So just using an artist's brush, chalk board paint and water I made a stain to wash over the areas I wanted black. I did the same with white chalk paint for the part I wanted white, remember no two tails are alike so you can't mess this up!
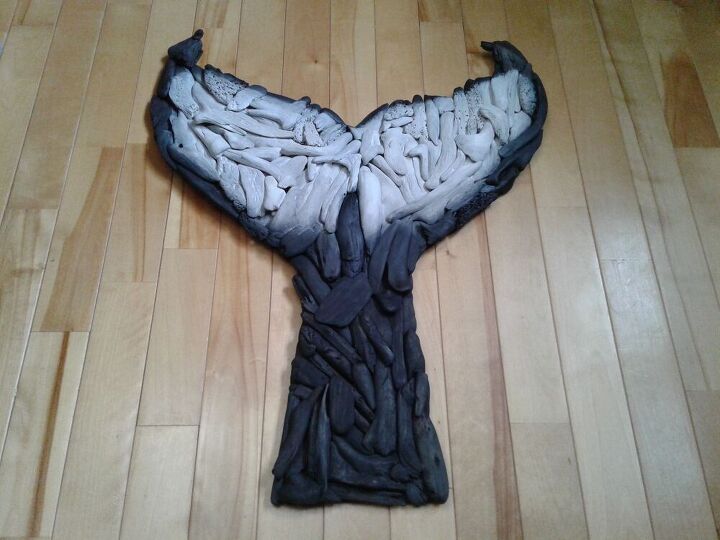
How do ya like me now? I love... but I realize the naturalists are screaming at me now.
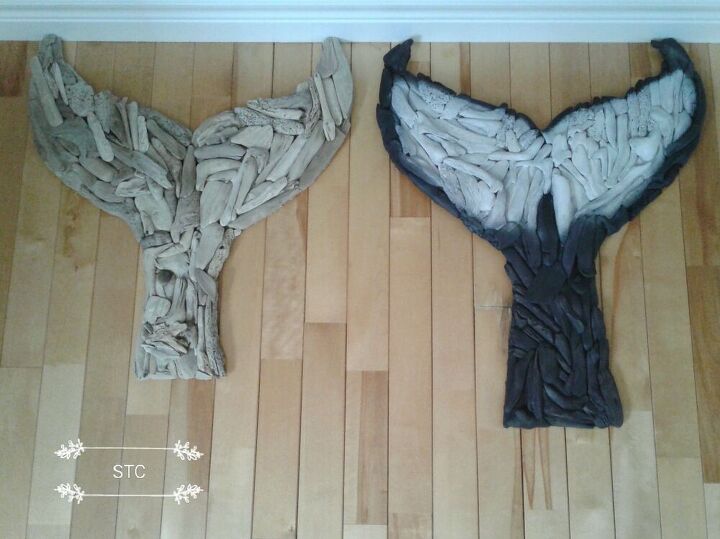
It's up to each individual how they see and prefer things but for me this was a fresh alternative to all of those previous driftwood projects that I created and left natural.
The main reason that I stained it? We are going with a mostly black and white color scheme throughout our home and wanted some new wall decor that still had a nautical theme and a sense of home. I'm super pleased with both tails but I am keeping the stained one for myself. Thank you always for taking the time to pop in and see what we are up to, until the next project stay safe and stay well.
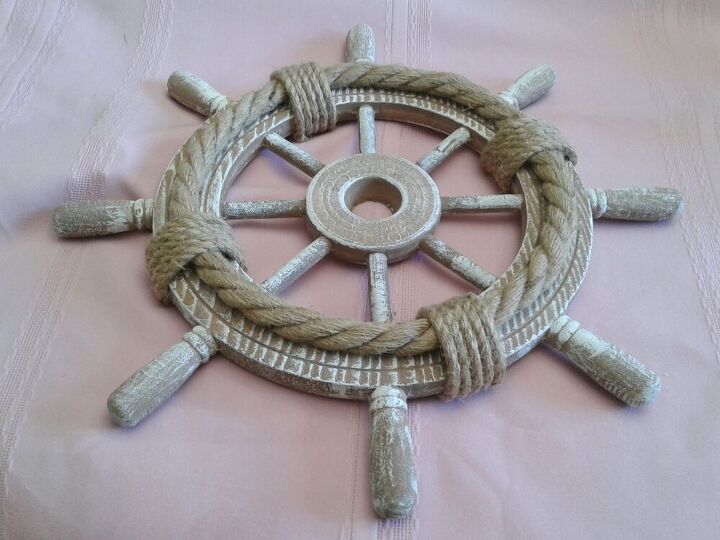
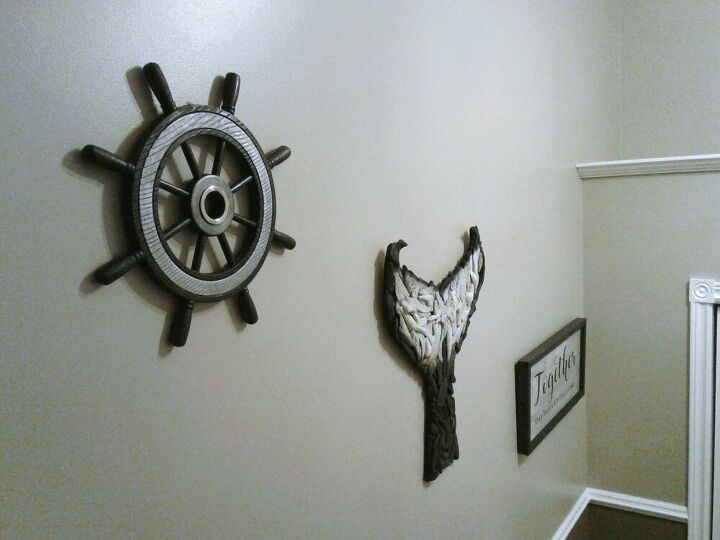
Just to spark another idea for you maybe, this ships wheel is just your mass produced Dollarstore find but I'll show you how I made it mine!

The rope was all removed, black chalkboard paint and a little silver craft paint to accent it, the center metal round? A curtain grommet that I recycled, it fit perfectly and made the wheel a little more realistic!
Resources for this project:
See all materials


Comments
Join the conversation
-
Wow. Beautiful! Love your creations!!
-
Beautiful! Just so beautiful! Natural or the black and white theme ? Well, I’m thinking both work perfect. O each their own xxx I love it. Thanking you for sharing. It gives me ideas, as I live 2 minutes from the sea xxx🌹


Frequently asked questions
Have a question about this project?
Did you get the steering wheel at Dollar Tree (unlikely) or Dollar General? Hard to believe that came from any dollar store!