


DIY Above TV Shelf | How to Decorate You TV Wall
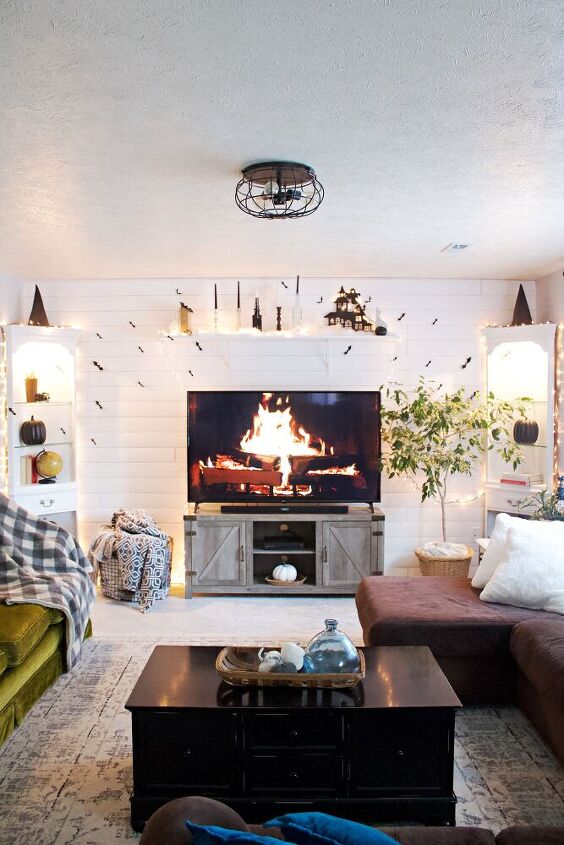
Our above TV shelf is what I like to call the frosting on top of our wall project cake.
We all know frosting is the best part of any cake right? Well that’s how I feel above TV shelf we put up. It was the finishing touch that made the wall complete.
If you’re new to our TV wall story, I’ll recap you quickly. Then we’ll move onto the shelf and decorating around the TV.
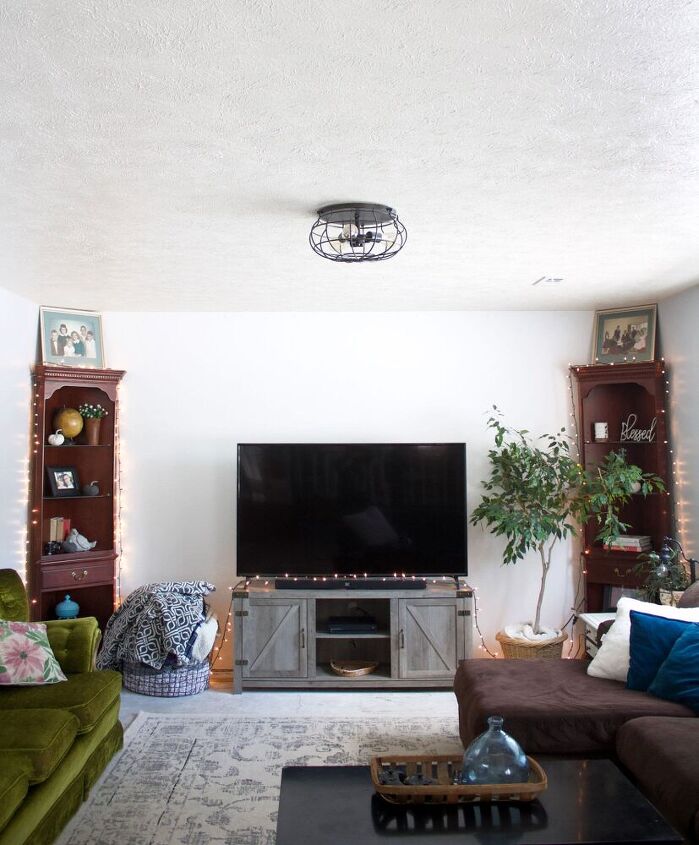
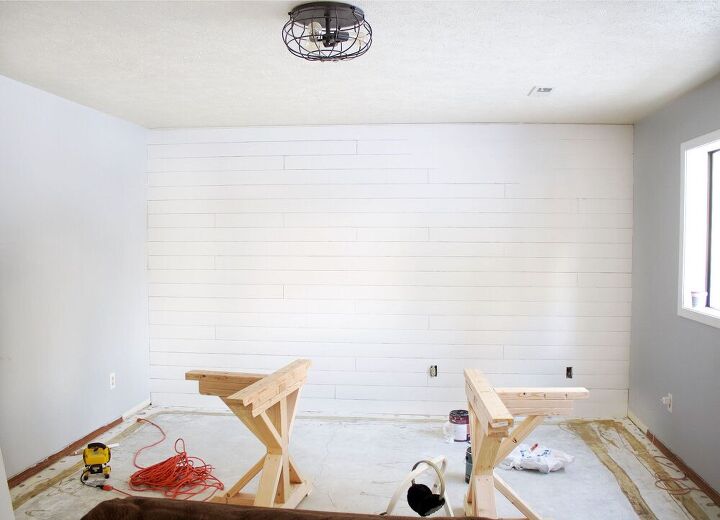
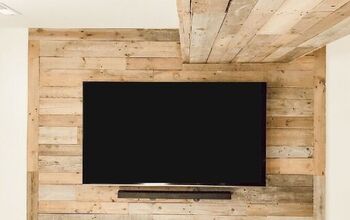
Recently we decided the wall behind our TV was boring and sad, and we wanted to add shiplap to it and warm up the space a bit. We completed that project last week, but the wall was still missing something.
And as I stared at my pretty wall, suddenly I just knew.
It needed a shelf. Above the TV. The frosting on my wall . . . perfection.
It was such a simple thing that made a huge difference. All for only $32 and about 10 minutes of my time.
DECORATING THE WALL BEHIND YOUR TV
There’s an art to decor on the wall behind your TV. You don’t want decorations so loud that they distract from your favorite show. But also, a huge empty wall behind a TV is bare and sad.
How do you find the middle ground between overdone and cold and sad? Here are a few tips.
KEEP THINGS BALANCED
To keep the TV the central focus, balance both sides of it with lamps, photos, sconces, shelving, you get the idea. Keeping the wall symmetrical is soothing to the eye, and helps tie everything together.
DON’T MAKE THE DECOR TOO LOUD
This is why I loved doing our wall and decor monochromatic. It soften the wall while still adding definition and visual appeal.
Truly that’s the core basics. Don’t overthink it. A few key pieces, art, or shelving and you’re set to go!
HOW TO MAKE YOUR TV SHELF
This is the simplest DIY on the planet. Truly.
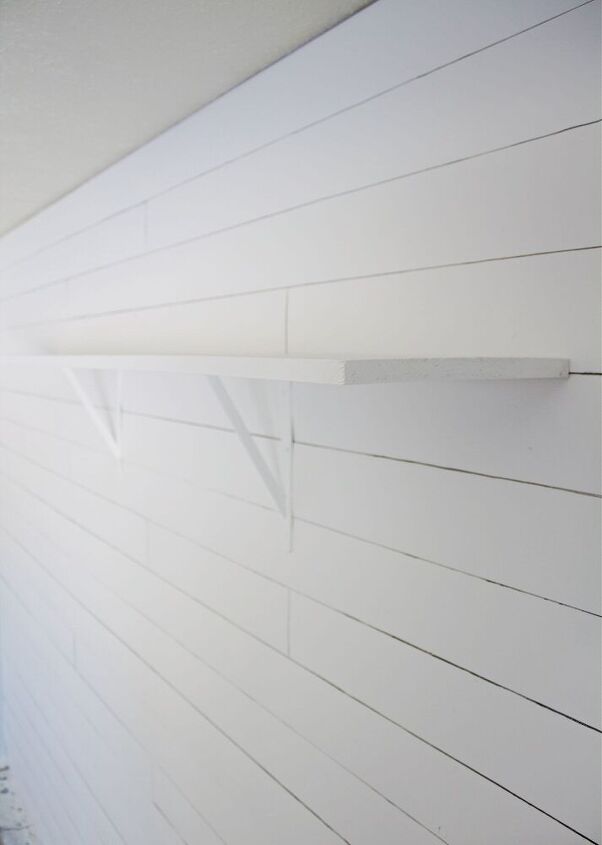
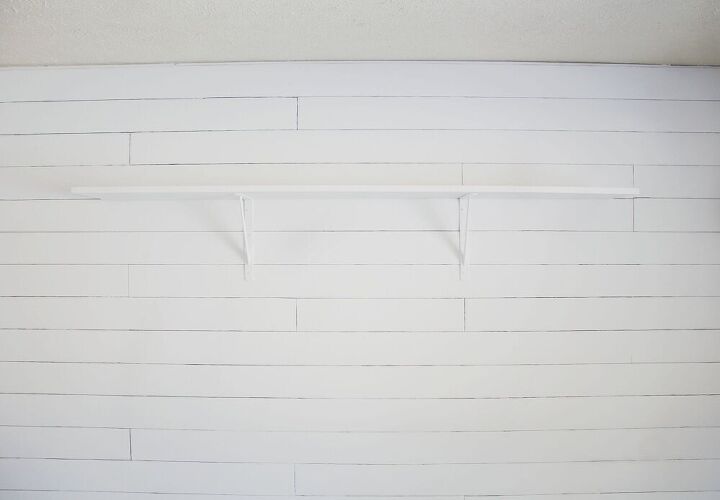
We went with a 12" wide, 6' board and purchased white brackets.
To put up the brackets, try to make sure they’re both in studs. Now, whoever made our house didn’t believe in spacing the studs evenly, so we ended up placing one bracket in a stud, and then simply putting the other one through the wall where it was even and matched up from the other bracket and side of the room. Thankfully, since we nailed all our shiplap into studs, screwing the bracket into the shiplap provided the support we needed.
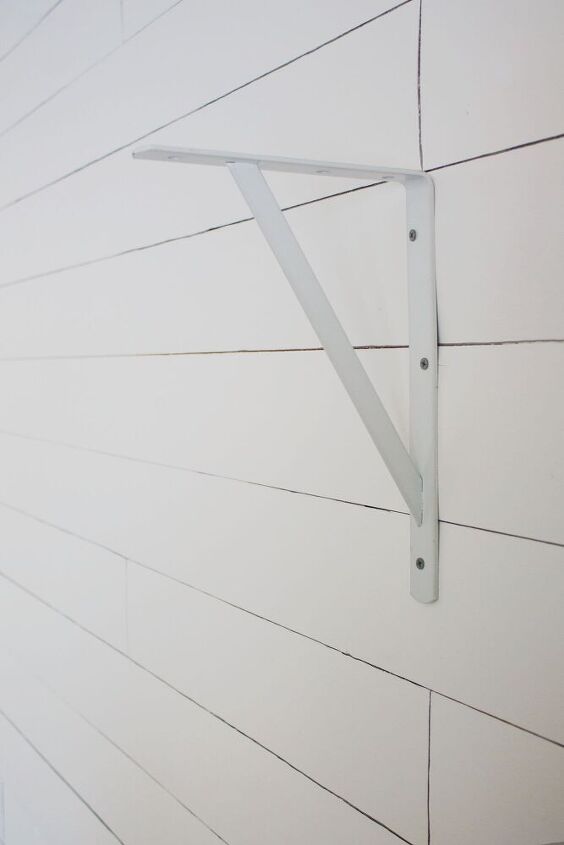
Now friends, this may sound weird, but the brackets white color bothered me, it was a touch off from the white we painted the wall. We used Nano white by Behr.
Normally I wouldn’t recommend painting metal brackets. The paint will scratch off easily.
But these brackets are above the TV. And no-one should be messing with anything around the TV. So I painted them.
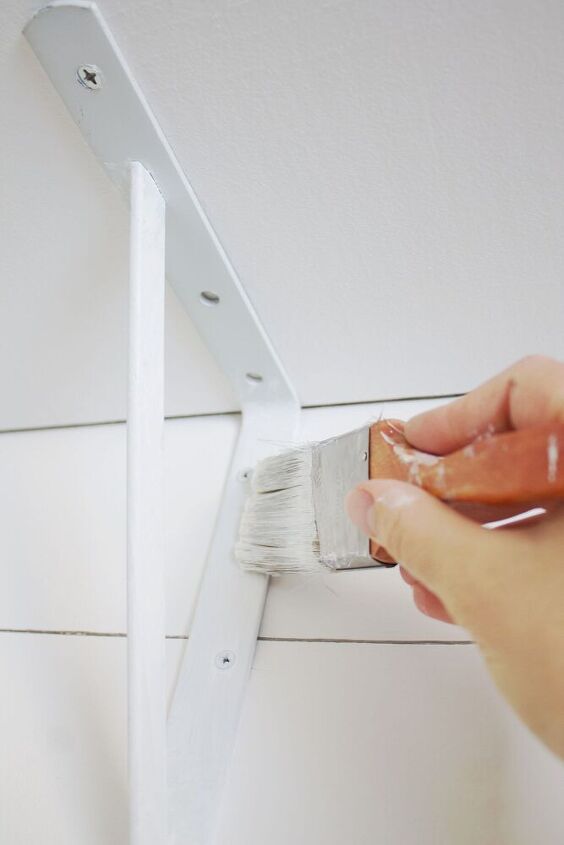
And all was right in the world.
Then we placed the painted board on top and it was simply perfection.
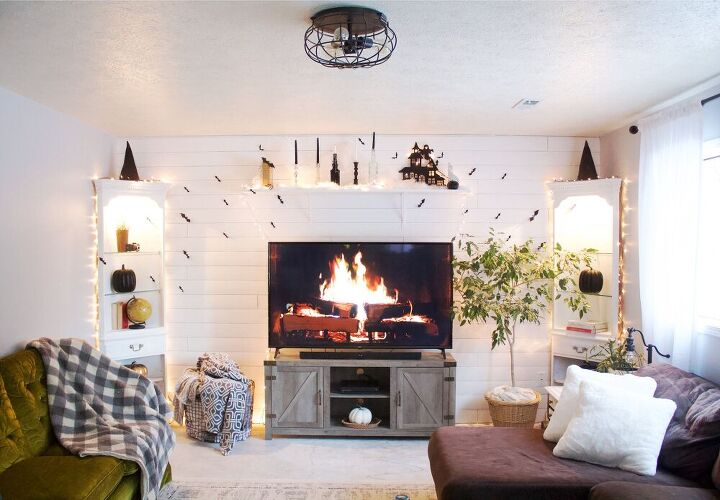
I had to immediately decorate it with Halloween decor, since Halloween is three days away. I’ll soon be switching it out for Christmas decor though. Can’t wait to share that with you!
Do you love your TV wall? Or is it bare and sad? Let me know what you want to/or have done with the wall behind your TV!
And make sure to following along over on Instagram where I share all my DIY in real time!


Frequently asked questions
Have a question about this project?