


Rust-Oleum RockSolid Flooring Kit - Our Basement Floors
2 Materials
$450
6 Hours
Medium
How we completed our Basement floors using a Rust-Oleum RockSolid Flooring Kit. The last major basement project ( the spray painting job from hell to complete the ceilings) I couldn’t take any credit for, Lodi was tackling this space without me. But once he moved to the floors (and I finished a few of my own projects) we combined forces. This floor is over 100 years old so we went into this figuring whatever the result it would at least be better than what we started with.
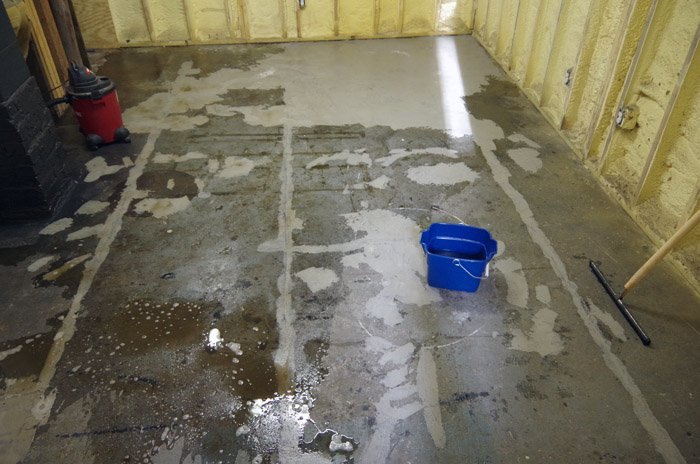
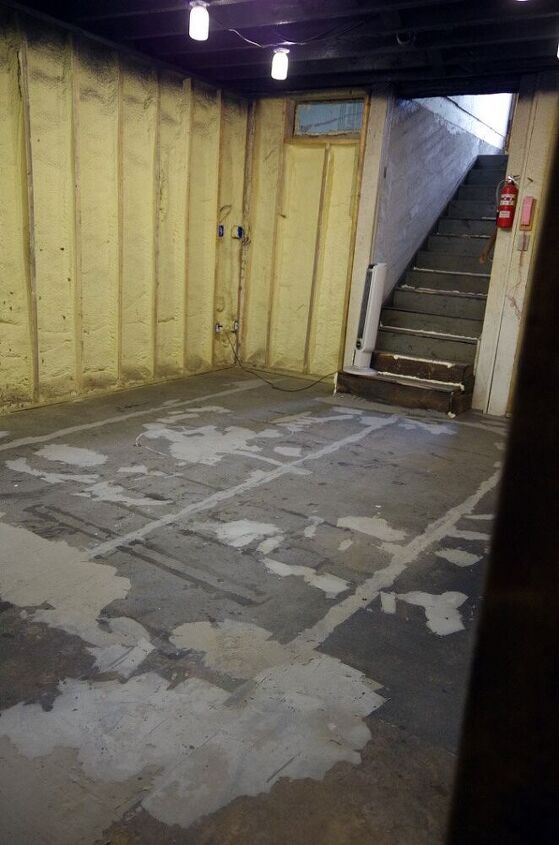
The boxes we purchased each claimed to cover up to 250 square feet. The ENTIRE basement is 500 square feet so I assumed two would be enough because we weren’t going to be doing our water closet or storage closet or under the kitchen and bathroom cabinets etc.So, we had less than 400 square feet to cover.Lodi did an insane amount of prep for this project.Besides cleaning the floors multiple times he also did a lot of concrete patches (using a latex patching cement) throughout.The boxes each come with a bag of citric acid for cleaning the floors with. Lodi mixed it in water, spread it out (lots of bubbling) and then used a squeegee and shop vac to remove as much of it as he could.He did this over two days with me stepping in the second day to help him do the second scrub.
After that we thoroughly rinsed/cleaned the floors twice with just plain water. Dry time was insane even though we vacuumed as much moisture out as we could. Not to mention I have no problem admitting that this was a project we were both nervous about and totally procrastinated on.Besides a tiny amount of experience using epoxy on my part this was a rare instance that neither of us had ANY experience with what we were doing. It made us both very hesitant.Lodi: I’m glad we’re doing this together.Me: Oh yeah, me too.Lodi: That way we’ll screw it up together.Me: Exactly.
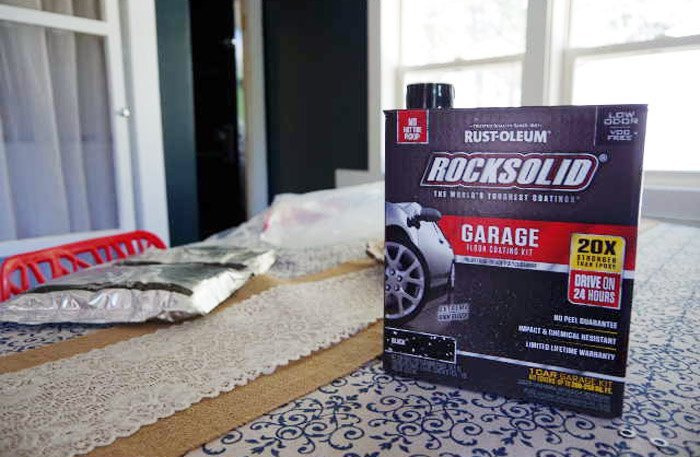
The flooring comes in one bag that is split in two down the center. Each side needs to be mixed and worked and then, by applying pressure, the center breaks and combines the two ingredients into one. Then it requires another several minutes of “mixing” inside the bag.Once the mix is complete its GO TIME – with only one hour before this RockSolid Flooring becomes rock solid.
I snipped off one end of the bag and used it for pouring. (A lot of videos I saw online show people pouring the bag contents into a separate container but I figured that would make it gel up and dry even faster and also cause more waste.)The common complaint of all of the reviews online was that the boxes don’t cover near as much as they claimed they would. So, I knew going into this we would be applying the thinnest coat possible and, I also knew, the halfway point that we HAD to reach with the first box.We started in the bathroom with a brush getting around all the edges. After that Lodi grabbed the roller and I took over pouring and dealing with the bag of goo. I was constantly working it and figuring out how to give him the right amount while still being as frugal as possible.THIS WAS NOT FUN.

I can’t imagine attempting this with only one person. (In fact I really wish we had had a third person to take pictures.) Lodi was roller guy because he has a lot more upper body strength than I do.This stuff is the consistency of luke warm tar.It doesn’t like to move. It doesn’t like to be spread and it is very difficult to get into the nooks and crannies of a very old concrete floor.It smells like melted plastic and, yes, does give off some fumes but as far as stinky goes its not bad at all. (I was expecting it to really really really stink like epoxy but this is not epoxy – it is definitely its own thing.)Once we started I understood immediately why people complained it didn’t cover as much as it should have. If we had been covering a brand new polished smooth concrete floor it would have been a lot easier to spread and would have much more easily covered more square footage.
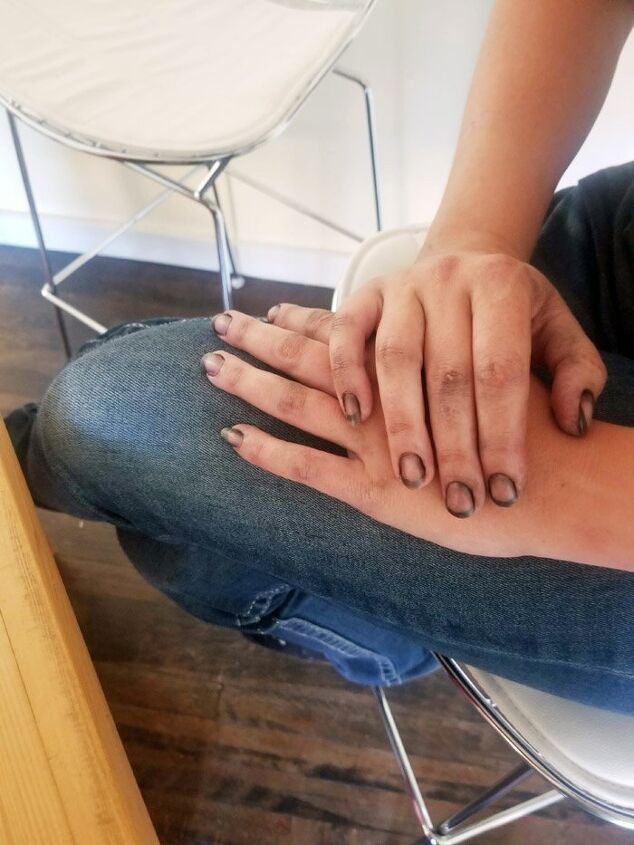
This was not a smooth floor. This was a TON of work.If I had known I would have purchased thicker nap foam rollers for this job. Lodi totally destroyed the rollers that came with the kits as they were CLEARLY included under the idea that they would be used on a SMOOTH floor.There is nothing smooth about our floors down here.I had to help constantly with a brush to get it into every little divot and nook and cranny.I got it ALL over my hands and arms.
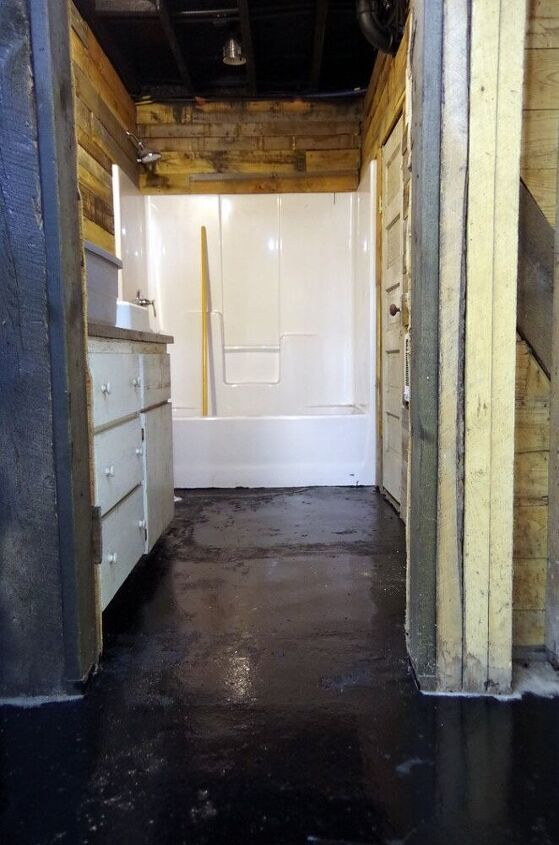
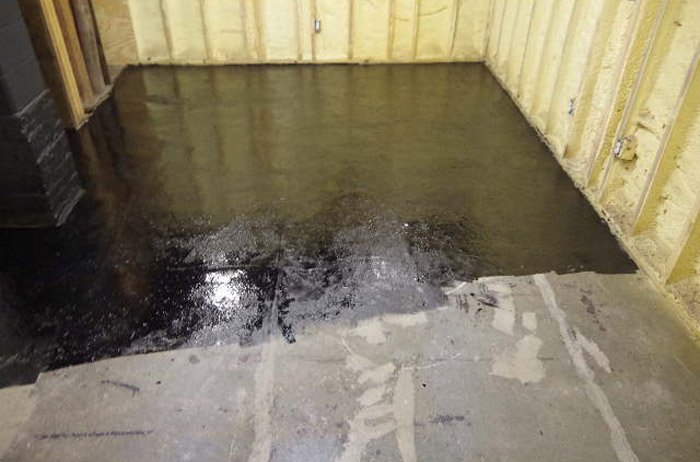
It was totally inevitable with the consistency of this stuff. (I would have worn latex gloves if I could go back and do this differently.)Halfway through we took a break and Lodi helped me scrub my arms and hands with mineral spirits. This also gave me a chance to snap the few “during” pictures I have to share.We proceeded with my wearing work gloves for the second box though it didn’t help much as this stuff went right though them. (I didn’t have latex gloves on hand.)We started the next batch of RockSolid Flooring at the far wall in the kitchen working our way backwards toward the staircase and where we ran out with the first bag. Because we were frugal initially we ended up with a much heavier coat at the bottom of the staircase which is totally fine.
We chose not to use the speckles that came with it for two reasons.First reason: This isn’t a garage floor and we thought that would make it more industrial down here than we wanted.Second reason: Lodi and I are both hardcore OCD and I could only imagine the horror of us trying to sprinkle it evenly enough to make either of us happy…If I had any advice for people using this stuff on their own concrete floors I would encourage them to invest in a floor leveling compound/pour and cover the entire floor with that first.Most of the work for us here was that we were not dealing with a smooth surface.Of course I wouldn’t take my own advice even if we could go back and do it over… I love how our old floors look like lava rock. They’re still my grandparents’ 1915 basement floors, they are still totally unique, full of character and totally ours.That would have been lost if we had done this any other way.We love them!
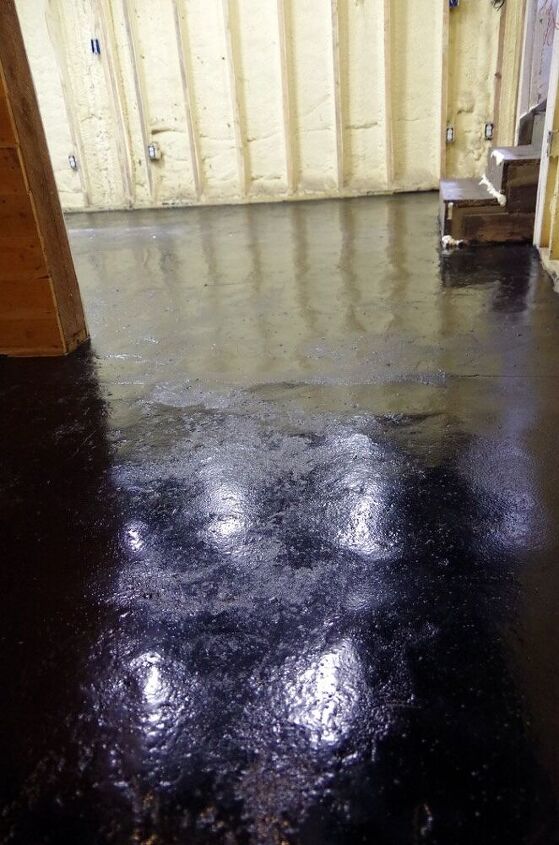
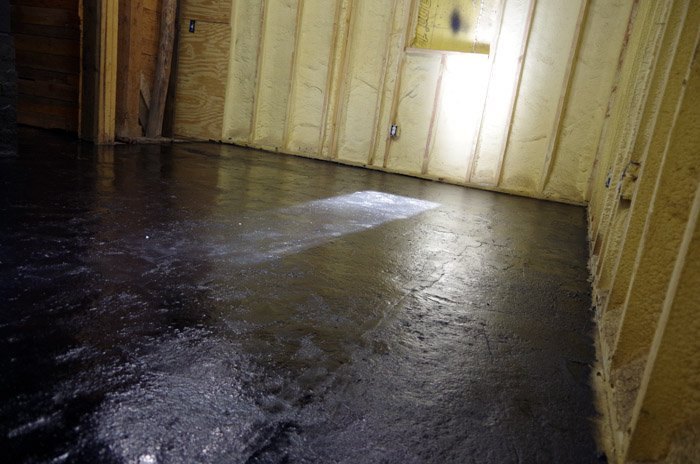
(The after pics you see may make it look like the floors are still wet but they aren’t at all. This is the shiny end result.)I’m on the fence when it comes to this floor and the cost and time and labor we put into it.This is my advice: DON’T BOTHER INVESTING IN THIS PRODUCT UNLESS YOU’RE PUTTING IT IN A GARAGE TO BE DROVE ON OR REALLY REALLY HIGH TRAFFIC AREAS.I honestly feel we would have been just as happy had we painted the floors with a couple of gallons of high gloss Rustoleum paint. It would have been easier to apply, a lot less expensive and given us an almost identical result that would have worked just fine for us down here.That, of course, doesn’t mean I’m not REALLY happy with the end result!
Resources for this project:


Any price and availability information displayed on [relevant Amazon Site(s), as applicable] at the time of purchase will apply to the purchase of this product.
Hometalk may collect a small share of sales from the links on this page.More info

Want more details about this and other DIY projects? Check out my blog post!
Comments
Join the conversation
3 comments
-
Thanks for posting... a project I will never attempt, kudos to you guys., hope it gets better for you.
-
Thanks.


Frequently asked questions
Have a question about this project?
Could it be used on open patio
Can it be used on an open patio