


Stripping Factory Varnish Off Bathroom Vanity

We decided to makeover our 1/2 bath. The current vanity worked well size wise, but the coloring wasn't right for the desired look. Removing the dark varnish updated the vanity perfectly!

Choose the piece that you'd like to strip the varnish off of.
Move the piece to an area where the vanish remover won't damage the surface underneath.
Gather your supplies:
-furniture refinisher
-smaller gloves
-taller kitchen gloves
-0000 steel wool
-paper towels
-garbage bag
-small disposable container (I used a sour cream plastic container)
-old toothbrush that you will throw out
Layer the smaller gloves under the taller kitchen gloves. The chemicals can eat through them so you want to be sure you're being careful to keep an eye on the gloves as you work.
You don't want to get any of the chemicals on you skin! I would wear a mask if you are working indoors, eye protection is always a good idea.
I began removing the varnish in place in the bathroom (we are replacing the tiles so I wasn't worried about damaging them) but moved the vanity outside to finish the work so that I could work more easily and reach each surface.
The varnish remover is easiest to work with when the surface you're working on is horizontal, being able to maneuver the piece will help immensely.
Pour some furniture refinisher into the small disposable container (about 1-1.5" in depth or 1/4 the way full).
Dip the steel wool into the liquid and then lift to allow the excess to drip out.
Carefully transfer the steel wool over to the surface you're refinishing.
Working in small sections, use a circular motion to work the liquid into the varnish. You will see it quickly start to remove the finish.
Repeat.
Over time the steel wool will build up with varnish and you'll need to switch to a new piece. I used three pieces for this vanity.
Once you've got a section mostly stripped, dip a corner of a paper towel into the refinisher and use the paper towel to wipe the surface. This helps to remove any residual varnish or coloration.
Place used paper towels and steel wool into the garbage bag as you go to keep the mess contained and prevent accidentally coming in contact with the chemicals.
For tricky corners or detailed areas dip an old toothbrush into the refinished and gently brush the varnish away.
Once finished, let the piece dry completely.
After removing the varnish off I wanted to be sure to seal up the vanity so that it wouldn't be damaged by water.
I used Minwax Finishing Paste Wax in Special Dark color.
Using a paper towel I applied the wax to the vanity, waited a few minutes, and then buffed it off with a cloth.
I stop when the wax feels smooth to the touch as I slide my hand across the surface.
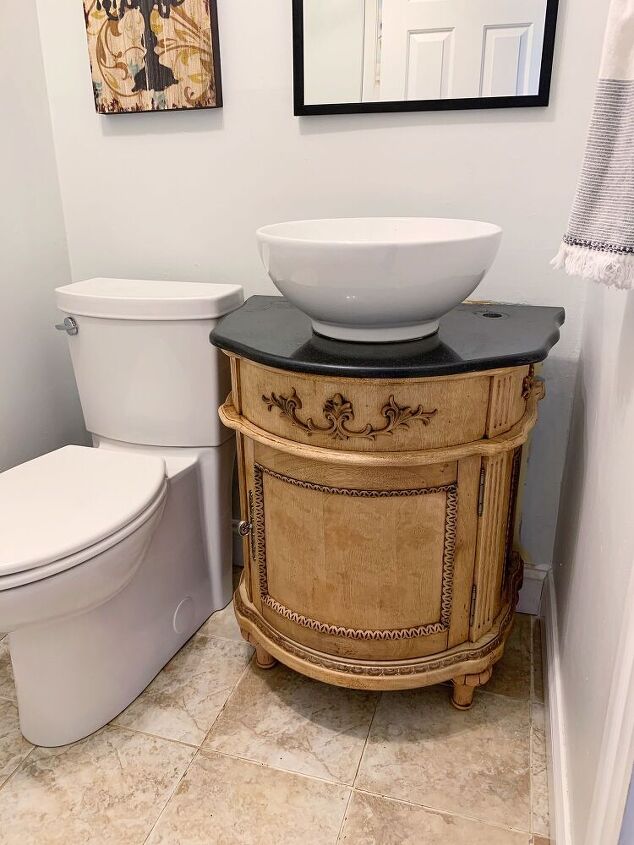
Enjoy your new look!
I wish I had found this refinisher years ago!! It saves me so much time and effort. I would never have been able to sand all of the detailed areas in the vanity, and already have a few more pieces in mind to refinish!
Resources for this project:
See all materials


Comments
Join the conversation
-
I have not had a problem with Citristrip. Of course it does need to be neutralized once everything is scraped off. Then the item does need to be sanded smooth and refinished.
-
It wasn’t bad to start off with but this new colour is gorgeous.


Frequently asked questions
Have a question about this project?
What brand of product did you use to remove the varnish?