


DIY Ribbon & Lace Pumpkins
Fall is my favorite time of year, and one of the things I look forward to every fall is creating a few projects like the one I'm sharing with you today... quick and easy lace and ribbon pumpkins makeover.

A while back I went to my local dollar store to see if I could find any crafting pumpkins.
Even though there wasn't a lot left, they put things out so early these days, I did manage to snag one netted bag of small plastic orange pumpkins for $2.
They sat for a few days while I was trying to decide what to do with them. I knew I was going to cover them with something, but I have to say that the orange was really throwing me off.
Do I spray paint them, I asked myself?
I could have done that but it's been way too windy here lately, and I never spray paint inside.
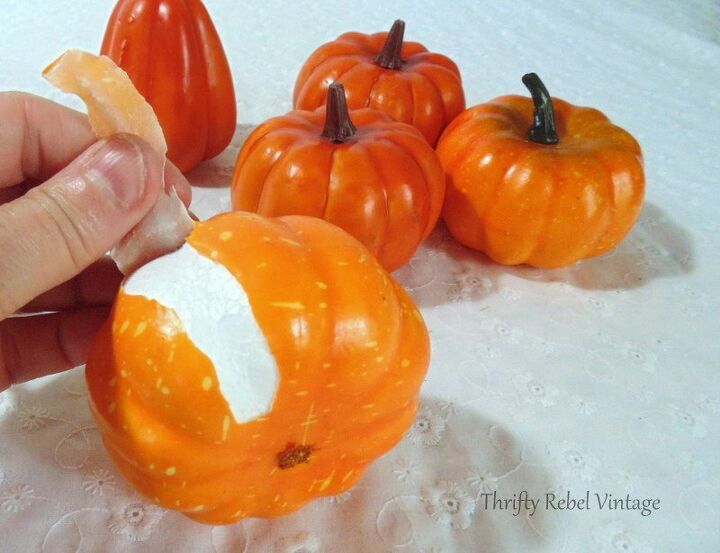
One day when I was messing around with them I accidentally put a large nick into one of them.
Eureka!
At first I didn't think so, but that oopsie turned out to be the best thing that could have happened.
Did you know that you can peel these pumpkins like an orange?
I had no idea!
Since I'm not really crazy about orange pumpkins, and I was going to cover them with something anyways, I decided to peel them all.
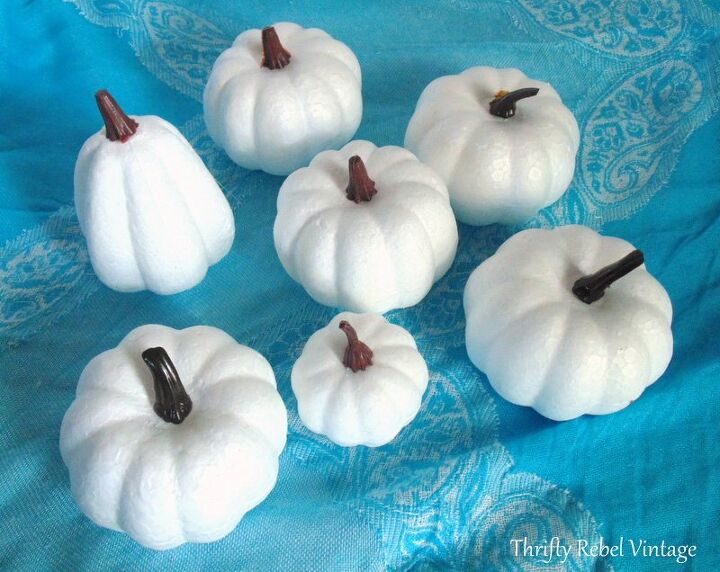
Here they are in the buff. So much better.
Underneath that nasty plastic was this lovely white styrofoam.
This is the blank canvas that I was looking for. It actually cleared my mind and suddenly I could see exactly what I wanted to do.
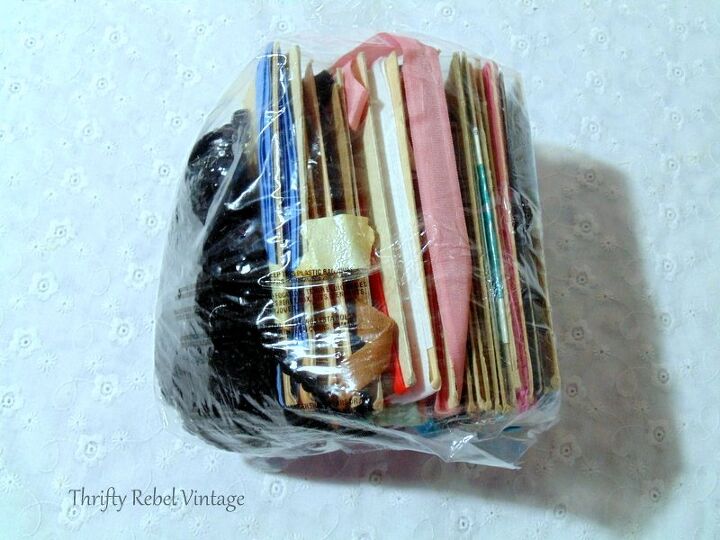
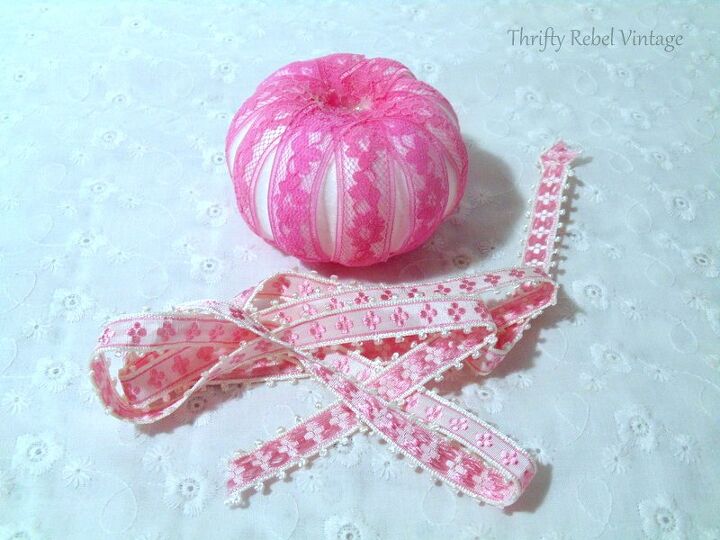
I recently thirfted this bag of ribbons, trims, and laces for $2.
Check out this mixture of vintage and newer goodies that were in that bag.
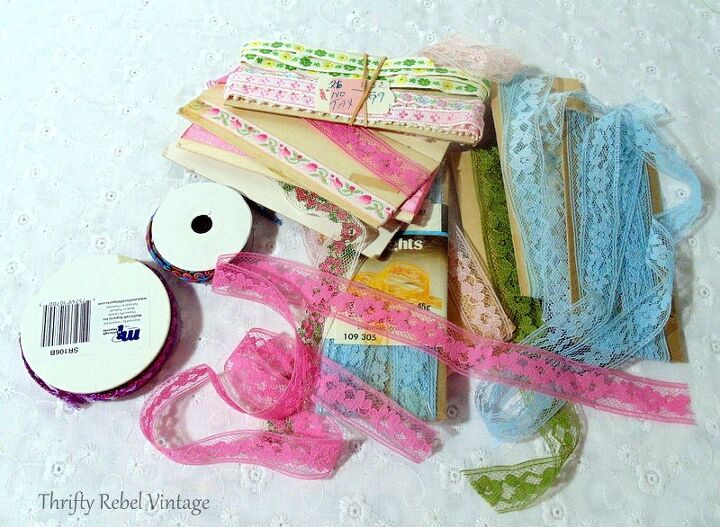
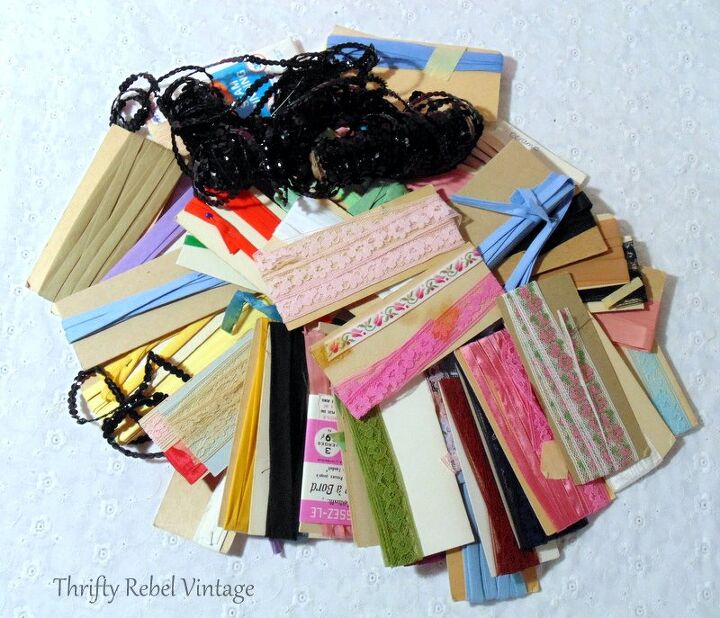
And here's the laces and ribbons that I pulled out to work with.
The two spools are from another thrifted stash.
There's a full list of supplies that I used to create these lace and ribbons pumpkins later in this post, so please check it out.
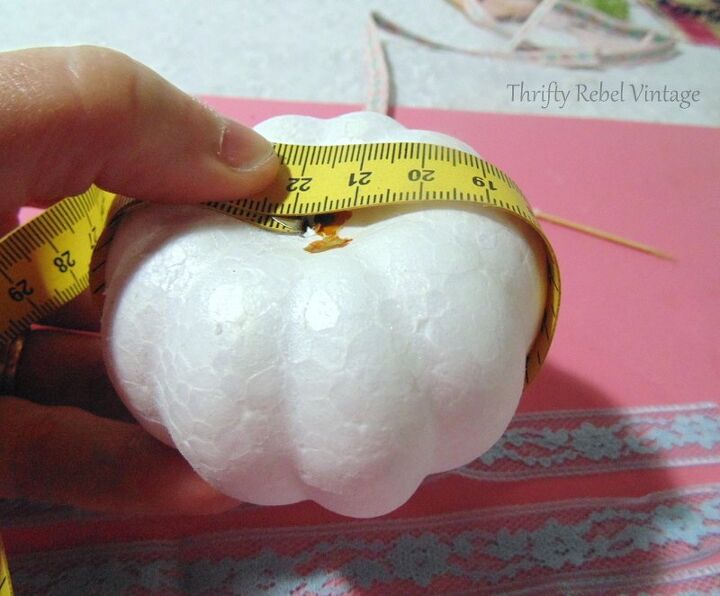
After removing the stem, the first thing to do is measure around the pumpkin, and then cut your lace and ribbon pieces to length.
This pumpkin had ten sections, so I needed five 8 inch pieces of lace and ribbon
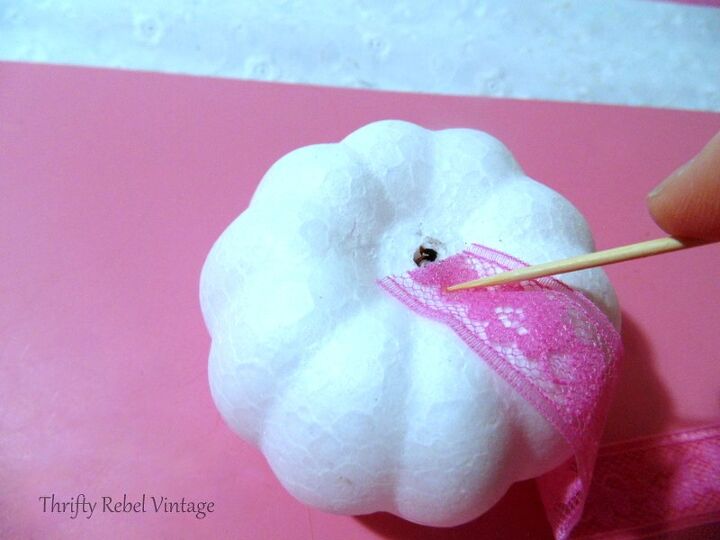
I simply glued on the lace with my hot glue gun, using a toothpick to press the lace in place so I didn't burn my fingers.
I'm not a fan of having hardened hot glue all over my fingertips.
The lace then goes over the raised sections of the pumpkin, around the bottom, and is glued on the other side.
Just make sure not to cover up the hole that the stem goes into.
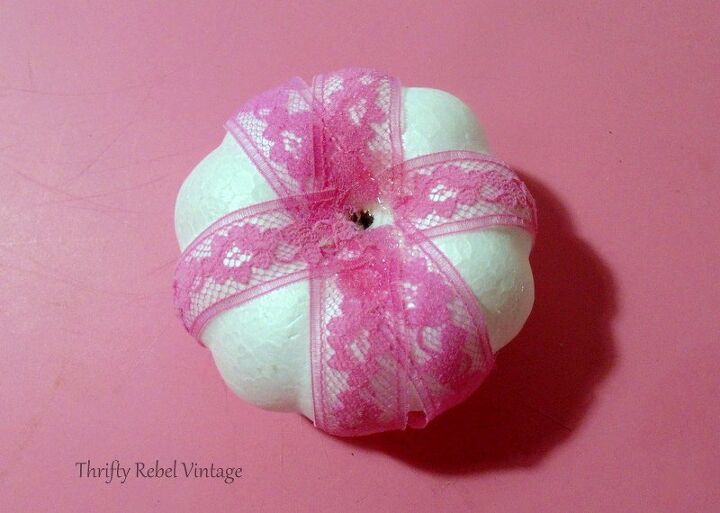
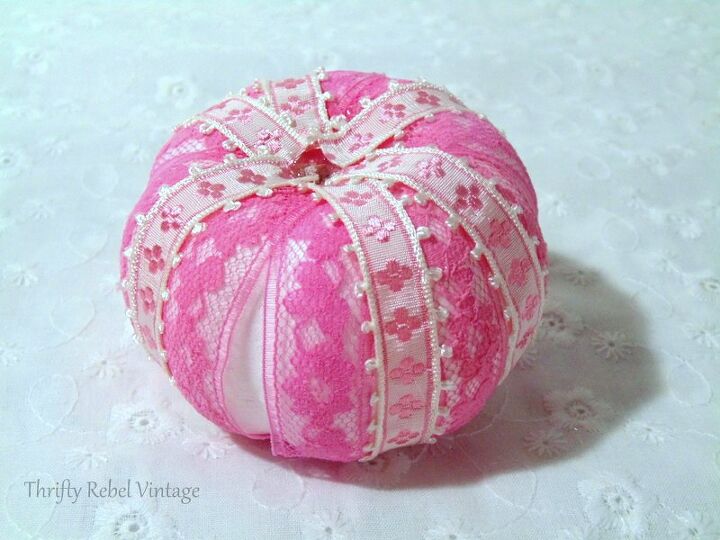
When you're finished there will be styrofoam showing in between the lace, but that's ok and is actually the idea.
Here's where a pretty ribbon comes in.
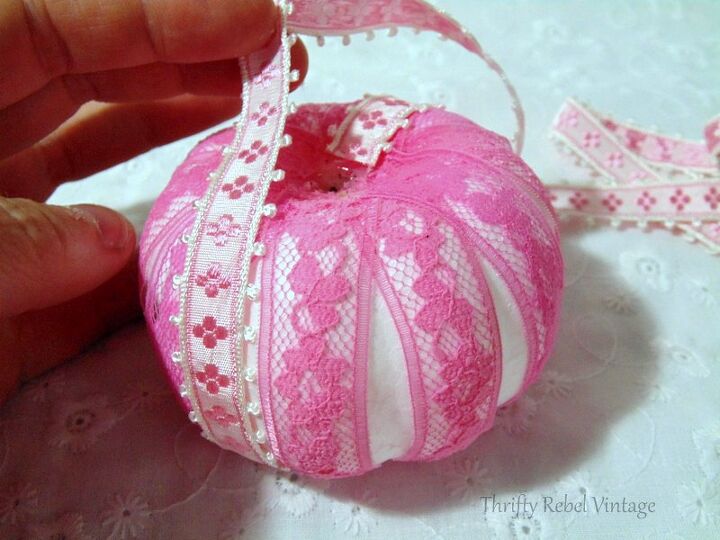
The ribbon goes over the indented sections of the pumpkin where the styrofoam is peeking through.
This gives this sweet little pumpkin some definition, and makes it more interesting to look at.
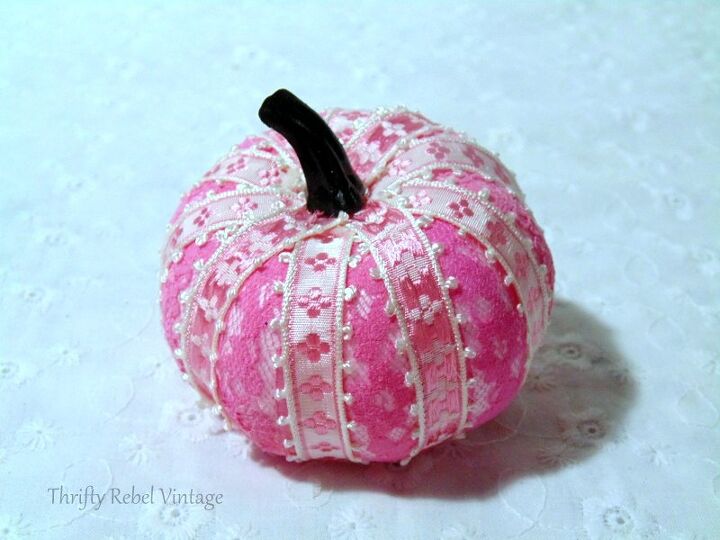
When I was done I just popped the stem back into place. You could spray paint the stem if you wanted to, but I like the contrast of its dark color and texture.
This pretty in pink pumpkin is the first of four lace and ribbon pumpkins that I made in about 45 minutes.

So here's what they were.
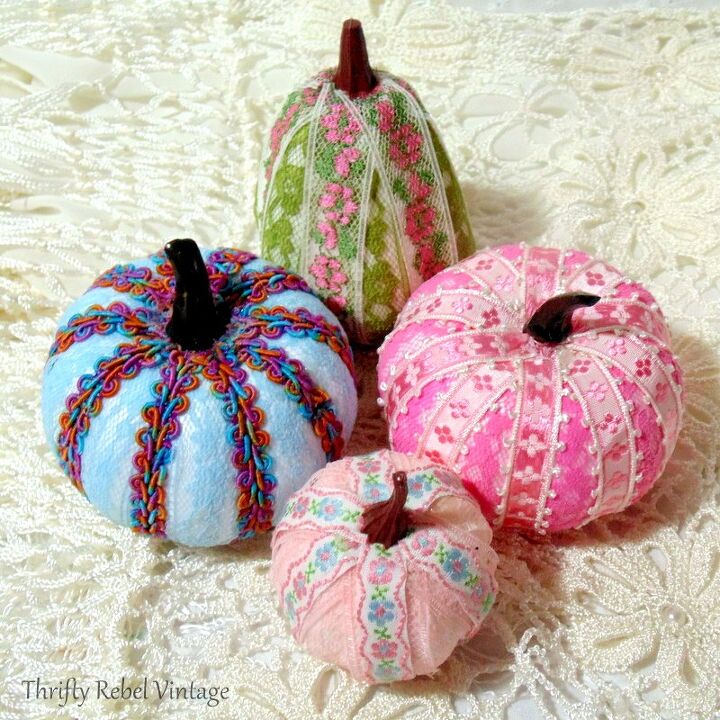
And here's what four of them became.
The blue lace pumpkin has a lovely contrasting multi-colored trim, and the pink roses ribbon on the green lace gourd is so pretty.
These lace and ribbon pumpkins are a great way to use up bits and pieces of ribbons, trims, and laces.
They can be any color or combo of colors that your autumn heart desires.
If you enjoyed this project you can find more fall projects on my blog here.
Resources for this project:
See all materials


Frequently asked questions
Have a question about this project?