


Mason Jar Tree With Farmhouse Style
The first mason jar tree I created won a free book from Junk Market. But shhhhh! I like this version a ton better.
- 12 wide mouth pint mason jars
- 10 of your favorite small ornaments (they need to fit inside the jars
- 1 by 4 board cut into 4 pieces - 12 inches, 9 inches, 6 inches and 3 inches
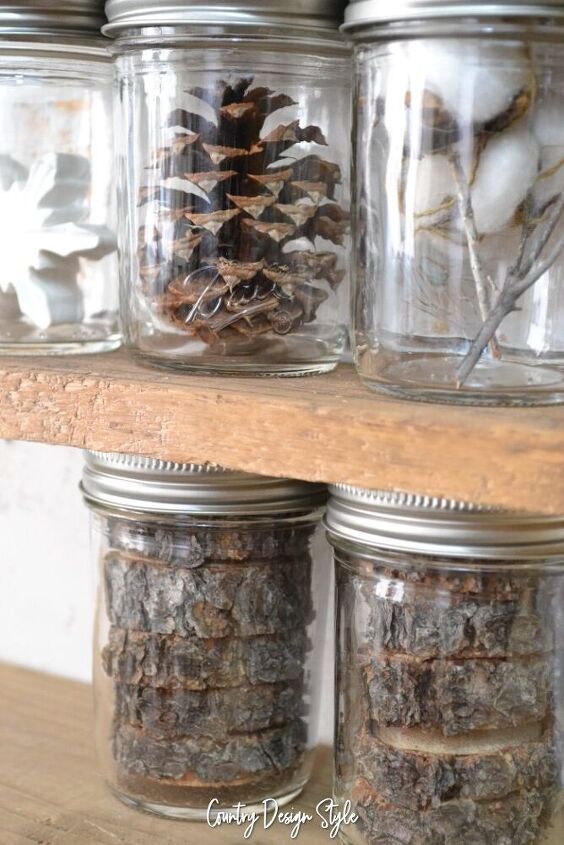
- Small sticks or wood slices that fit in 2 of the mason jars
- Quality double stick tape or earthquake putty
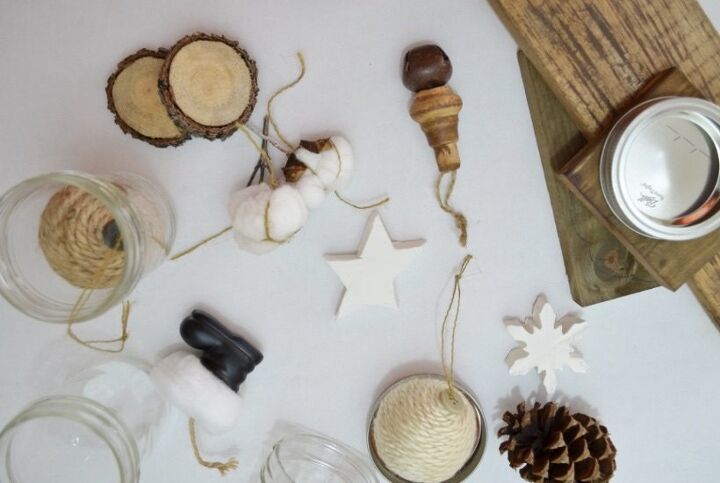
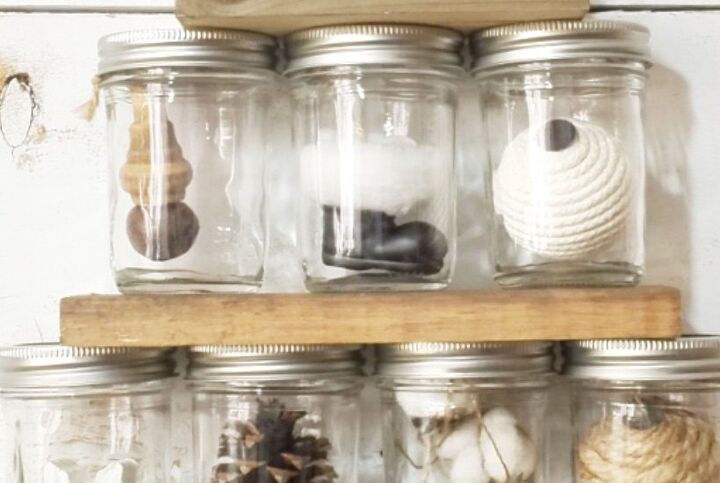
My ornament collection for this mason jar tree consists of twine wrapped ornaments, handmade clay, spindles with bells, cotton stems, and a Santa boot with cotton glued over the red glittered top.
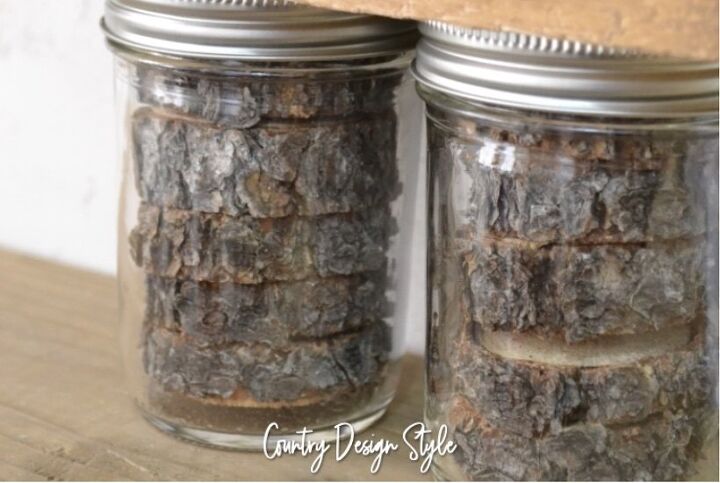
I added wood slices inside two mason jars to make a trunk. Then used double stick thick reusable tape (aff. link to the exact tape is in the post) on top of each jar. Then centered the 12 inch board on top. For extra caution you could add a piece of the double stick tape between the wood and the wall. It doesn't harm paint or walls.
Note: we don't have small children, but I still place the mason jar tree on a high mantel.
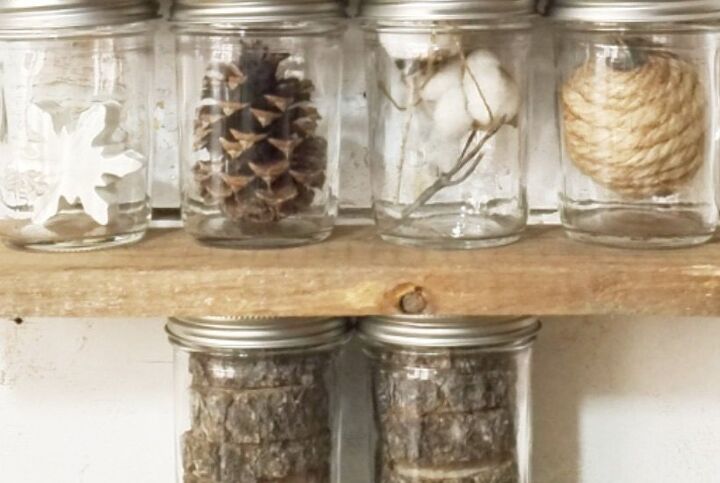
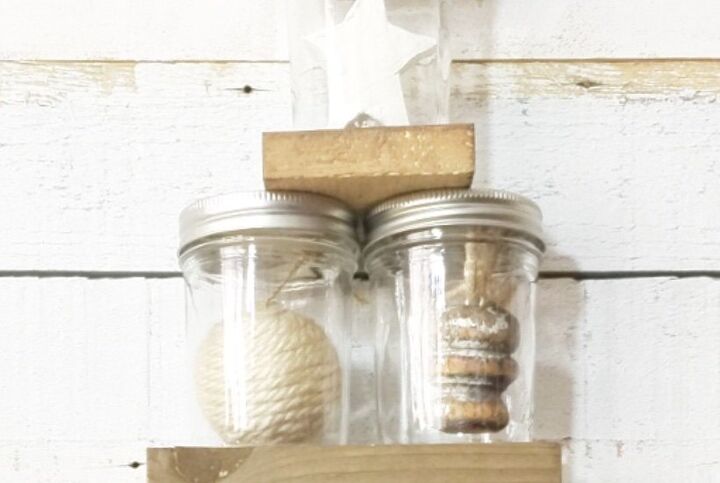
Add one ornament to the other 10 jars. If an ornament has a string, you can catch the string in the seal to make the ornament hang inside the jar.
Now add a small piece of double stick tape to the bottom and top of four jars.
Place two jars directly over the wood slice jars. Then add jars to each end of the board.
Add tape to the top and place the 9 inch board on top.
Add three jars using the double stick tape. Then place the 6 inch board with tape on top.
Add two jars holding things together with tape, then top with the 3 inch board.
Now add your top to your mason jar tree. Notice my top is a clay star.
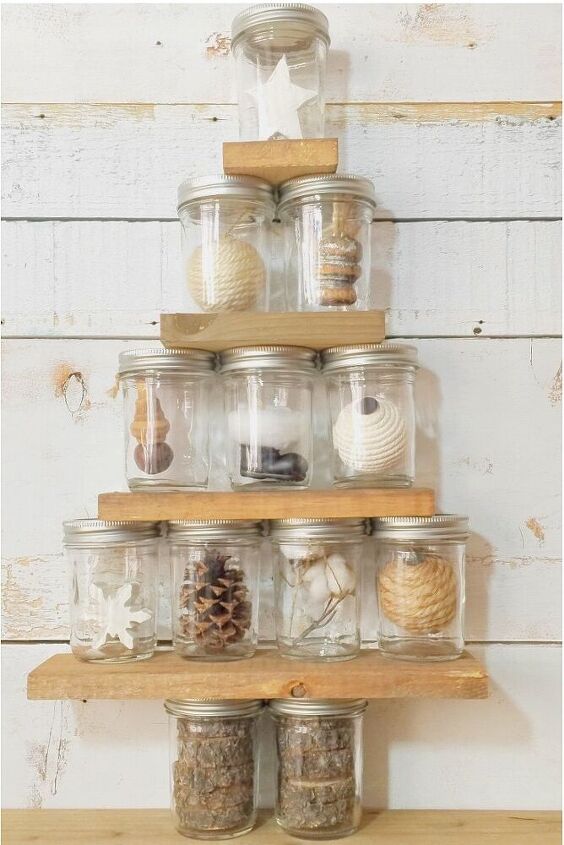
The farmhouse style mason jar tree is done.
Here's a few other ideas
- Add a small strand of battery lights
- Add small balloon lights inside the mason jars
- Use plastic jars if you have youngsters
- Add letters to spell out a name
- Look for or make ornaments for the 12 days of Christmas
- Add elements to make a tree for other holidays, like eggs for Easter.
Note: save the box the jars came in to store the tree for years to come.
Resources for this project:
See all materials


Comments
Join the conversation
-
What a good idea. My space is too small for mason jars, so I’m going to use glass spice jars with miniature natural items. I love the neutral look, and this is perfect.
Chemara
-
I love it..such a cute idea!


Frequently asked questions
Have a question about this project?
Where did you get the wood circles