Top 22 Ways to Reuse Empty Tin Cans
Once its contents have been consumed, we usually throw out tin cans or recycle them. However, repurposing and reusing empty tin cans not only reduces our environmental footprint by diverting waste from landfills but also allows us to tap into our creativity and transform trash into treasure!
Here, we're sharing 22 ways to reuse empty tin cans, many of which are sure to surprise you. From simple and practical applications to intricate and artistic endeavors, the possibilities are endless. Whether you're a passionate DIY enthusiast, a dedicated environmentalist, or someone seeking budget-friendly home décor solutions, these projects will inspire you to create something new.
DIY home decor using recycled materials
1. DIY tin can utensil holder
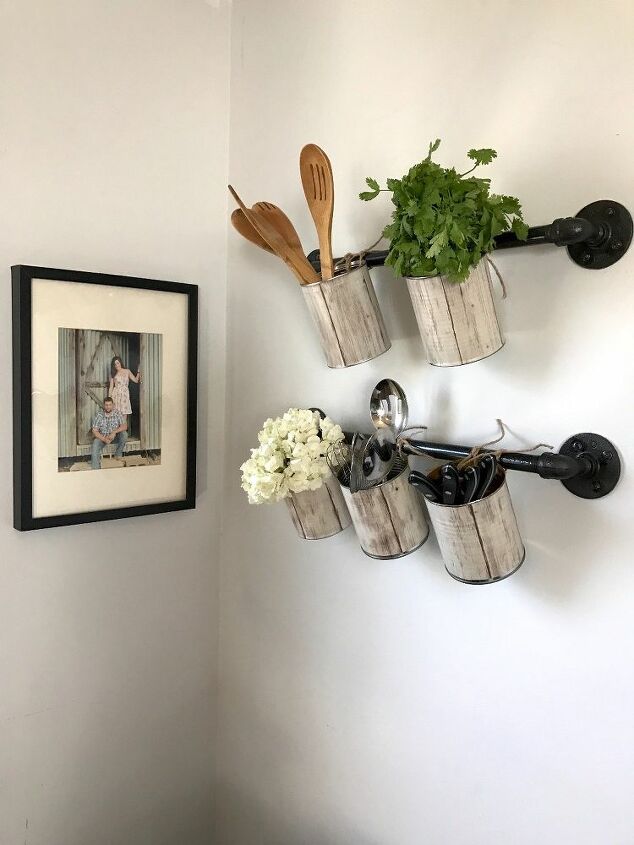
This project by Rob & Courtney M provides a step-by-step guide for creating herb and utensil hangers using black pipes, tin cans, and contact paper.
The project begins with cleaning and spray-painting the piping pieces for an industrial look. The rods are assembled by attaching elbows and piping to flanges. The cans are prepped by removing paper labels and drilling holes for hanging. Contact paper is cut and applied to the cans for a decorative touch.
Finally, the rods are mounted on the wall using screws, creating a functional and visually appealing herb utensil hanger. Get tutorial here
2. DIY tin can lanterns
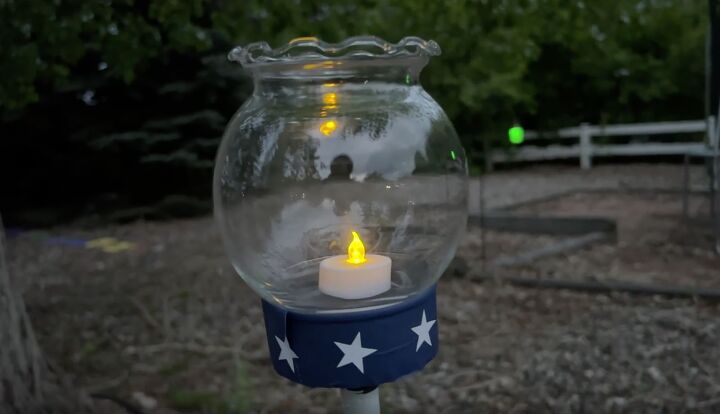
In this DIY project, empty tuna cans are repurposed into charming outdoor lanterns with a patriotic twist! The process involves cleaning the cans, removing labels, and decorating them creatively using options like spray paint, ribbon, or stickers.
A broom handle is used as a pole, hammered into the ground, and attached to the decorated can with hot glue. Glass candle holders or vases are inserted into the cans, and either real candles or battery-operated ones are placed inside.
These versatile lanterns can be customized for different seasons and occasions, adding a magical ambiance to outdoor spaces. Get tutorial here
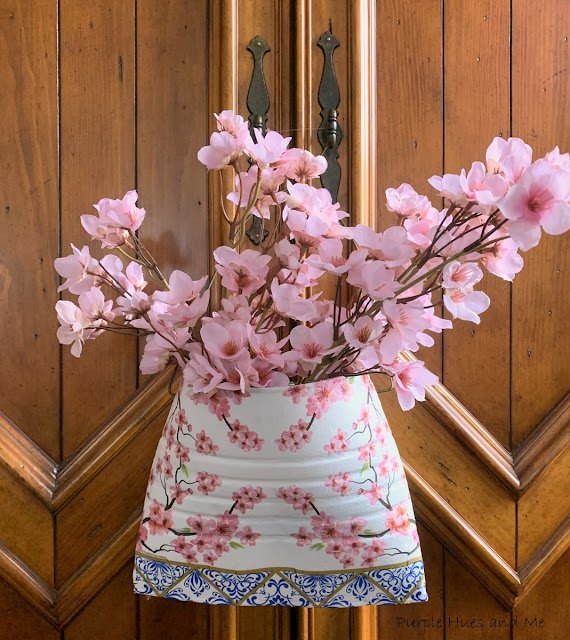
3. Upcycled coffee can wall pocket
To celebrate the Cherry Blossom Festival and combine American and Japanese cultures, Gail upcycled a coffee can into a wall pocket. First, she decoupaged cherry blossom napkins onto the can using Mod Podge. After removing the bottom and label from the can, she glued the edges together to create a pocket and painted it with white chalk paint.
Holes were drilled for hanging, and the napkin was carefully applied using Mod Podge and clear plastic to smooth out wrinkles. Once dry, another layer of Mod Podge was added for sealing. A wire clothes hanger was attached as a handle, and cherry blossom florals were placed inside the pocket for a final touch. Get tutorial here
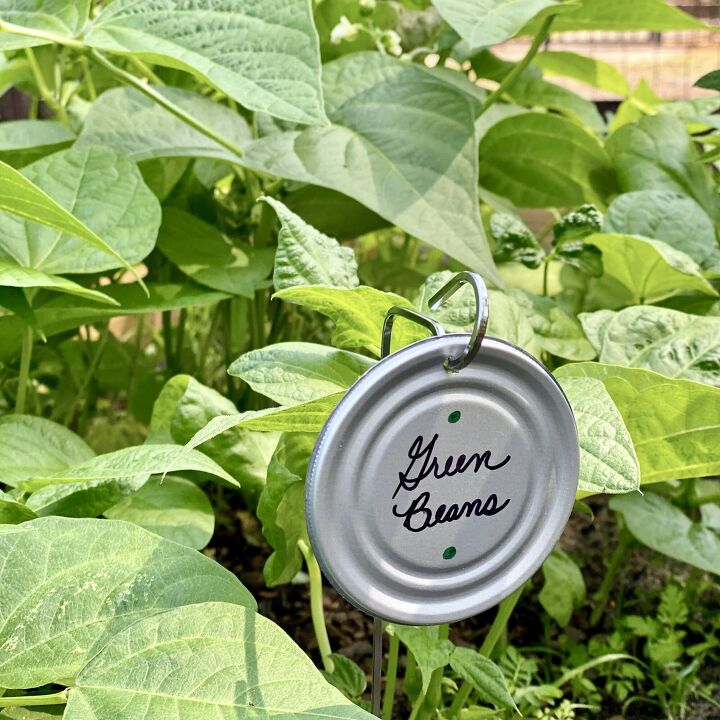
4. DIY garden markers
With gardening season in full swing, these upcycled DIY garden markers offer an easy and beautiful way to mark plants, flowers, and trees. Using tin can tops and metal BBQ skewers or old clothes hangers, these markers are durable and cost-effective.
Simply bend the skewer, drill a hole in the can top, write the plant's name, and hang it on the marker. This DIY project is a fun and eco-friendly way to add charm to your garden. Get tutorial here
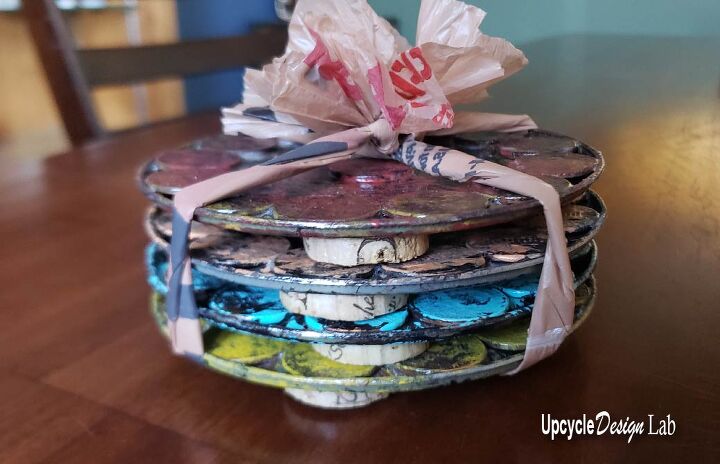
5. DIY coasters
Cindy's DIY project involves creating recycled tin can coasters with a rustic look. The process includes removing can lids, attaching pennies for weight, painting the coasters, cutting and smoothing wine corks, attaching cork feet, and applying a coat of Mod Podge for finishing.
This craft is versatile and can be done with different finishes and creative variations. This is such a simple and eco-friendly way to repurpose tin cans into functional and decorative coasters. Get tutorial here
6. DIY rusted tin can decor
This tutorial explains how to rust metal faster-using household ingredients. By combining white vinegar, hydrogen peroxide, and salt in a spray bottle, you can create a mixture to rust metal, such as tin cans, and give them a vintage, weathered appearance.
The process involves multiple applications and may require breaking the surface of the metal with steel wool for better results.
The effectiveness may vary depending on the type of metal and existing coatings, but this cool method offers an affordable and straightforward way to achieve a rustic, rusty look on new metal pieces. Get tutorial here

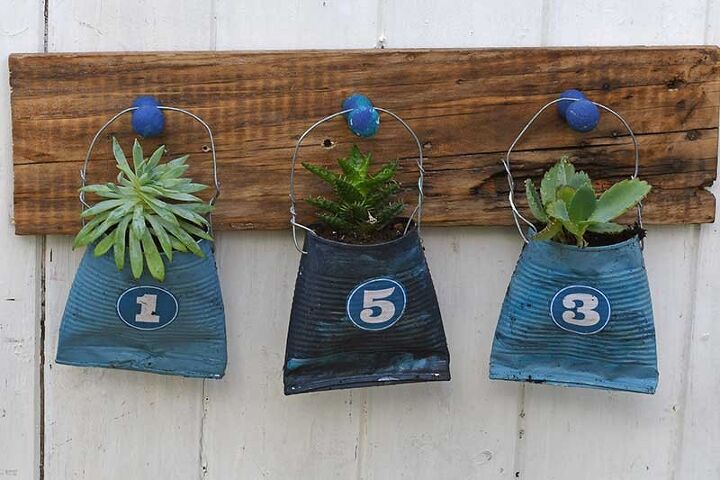
7. DIY tin can number planters
Next, Claire shows us how to upcycle tin cans or soda cans into hanging planters that display house numbers. The cans are flattened, painted, or decoupaged, and then planted with succulents or fake plants.
Wire handles are added, and the planters can be hung on a custom-made board or simply on nails/hooks. Simple! Get tutorial here
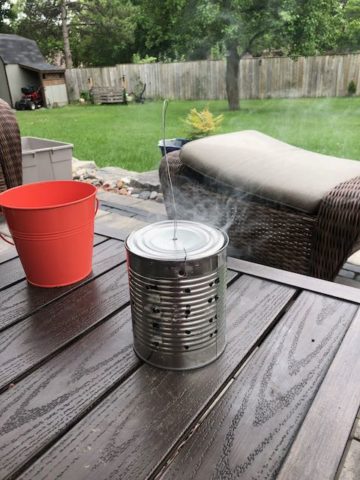
8. DIY mosquito repellent
Do you suffer during mosquito season? Then you need to try this DIY mosquito repellent hack using recycled cardboard drink holders and a tin can.
Holes are drilled in the tin can for airflow, and a wire is attached for hanging or handling. A piece of cardboard holder is lit on fire and placed in the can, producing smoke that repels mosquitoes. The wire handle allows for easy transportation, and the ashes can be easily dumped out. Get tutorial here
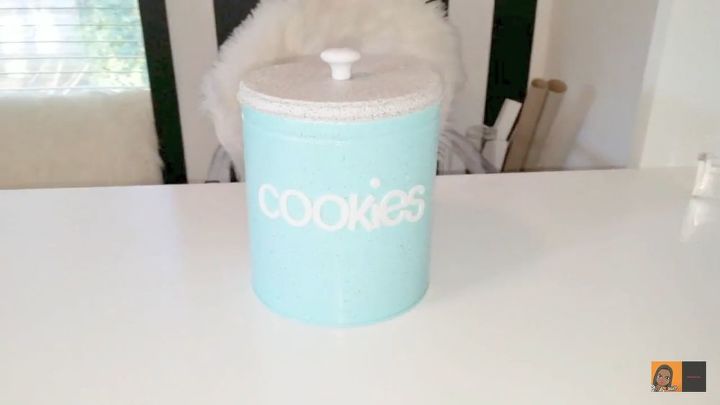
9. DIY cookie tin
This DIY project involves upcycling a cracker tin into a pretty container. The tin is primed with white spray paint and the lid is coated with stone texture spray paint.
After drying, a knob is attached to the lid using a strong adhesive, and sticker letters spelling "cookies" are added to the tin. The result is a personalized and stylish container for storing everyone's favorite snack! Get tutorial here
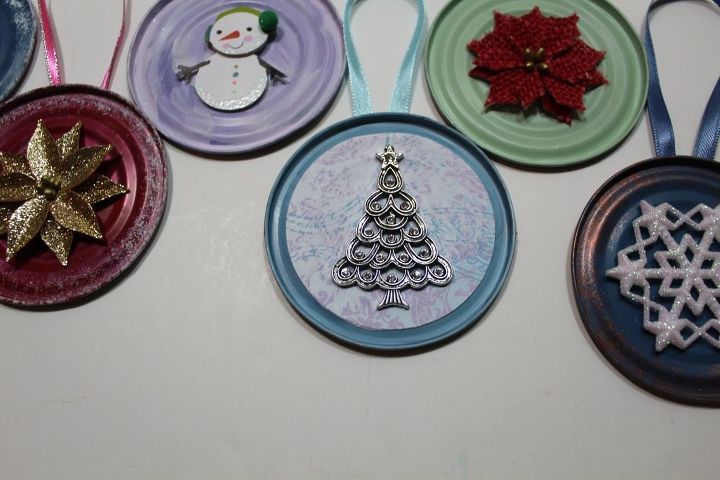
10. DIY tin can lid ornaments
This fun and festive craft focuses on repurposing tin can lids to create Christmas ornaments. The lids are cut off the cans using a safety can opener and painted in various colors. Stenciling and glitter can be added for extra decoration.
Pictures from Christmas cards or small decorations are glued to the center of the lids, and ribbon or yarn is attached as a hanger. The result is a collection of personalized ornaments for the holiday season. Get tutorial here
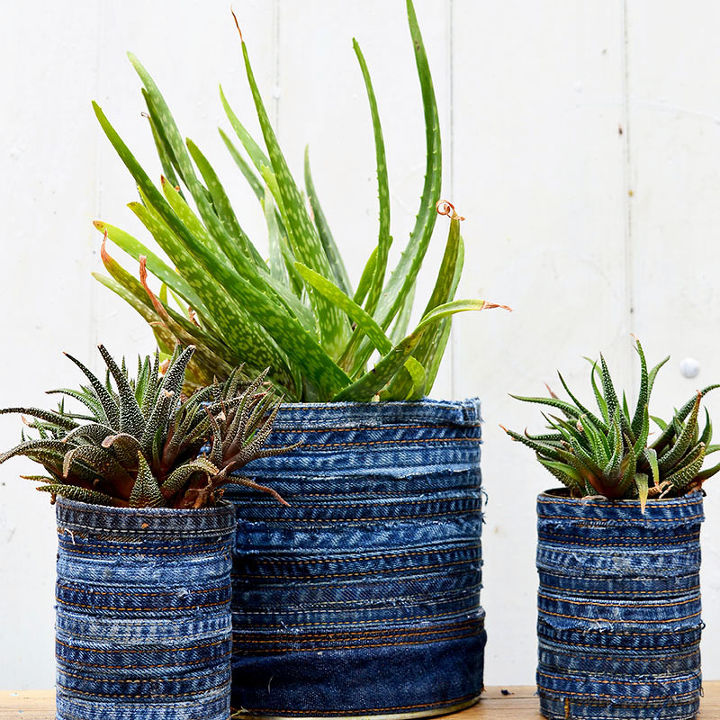
11. DIY denim planters
In this project, old pairs of jeans and tin cans are repurposed to create denim planters without the need for sewing. The seams, hems, and waistbands of the jeans are cut and used to cover the tin cans using Mod Podge as glue.
The resulting planters have an ombre effect and look beautiful when paired with succulent plants. They can serve as decorative pieces or make thoughtful gifts. Get tutorial here
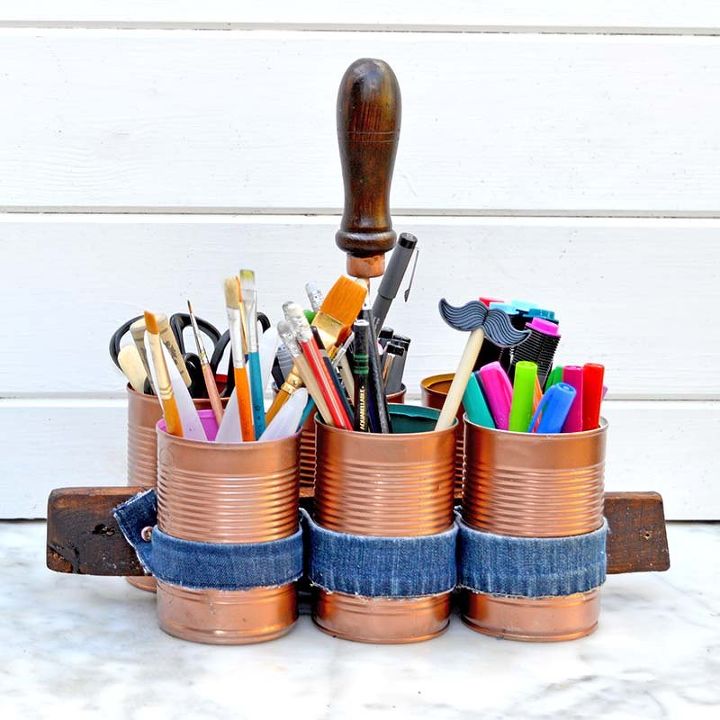
12. DIY craft storage caddy
Claire also used a similar technique to create some DIY caddies for storing craft items. She simply spray-painted the tin cans and attached them to a wooden handle using denim hem strips. Easy and effective! Get tutorial here
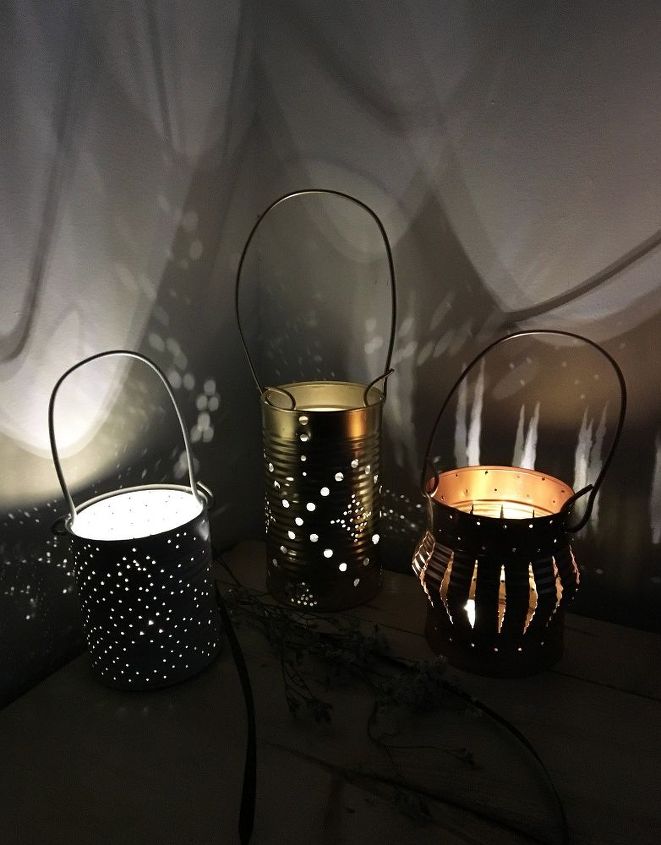
13. DIY tin can lanterns
Next up, Amanda offers a simple and inexpensive way to repurpose tin cans into lanterns. By cleaning the cans, creating patterns or punch designs using a rotary tool or drill, and adding a wire handle, the lanterns are easily assembled.
Optional steps include spray painting the cans for added character. Once completed, placing a light inside the lanterns illuminates the designs. Get tutorial here
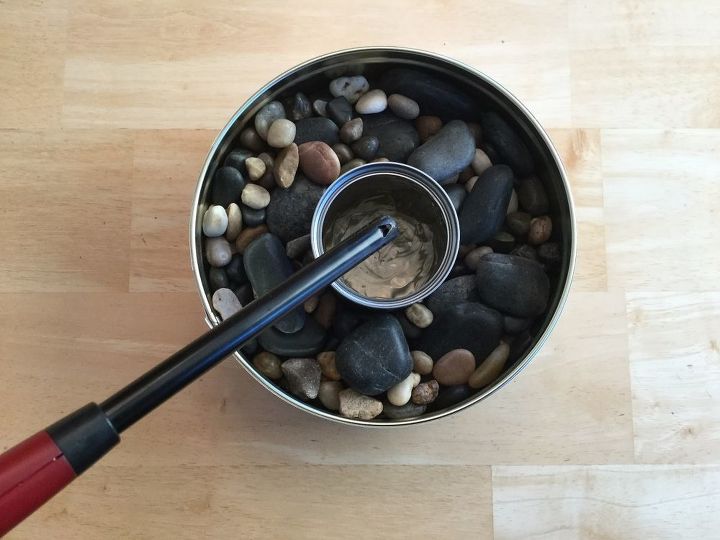
14. DIY fire bowl
This cool DIY project provides a simple and inexpensive way to create an indoor/outdoor fire bowl. By using a cookie tin, an empty tin can, rocks or sand, and hand sanitizer, you can assemble a safe and functional fire bowl.
Decorate the tin, place the can in the center, add rocks around it, fill the can with hand sanitizer, and light it up. That's it!
This DIY fire bowl provides heat, ambiance, and a cooking option during power outages or as a survival emergency tool. Get tutorial here
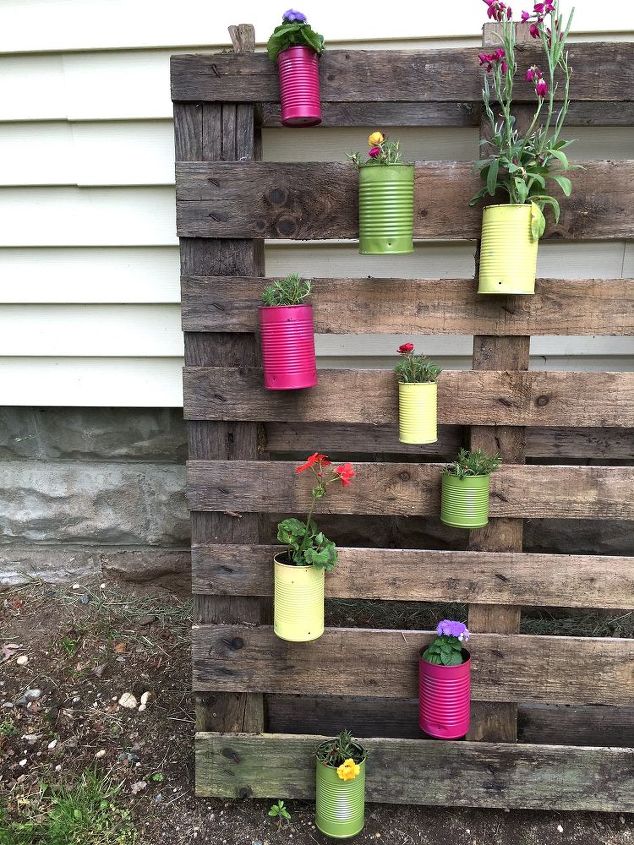
15. Upcycled tin can planters
Rob & Courtney M show us how to repurpose tin cans as planters in a creative and eco-friendly craft. The first step involves drilling holes in the cans' bottoms to ensure proper drainage. The cans are then prepped with sandpaper and spray-painted.
Once the cans are securely attached to a pallet, they can be filled with potted plants, flowers, or herbs. This is such a cute way to add a decorative touch to fences or outdoor spaces. Get tutorial here
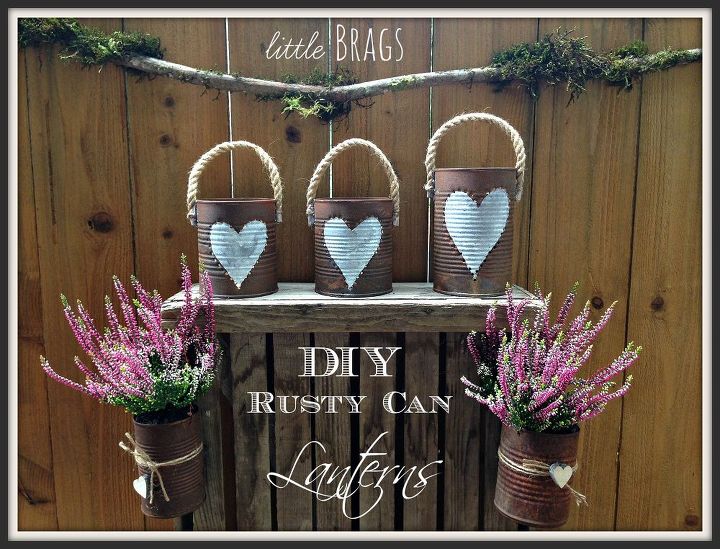
16. Rusty tin can lanterns
In this DIY challenge, Christine combines rusty cans and lanterns to create a unique project. The cans are decorated with twine and hearts, and battery-operated string lights are used instead of candles for better lighting.
The process involves freezing water in the cans, drawing designs on paper, hammering holes using ice as support, and spray painting for a rusty effect. Rope handles are added for a fun farmhouse effect. Get tutorial here
17. DIY watering can flowerpot
In this cute project, Gail repurposes a tin can into a flowerpot resembling a watering can. The process involves cleaning the can, attaching a slanted cardboard tube as a spout, painting the can, and creating a handle using a galvanized strip.
Napkins are torn to create a pattern, which is then decoupaged onto the can using Mod Podge. The final result is an environmentally-friendly flowerpot that can be a thoughtful gift, particularly for Mother's Day. Get tutorial here

18. DIY tin can flowers
Next up, Stacey repurposes tin cans into flower petals. The cans are cut into petal shapes, sanded to remove sharp edges, and spray-painted. A draw pull is used as the center of the flower by attaching it to a flattened aluminum pole. The finished product is a unique and inexpensive decorative item. Get tutorial here

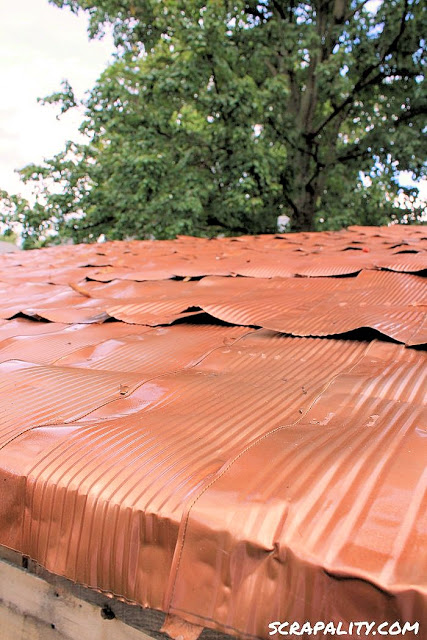
19. DIY tin can roof
Did you know you can build a shed out of pallets, old windows, and tin cans? The shed is made from pallet planks and features windows and a door found on the curbside. The roof is creatively covered with flattened and painted tin cans. Wow! Get tutorial here
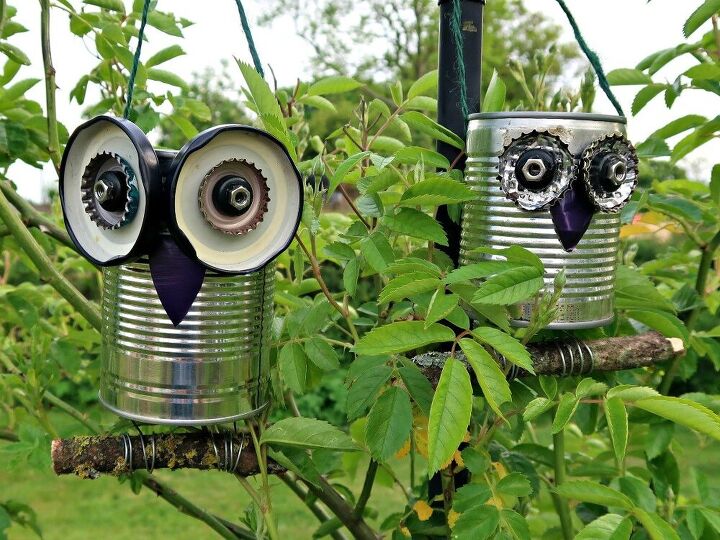
20. DIY tin can owls
This tutorial explains how to transform empty tin cans into adorable owl decorations or planters. The process involves using various metal household scraps like bottle tops, washers, nuts, and coffee pods to create the owl's eyes and beak.
The cans are assembled and wire legs are attached. The finished DIY tin can owls can be hung in the garden or used as planters, adding a whimsical touch to outdoor spaces. Get tutorial here
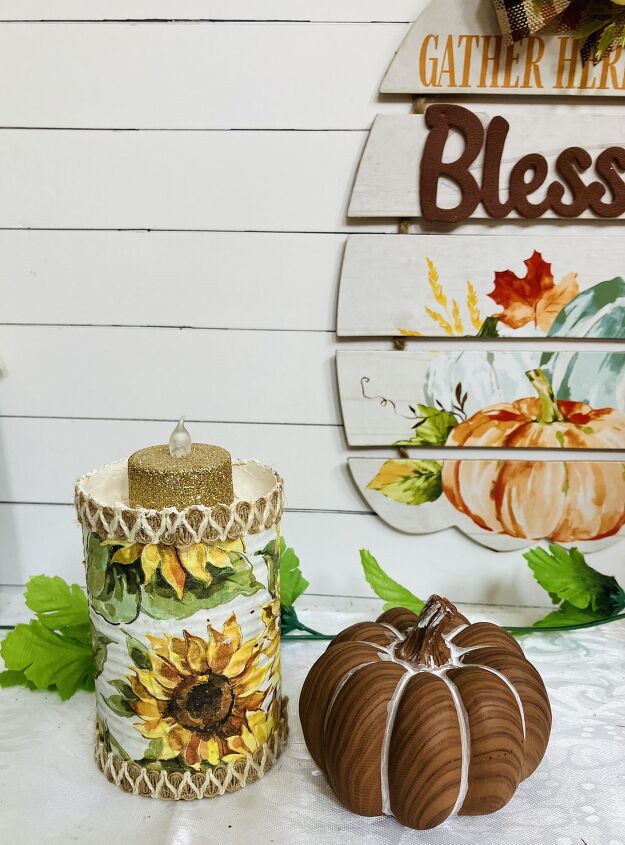
21. DIY tin can candle holder
This DIY project by Sun’s Arts demonstrates how to create a candle holder using upcycled tin cans. The process involves cleaning and painting the tin can, adhering a napkin design using Mod Podge, stuffing the can with plastic shopping bags, sealing the top with a caulk and glue mixture, and decorating with jute ribbon.
The finished candle holder can be topped with an electric votive or a flame candle, adding a lovely touch to your home decor while repurposing materials and promoting environmental consciousness. Get tutorial here
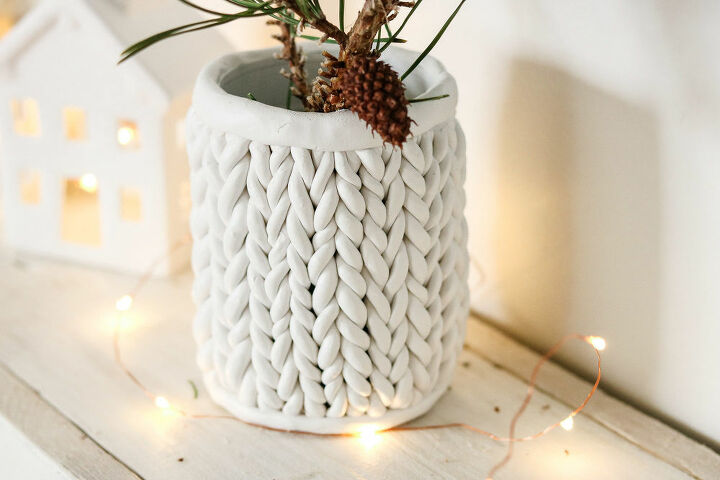
22. Chunky knit tin can planter
Learn how to transform tin cans into adorable chunky knit planters with this simple upcycling project. Using polymer clay, roll out long strings and fold them in half before twisting them at the top. Combine the twisted strands to create a braided effect and attach it to the tin can, pinching off both ends.
Finally, bake the creation in the oven according to the clay's instructions. Don't these little planters look adorable? Get tutorial here