


DIY Easy Christmas Decor Hack
I've mentioned before that I'm a huge Christmas fan. And because I love it so much, not only do I start decorating early, I also don't hold back. My collection of Christmas-related decorations grows every year, which means each December is bigger and better than the last.
I should point out that even though the holidays are my favourite time of year, that doesn't mean I enjoy spending all of my money getting ready for them. Like anything else in my life, the cheaper I can accomplish something without sacrificing my vision, the better.
So, if you're like me and can't get enough of Christmas, but also prefer to stay well under budget when it comes to decorating, this post is for you! To see how I managed to create a charming, festive look in our living room without breaking the bank, keep reading.
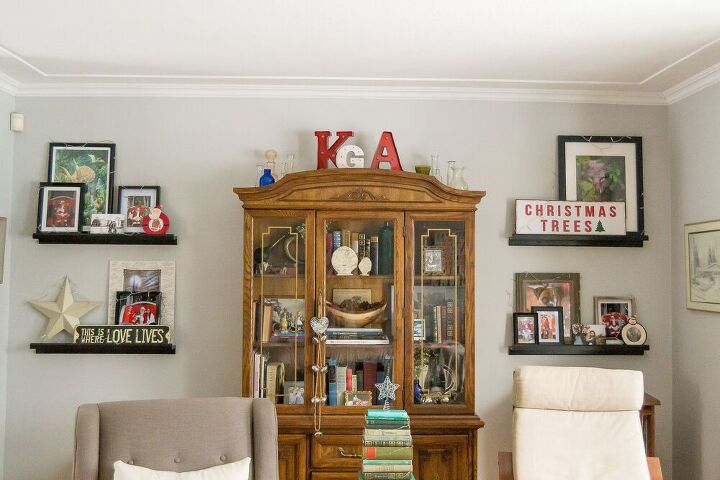
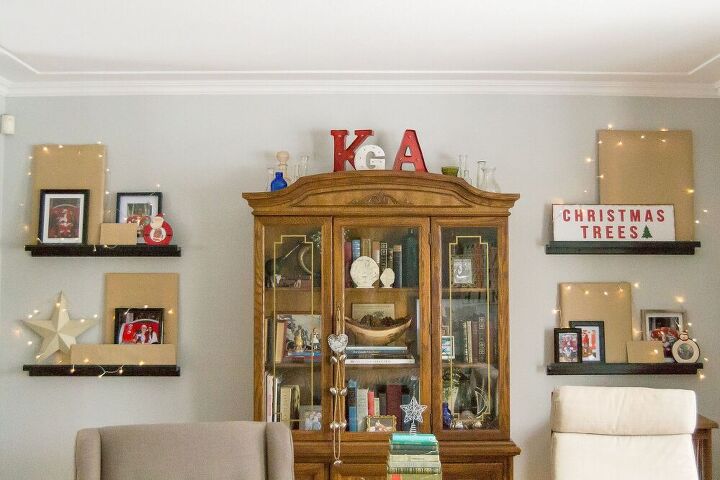
The living room is the first thing guests see when they walk through our front door, which means it gets the bulk of my attention when it comes to decorating. As you can see, against one of the walls, I have my grandmother's hutch filled with a bunch of amazing goodies, and on each side of it, there are two picture rails.
For eleven months of the year, these shelves are covered in family photos, artwork, and other pieces of decor that perfectly represent the life my husband and I have built together. But for the holidays, some of those pieces are replaced with festive accents and Santa photographs!
Now, because I normally have numerous items layered on top of one another on each shelf, taking away everything that wasn't Christmas-y made them look a bit too sparse. But, as you can see in the picture I've shared, mixing the festive and non-festive pieces together didn't look great, either.
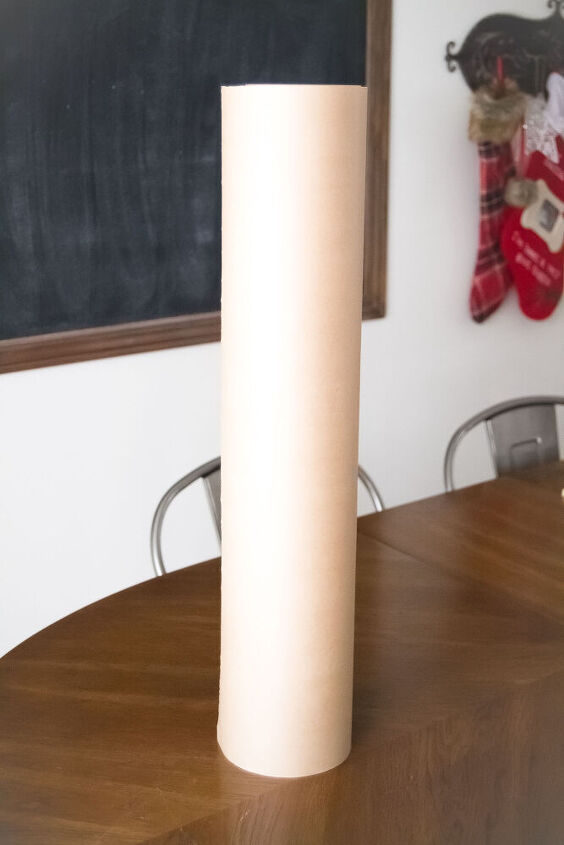
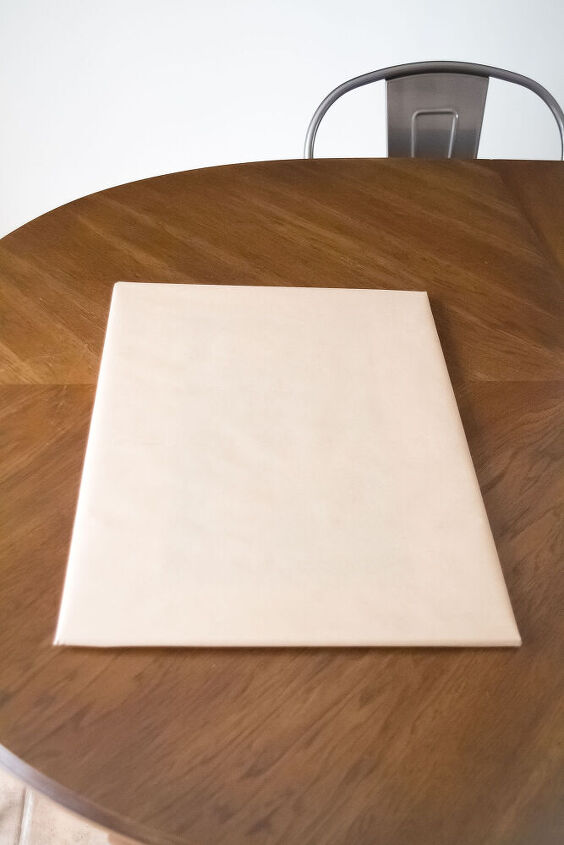
That's where this lovely, classic, inexpensive roll of craft paper comes in! Oh, and a pair of scissors, as well as some tape, of course.
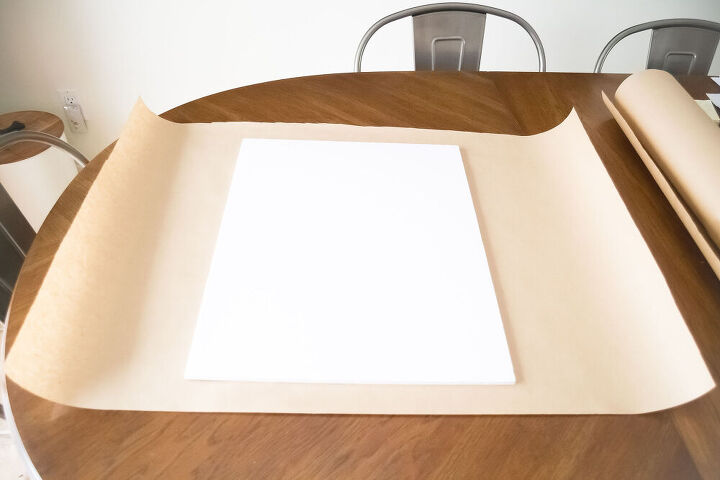
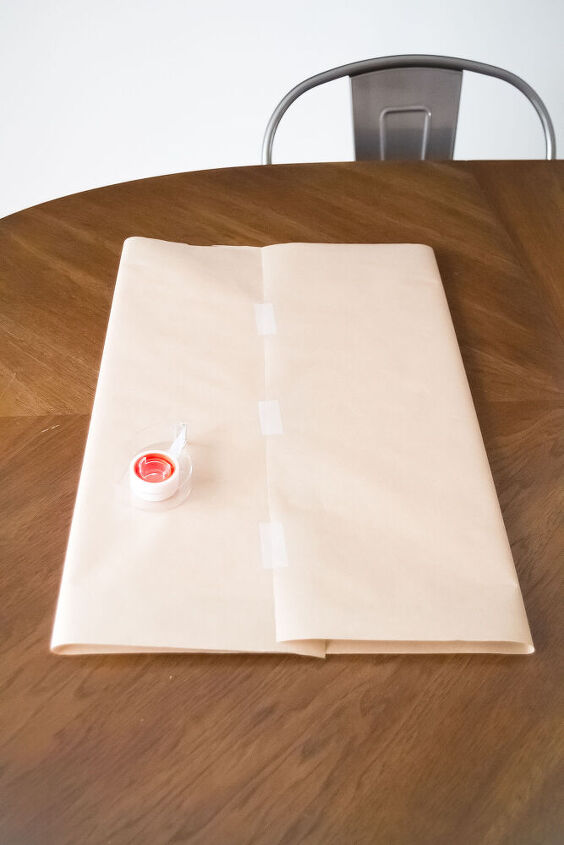
To maintain the fullness of each picture rail while also creating a classic, festive look for the holidays, I wrapped all of the accessories and photos that weren't Christmas-related in brown craft paper.
I then put the pieces back in their original spots and draped battery-operated LED lights from one side of each shelf to the other.
Boom! Instant Christmas cheer that cost next-to-nothing to create! It doesn't get better than that.
I love this holiday hack because it's both easy and affordable to pull off. It's also completely customizable! You can add ribbon or bows to some of the wrapped pieces or, if you're not a fan of the brown craft paper, you can substitute it with a roll of your favourite wrapping paper. Not too shabby, right?
Resources for this project:
See all materials


Comments
Join the conversation
-
In our home, we decorate our pictures with wrapping paper and decorative trinkets that match the wrapping, like mini Christmas wreaths, Santas and ribbons. I have also incorporated visiting guests in the wrapping while enjoying some holiday "cheer".
-
Meant to comment, very nice and subtle..and Rustic..........


Frequently asked questions
Have a question about this project?