


Board and Batten / Tall Wainscot

I’m so excited to share with y’all my entryway update!
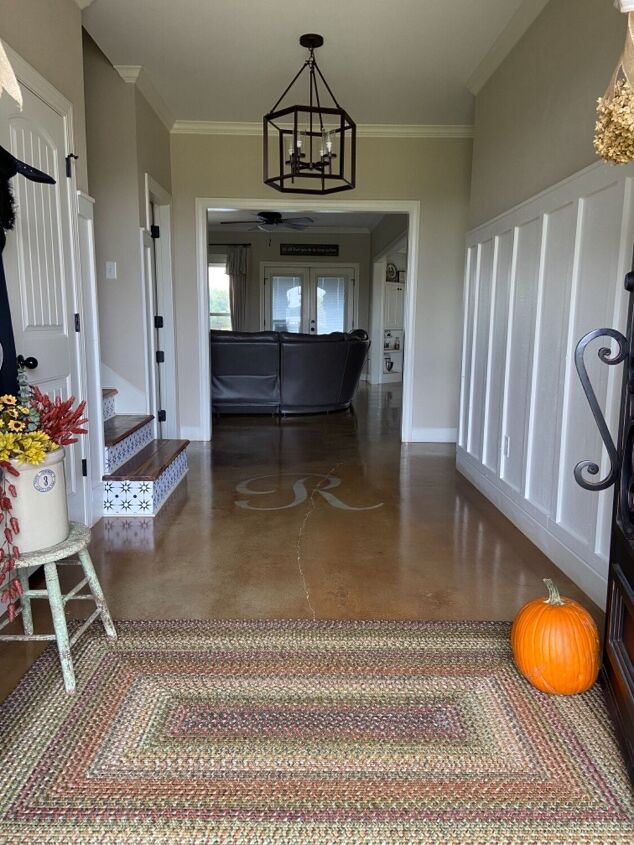
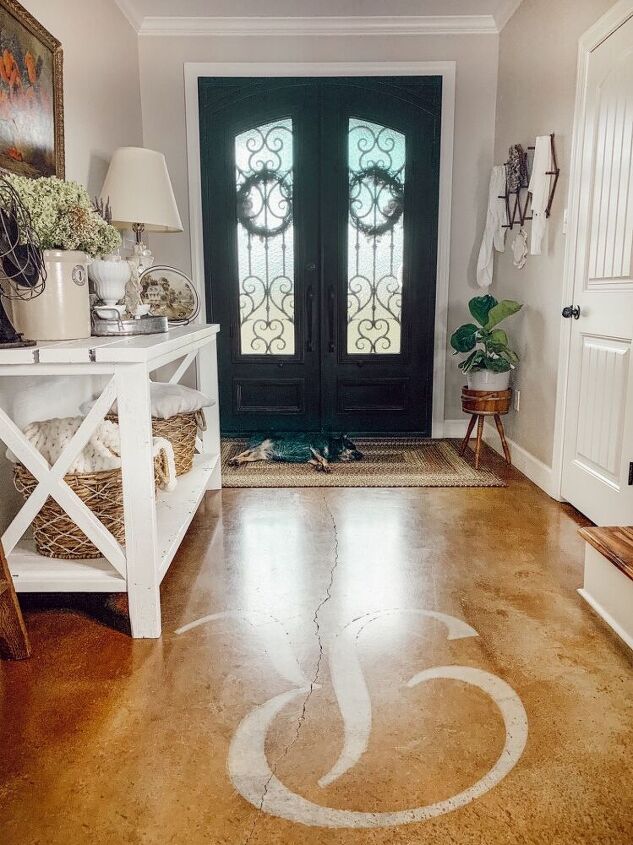
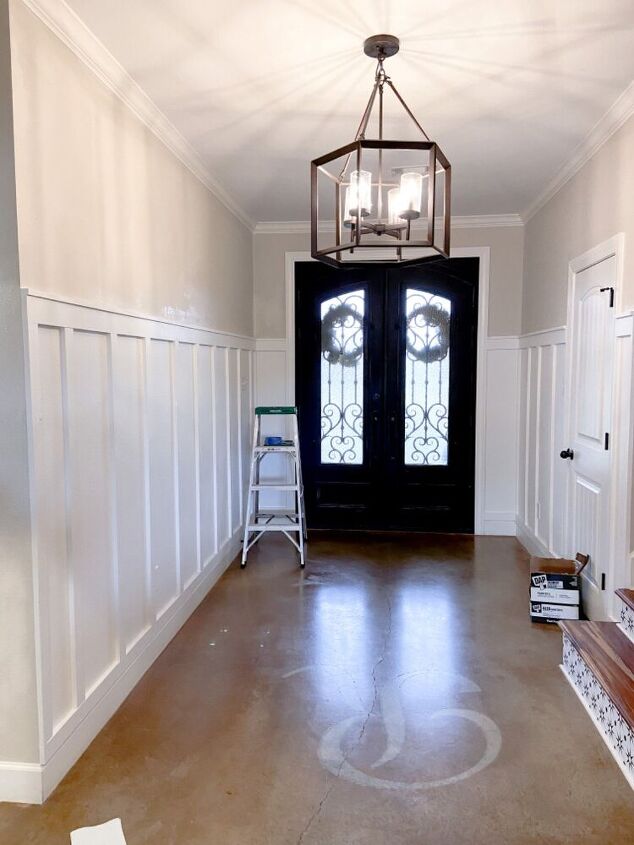
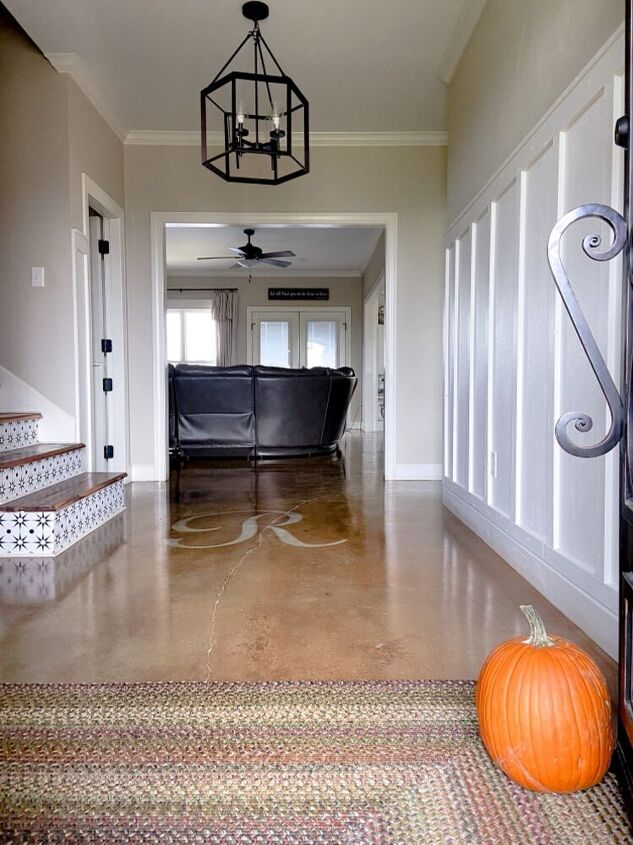
We built our house three years ago, but because of trying to save money there were several things that we weren’t able to include initially. I love our entryway and I especially love the stamped R on our stained concrete.
I think what I dislike the most is how dark it is. We have double iron doors that let some light in, but I really wanted to lighten things up.
We added Board and Batten (also called Wainscot, but taller) and painted it a lighter color.
This was an easy addition to the room! Painting it was more of a challenge than installing it because of a silly mistake I made!!!
Did y’all know you can’t use silicone caulk on a painted surface? Well if you did… Y’all failed to share that with me! I learned this the hard way.🤣🤣
Anyway… That’s another story for another day. Let’s get right down to the board and batten.
Items needed:
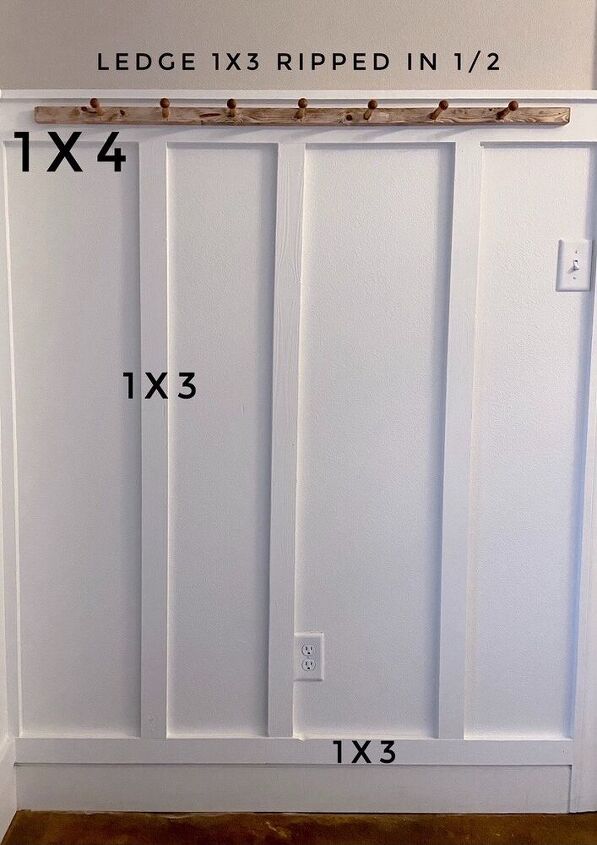
- 1×3 common pine
- 1×4 common pine
- Brad gun
- Finishing nails
- Tape measure
- Pencil
- Magnet
- Level
- Optional: F26
- Miter saw
- Table saw
- Supplies for week 3… Caulk (NOT SILICONE!!), putty and Paint
Cuts (usually I have exact cuts for my projects, but due to varying room sizes you will need to measure your room and cut accordingly):
- Vertical pieces 1×3 common pine boards 5 ft long x however many pieces you need.
- Bottom border, 1×3 common pine, measure around the bottom of the room and cut accordingly.
- Top border, 1×4 common pine, measure around the top of the room and cut accordingly.
- Ledge rip 1×3 in 1/2 with a table saw or buy a smaller piece. Measure around the room and cut accordingly.
If you have an awesome stud finder then perfect.. use it and mark each stud with a pencil.
If not I discovered the BEST trick ever! For years we have struggled with finding studs. We have purchased several stud finders and they never seem to work right. A carpenter recently told us it’s probably because the added insulation to our interior walls. He said that this can interfere with the stud finders readings. The most genius trick I’ve ever learned through all of my DIY‘s is using a magnet to find your studs! When your sheet rock is attached to your studs they use screws. The magnet will stick to the screws, therefore finding your studs! The screws should go in a horizontal line along your wall in a couple different spots on your studs.
Can you see my excitement in the video 🤣🤣!
Find the studs and mark them. They are typically 16” apart. Remember 90% ( I totally made that number up!!) of the time things will not be exact so plan on struggling to find one or two of them.
Lower Border
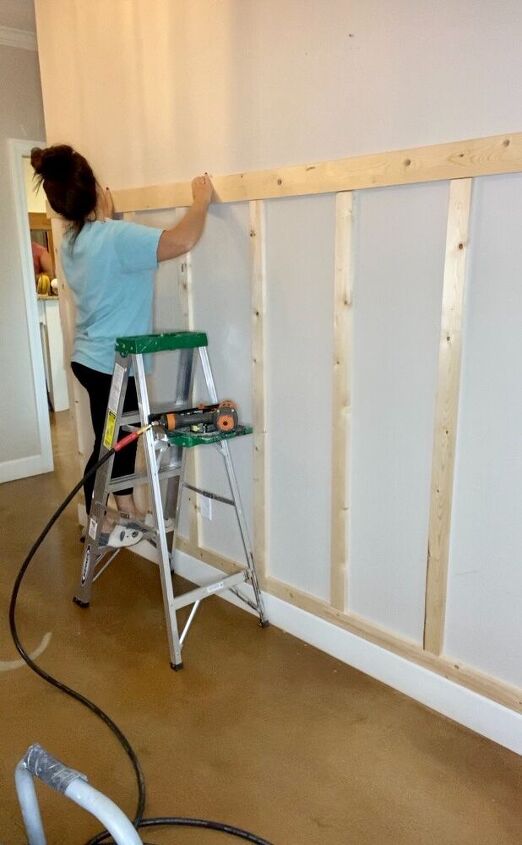
Using the 1×4’s hang the lower border first. Place your nails where there are studs. Otherwise, your wood will pull away from the wall. We left our trim up and butted the 1×4 up against the trim. Our entryway leads to the hallway, living room, and laundry room so it would have been a massive job pulling up the existing trim.
Vertical Pieces
Now hang your 1×3’s vertically along your studs. Be sure to use your level to ensure each piece is straight.
Top Border
Back to your 1×4’s, hang the top border all the way around the room placing your nails on each stud.
Ledge
I decided I wanted a thin ledge. After consulting with my IG bestie and texting her random videos and pictures of different sizes of wood I ripped a … and nailed it down along the top border.

Hope y’all enjoyed this project! If so be sure to drop me a comment below or tag me on IG!!
As always thanks for stopping by!
❤️Danya


Comments
Join the conversation
-
So pretty. You did a wonderful job
-
Hi Danya, Wonderful project and well done. Your cement Floor is gorgeous. The crack that was noticed reminds me of OLD Italian villas that have the cracks in the walls and floors. Lovely!
If I may ask, I love your rug may I ask the name of it and if it is from a rug company who you purchased it from. Thank you for taking the time to answer.


Frequently asked questions
Have a question about this project?
Is that paper bag flooring?
I just ran across this project. I love the floor did you do that yourself and how?
Just seeing your beautiful entryway! How high are your walls? Thank you kindly for any response.