


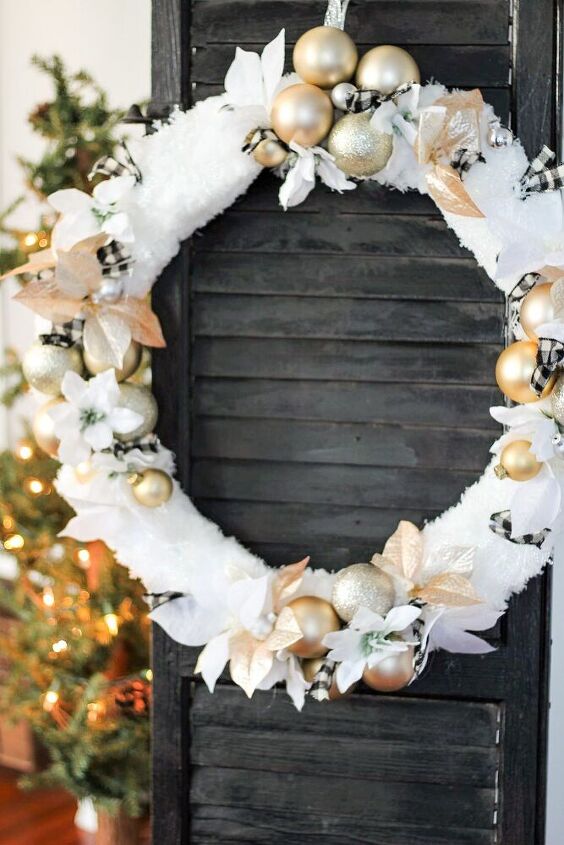
DIY Snowfall Festive Christmas Wreath
Create a high-end looking Christmas wreath with items from the Dollar Store!

Recently, I took part in a DIY challenge to create Christmas decor with items you shopped for in your home. I had already decided on making a 'glam' wreath for our dining room this year, but I needed a bit of inspiriation before I got started. Looking online I found a couple of gorgeous options, including a Mackenzie Childs wreath that I LOVED it was also $495! WOW! Even so, it was lovely and whimsical too, but I wanted mine to be softer and fluffier. More like the Scandanavian design I love so much! With that in mind I went about shopping my home for supplies.
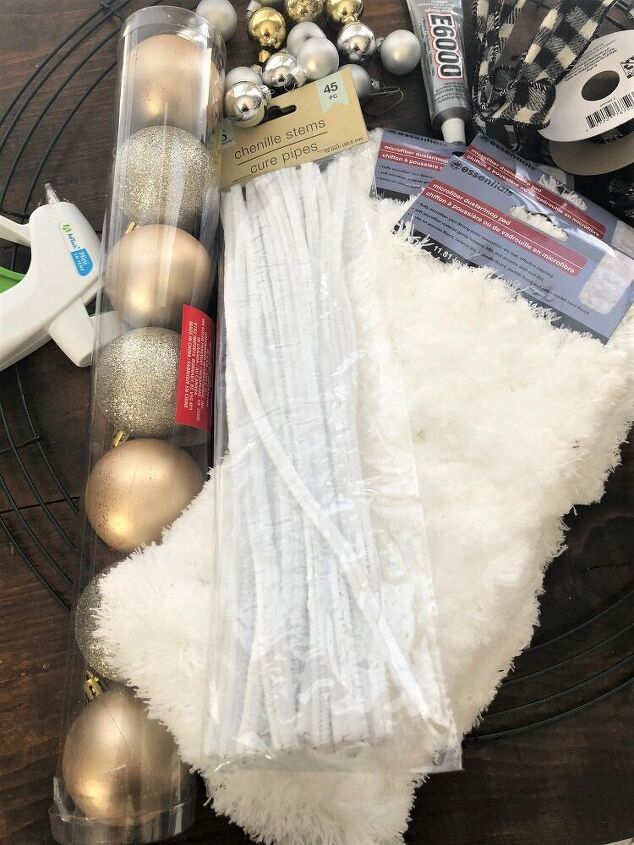
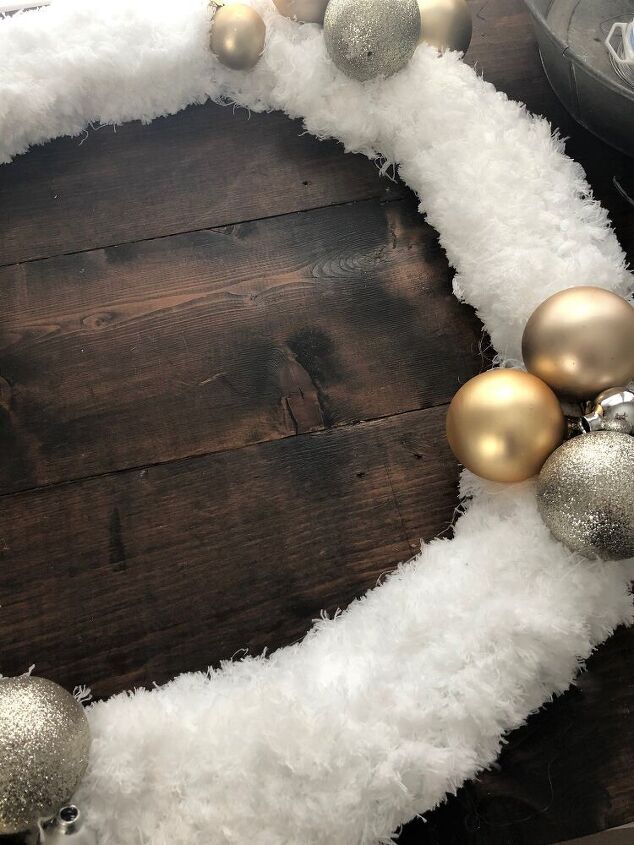
Most of the items I used were leftover Christmas supplies I bought last year at the Dollar Tree. Gold and Silver Christmas ball ornaments, white and gold poinsettia's, a wreath form( 18 inch) and some pipe cleaners. I also grabbed some things from my craft supply like my glue gun and ribbon. But one item was something I found in my cleaning supplies. You guessed it! Mop Dusters! Update: Please note these are the large individual Mop Dusters at the Dollar Tree! They also have 3 in a box but those are much smaller.
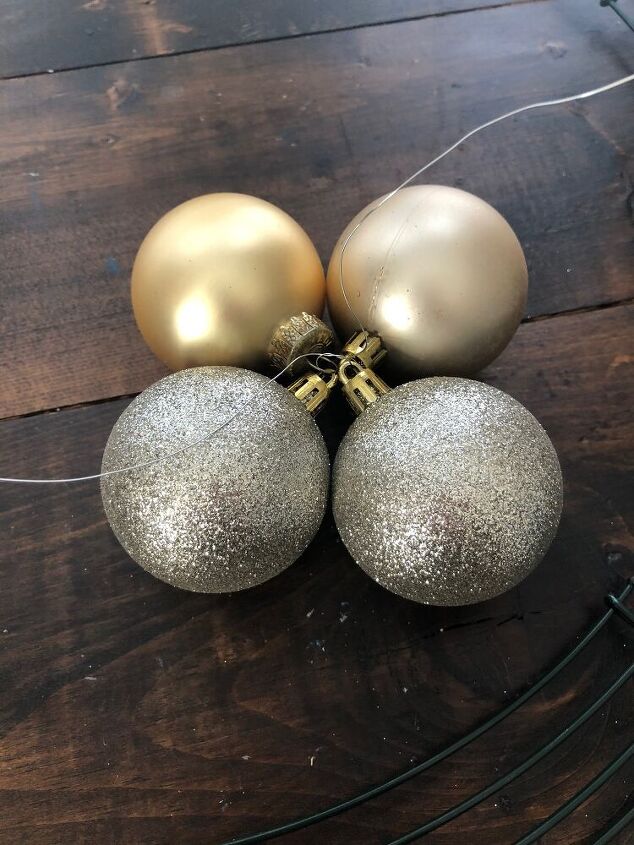
To start I began to string together 4 of the larger Christmas ball ornaments. I used some bead wire to that. Then I tied them off. I decided to place these on each corner of the wreath form. Although the balls were pretty sturdy once I tied them to the wreath, I decided to glue on or two of them to the base just in case. Originally I thought to use E6000 glue but that seemed pretty permanent so I ended up using my glue gun.
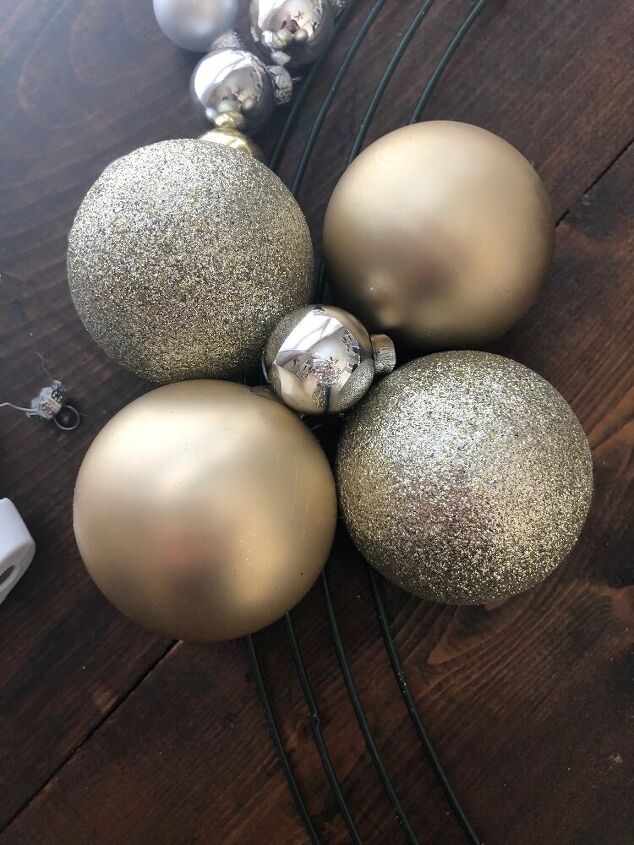
Next I took the tops off off four of the smaller Christmas ornaments and glued them to the center of each of the larger ones. This was mostly for decorative purpose and to hide the tops of the larger ones.
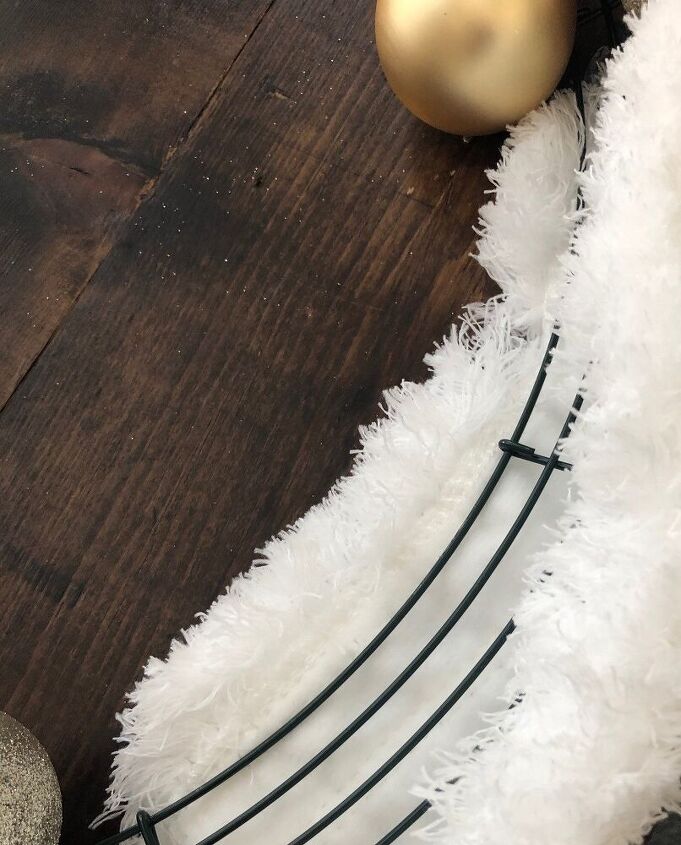
Next it was time to fill in the empty spaces around the Christmas ornaments. I did so with four of the mop dusters. I simply removed the tags, slid the duster under the wreath form, placed some glue on one side and folded it over and sealed. Each one fit perfectly snug, so all I had to do was fluff! Once I had all the sections covered, I cut up a 5th duster and filled in any empty spaces around the ornaments.
To add more texture and whimsy I added mini bows using the buffalo check ribbon I had, along with the pipe cleaners.
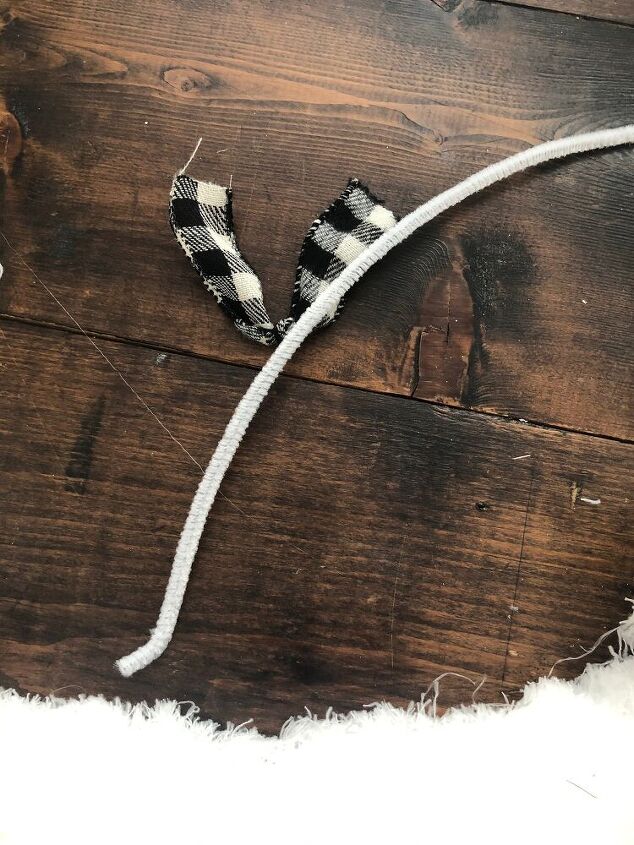
Since the ribbon wasn't wired, the pipe cleaner gave the bows more stability and flexibility. I just folded a piece of the ribbon in half, wrapped the center with pipecleaner and glued the bows in place.
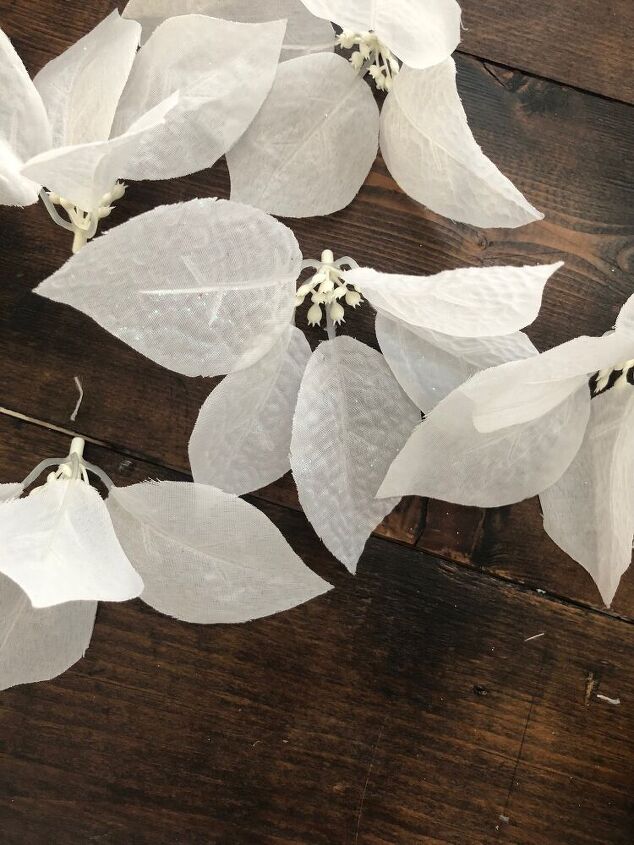
Then to add a bit more texture and fill in the wreath, I took the white and gold poinsettia's and removed the top from the stems. Then I glued them into place as well.
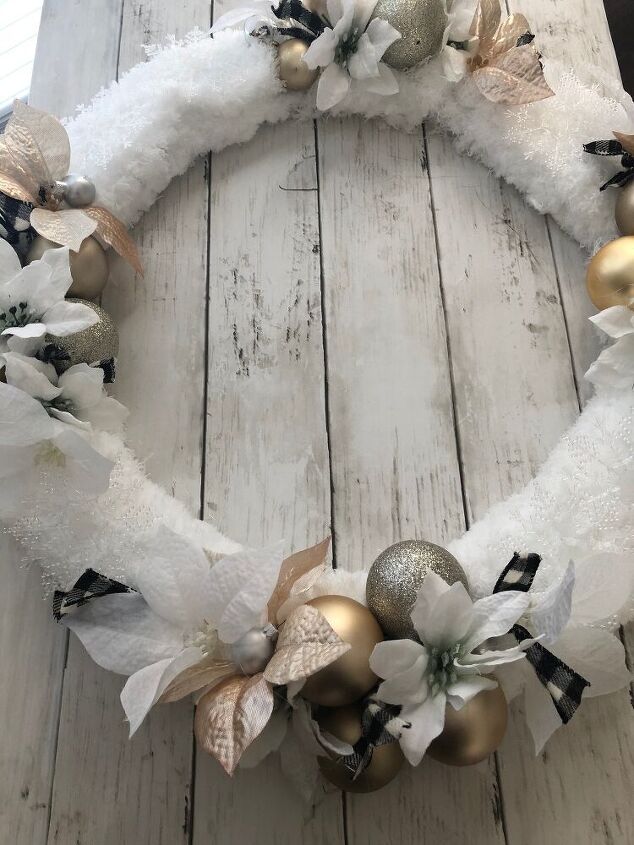
Last but not least I added a bit of 'sparkle' by filling in with these Dollar Tree sparkly snowflakes and a few more small Christmas ball ornaments.
Since I already had all of the items on hand the wreath didn't cost me anything, but since all of the items except for the ribbon came from the Dollar Tree, it would cost less than $10 to make! You can find my full tutorial in the link below!
Resources for this project:
See all materials


Comments
Join the conversation
-
I’m trying it thank you
-
I’m working on one now!! Thanks for the inspiration!!!


Frequently asked questions
Have a question about this project?
That was so creative and beautiful. BUT, my dust thingies don’t look anything like yours and Amazon’s price for them is ridiculous. Knowing that you creative gals use a lot of items from the dollar store, I’m thinking that you probably bought yours there, could you please in lighten the rest of us? Personally, I need all the help I can get! Thank you for sharing your creativity, for those of us who don’t have many original ideas, but love people like you who do, I send a very, heartfelt THANK YOU and please keep it up!
Gorgeous!!! Well done!!! Thank you for sharing!!!
It states you used sparkling snowflakes, but I don’t see them. What do they look like and where did you add them?