


Using Restor-A-Finish
If you've seen Restor-A-Finish at vintage stores you might be wondering like I was, does it work? I bought some to find out!

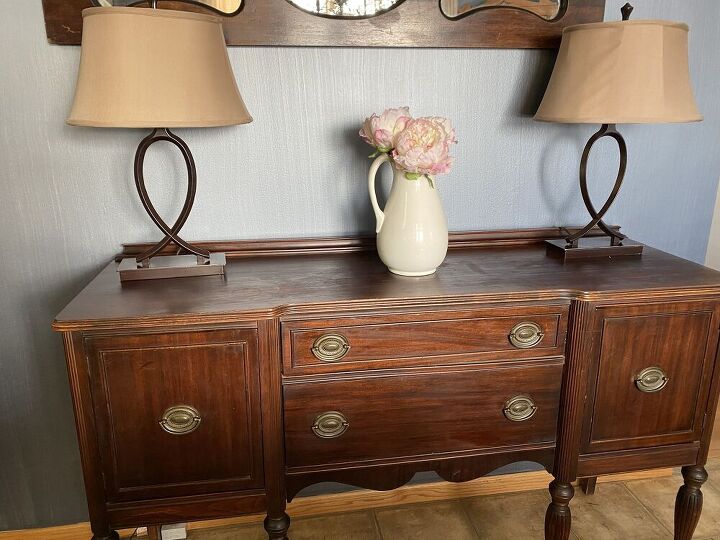
When you look at the photo above the buffet doesn’t look too bad. It just looks tired, but let's see a close up.
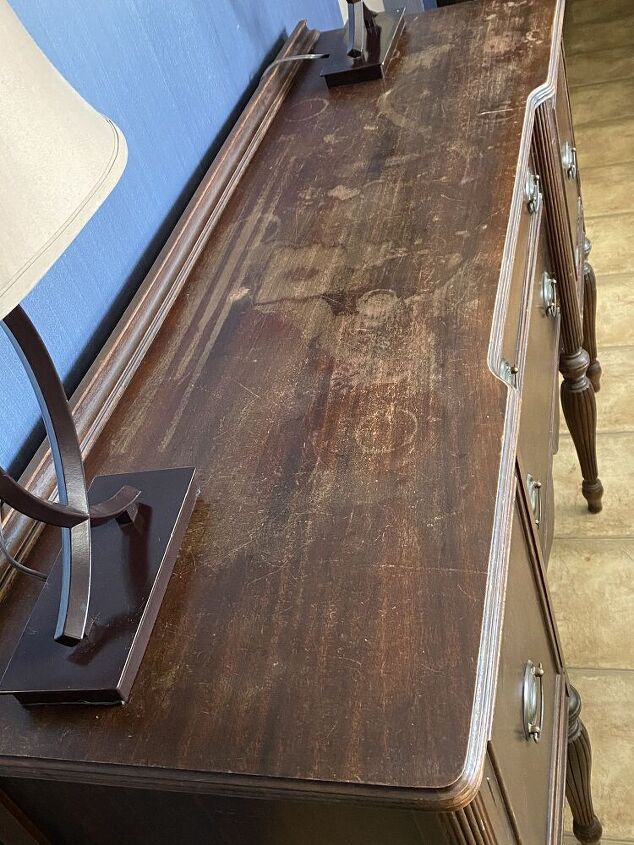
How do you like it now? Yeah, now you can see why I wanted to see if Restor-A-Finish works. This buffet has all the problems, heat rings, water damage, oxidation, scratches and fading. It's just plain ugly.
This stuff makes bold claims and the antique dealers love it, so I have to say my hopes are really high. I really don't want to paint my buffet and I don't have time before the holidays to give this piece the full restoration it needs. I want something that can improve the look at least for a little while.
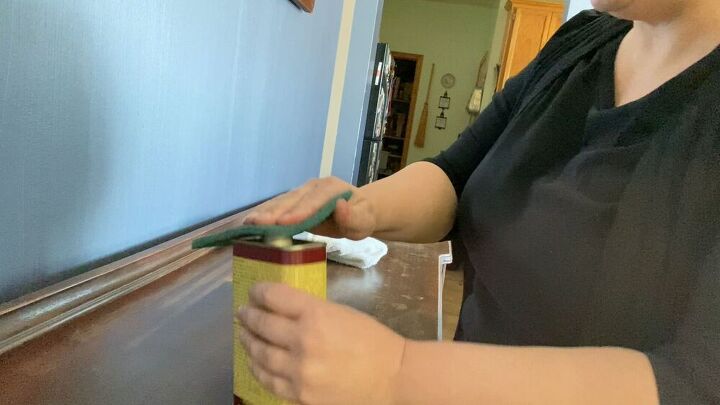
The process is pretty straight forward. The directions say use a cloth to wipe it on and then wipe it off. For heat rings or severe damage use a fine steel wool to apply the product. I don't have steel wool and I don't like using it EVER. Instead, I used a fine scuff pad which has the same abrasive properties. It worked great.

Apply the lightest pressure when applying with a scuff pad or steel wool. You don't want to sand through what's left of the finish. Wipe with the grain across the entire piece.
Right away I was impressed with how well Restor-A-Finish covered the mess of my buffet top.
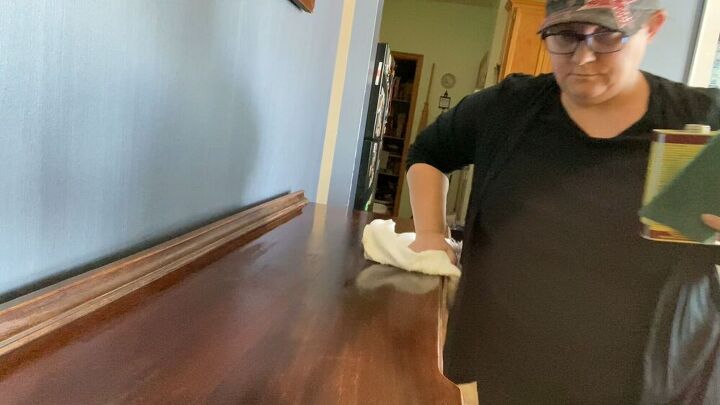
Once you've applied a full coat grab a rag. You want to wipe away the excess right away. I was tempted to leave it to sit for a while but the instructions were very clear about cleaning off the extra immediately.
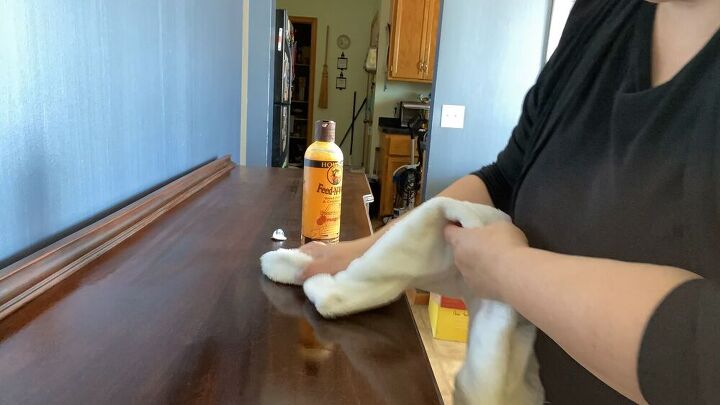
When I picked up the Restor-A-Finish I picked up the Feed-N-Wax at the same time. Not just for the buffet but I have other wood furniture that seems a little dry these days so I thought it would be a good investment.
It's an easy wax finish to use unlike some other wax products that require arm numbing buffing. To use Feed-N-Wax you simply use a cloth to wipe it on and then let it sit for 20 minutes. Then just wipe away any excess.
My buffet drank up even the wax. After 20 minutes there wasn't a lot of wax to remove.

I admit that my expectations were very high. Maybe too high because I was disappointed by some shadows of the heat ring that I could still see when it was all done. I felt a little better when my husband came and noticed the change (in a colorful manner I won't share here  .)
.)
I guess it looks better than I thought.
I think it's good enough to get me through the holidays and maybe a little longer. Now to tackle the mirror frame above it! If you want to see the full buffet transformation watch the YouTube video below. Let me know what you think. Do you have a project you're ready to try to restore?

Comments
Join the conversation
-
I think it looks great!
-
Yes! My husband accidentally knocked over a bottle of perfume(the real stuff) on my 75 year old maple dresser, leaving ugly damage to the top. I was heartbroken because it belonged to my parents. I’m going to try this to try to improve the damage on the dresser!


Frequently asked questions
Have a question about this project?
What color of finish did you buy? My bedroom set is about the same color as yours.
Where did you find/buy that piece?