


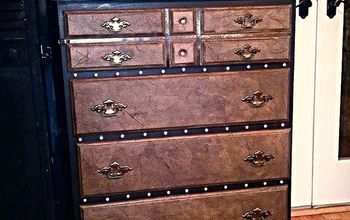
Spruce up Your Table With This Easy Faux Leather Technique
Sometimes we need something new to take our decor up a level. Many times, though, you can create that something new yourself from the furniture you already have. I love a nice, classy table with leather but, that, of course, can be very expensive. In this tutorial, I’ll show you how you can add a leather look to your table out of just some paper and paint. The end result, in my opinion, is absolutely beautiful.
Tools and materials:
- Table
- Ruler
- Brown paper
- Baby wipes
- Spray glue
- Paper towel
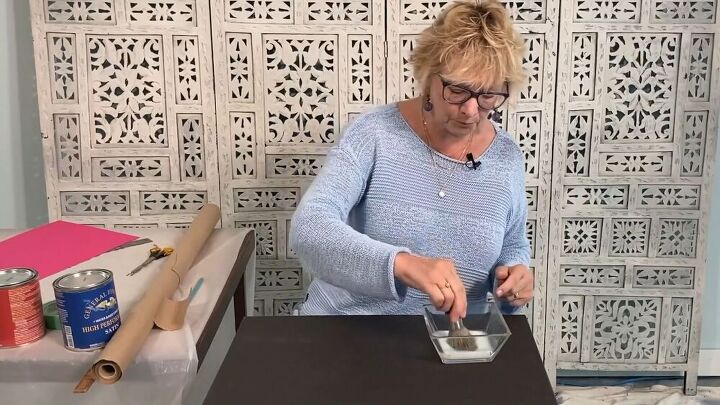
- Paint, 2 colors
- Water
- Paintbrushes
- Wax
- Upholstery nailhead trim
- Hammer
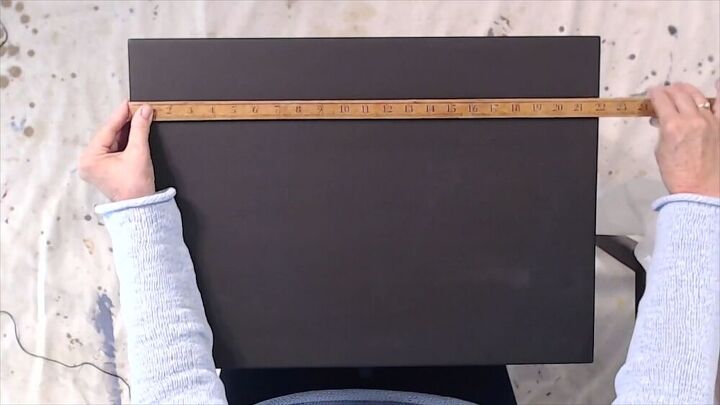
The first thing you’re going to need to do is to measure your table. I knew that I wanted to have a 2” border all around the table, so by measuring the table and adjusting the measurement, I knew what size I needed my paper to be.
Even if your table, like mine, doesn’t actually require a topcoat, I do recommend putting some around the parts you’ll be taping down. This will just make it easier to remove the tape when the time comes. It’s not necessary to paint the middle of the table, as you’ll be covering that anyway. Once your topcoat is on, let it dry before moving on.
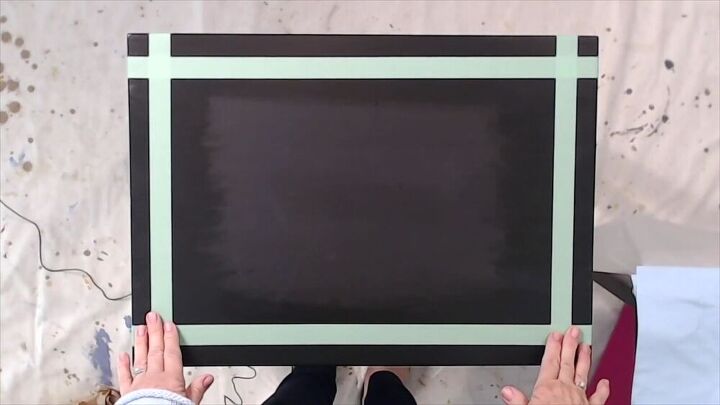
Tape off the edges of your table, so that you’re left with a rectangle in the middle for your paper. I chose to do 2” on each side. Then cut out your paper so that it’s the size of your inner rectangle.
You’re now going to take your rectangle of paper and scrunch it up really well in your hands. Once it’s all crinkled up, you’re going to lie it down and smooth it in place. You’ll notice that the rectangle has actually become a bit smaller, so smooth out the edges as best you can, but don’t worry if it doesn’t fully fill up the allotted space.
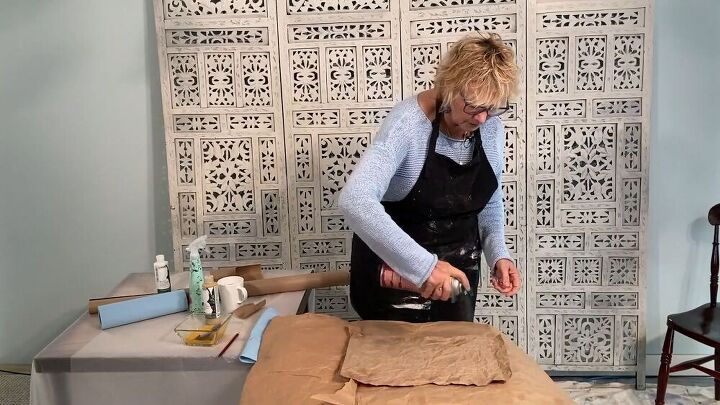
Now it’s time to put your paper in place. The best way I’ve found to do this is to spray adhesive all over it. If you’re using your table as your work surface, be sure to cover the table so that you don’t get the glue on it. Spray all over the paper to make sure you get the glue into the creases as well.
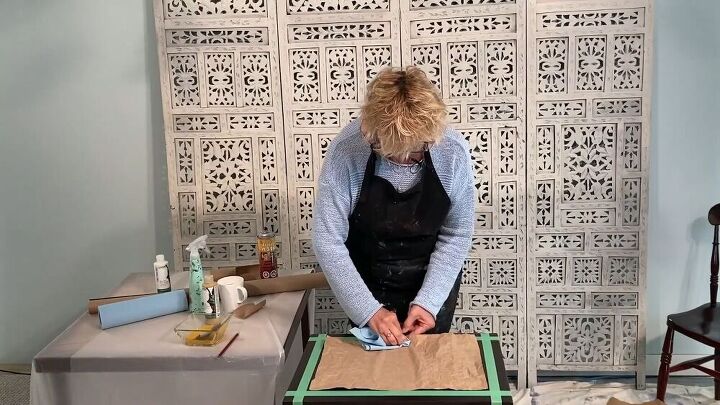
Now that your paper is nice and sticky, you can go ahead and press it in place. Start as close to the edges of your marker as you can, and stretch it out to fit the space as best as possible. Then grab some paper towel and use it to press down the paper, starting at the top center and smoothing it out as you press. If you’re not happy with your placement, you can easily lift off the table and readjust it. Leave it to set for about fifteen minutes before painting it.

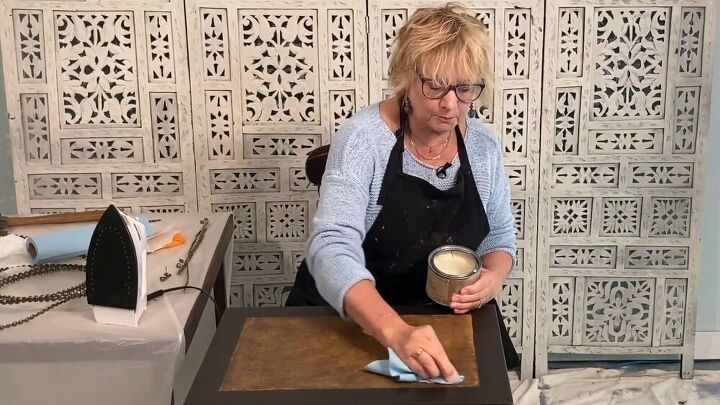
Once your paper is properly stuck down onto the table, you’re ready to paint on the first layer, so you can go ahead and remove the tape. I chose a yellow fluid acrylic paint and mixed it with some water to make it a bit runnier. You can use any paint you want, but make sure it’s on the runnier side; the consistency should be just a bit thicker than that of milk. Paint all over the paper, carefully going up to the edges. If you’re worried about getting the edges neatly, you can reposition your tape to the new size of the rectangle.
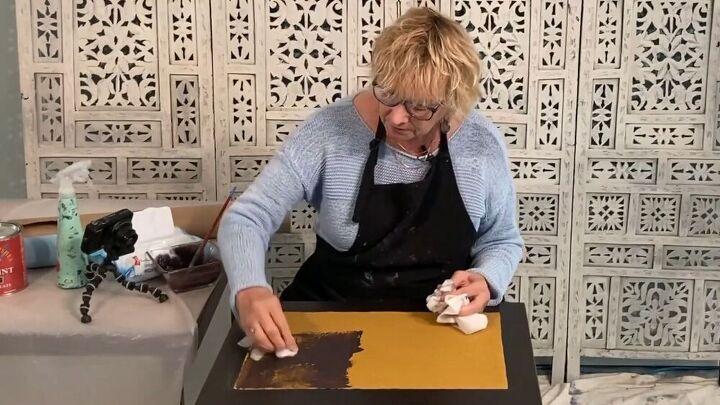
Grab your second color. You can choose any two colors you like, as long as one is lighter than the other to give you a contrast. Add water to your second color again, to get that same consistency, and start painting. For this part, I used a fan brush, which is great for getting the texture of the paper. Put on a bit of paint, then take a baby wipe and dab at the paint, removing a lot of the paint. Change the direction as you’re dabbing to avoid getting a pattern. Continue this process until you’ve painted the whole paper.
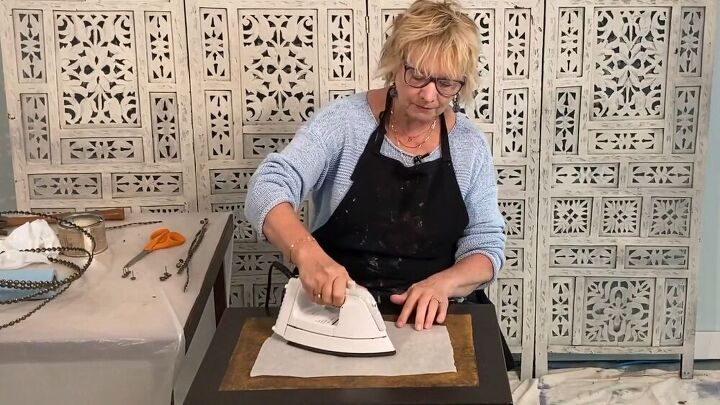
If you find that your paper isn’t stuck down completely, or if there are bubbles in it, you can use a hot iron to get them out. Just cover your paper with a (non-wax) baking sheet and apply heat, constantly moving your iron.
To bring out the shine, you’re now going to apply some wax to the whole surface of your table, both the paper and the table itself. This will give you a nice, glossy finish. Remember that wax is always last because you can’t paint over wax.
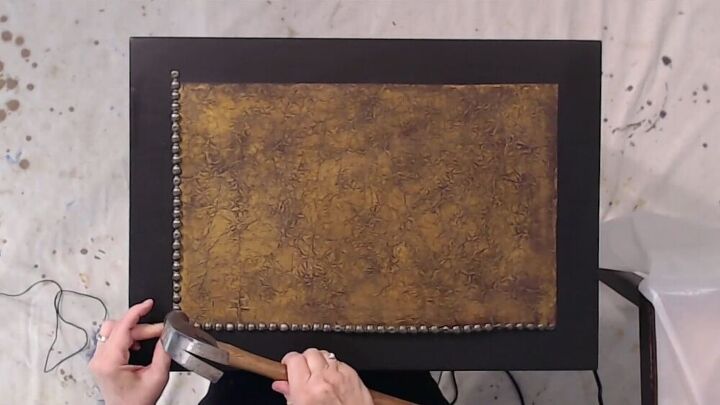
You’re now going add upholstery nails around the paper. You can get individual nails and hammer them in one at a time, but that will take quite a while. So instead, I purchased a nailhead trim. It looks like a row of nails, and every fifth one has space for you to put in a real nail, holding it in place. So cut yours down to the right size, making sure that you have a real nail in at each end. You can also overlap the ends.
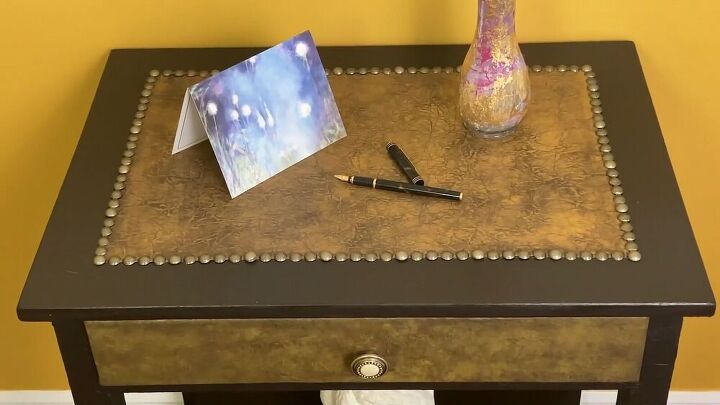
You can just leave your table like that if you’d like, or you can add some color to it. Since mine had a drawer, I painted it in matching colors.
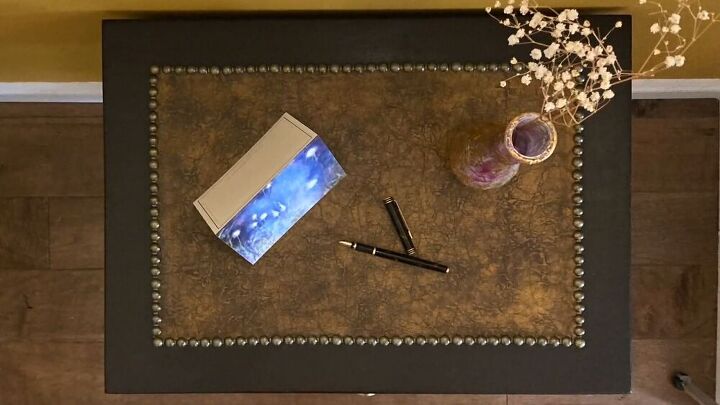
That is your table, done! I am a huge fan of this table and the way it turned out. It’s beautiful. and classy, and unique, and it was very easy to do. I highly recommend giving this project a try if you’re looking to redo a table, or really any piece of furniture. And, of course, show me your results down in the comments! I’d love to see them.


Comments
Join the conversation
-
I did something similar to my 12 year old grandsons nightstand. He's now 25 and it still looks pretty good. I put 2 coats of polyurethane on top of the dried papper. It's held up well.
-
It's a great trick, mine is looking great too. Julie


Frequently asked questions
Have a question about this project?
How do you keep fungus from growing on or under the paper?
Very pretty but... won’t it get ruined if it gets wet?
Amazing! Who knew you could do that with plain, old brown paper? I would never ever guess that wasn’t leather.
By the way, I love that screen behind you!! Did you make that?