


DIY Concrete Planter For Christmas With Ribbing
How to make a ribbed DIY concrete planter for a handmade Christmas gift.
With Christmas coming, people are looking for homemade present ideas. If you love working with cement, then why not use that as your medium for gifts?
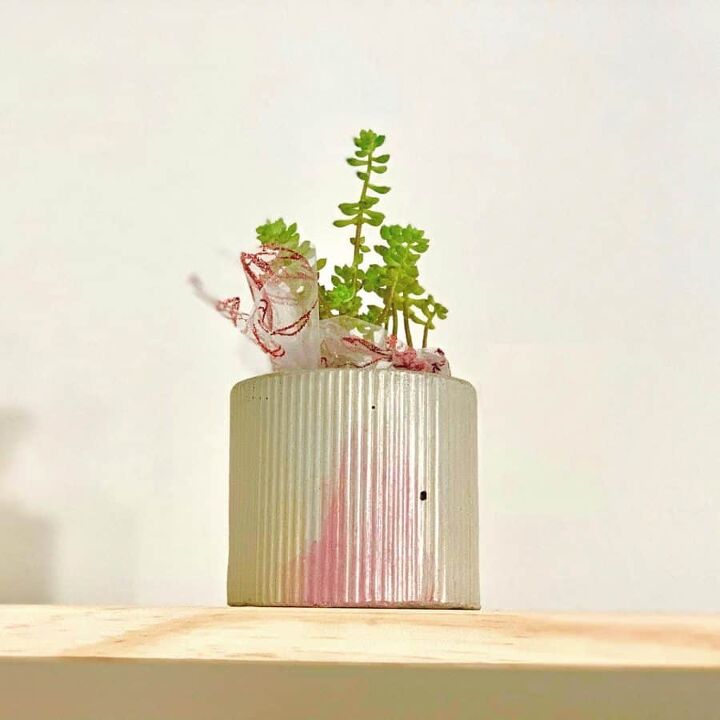
Concrete crafts are perfect for handmade Christmas gifts, and with this planter, the shimmery paint, as well as the holiday mesh accent wrapping, adds holiday accents.
However, this type of DIY cement planter can be made as a gift for any time of year.
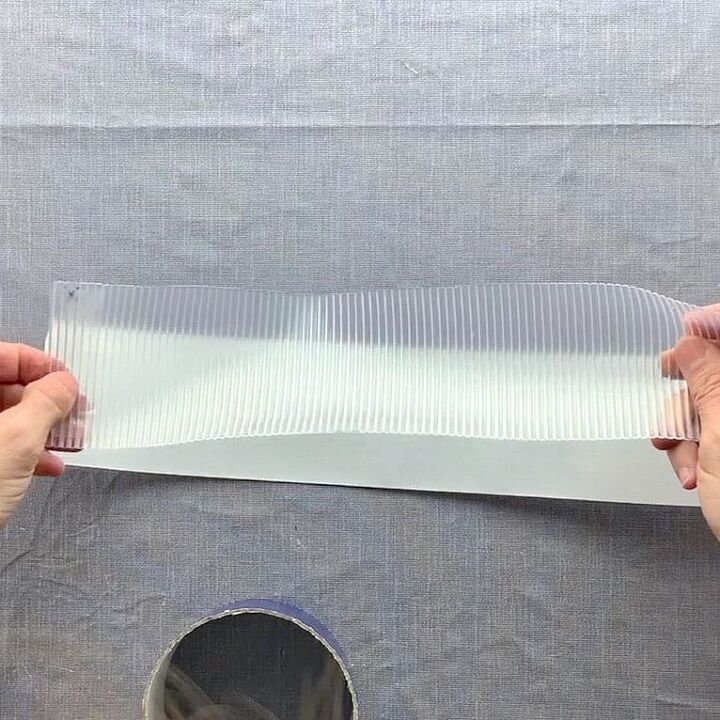
I gotta say, making this cement planter was a blast.I had leftover closet shelving liners and was storing them away when I realized how great of a texture these had specifically for something made with concrete.
I could totally envision a nice, DIY ribbed concrete planter being made from this. Lining the cardboard tube with this shelving liner was a win-win because the liner is soft plastic.
Cardboard can be used for concrete molds, but the concrete will stick and not have a very refined texture.And cardboard demolds very easily because you can just peel it off.
I wanted to be strategic on how I made this because I didn’t want this Christmas gift to be used only during the holidays.
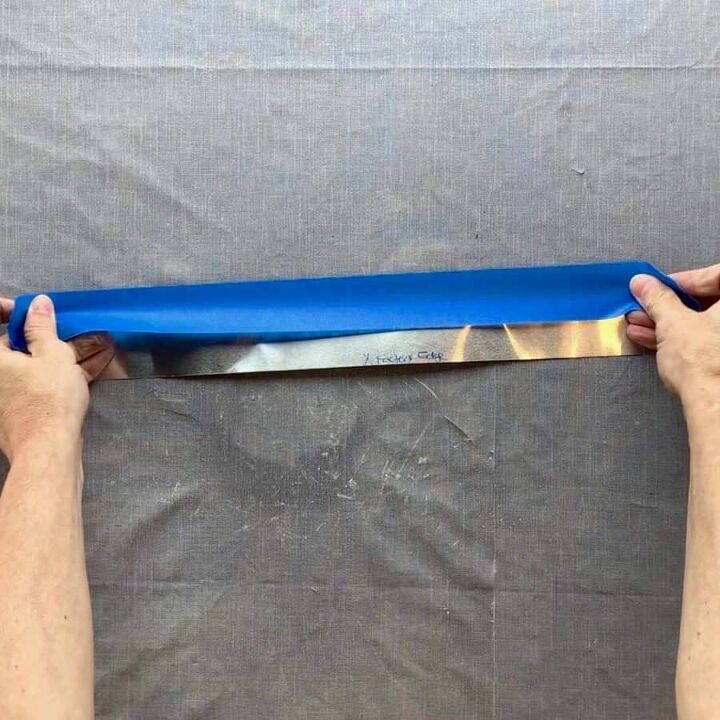
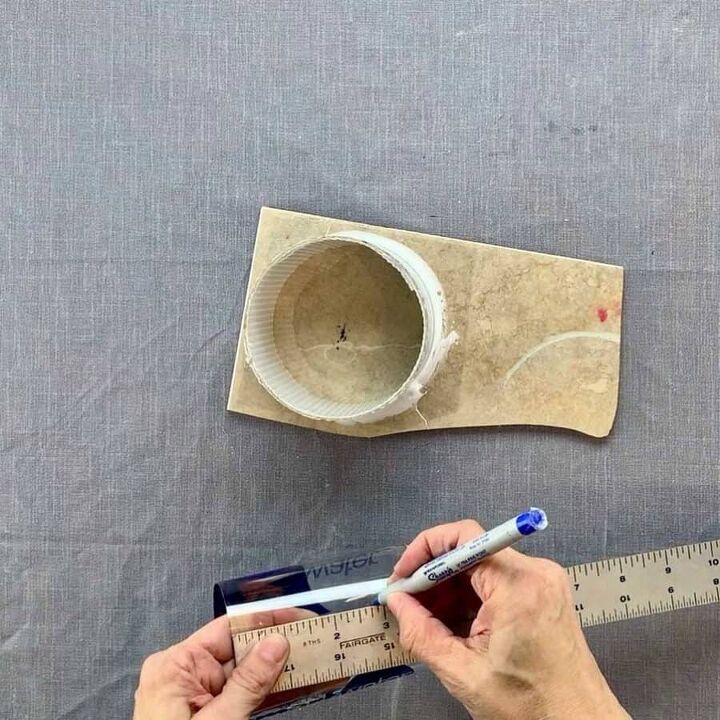
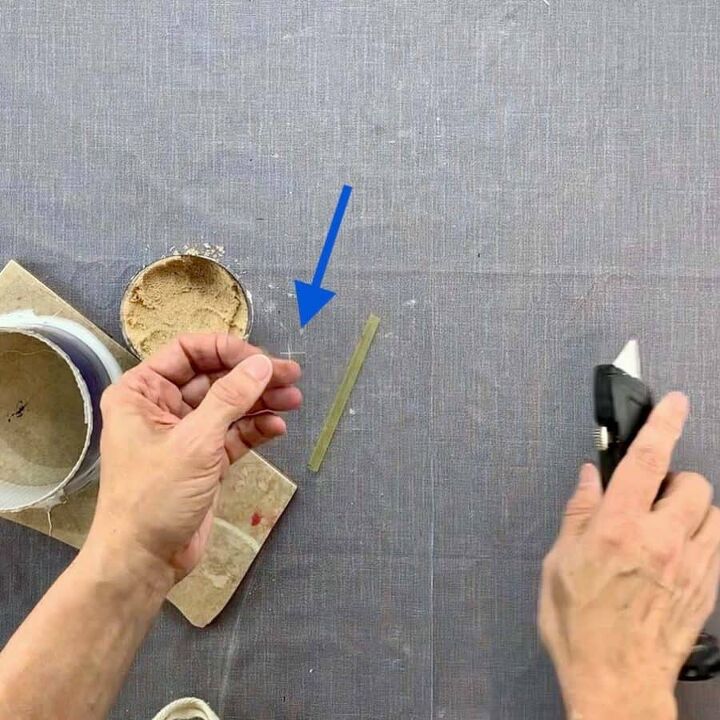
Take a piece of aluminum flashing and cut it to 1 ½” x 14” long. Be sure to leave one side of 10” length with the factory cut edge.
Now run a piece of blue tape along the non factory cut edge. Ensure that you overlap the tape on both ends.
** If you are looking for more inspiration on what to make for gifts this Christmas, then take a look at my 39 DIY Dollar Tree Christmas Crafts Tutorials post. 
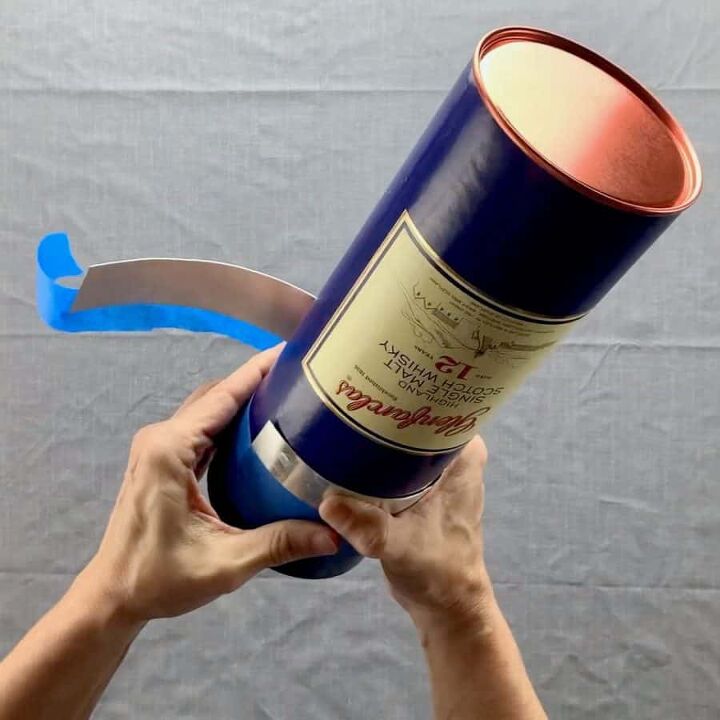
First, decide what height you want to make the planter and measure up the mailing tube, from the worktop, and mark this in 3 places around the tube. I made mine 3” tall.
Now take your homemade straight edge and wrap it around the tube, ensuring you line it up with the marks. You also want to be sure that you have the flashing covering the piece you will use, this way if the blade slips, it will cut the side you aren’t using.

Now use a utility knife, with a fresh blade and hold the blade against the factory edge of the tube and cut through.
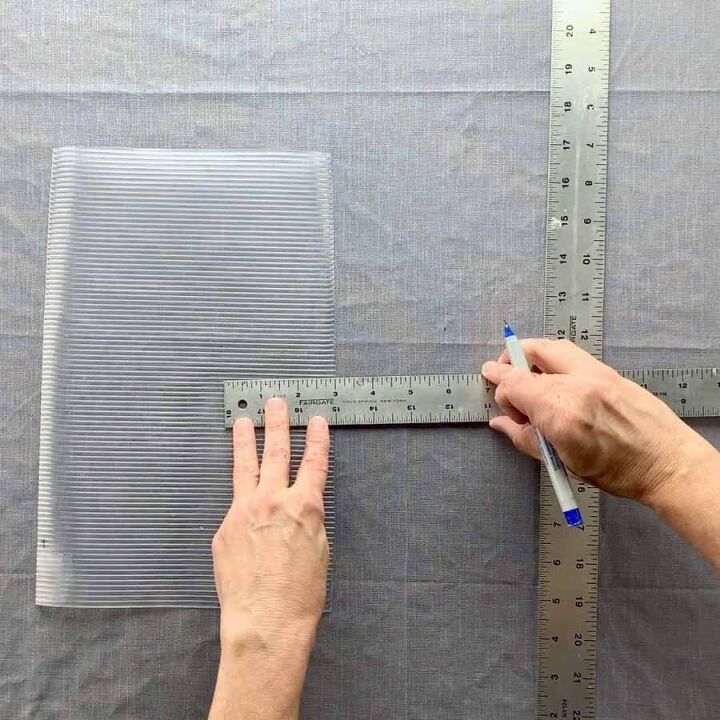
Trim the liner to the height of the planter. You want this liner to be straight and even when it’s inside the tube, so use a T-square to keep everything square.
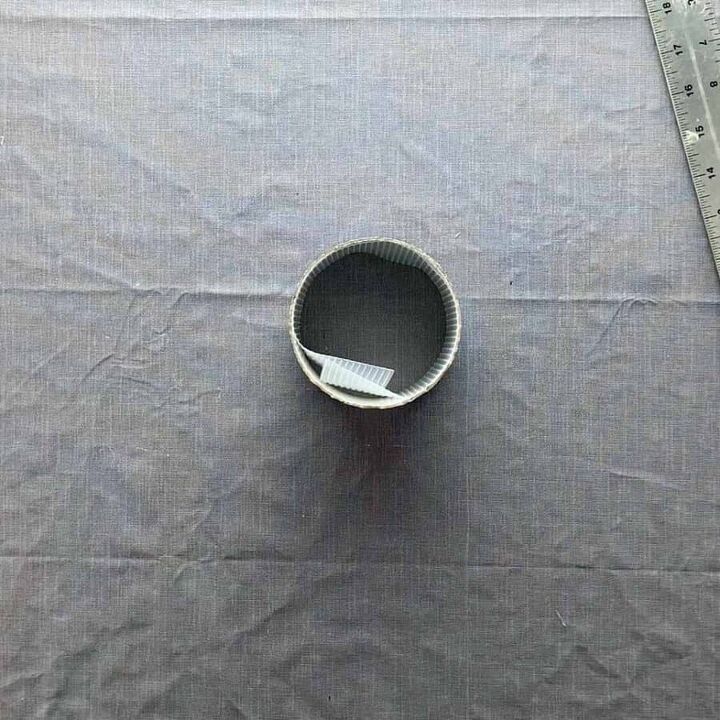
Next, wrap the ribbed liner around the tube and let it overlap an inch or two, then use a permanent marker to mark this and then trim it to fit, with the slight overlap. Also, trim the liner in height to fit.

If the liner has different types of ridges on each side, decide which side you want to touch the cement. Test this first by pressing some of the plasticine clay against each side and be sure to mark the side that will be against the clay.
Take a piece of double sided tape and run it along the side of the liner that doesn’t have the mark you made. Be sure this is correct before sticking the tape to it.
Now fit the liner inside the tube and press the tape against the sides. It’s best to start at one end and slowly roll it around the tube while pressing.
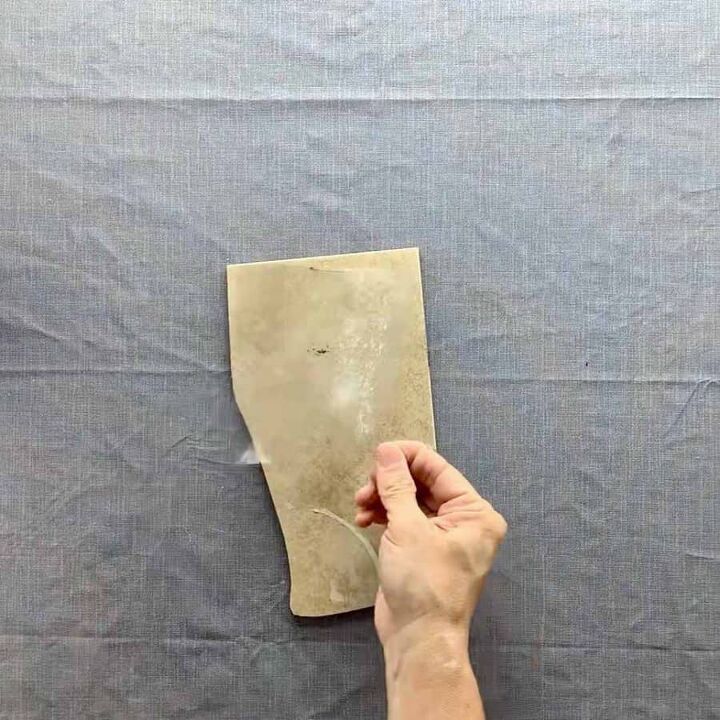
Cut a piece of acetate that is wider than the tube (4×4”) and use spray adhesive to stick it to a tile.
Use either silicone caulk or hot glue to secure the tube to the acetate. If you use silicone caulk, you will need to wait an hour or two until it dries.
Take the water bottle and cut it to the height of the plater, but be sure to subtract ¼” from the number. This will give you ¼” floor thickness for the concrete planter. Mine was 2 ¾”.
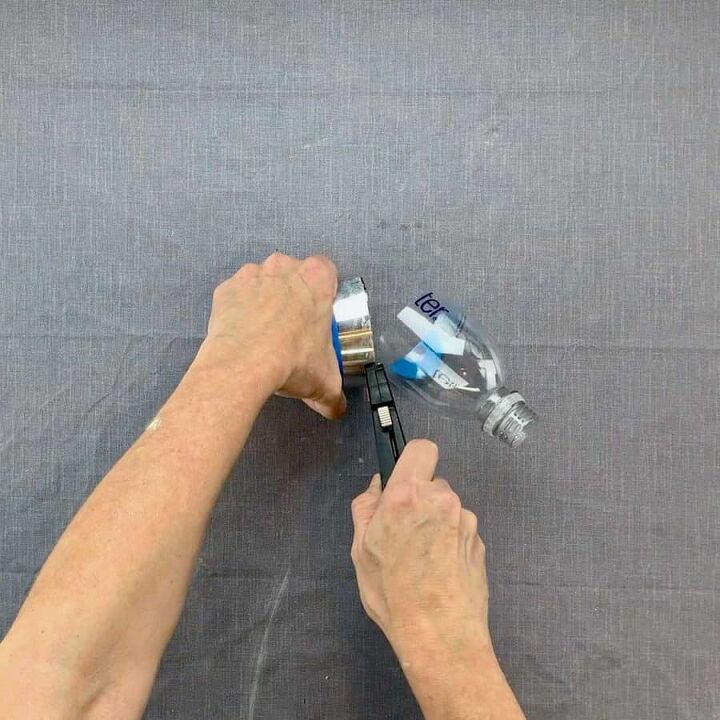
Cut the bottle the same way you did the tube, by measuring up from the worktop and marking in three locations around the bottle.
Then use the utility knife to cut through. Roll out a piece of plasticine clay to about ¼” thickness and use the water bottle to cut it out so the clay fills the bottom of the bottle.
Leave the clay there at the bottom.
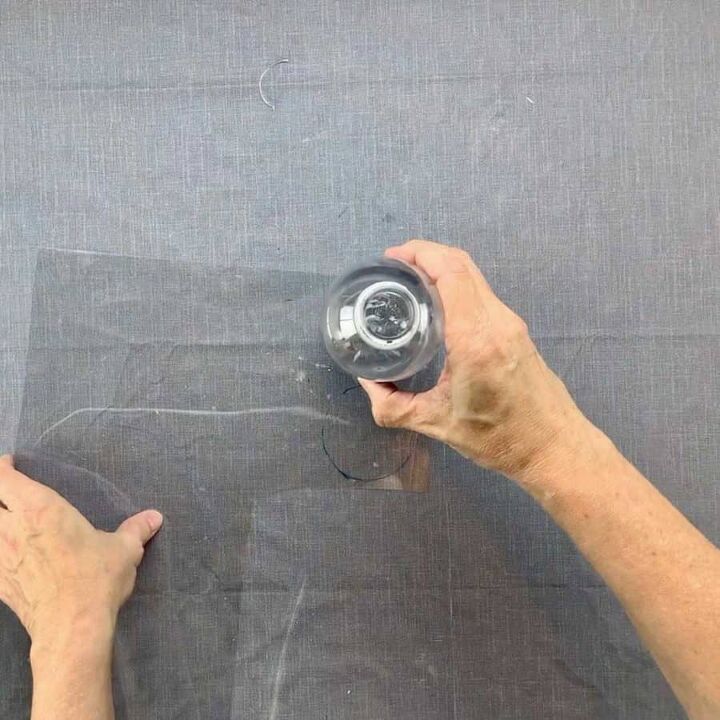
Next, trace two circles around the bottle and onto the acetate, and cut them out with scissors.
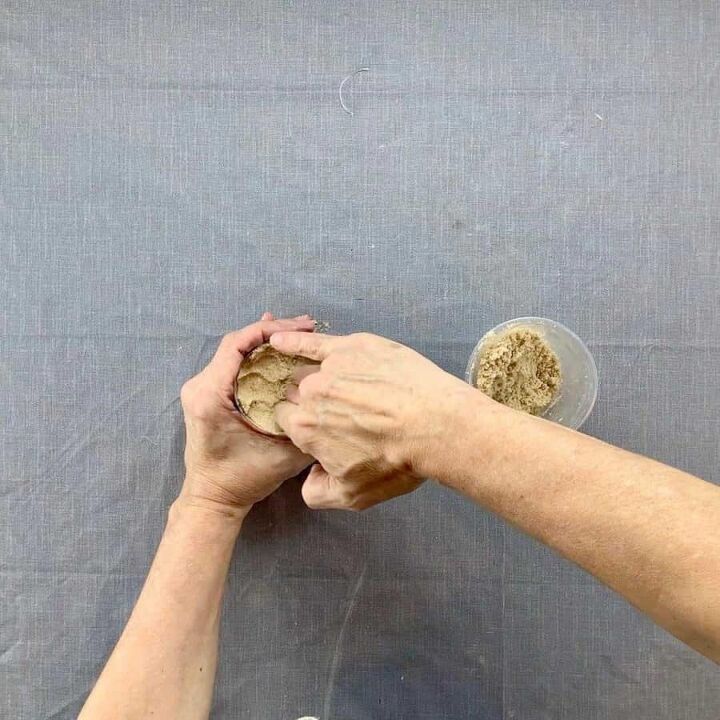
Fill the plastic bottle with damp sand and be sure to pack in the sand and go up to the top so the packed sand is flush with the top lip of the bottle. I left a bit of a recess which made removing the acetate require a little elbow grease.
Next, take one of the circles and mark an x through the center with the utility knife. Now push the straw through the hole of the acetate circle.
The straw needs to be long enough to protrude at least an inch past the top of the inner mold.
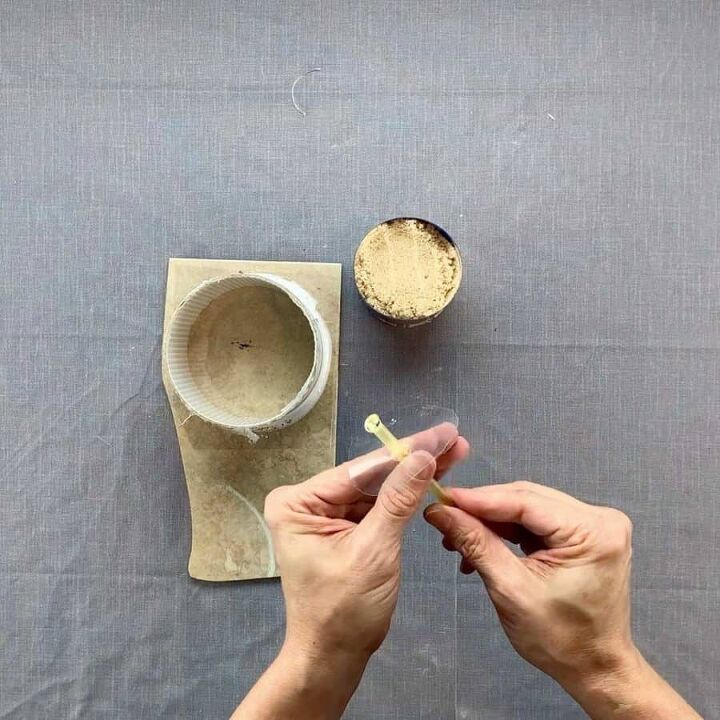
Use either caulk, hot glue or a bit of clay to plug the hole at the top of the straw to prevent cement from accidentally dripping down inside.
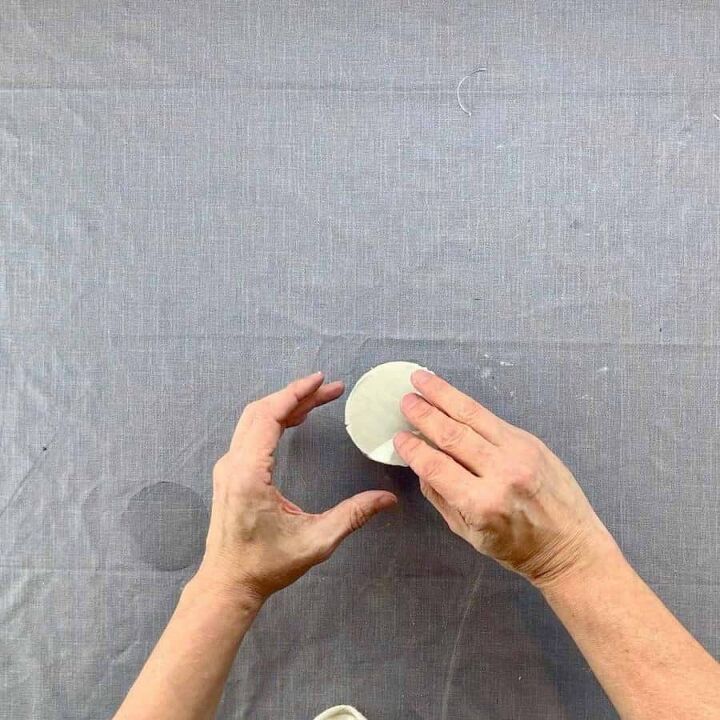
Now take the other circle and use spray adhesive on one side. Press the unglued side against the clay and then press the glued end and press it firmly into the center of the cardboard tube.
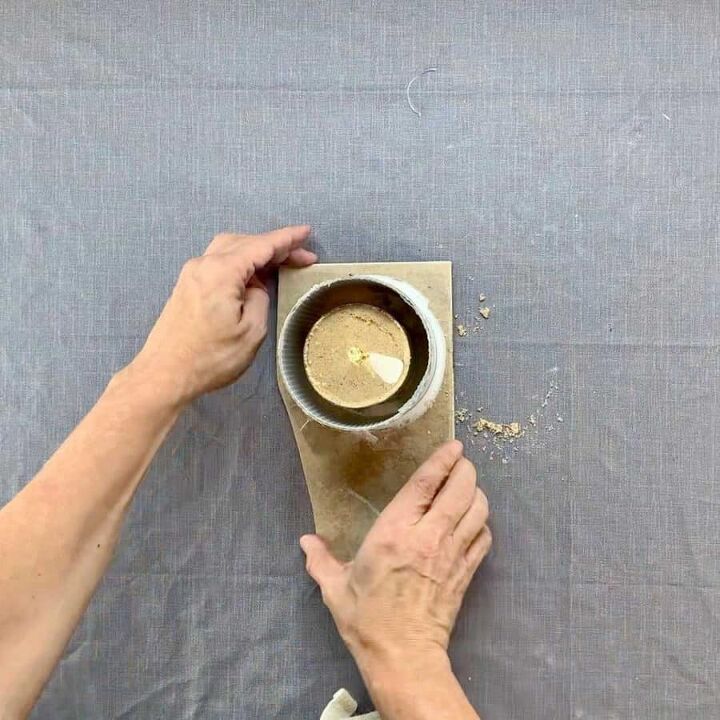
Note: The inner mold should be ¼” below the height of the outer tube mold.
**If you love making concrete projects, then check out my Pocket Guide to Concrete Mixes!I tested 6 mixes and made a handy reference chart. It's a FREE download. 😉
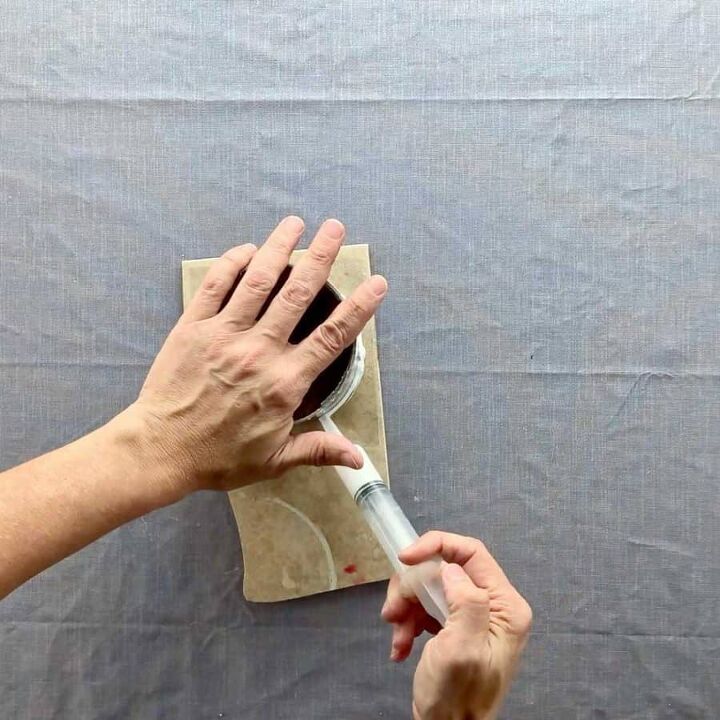
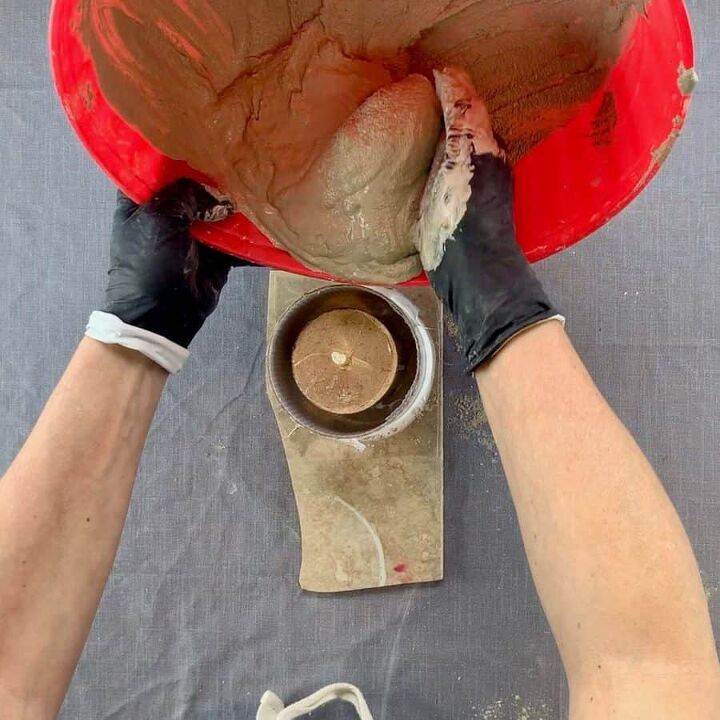
Mix the cement to a thick milkshake consistency and carefully pour it into the empty space between the molds. The consistency in the photo was a little too thick, but a thick milkshake consistency will be perfect.
Fill this so it completely covers the inner mold and is filled to the top of the outer mold.
Next, level off any excess cement and vibrate the mold to release air bubbles. Don’t do this too vigorously, as you don’t want the inner mold to dislodge. Just tap and lift gently and keep tapping the sides of the cardboard tube.
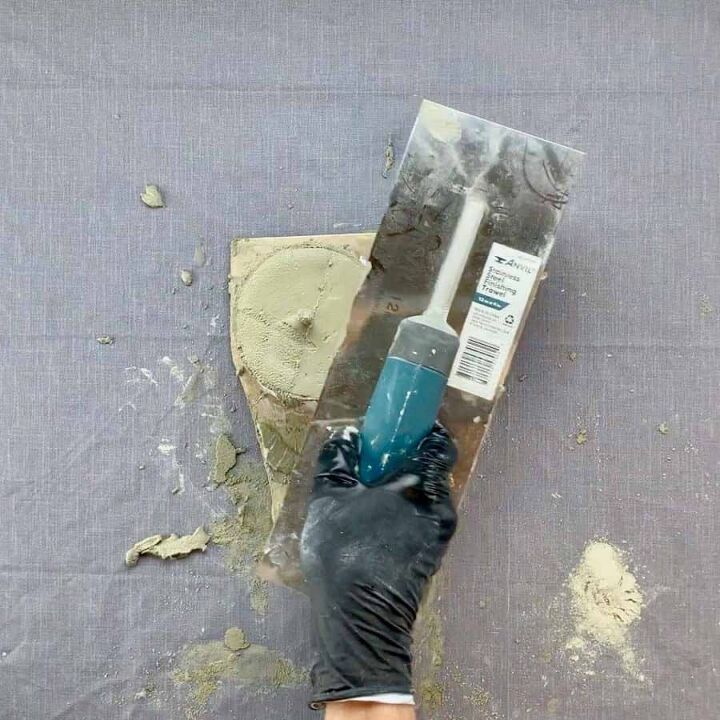
Let this cure a couple of hours. The cement will heat up quite a bit, after it has gone through that process and has cooled, then it should be ready to demold.
Demolding this should be relatively easy. Just remove the straw and pull the planter off of the acetate/tile. Now, peel off the clay and dump out the sand.
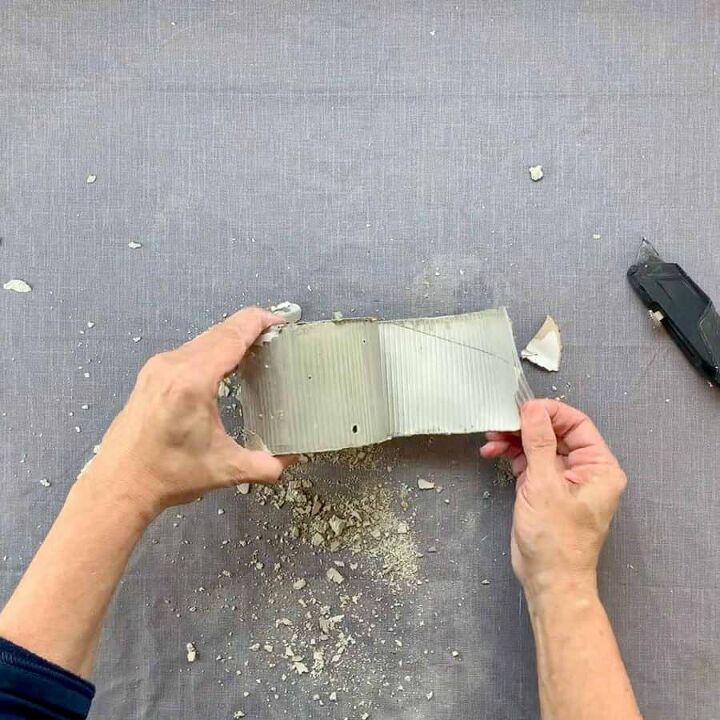
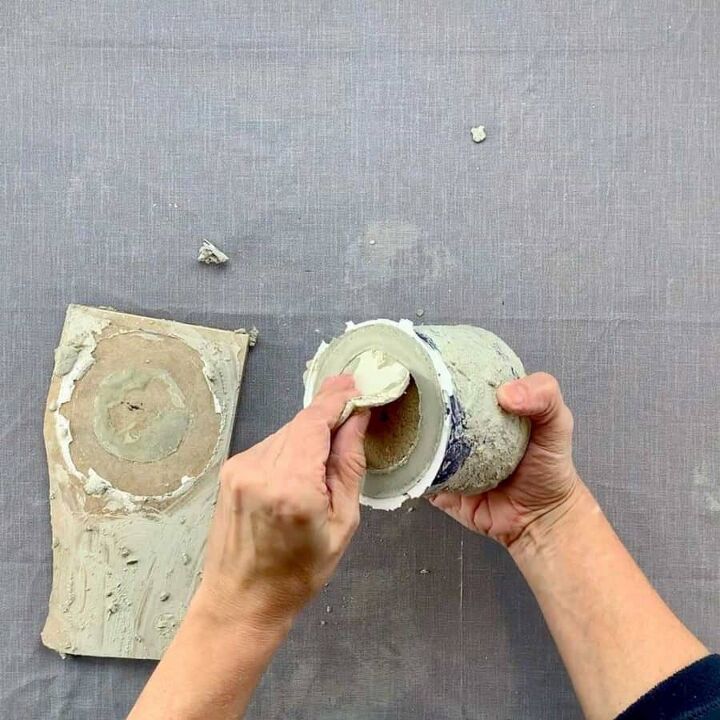
Use a utility knife to slice through the cardboard and unravel and then peel off the liner.
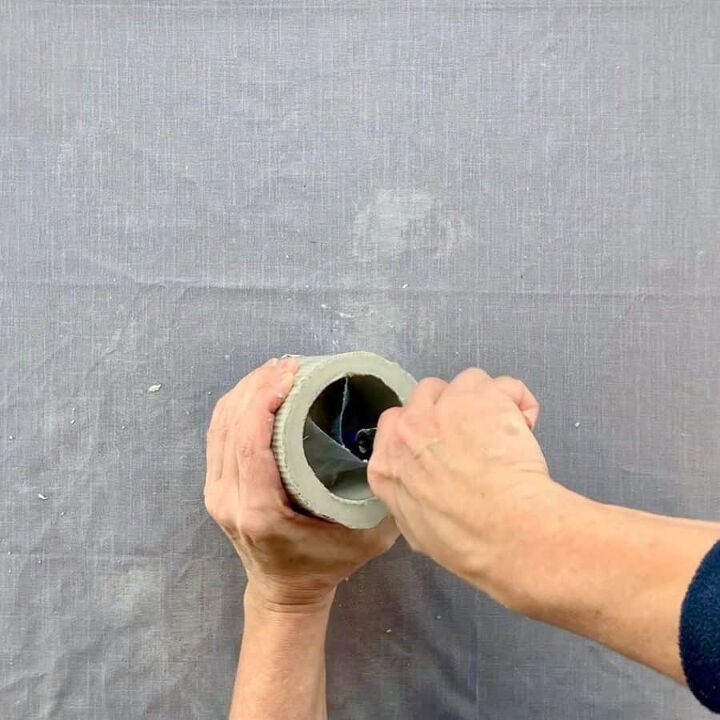
The final piece to remove is the bottle. Just dump out the sand and if it was packed fully to the top with sand, then you should be able to pull it right out. If not, then grab some needle-nose pliers.
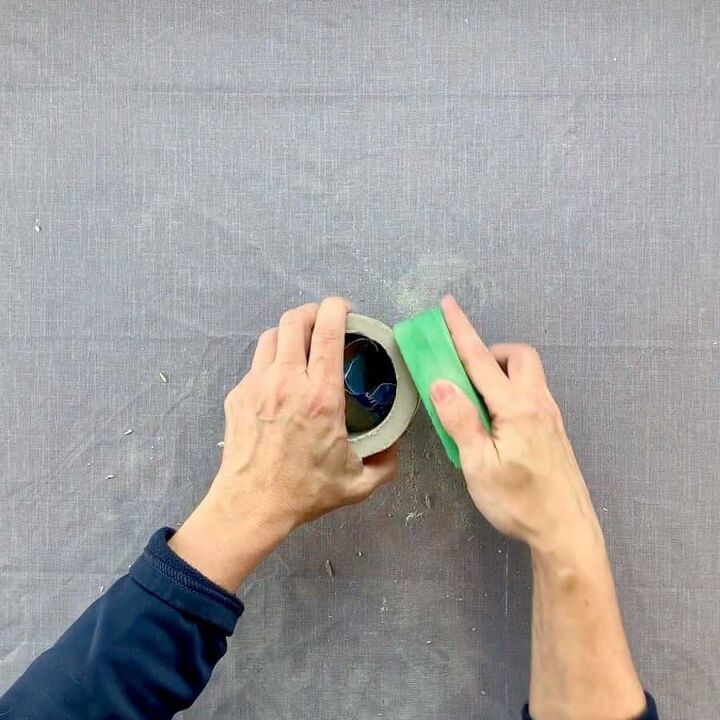
Finally, sand any rough edges with a diamond grit sanding sponge, or you can use a regular 150 and 220 grit.
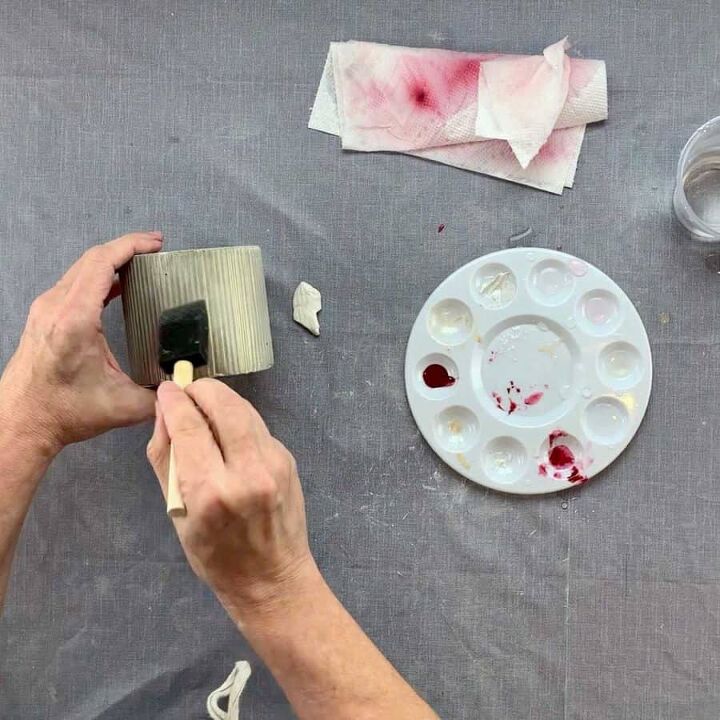
Let the planter dry for a full 24 hours before painting it.Once dry, add the shimmery paint colors to the paint tray and add some water to a few of the other compartments. This ribbed DIY concrete planter is a nice unique texture, so look for ways to accent that lineal texture.
Though I only used one cup of water, I recommend having three so you don’t have to keep emptying and refilling each time you use a different color paint.
Also, keep a couple of paper towels on hand. To paint this handmade Christmas gift, I just basically white washed this by watering down the gold and red colors and using the foam brush to blend the colors in.
I alternated the gold with the iridescent. The iridescent paint, since it’s a medium, is actually made to be blended with other paints, but it can be used by itself.
You can add more water if you feel you went too dark, or go back over areas and continually blend.
FINAL STEP | PLANT THE POT AND ADD SOME CHRISTMAS FLAIR
Aside from using Christmas mesh as a dressing, here are some other ideas on how to make this handmade Christmas gift throughout the year.
You can get some pebble filler and spray paint it green, gold, red or silver and dress the plant with that. Then it can be changed out after Christmas.
You can just wrap ribbon around the planter, or stick a bow on it. Or how about planting a seasonal looking plant like a Christmas cactus or even small ornamental pepper plant!
Resources for this project:
See all materials


Frequently asked questions
Have a question about this project?