


Dehydrated Fruit & Chestnut Garland
Hello, I'm Cindy and I blog over at Cloches & Lavender where I share painting furniture ideas, DIY crafts, Upcycling and the occasional recipe.
I hope to inspire my readers to be creative, enjoy painting furniture with different techniques.
I enjoy upcycling pieces and giving them new life too.
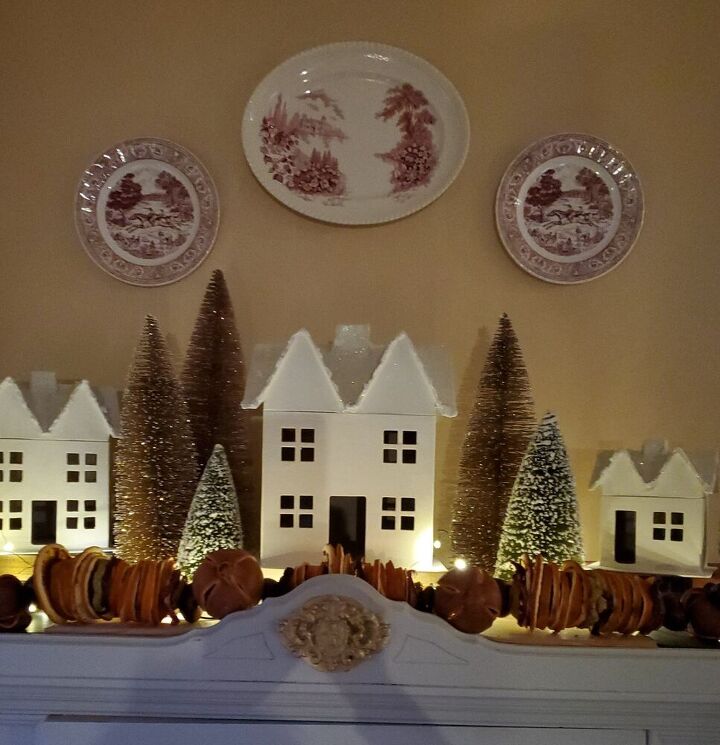
Today I am sharing a dehydrated fruit & chestnut garland with you. I wanted to share this so you can make one for your home in time for Christmas. A dehydrated fruit & chestnut garland is perfect for Christmas.
Also, this garland would work for your fall decorating as well next year so it's a two for one craft.
I made my first dehydrated fruit piece in this post you may enjoy. The decision to make this garland came from that post as well as this post of easy DIY snowy houses. Because I made these houses I thought a dehydrated fruit & chestnut garland would add a pretty touch. Besides waiting for the fruit to dehydrate, this dehydrated fruit & chestnut garland is very easy to make and is fun for the entire family.
Let's Begin With What You Need for the Dehydrated Fruit & Chestnut Garland
Items Needed:
- 1 bag red delicious apples
- 1 bag granny smith apples
- 2 lemons
- 1 bag oranges
- Halos or Tangerines optional
- Whole oranges optional
- baking sheets
- stainless steal cookie racks
- medium bowl
- real chestnuts in the shell walnuts in the shell can be substituted
- oven or dehydrator
- fishing line
- drill for drilling holes in chestnuts or walnuts
- needle
- polyurethane, optional
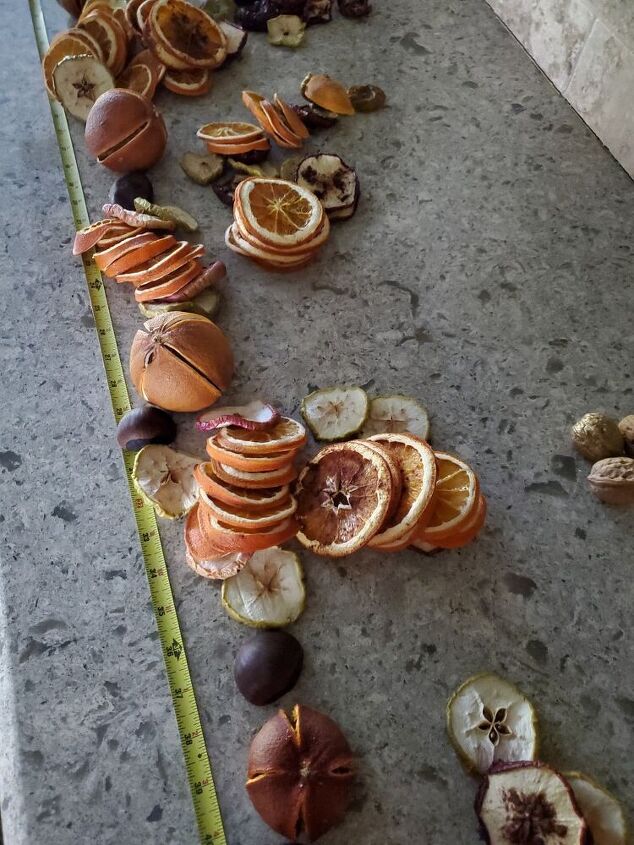
For my garland I also dehydrated whole oranges and a bag of Halos, tangerines would also work. These need to dehydrate over night. You'll see in the photos they truly make a statement and a great addition.
First Steps for Making Your Dehydrated Fruit & Chestnut Garland
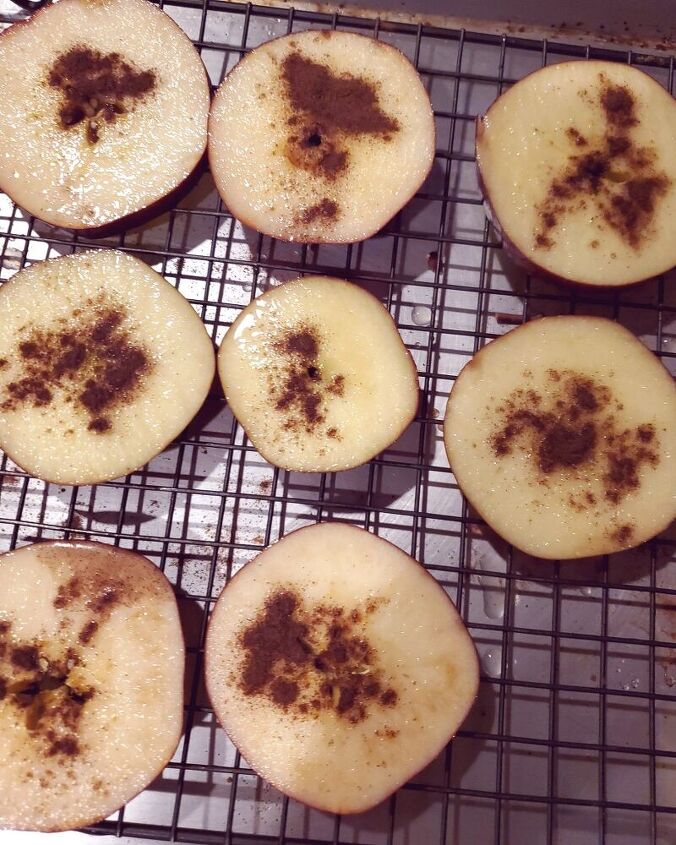
Preheat your oven to 140/150. If your oven doesn't go that low set it to 180.Meanwhile, place your cookie cooling racks on your sheets pans. After getting all your supplies begin by slicing your lemons in half. Lemons are necessary because the lemon juice will be used to keep your apple slices from getting brown. Begin slicing your apples 1/4 inch thick. Red delicious apples for instance were chosen because of their dark red color. Adding cinnamon makes these smell wonderful too.
Next, squeeze your lemon juice into your bowl. As a result of trying to use a pastry brush on my first apple slice in the end putting the juice in a bowl is faster. Also, it coats the apples better.
The apples took up approximately three baking sheets. Now place them into the preheated oven and allow them to dehydrate for 8 hours. As a rule, it's a good idea to turn them at the halfway mark. After the apples are dehydrated store in a brown paper bag while dehydrating your next fruit.
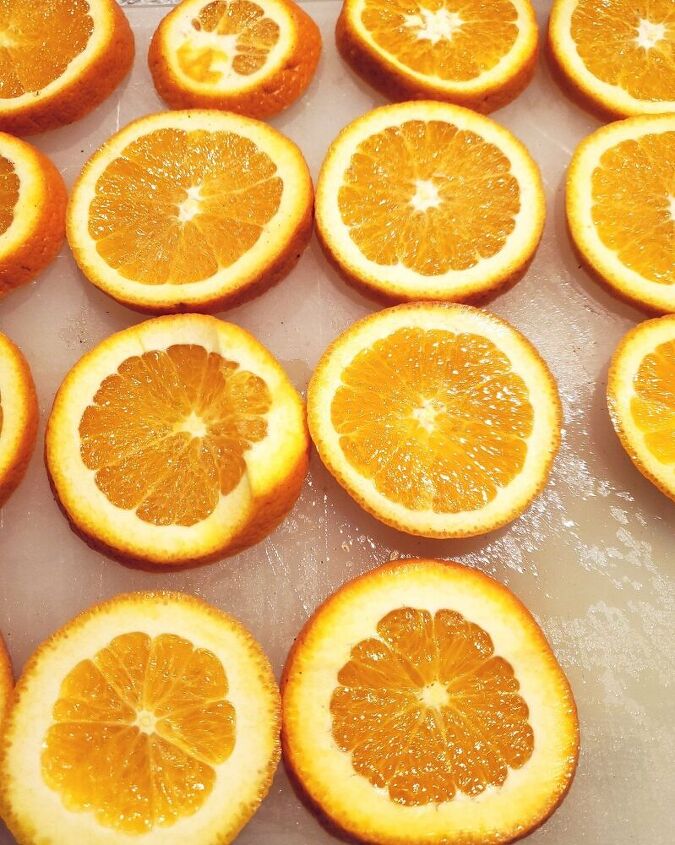
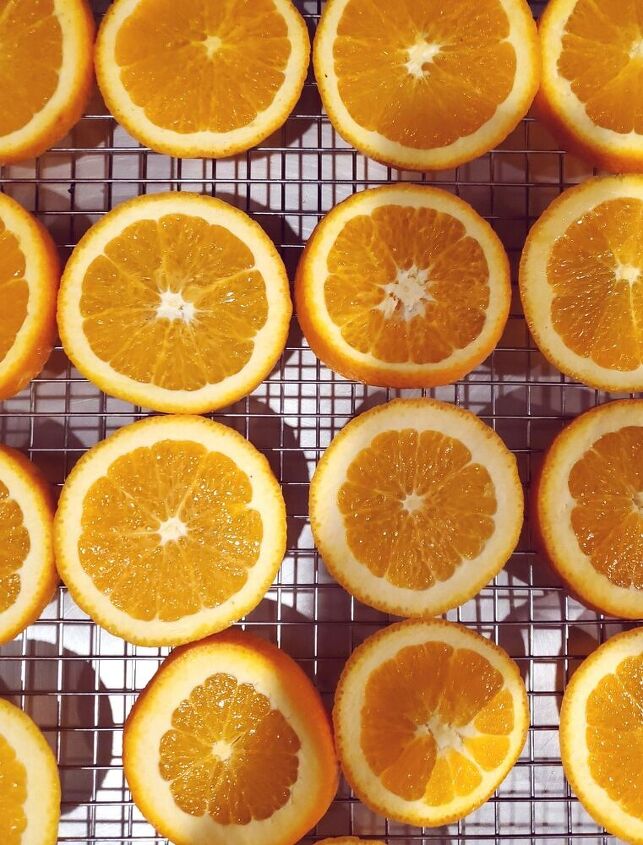
Next, slice your Granny Smith apples 1/4 inch thick. These are specifically chosen because their deep green color is truly beautiful . Also, coat them with lemon juice. Place on the racks and into the oven again for 8 hours turning at the halfway mark.Afterwards placing them in the same brown bag.Lastly, slice your oranges again at a 1/4 inch thickness. Place your slices on your cookie cooling racks. Place in the oven for the same 8 hours turning at the half way mark.
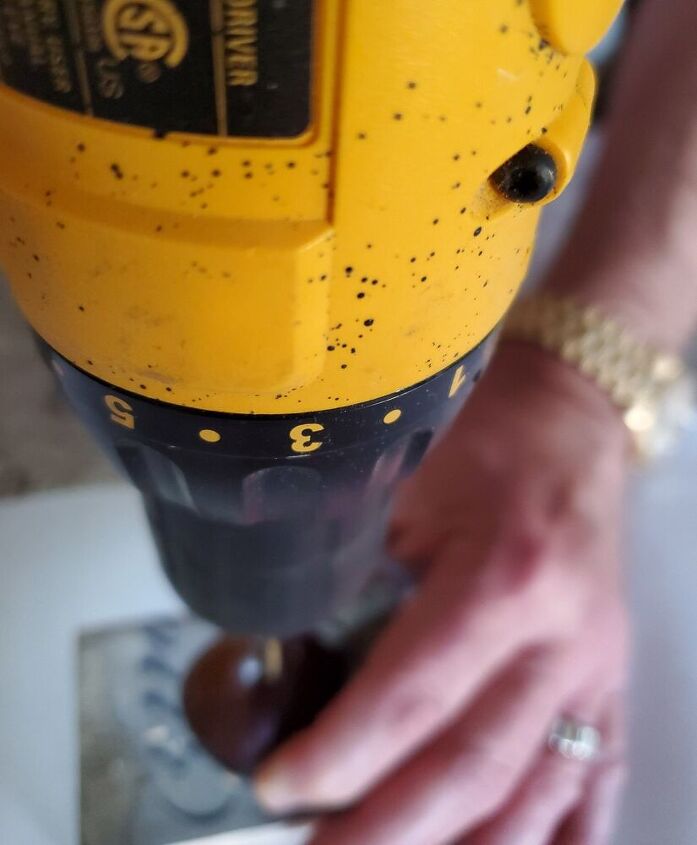
Drill, Holes in Chestnuts or WalnutsIn the meantime, it's a great time too drill your wholes in your chestnuts or walnuts. My husband did this for me and tried to keep the holes even on the two sides. A few weren't perfect so don't be overly concerned if your holes are off on a couple.
Incidentally, before stringing your garland this is a time to spray polyurethane your fruit slices. Of course this is optional, but I want to save our garland to use for a few, years.Finally, stringing the garland begins. By the way, we measured our cabinet where the garland is being placed. It's also a great time to lay out your pieces as well to decide your layout before string your garland.
Beginning to Layout our Garland
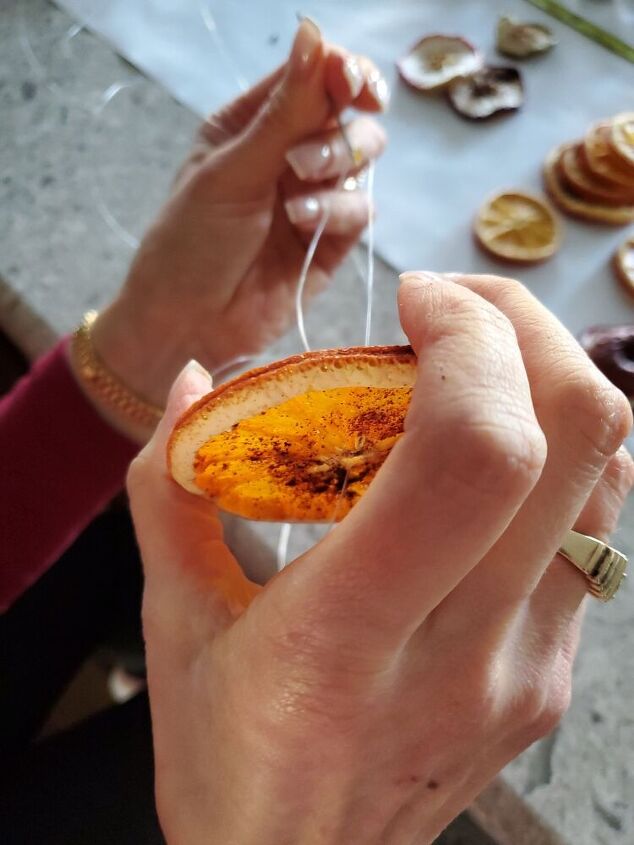
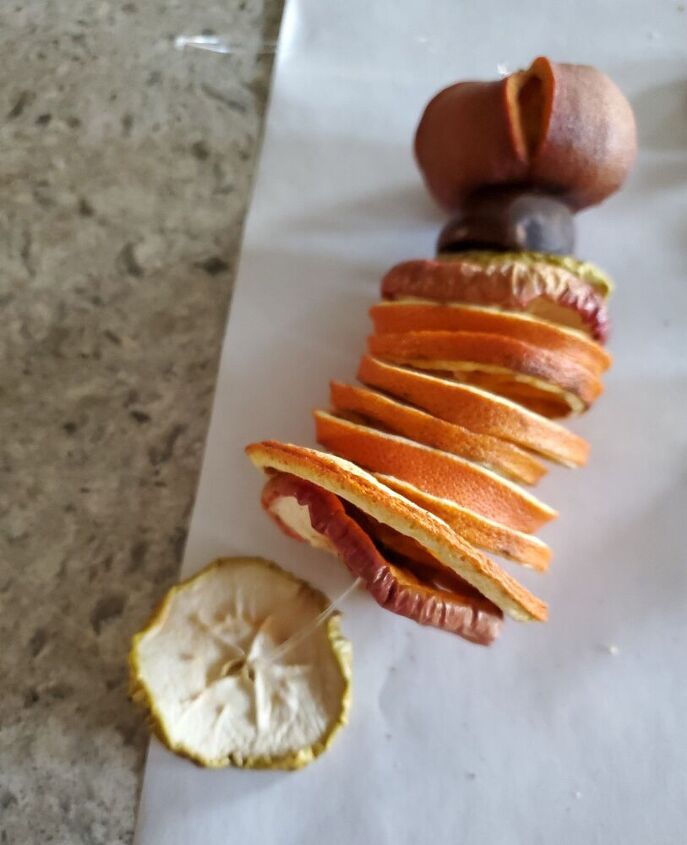
Next, thread your needle with your fishing line and tie a knot at the end so your fruit won't fall off.Begin stringing your fruit and pulling taught.
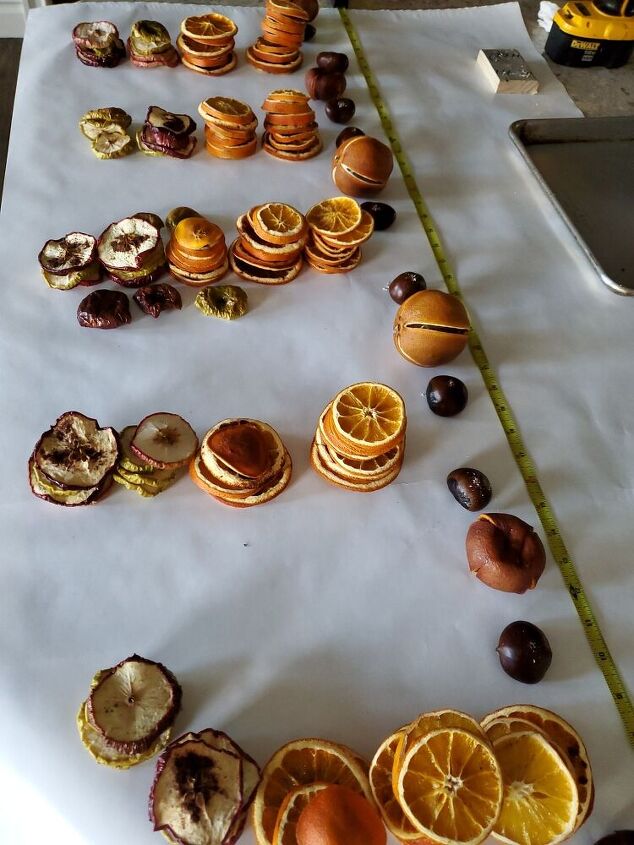
Layout Before Stringing Garland
Additionally, as you're stringing your fruit, it 's a good idea to recheck your measurements every once in a while. This is specifically to avoid getting off course. Also make sure your fruit is facing the same direction.
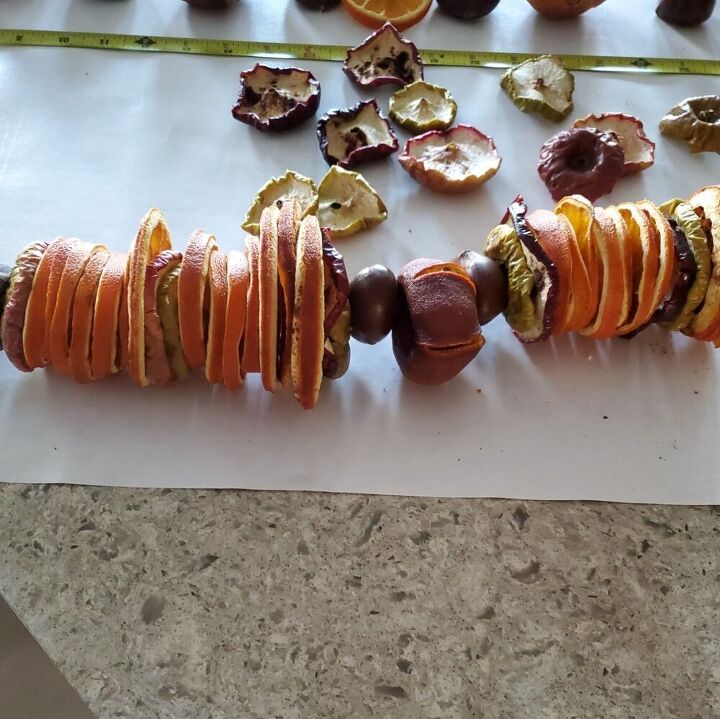
Making Sure the Measurements are Still Correct
When finished stringing hang and enjoy for years to come. It's equally important to store the garland in a cool dry area after the holiday season in a brown bag or wrapped in brown paper.
The timing listed below depends on the amount of fruit you dehydrate.

I hope you found these directions easy to follow. I would love to know if you think you will give this a try with your family.
Resources for this project:
See all materials


Comments
Join the conversation
-
Beware! Not a good idea in the Deep South! Bugs & Rodents will go after these - and popcorn & cranberry strings, too!
-
This garland is for INDOORS ONLY!


Frequently asked questions
Have a question about this project?
How did you dry the whole oranges? Thank you!
I was also interested in directions for how you dried the whole halos / mandarin oranges. Do you have instructions for those? Thank you 😊