


How to Make a Simply Elegant Christmas Tablescape
As I was making my Scandinavian Inspired Tray for a Blogger DIY Challenge, I wanted to style it on a beautiful table set for Christmas entertaining. This is the step-by-step of how I put it together to create a simple Christmas table set that any can make!
Sometimes, we just need a little 1-2-3 to get us through the holidays. There’s so much to do and the thought of decorating the table for a holiday dinner can easily be overlooked with everything else on the to-do list.
What I’m sharing today can be done in an afternoon and will impress even the fussiest person on your guest list!
Disclosure: Some of the links in this post are affiliate links, meaning, at no additional cost to you, I will earn a commission if you click through and make a purchase.
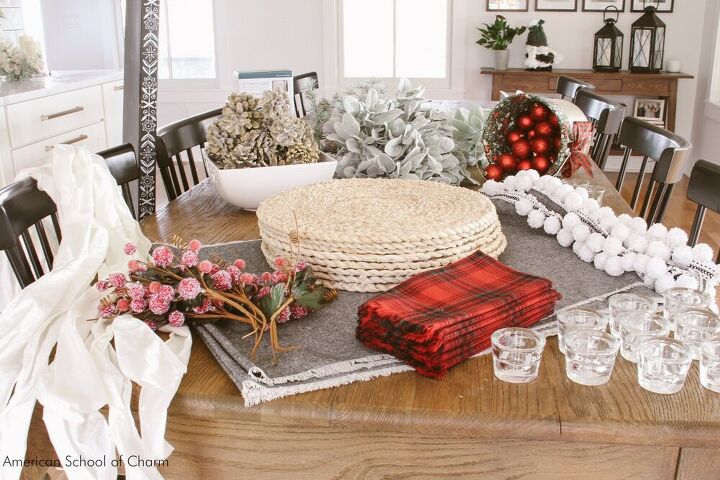
For this festive Christmas tablescape I made a little, repurposed a little, and bought a little. For all the links to the supplies I used, see the post How to Make a Simple Christmas Table Set.
- Woven (not printed) fabric
- Pom-pom or tassel trim
- Riser tray for centerpiece
- Artificial flocked lambs ear
- Pinecones (plain and gold sparkle)
- Fairy Lights
- Red ornament balls
- Taper candles
- Taper candle holders
- Round woven chargers
- 4" Ribbon
- Cloth Napkins
- Tableware (plates, utensils, glasses)
- Red accent sprigs
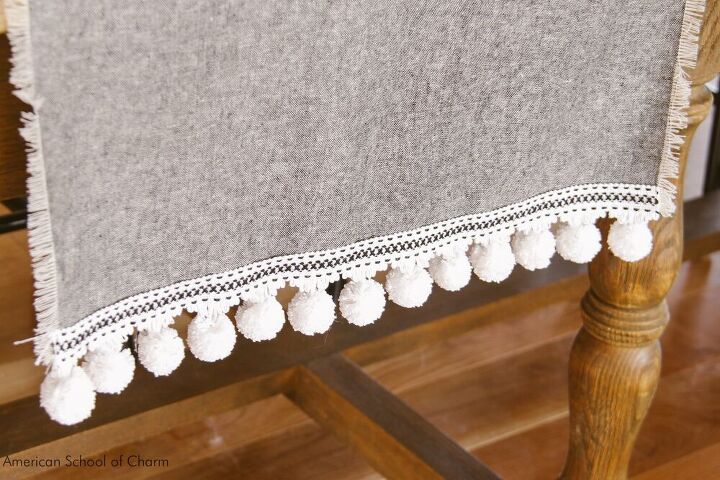
The table runners used for this arrangement are a little different in that 4 were used. Of course, typically a runner goes the length of the table. Here, I decided to run them across the width of the table from one seat to another. This way, they’re also placemats!
I made these. Don’t let that scare you into running straight over to Homegoods to buy one. These are SO easy. Here’s all you do for each runner:
- Length = Width of Table + 24″
- Width = 20″
- Press both short ends over 1/2″ and sew pom-pom trim on top of the fold.
- Stitch a straight seam along the length of the fabric leaving 1″ seam allowance.
- Pull off all threads perpendicular to the seam for the entire seam allowance.
That’s it!
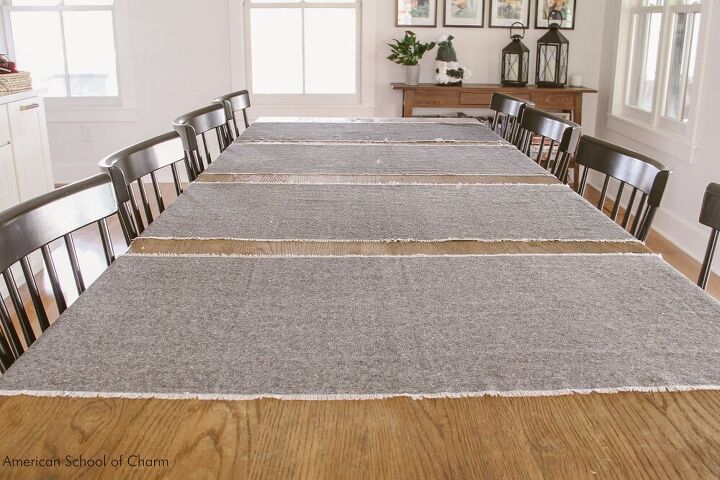
There is a little trick to pulling the threads out to make the fringe. Snip perpendicular to your seam (without cutting it) every 12" or so. This will make pulling the threads off much easier.
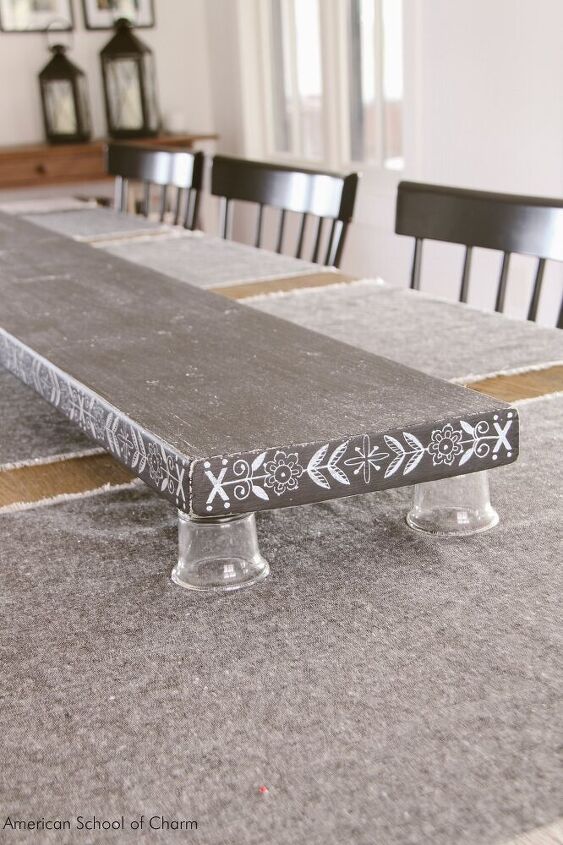
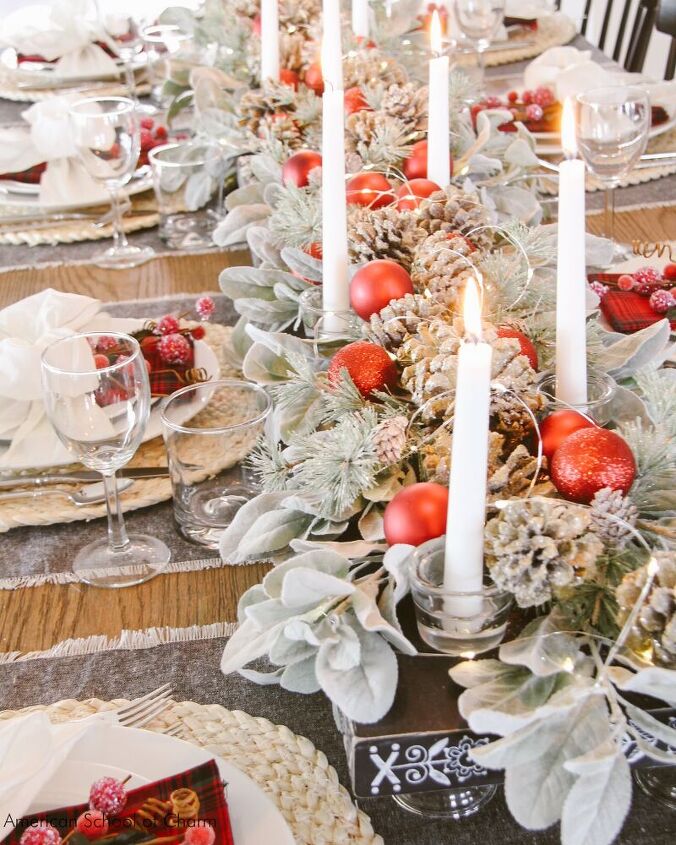
You can do this with one or multiple raised trays. As you can see in the photo, I decorated a long board using chalk paint and paint pens. Then I just put it on top of votive candle holders turned upside down.
It's a really easy project that you can see on my blog.
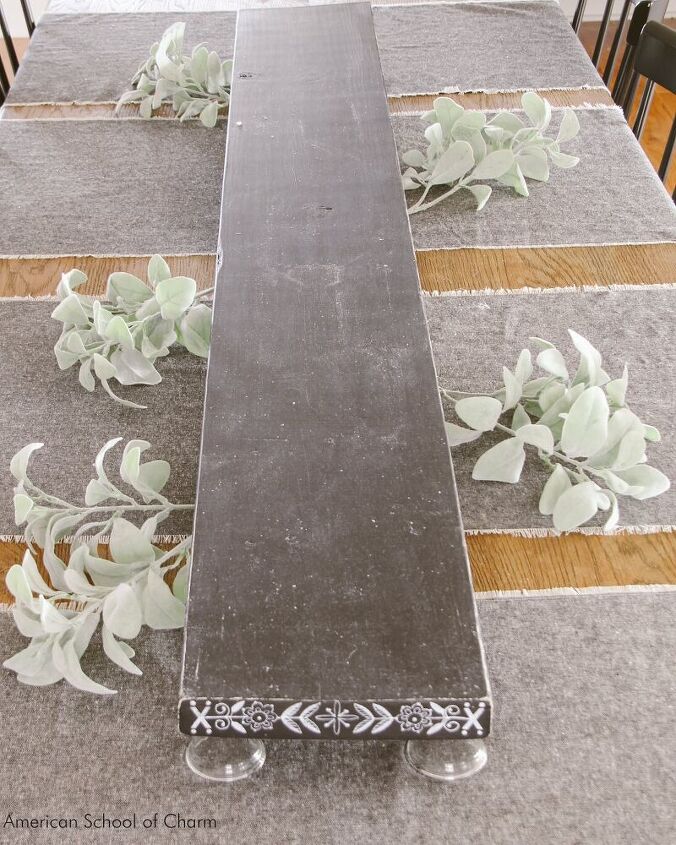
With a raised tray, there are two opportunities for decorating. Under the tray and on top of the tray.
Staring with underneath the footed tray, add a large stem of greenery. Here you'll see that I used artificially flocked lambs ear. It's a beautiful shade of green.
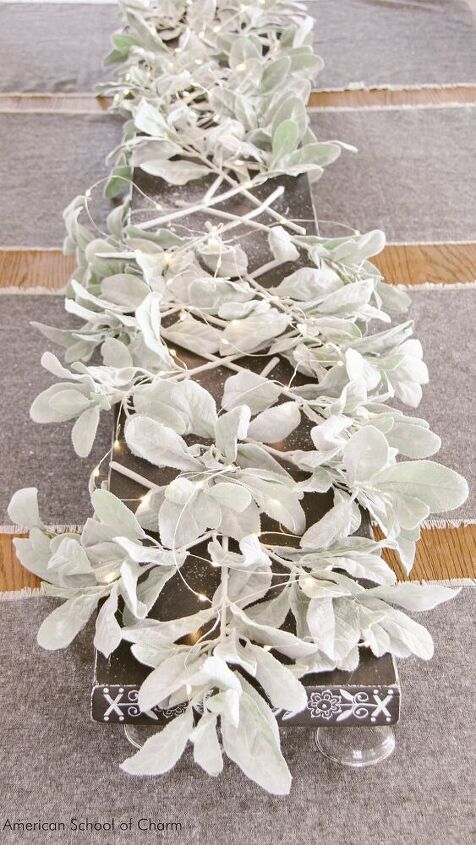
Using a criss-cross lattice approach, layer another type of coordinating greenery. I chose a smaller artificially flocked lambs ear for this layer. Then on top of it, I added little fairy lights (aka, LED mini/micro-lights).
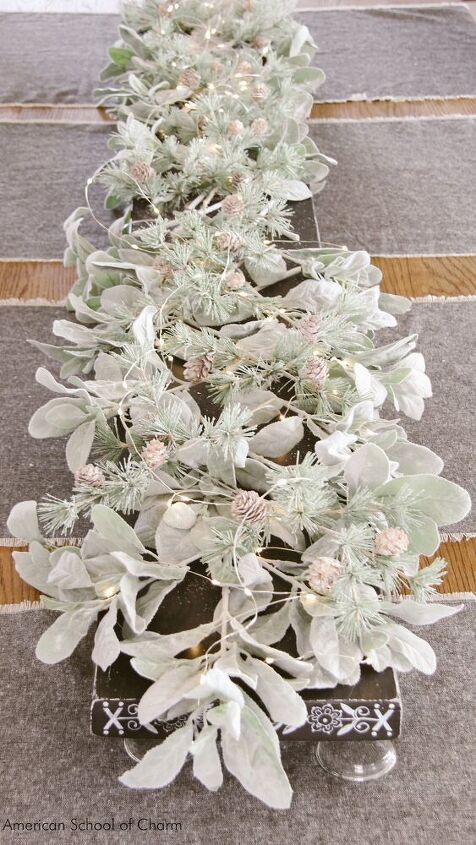
Now add one more layer of greenery in a coordinating color with a different texture. To keep the look subtle, keep it in the same color family as your first two layers.
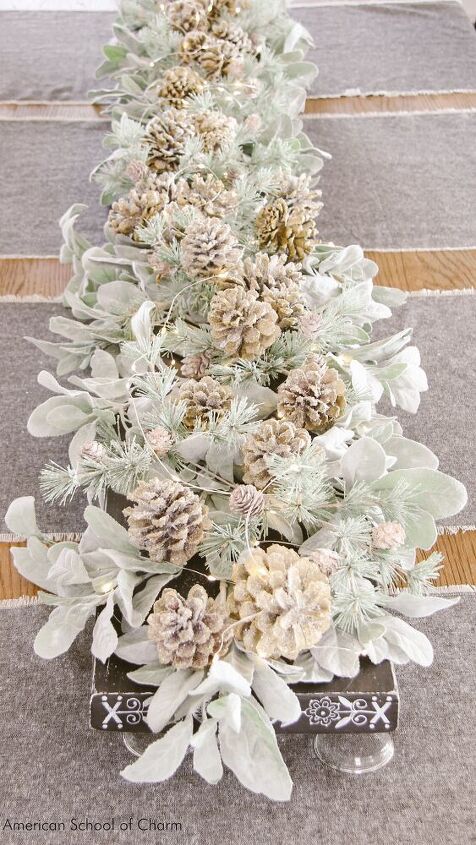
Oh, I love adding little bits of sparkle to my Christmas decorating. In this case, I painted a bunch of pine cones gold. Then added glitter with spray adhesive. It's an inexpensive project that has a beautiful impact.
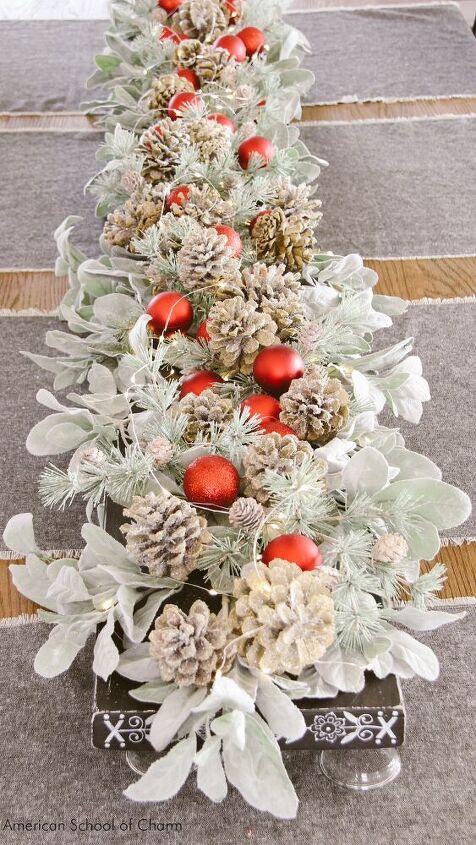
We want ONE punch of color to celebrate the season. I chose simple red ball ornaments. They were from the Dollar Store and are a mix of matte and sparkle.
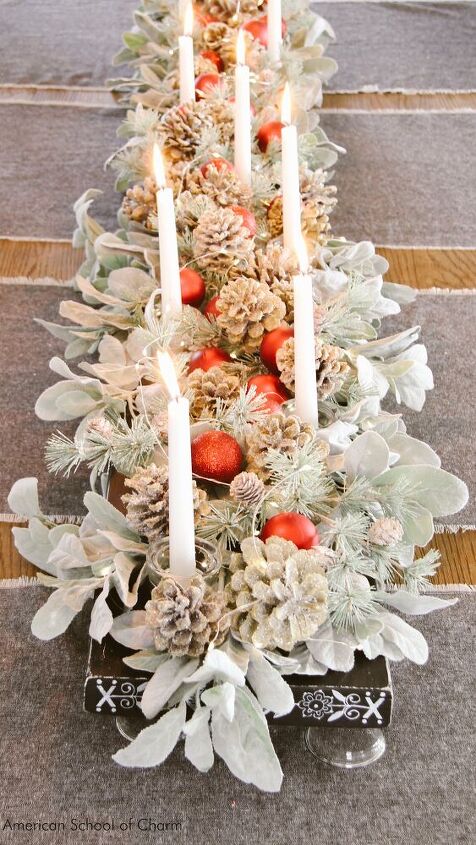
The final step for the centerpiece is to add taper candles. I selected white but red would have been pretty too!
Just wiggle in the glass taper candle holders into your greenery.
A tip for keeping the candles standing straight is to take an old taper candle and drip a little wax into the candle holder. Pop in the fresh taper candle and the hot wax will hold it in place. Voila!
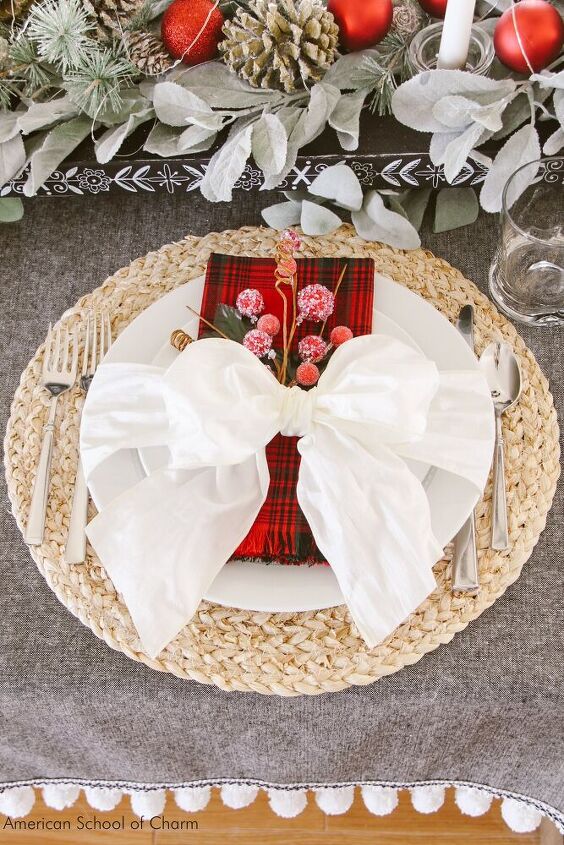
The setting is absolutely FABULOUS and it's also so easy!
Just layer your plates, a festive cloth napkin, an accent sprig and then tie a 4" ribbon around the entire thing. If you want to know how to tie a really perfect bow, check out my blog post.
This is both a pretty and practical table. There is no visual obstruction yet each person has an incredible view.
I hope you enjoyed your look into our simple Christmas table set. We have a lot more projects on AmericanSchoolofCharm.com so be sure to visit and subscribe!
Resources for this project:
See all materials


Comments
Join the conversation
-
I LOVE it! Hospitality is my favorite thing and I got a lot of new ideas from this! Thank you! Well done! I even have all .(In different colors)..except for the placemats..where did you find them? Love the neutral color.
-
Absolutely beautiful!! Merry Christmas and thank you for sharing 🎄🎄


Frequently asked questions
Have a question about this project?
Where is the room for the food?
How do you store it, or do you need to disassemble it