


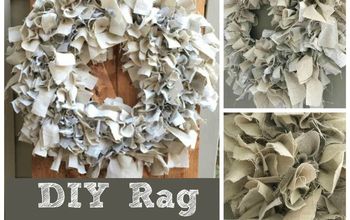
How to Make a Rustic Wreath for Your Front Door
This year, I wanted to make a rustic wreath for our front door. Making wreaths for Christmas is one of my favorite DIY projects. They can get EXPENSIVE though! So I watched for discounts on the sprigs and then, as I was playing around with my ribbon, an idea sparked!
Out the corner of my eye, I saw the drop cloth I’d been using for another project (a leather tote bag) tutorial. There was A LOT of drop cloth material left and it’s perfect for a rustic wreath!
The steps I took are all below!
Disclosure: Some of the links in this post are affiliate links, meaning, at no additional cost to you, I will earn a commission if you click through and make a purchase.

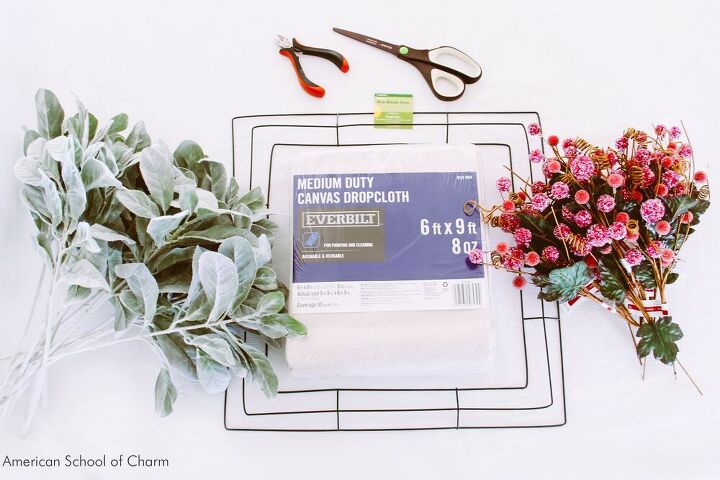
I'm happy to say that this project uses very few supplies and tools.
Here's what you'll need:
- Medium Duty Canvas Drop Cloth
- Square Wire Wreath Form
- Green Sprays
- Accent Sprigs
- Scissors
- Wire Cutters
For some projects, I prewash the drop cloth I'm using. I don't think it's necessary in this case.
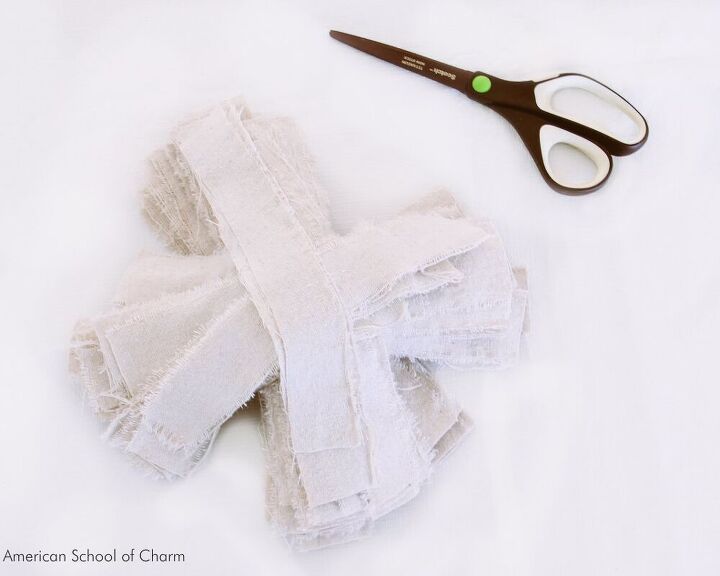
To prepare the drop cloth, first remove the binding. Simple make a 1" snip on the inside of the binding on all four sides. Then, using the 1" snip as your starting point, rip the drop cloth all the way down. It will rip straight although there will be threads hanging off. Just pull them off. The frayed edge is part of the look!
You'll then need to repeat this to make 170 or more 9" strips. So, in the same fashion, snip a 1" lead cut to make an approximately 1 1/2" wide strip. Rip down the fabric.
Then fold the 1 1/2" strip over to match short edges, fold it over again, and fold it over again until you have the 9" length (approximately). Cut at the ends where the fabric is folded.
You can pull of the hanging threads now or just wait until you're going to tie the strips onto the wire frame.
Btw, if you find ripping the drop cloth strangely satisfying ... you're not alone! Kids especially love doing this so you can make this a partner project with a younger friend!
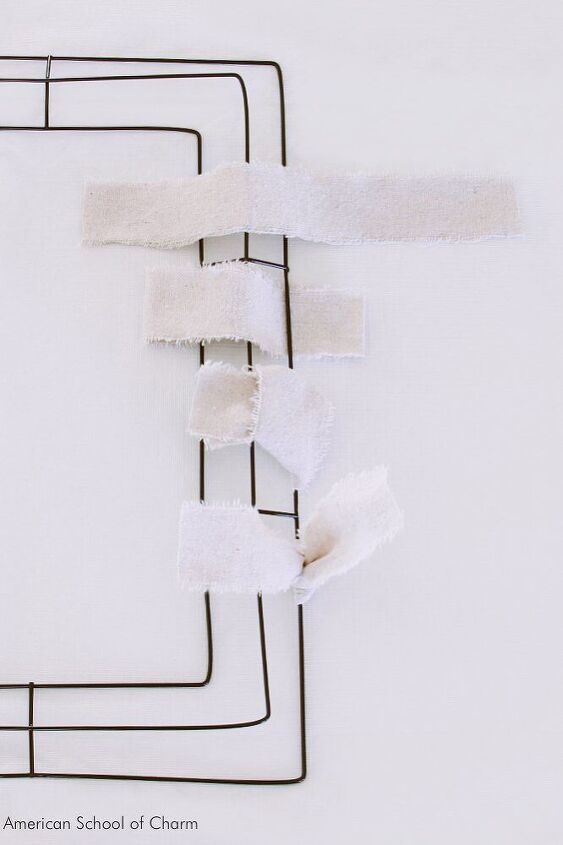
For the outer and inner wire rings you'll use a simple technique to attach the drop cloth strips. As shown in the photo, fold a strip in half. Then take the two loose ends and put them inside the folded end, enclosing the wire frame. Pull the loose ends first together and then one at a time to tighten the "knot" on the frame. That's it!
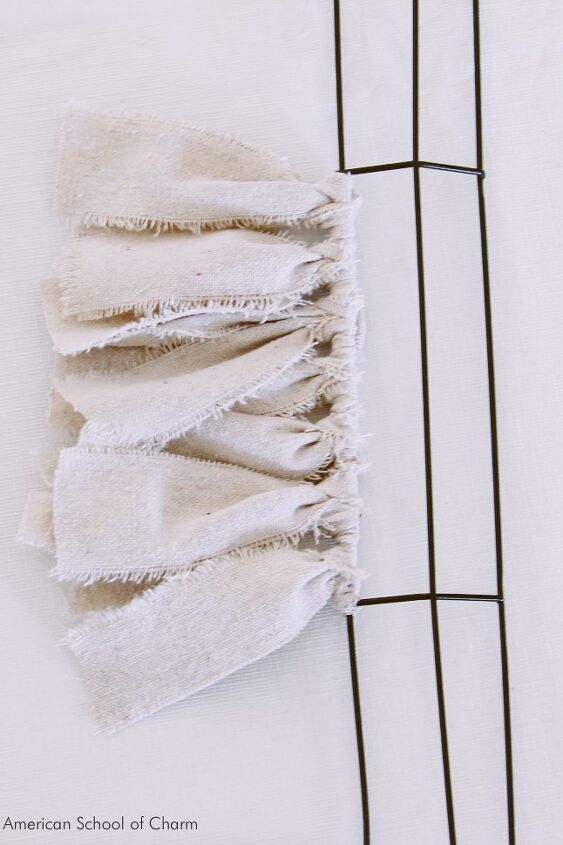
Continue to do this all the way around the outer ring.
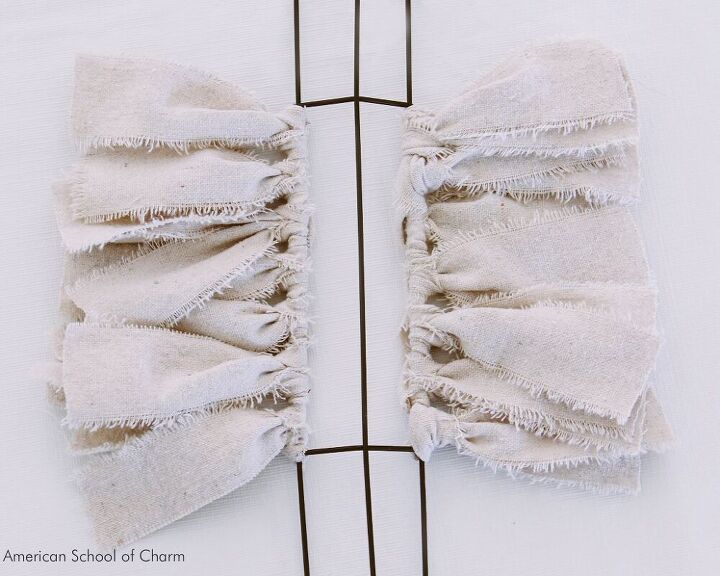
And then around the inner ring until both are covered with drop cloth strips.

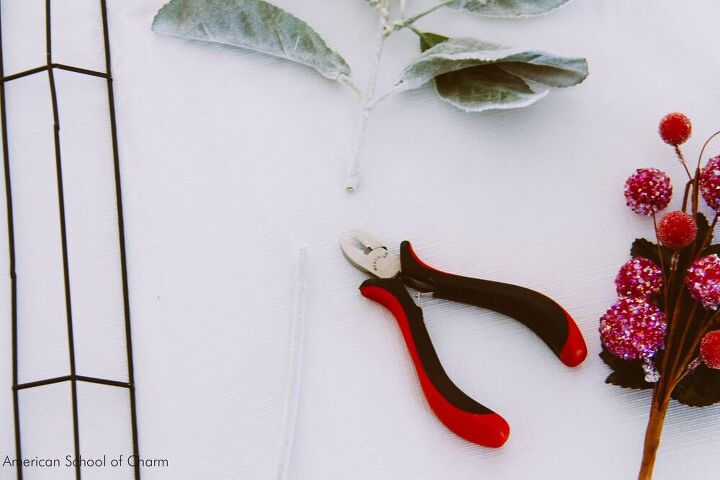
If the greenery sprays have long stems, you'll want to trim them. Using wire cutters, cut off the stem approximately 2" down from the last branch.

NOTE: I'm showing this without the outer and inner ring covered just so it's easier to see in the pictures. When you do it, the both the outer and inner ring will already be covered with the drop cloth strips.
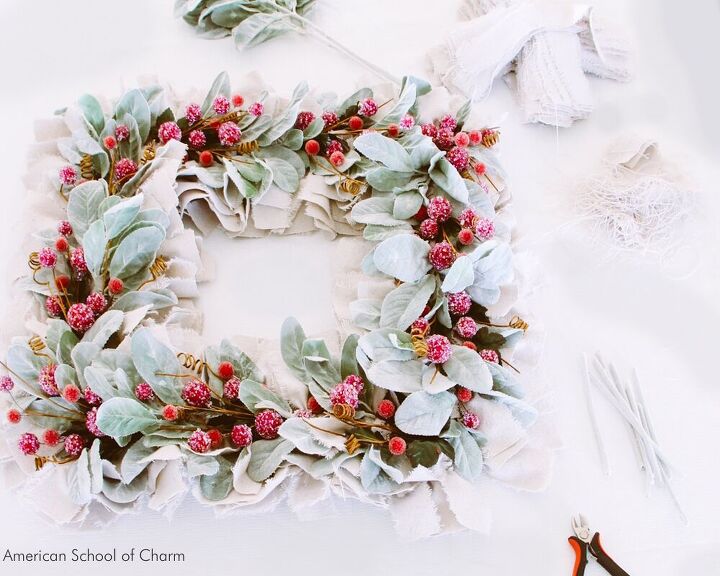
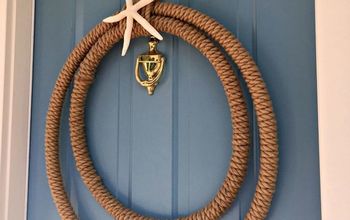
The center ring of the wire wreath form is going to be where you attach your sprays and sprigs. I choose an artificial flocked lambs ear spray and red ice berry sprig. You can find links to these in the post on AmericanSchoolofCharm.com.
Start by lining up the spine of the first spray with the wire frame. Lay a drop cloth strip on top of both in the middle of the spray. Turn over and tie in a simple over under on the backside. Pull tight!

This is how it'll look from the top.
Repeat this one more time moving down the spine of the spray.

Pull the ends of the drop cloth strips on top of the inner and outer rings.

Line up one sprig, here you see the red iced berry sprig, halfway down the spray. Tie a strip of drop cloth in the same manner you used for the spray.

Repeat this one more time.


Continue layering the sprays and sprigs in this fashion.
That's it! This wreath is so easy to make. You were probably waiting for the hard part but there isn't a hard part!
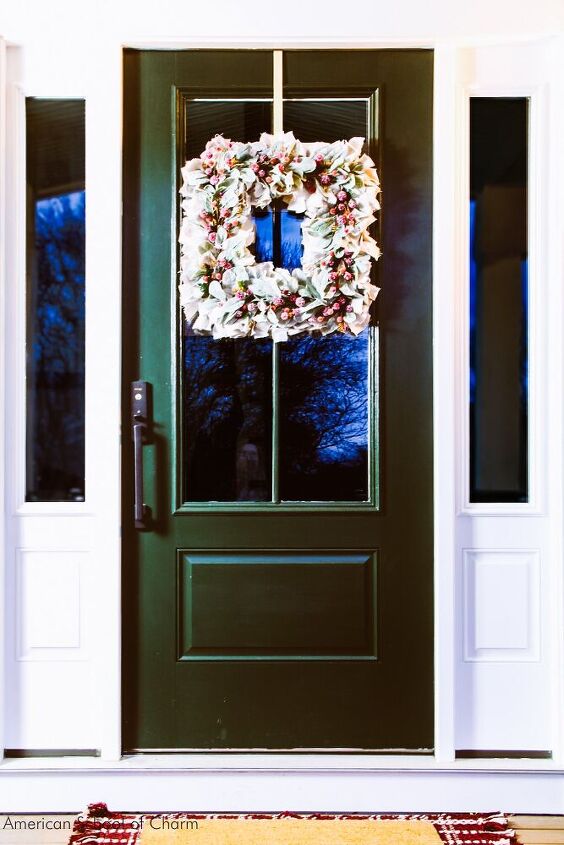
You can certainly attach a bow or some other sort of additional embellishment. In our house, we decided that we like it just like this!
See how pretty it looks on our freshly painted dark green door!
Resources for this project:
See all materials


Comments
Join the conversation
-
Ooooo! Love the torn rag effect! The best part is no gluing that also, believe it or not, adds weight. This design eliminates filler using the torn strips and they’re used to attach the greenery and sprigs. I love your choices of greenery & sprigs with the torn rags of creamy white! Looks professionally done to me! Brilliant!👏🏻👏🏻👏🏻
-
I freaking love this and I normally do t even look at a wreath project!!👏👏


Frequently asked questions
Have a question about this project?